
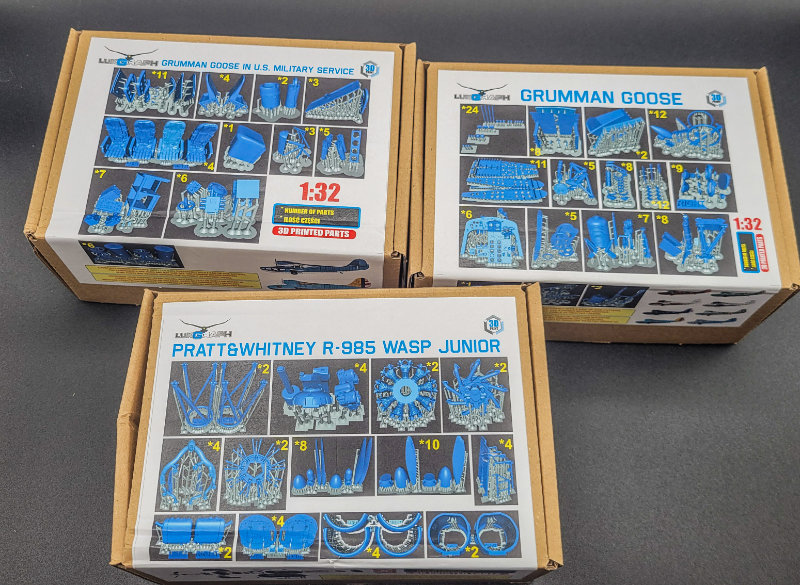
LukGraph | 32-072: Grumman Goose (U.S. Navy)
Reviewed by Matthew Robeson
LukGraph has been a player in the resin kit market for awhile now, appearing first in 2014 with traditional resin cast kits. Over the last 5 years though, they have transitioned into 3D printing, first with small details and then full kits. They’ve even gone back and redone some of their resin kits as fully 3D printed ones, namely the Jenny, Wapiti, and Phönix. They’ve produced kits of many homegrown Polish aircraft, as well as various inter-war and WW1 aircraft that have long been wished for.
Their kits have grown in both size and complexity, and the new Grumman JRF Goose joins the Caproni Ca.3 as their largest and most complex kits so far. This review will hopefully serve as a detailed look inside the box, and show what LukGraph has produced here.
History
Initially pitched as an executive cruiser for the wealthy businessmen of Long Island, NY to travel to New York City, the Goose has seen 90 years of service around the world. It represented a large leap forward for Grumman, serving as their first monoplane to fly, their first twin-engined aircraft, and the first to enter commercial service. The US military and Coast Guard found numerous uses for the G-21, including training, search and rescue, and anti-submarine duties. The Goose remains in use and production, as McKinnon Enterprises and Antilles Seaplanes hold licenses to convert old G-21s with different engines, and Antilles has been producing new build planes since 2007.
One also found use by Kaman after WW2 to test a tilt-wing configuration for STOL service. It was built, but did not end up flying.
LukGraph’s Kit
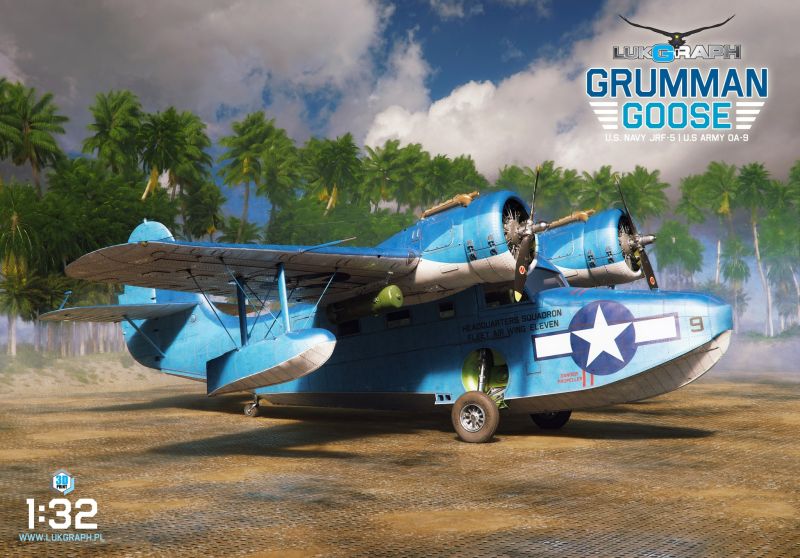
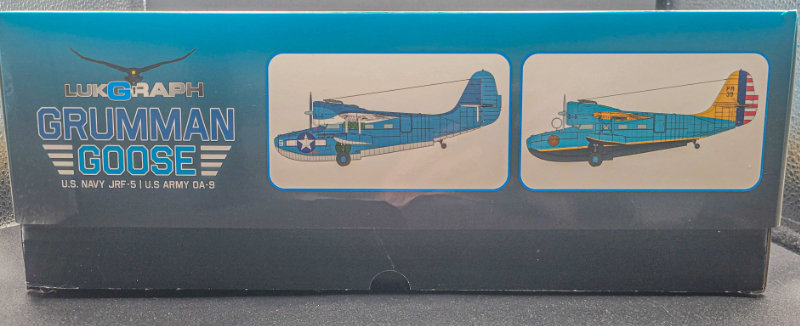
This brand new kit arrived to my door incredibly fast, making the trip from Poland to California in only 4 days, so top marks to LukGraph there. Inside the black plastic wrapped box, you’ll find a beautiful and large box awaiting you. It measures out at 15.25x11.5x5.25in, or 38.7x29.2x14.6cm in the rest of the world. While not quite the wooden presentation box of the Caproni, this one makes an immediate impression, with beautiful box art of a Navy Goose at rest on a tropical airfield, and profiles of the two color options awaiting you on the sides of the box.
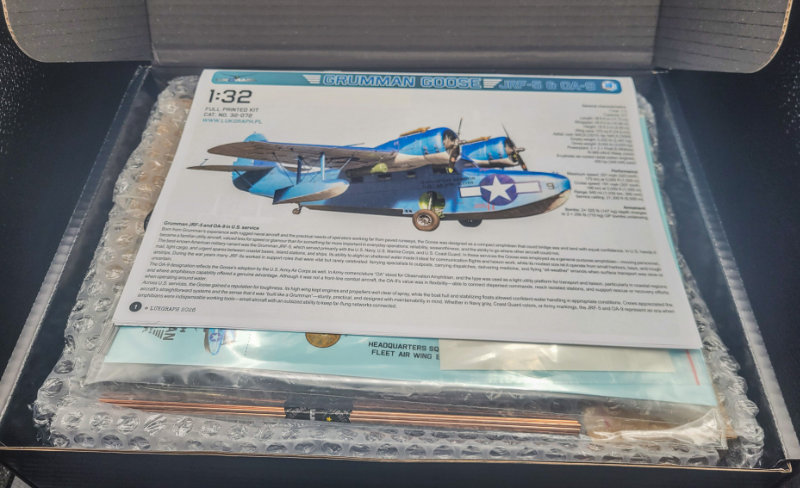
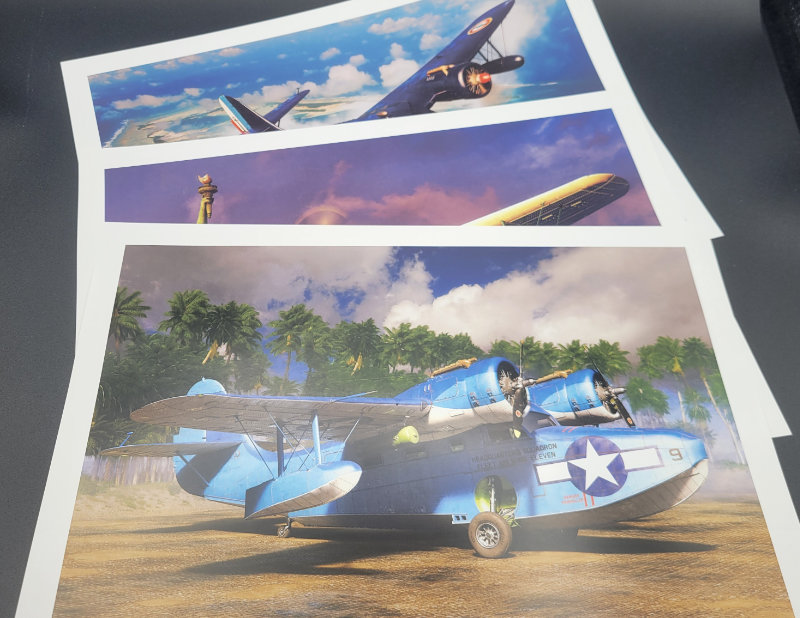
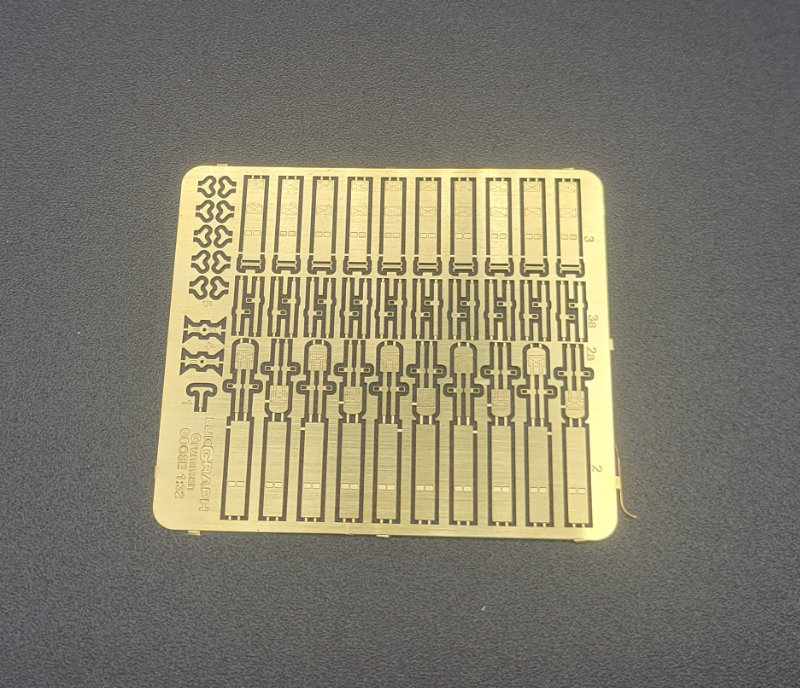
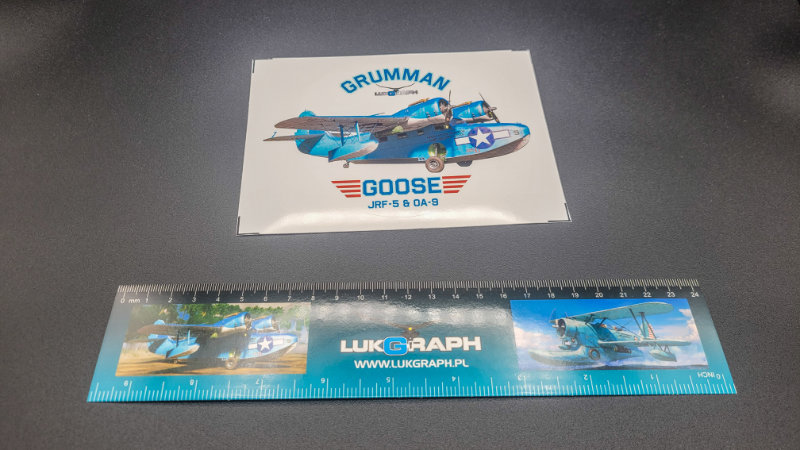
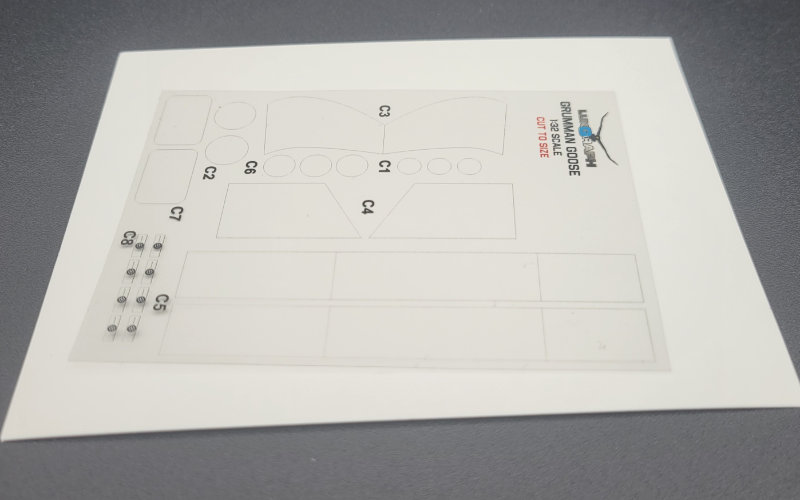
Lifting off the card lid, you’re greeted with a box inside the box, this one made of stout black cardboard. This box hinges open, giving you your first views of the kit inside. Resting on top are two clear envelopes containing the instruction booklet, decal sheet, a small sheet of vinyl masks, a photo-etch sheet of seatbelts, printed instrument panels on thick paper, and two sheets of clear acetate to turn into the various windows of the kit, and a couple of bonus extras: a sticker of the Goose, three A4 prints of the boxart of the three kits, and a 9-inch ruler featuring the boxart of this kit, and the recent Grumman Duck. Also included are the requisite metal rods used to help strengthen various assemblies of the kit.


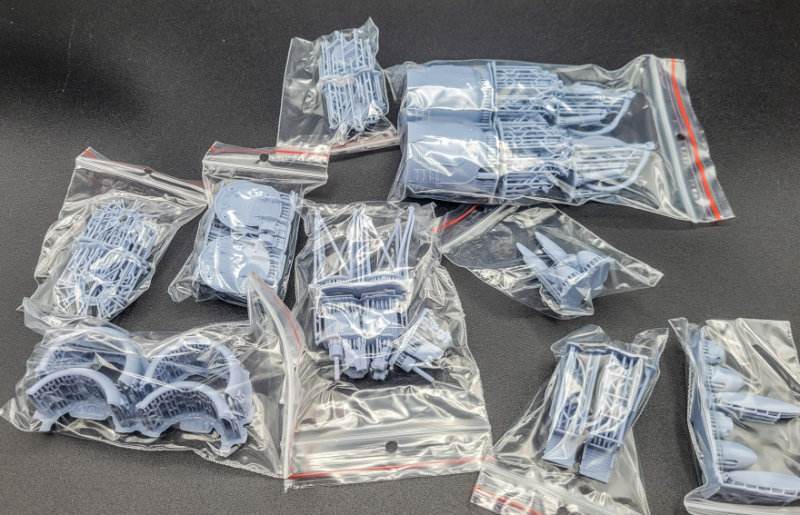
Beneath the envelopes and the layer of bubble wrap, you’re greeted by 17 plastic bags filled to the brim with parts, and 3 small cardboard boxes filled with even more parts. One thing is for sure with this kit, LukGraph did not waste a single millimeter of space inside the box, allowing everything to just fit back inside after looking it all over. Because the kit is so involved, I’ll be breaking it down by airframe section instead of just trying to cover the entirety of the printed parts at once. Let’s dive in, and see if this Goose lands with a splash.
Fuselage
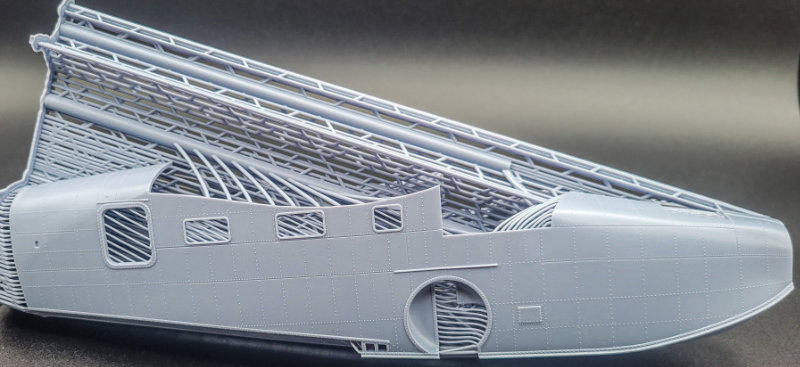
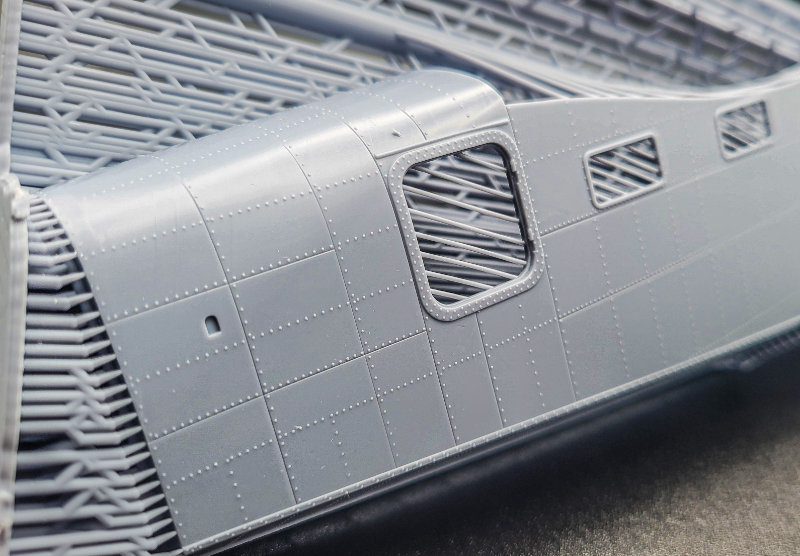
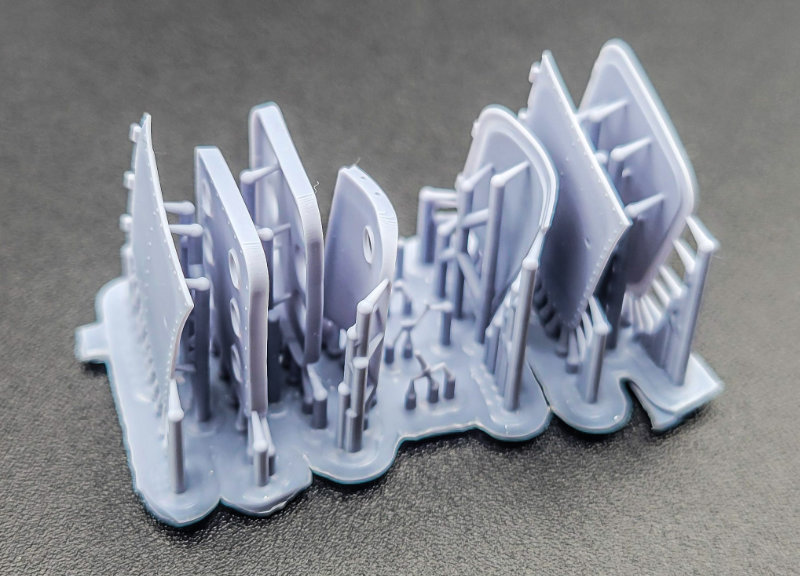
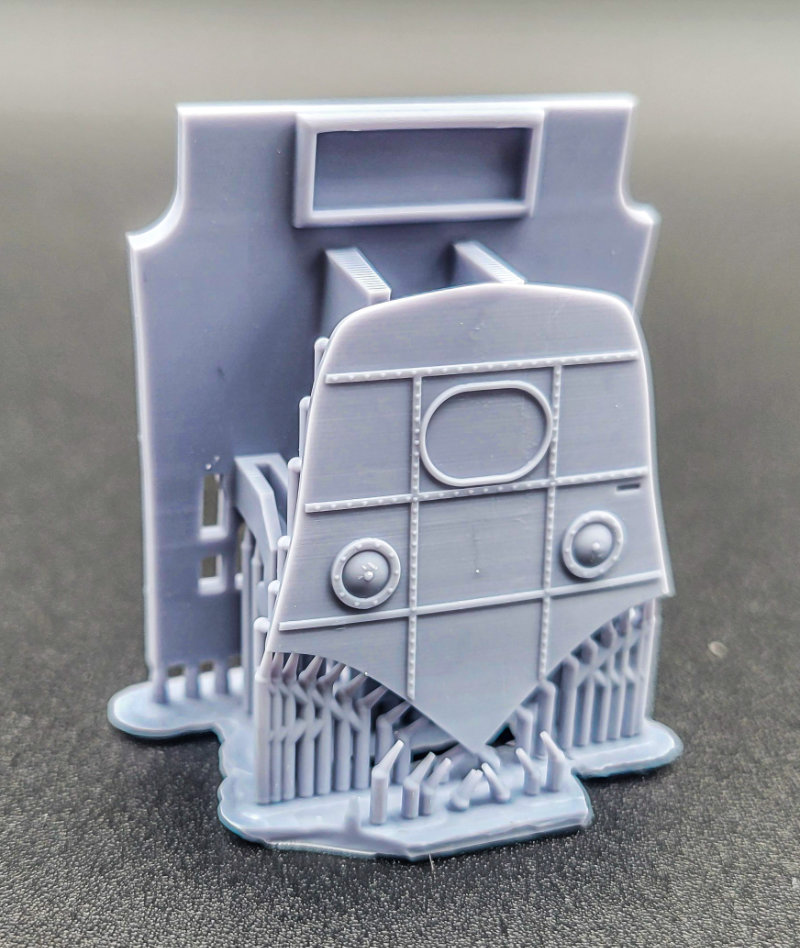
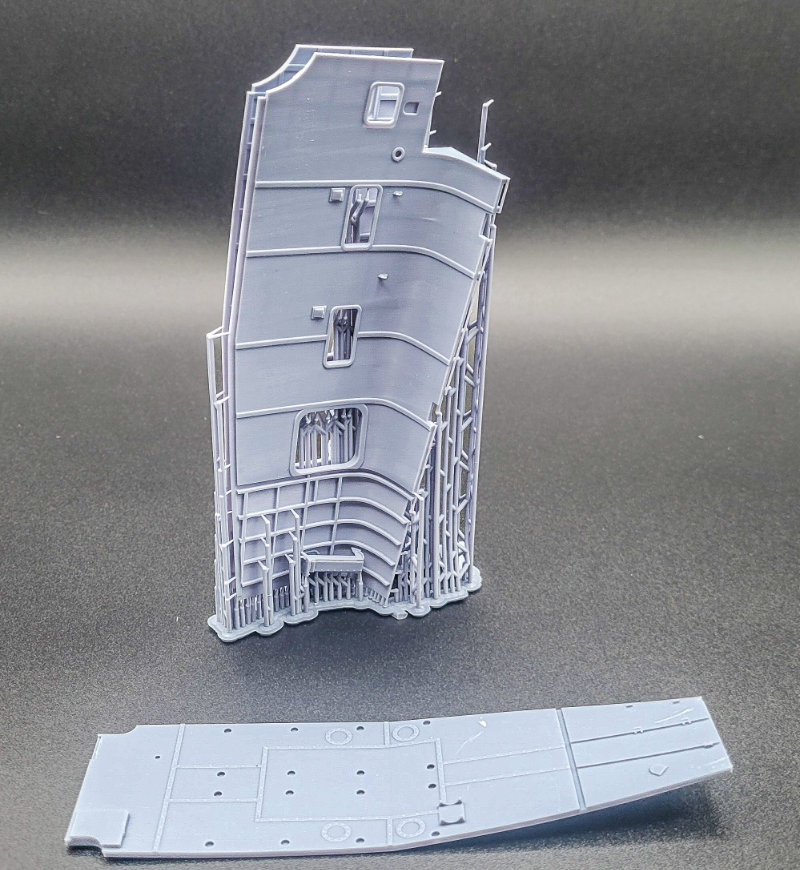
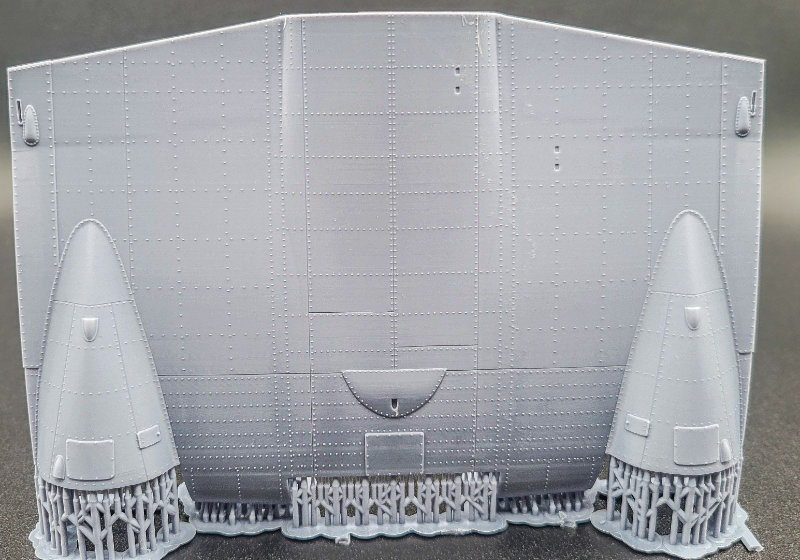
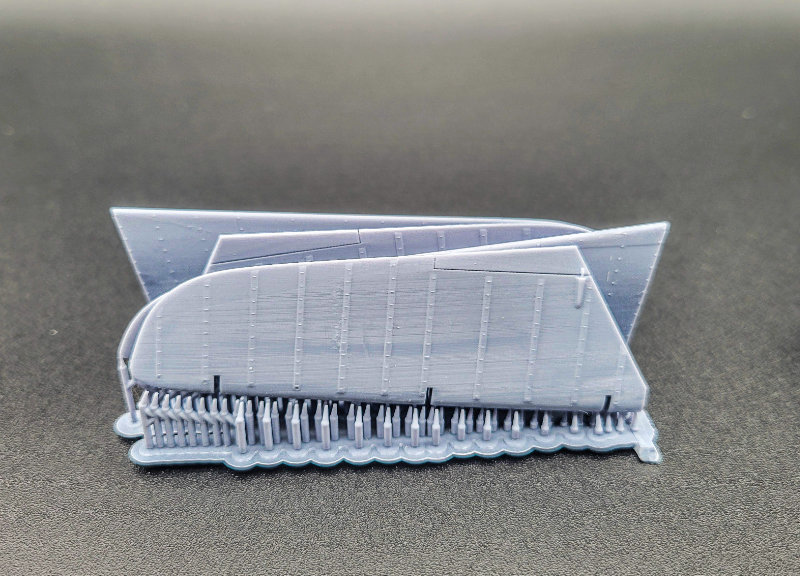
The first bag you’ll probably find, and also the largest, contains the mid-fuselage sections. These are printed together on one raft, and the surface detail immediately jumps out to the viewer. It is festooned with petite raised rivets, just like the real airframe. Recessed panel lines and raised surface panels sit alongside the rivets and some beautiful printed detail.
The tail section and extreme nose are separate, with a choice of nose cones with either a deflector plate or not. The tail comes in a single piece, just waiting for you to slot in the single-piece wheel well before it can be joined to the fuselage. The detail is excellent across these pieces, with only small examples of printed layer lines appearing.


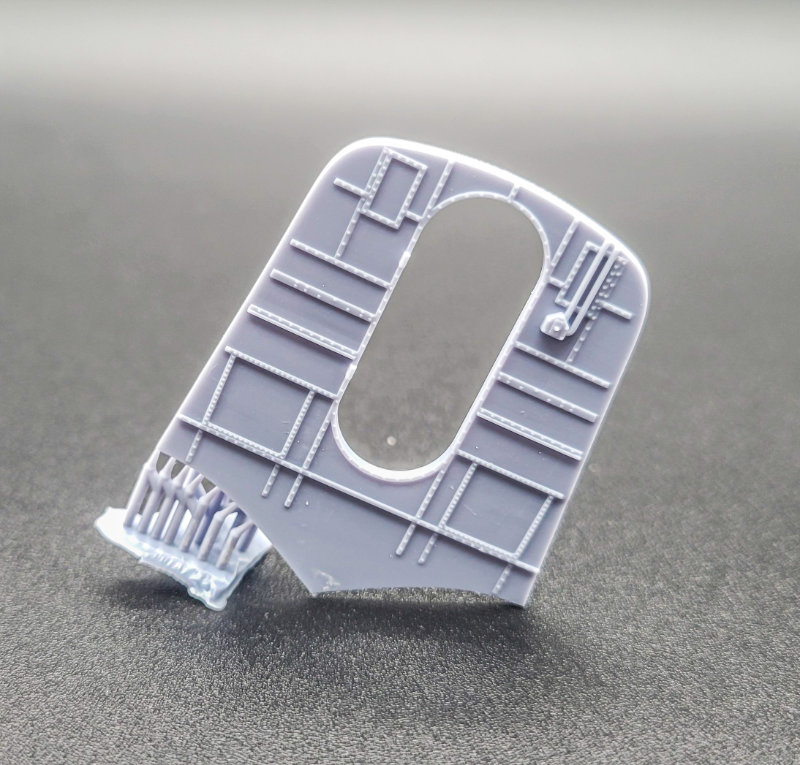
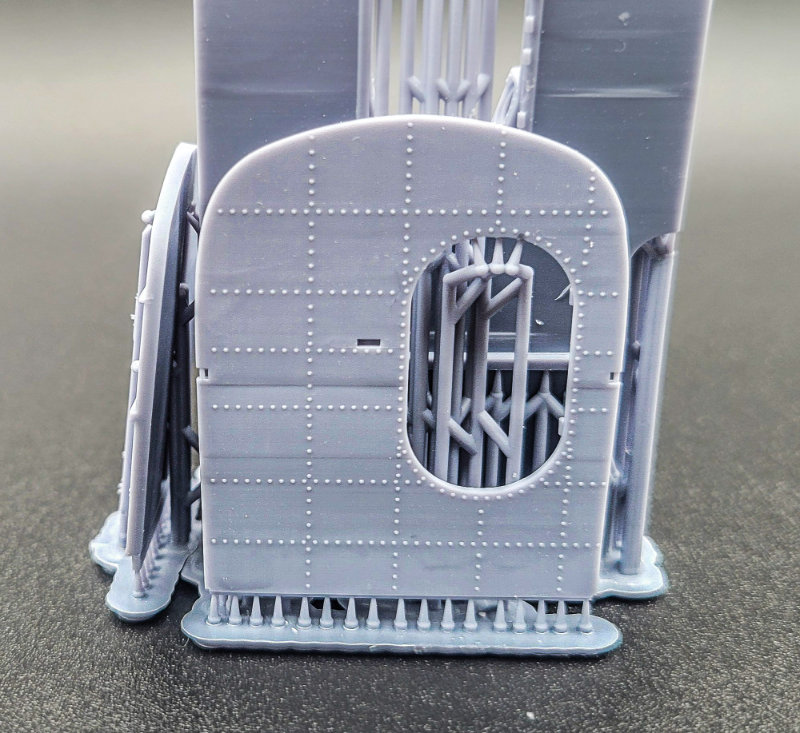
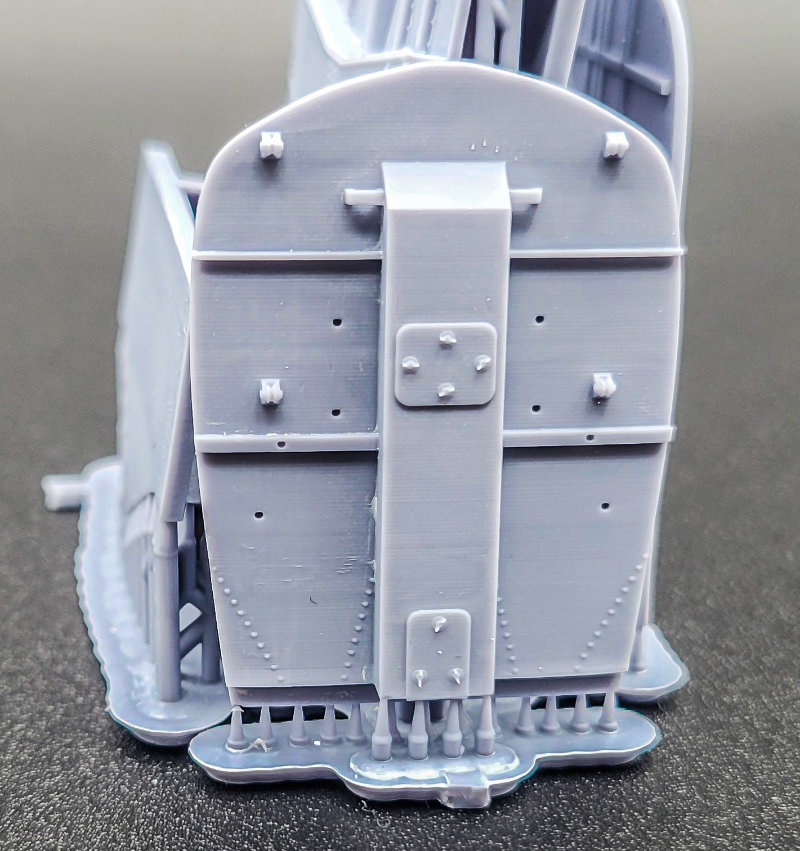
To help ensure visibility to the interior, you have the option of opening up all of the fuselage hatches. Detail is also included for the open hatches, along with some incredibly fine door handles to mount on them. If you want to mount the hatches closed up, then single piece versions of the hatches are also included.
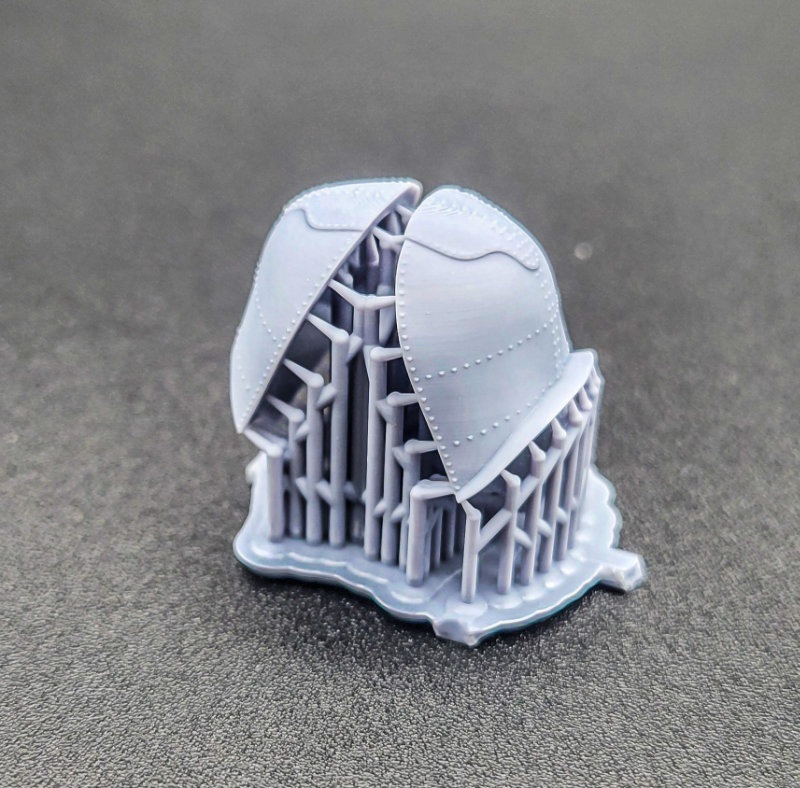
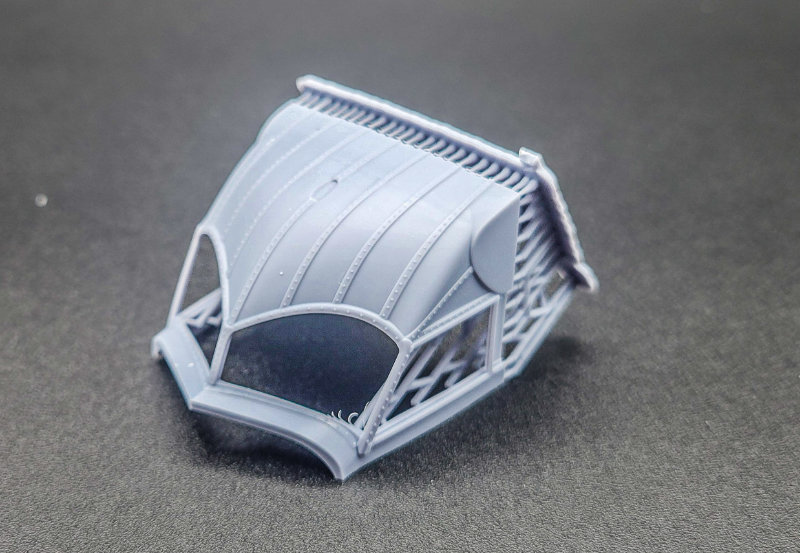
The last part of the fuselage exterior is the canopy, combining a printed piece that you add the acetate windows to. This is cast in one part, with a breakage along the rear edge. Interior detail is also printed in for when it comes time to mount the overhead console.
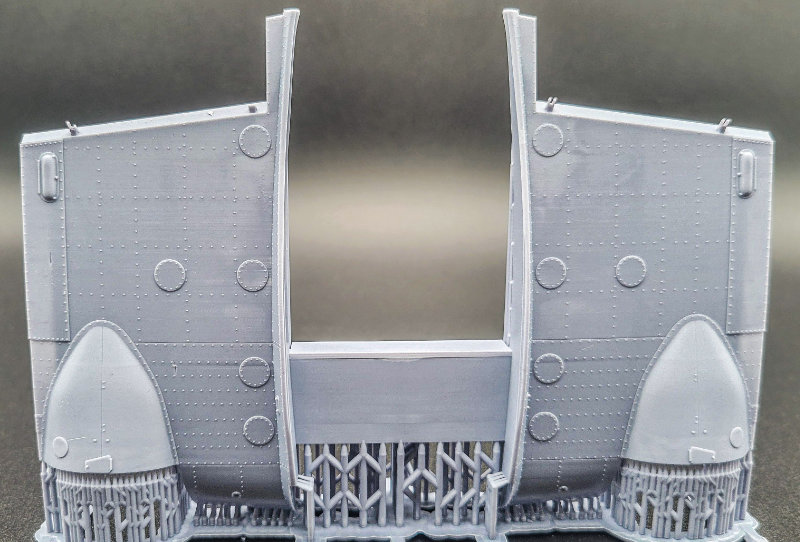
Interior
The first stop in the build, like most kits, will be the cockpit. LukGraph provides a wonderfully printed cockpit and bow compartment of the Goose. The floor and bulkheads come first, with the detail parts coming later in the package.
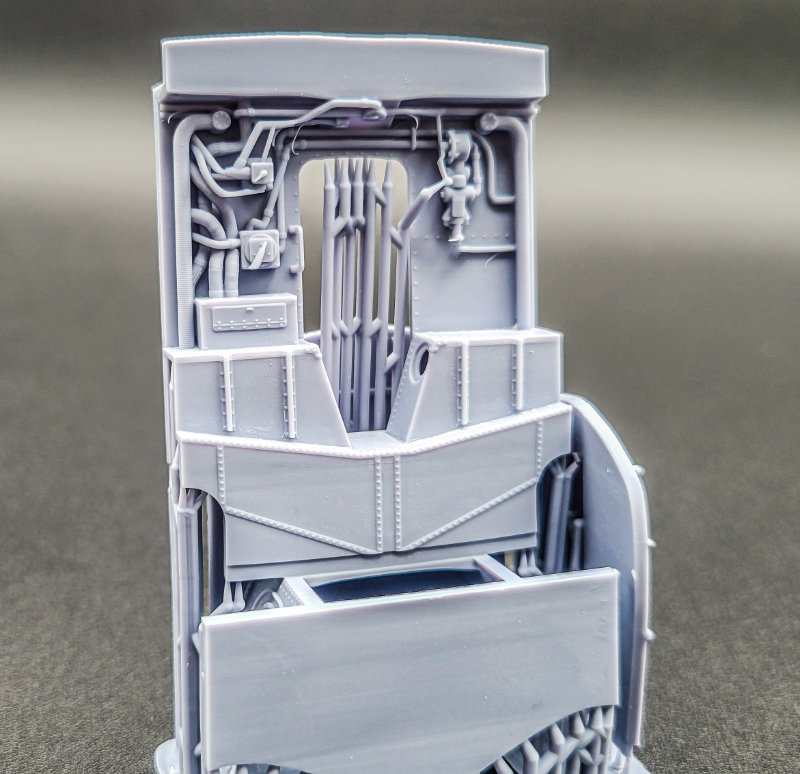
Following the example of other companies, the interior is actually a separate unit from the fuselage halves, allowing LukGraph to do the different versions of the Goose’s interior without needing a new exterior.
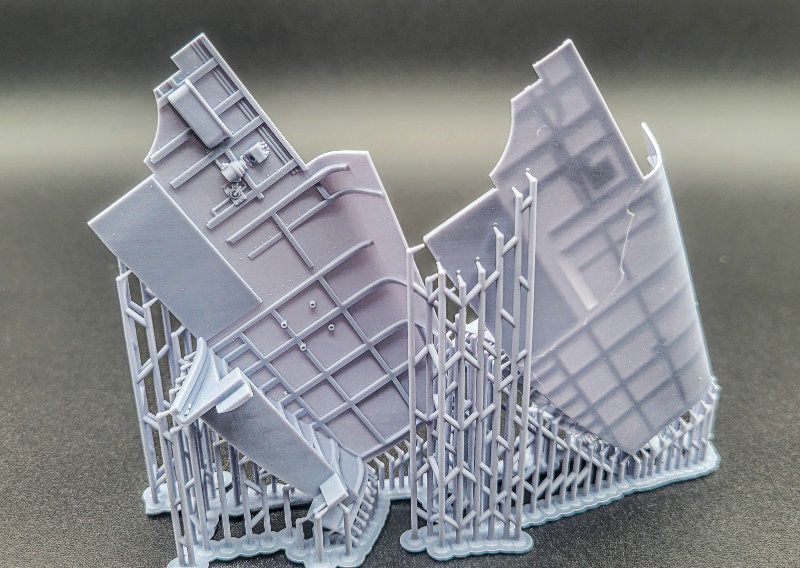
I did find breakage on the sidewalls, but both should be fixable with some care and CA glue during construction. Both sections have detail printed in, with much more to come in the detail part boxes later on.
Lastly in the fuselage, you find the bulkheads for the lavatory/luggage compartment. Hatches can be posed open here as well, but please, knock first before opening the hatch.
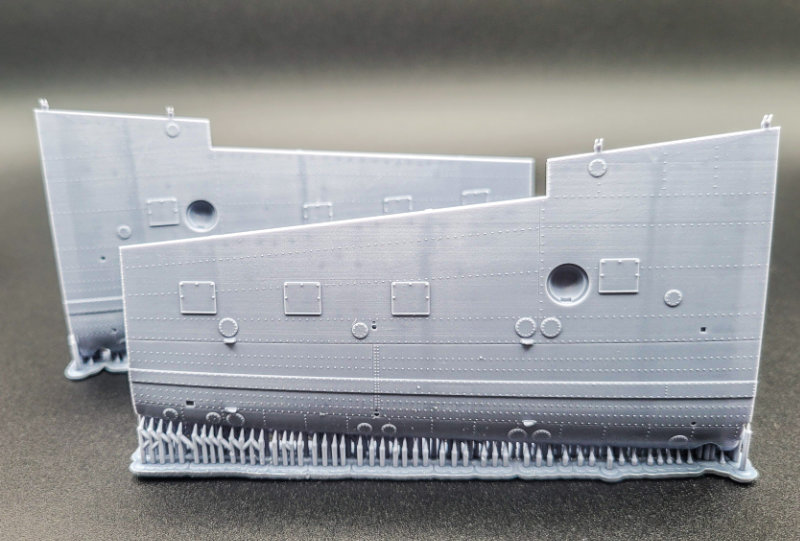
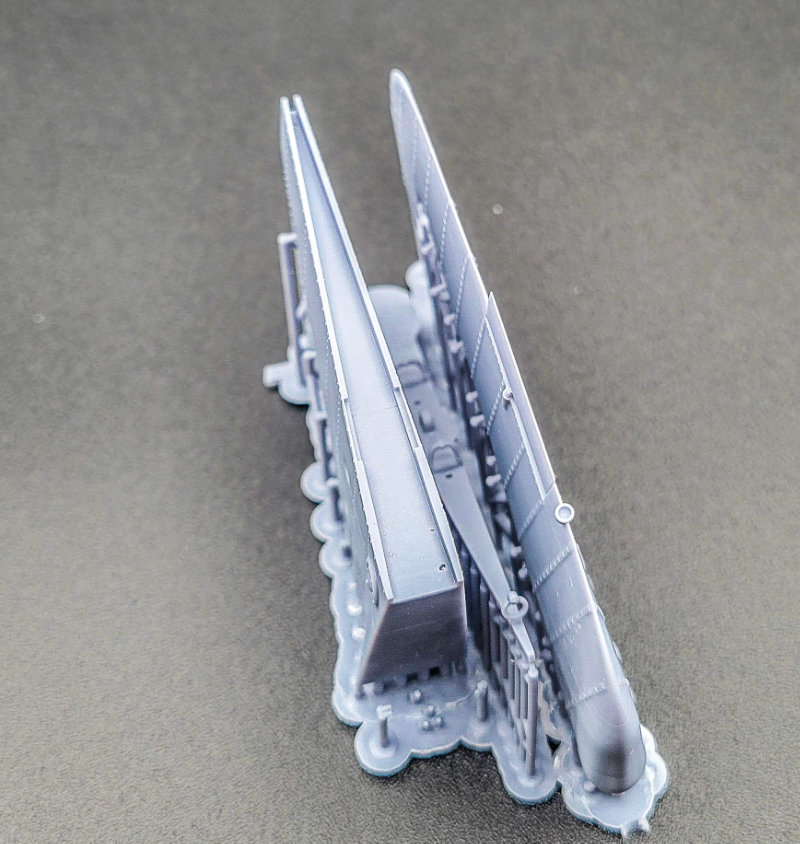
Wings
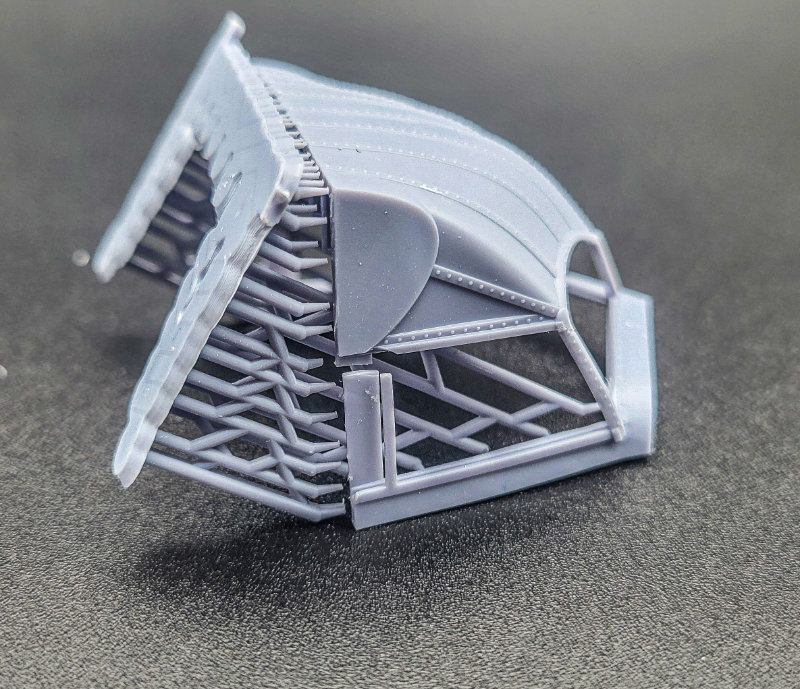
A new and welcome change in this kit from prior LukGraph kits is that this one features a completely hollow wing. It is printed in 6 parts, giving you top and bottom halves of each wing section. As an added bonus for the display space-challenged, the kit is designed so that the outer sections of the wings can be left off entirely in a similar manner to a Wingnut Wings Felixstowe. Additional pieces are even provided as caps for the wing sections if you go for that option. You also get the option of lowering the flaps on the wing, with separate parts provided for them.

Being a flying boat, the Goose had two outrigger floats near the wingtips, and these are also printed hollow, with the rounded upper section and lower plane printed separately. This cuts down on weight, and allows the builder to reinforce the strut mounting from the inside as well. Rigging points are also printed open, so no need to drill holes here.


Control surfaces come next, and they are all printed in one piece, and posable. In fact, LukGraph even provides the hinge points for the control surfaces, which I will show later on. They all come with decent representations of the rib tapes, although a bit heavy for my liking on the ailerons. A particular high point though is the rudder, which is printed beautifully thin on the trailing edge, although print layers are more apparent on the control surfaces than elsewhere on the exterior.

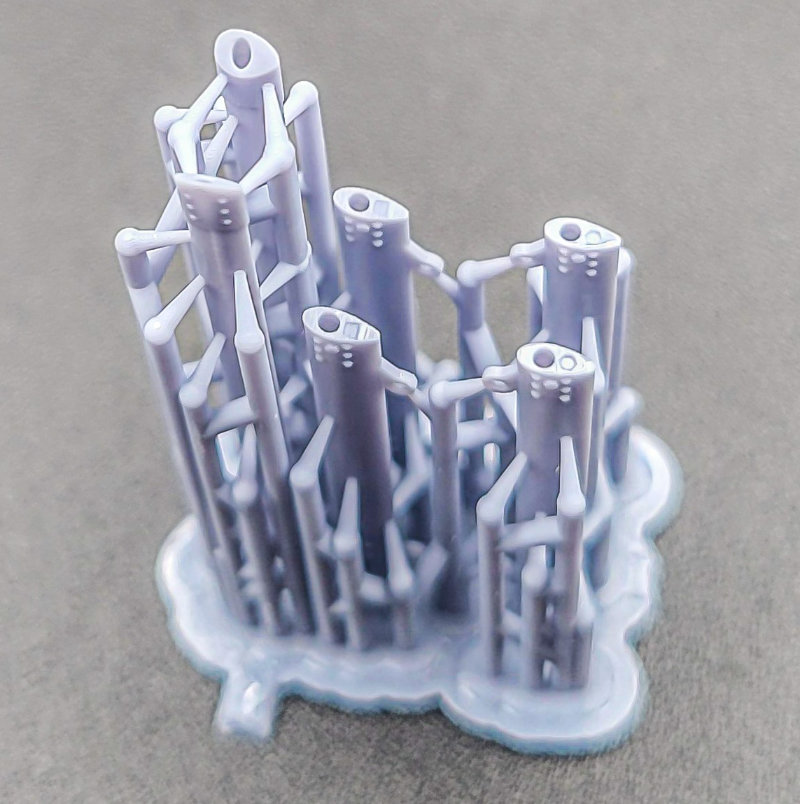
Finishing up the tour of the exterior bits, you find the struts and wheels towards the bottom of the box. The struts are printed hollow to allow you to add the supplied metal rod, and they were even nice enough to print small markings on the struts for the floats to help you keep them organized. Bonus point to LukGraph for that!
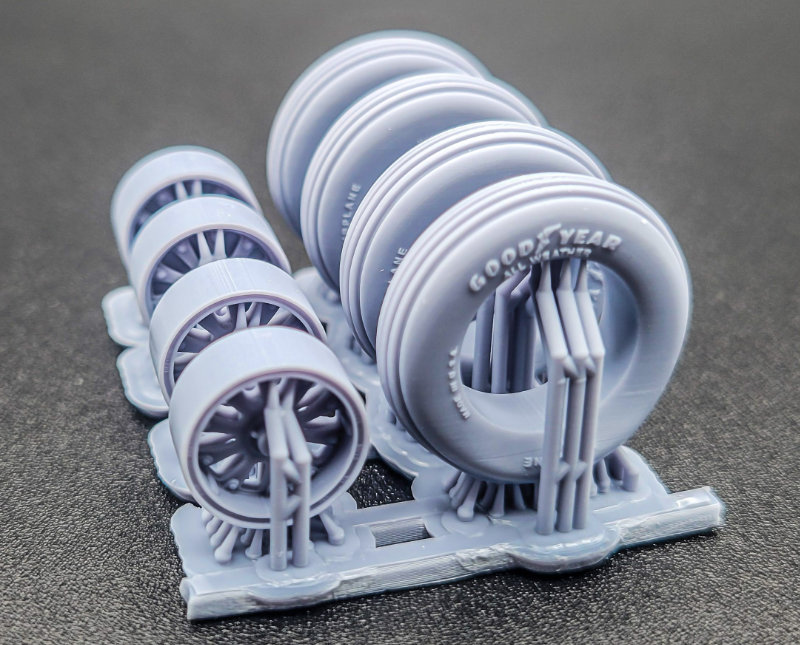
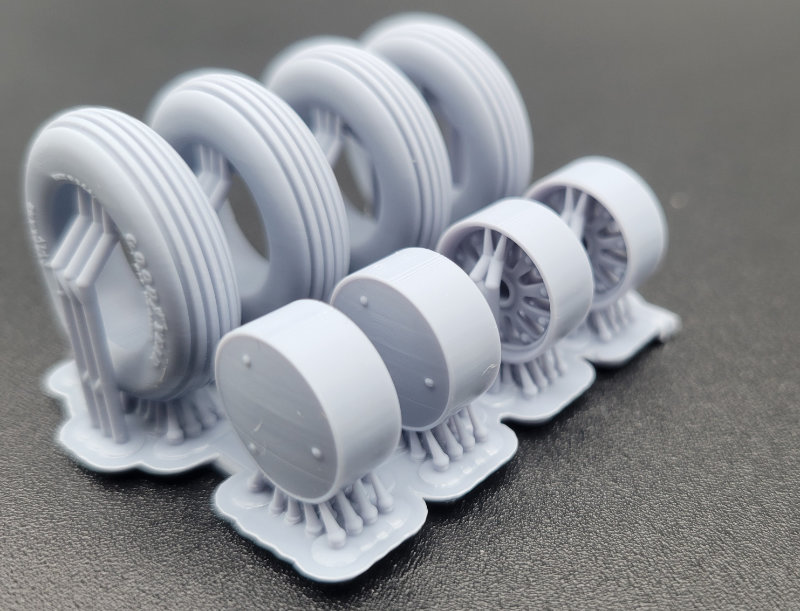
The wheels are also nice, although the wheel tread is quite heavy. Some light sanding could fix that, although you’ll want to be careful to not erase the great detail on the sidewalls of the tires. You get the option of weighted or unweighted wheels, and a choice of wheel hubs, so check your references to see which option works best for your build.

Detail Box 1
After burrowing your way through the plastic bags of larger pieces, you’re left with 3 stout cardboard boxes full of detail bits. This is a great way to help keep them safe, as well as organized. Every box will contain two of the same boxes, with the 3rd being dependent on which boxing you have. There’s a box of universal detail bits for the Goose, one with engine parts, and the 3rd contains interior parts specific to your version, mine being the US boxing of the kit.
I’ll start out with the universal details box, and the first thing you see on top are some cast resin pieces in three colors. The small red and green pieces are wingtip lights and other colored warning bulbs, and the clear parts represent the interior lights, lenses, and fuel gauges. These pieces are a nice inclusion, and wouldn’t mind seeing them use clear resin for the canopy and windows going forward instead of having to cut the acetate sheet out.

Beneath a layer of protective bubble wrap, you’ll find 15 small plastic bags of printed resin detail parts to fill the interior. The instrument panel and overhead console are beautifully detailed, and are complimented by the printed paper sheet shown earlier.

Also included in this box are the Northill anchor, bilge pump, chemical toilet, boarding ladder, exterior hatches, as well as the landing gear parts. These are impressively printed including hollow shafts for you to add additional metal rods for strength.
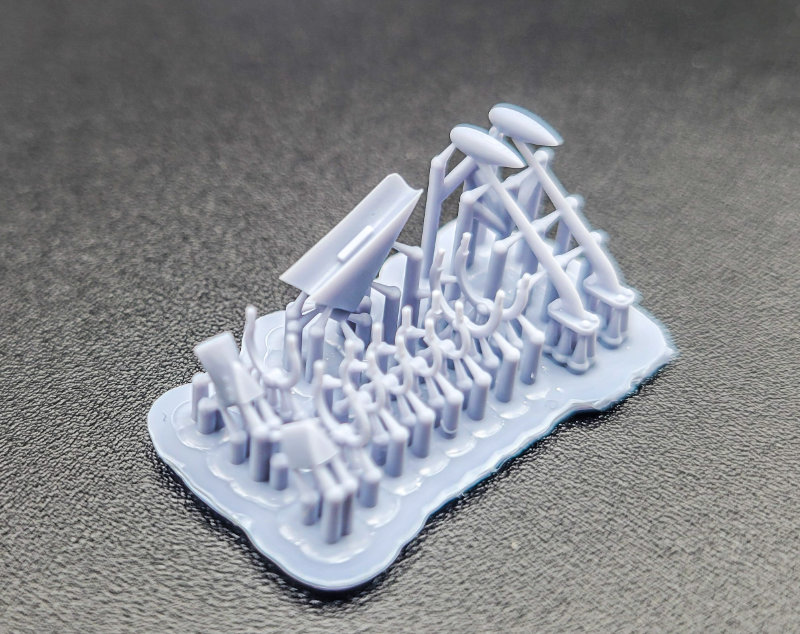
You’ll also be faced with some of the finest 3D-printed parts I’ve ever seen, and those are the control surface hinges. Yes, you read that right. LukGraph provides the actual hinges and connections for the control surfaces in the kit. All I can say is best of luck getting them off the supports and installed without breakage.
Detail Box 2
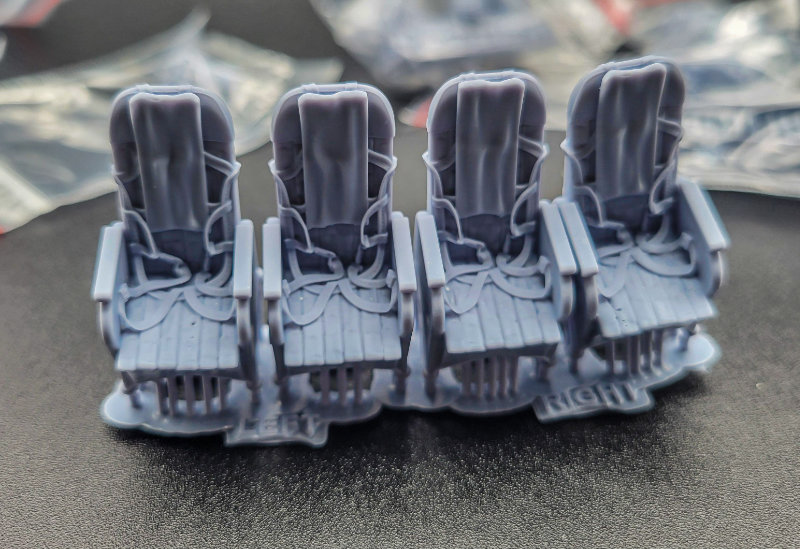
The next box contains comparatively less plastic bags, but larger parts than the first. This box is all about the individual parts for your boxing to kit out the interior. The US version contains four passenger seats, and full radio rack, depth charges, and night drift flares for the nose compartment.
You get 4 excellent passenger seats for the cabin, printed with parachutes and harnesses included. Although all 4 harnesses are identical, there’s little chance anyone looking inside will know.
Following the seats are the radio rack, populated with telegraph keys and radio boxes. The telegraph key is incredibly fine, so care will, as always, be the order of the day.
The US boxing includes a pair of depth charges and some of the best looking pylons I’ve ever seen. No need to try folding up photo-etch pieces for the thinness and open detail you get here. One of the depth charge bodies broke off in transit, but didn’t suffer any damage for it.
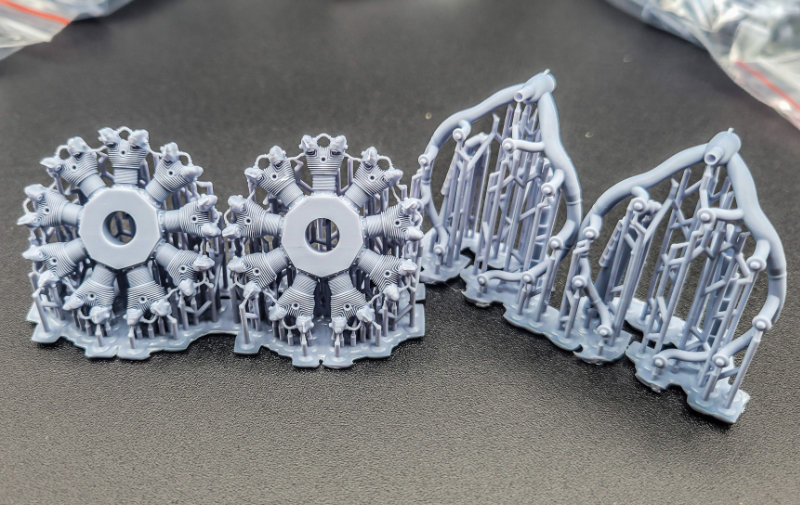
Detail Box 3
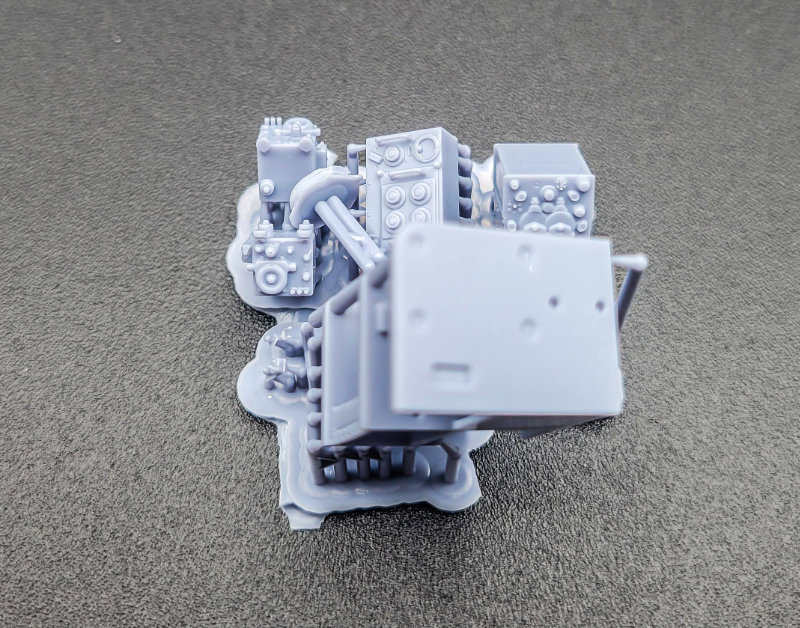
The final detail box contains the two Pratt & Whitney Wasp Junior engines alongside their associated cowlings and details. 9 plastic bags greet you, and you’re instantly presented with some big choices. LukGraph gives you the option of presenting the cowlings closed, or opening up the cowlings and engines for complete detail. No cutting or hacking here, just follow the instructions for the option you want.

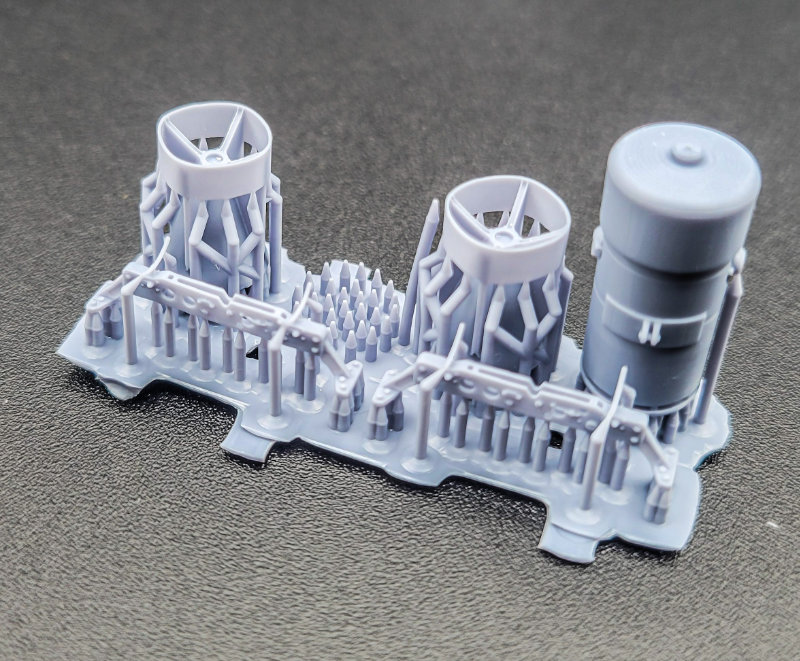
The rear cowling bulkhead has options, with the smaller one being for the closed option. They even printed “With Cowling” on the back of the part to help remind you. Engine bearers come next, and mine came more than bit warped and flexible, but the included metal rod should straighten them out nicely alongside a dunk in some hot water. Oil tanks and various detail parts for the back of the engines will help to populate the accessory section.

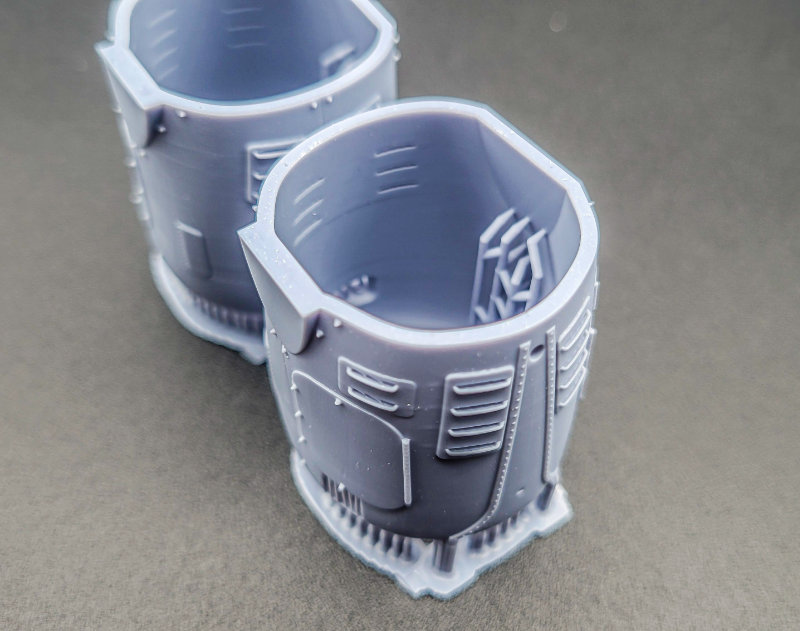
If you want to preserve the lines of your Goose though, and keep everything closed up, you’re given a pair of beautifully printed cowlings, where even the louvers are hollow for you. These are handed, and that info is printed on the base of them.
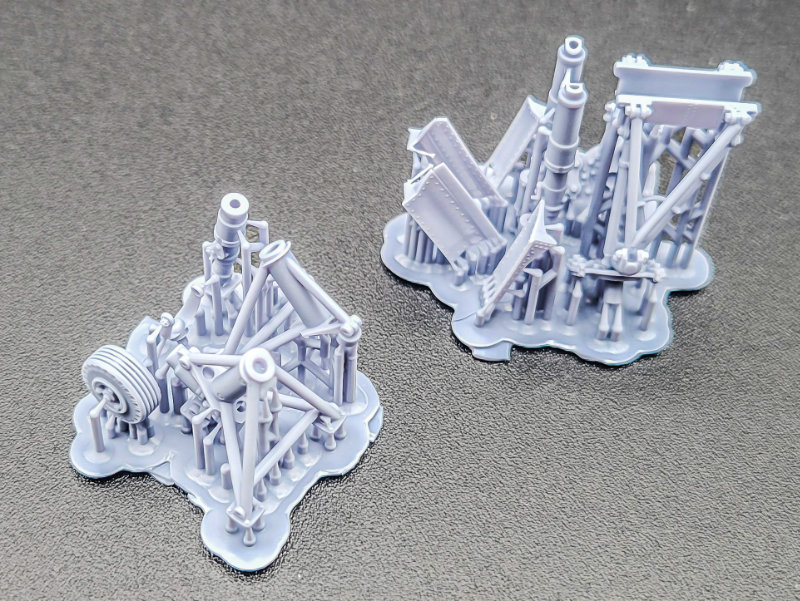
If you’re like me though, and can’t resist having some pieces open, LukGraph thought of you with this one. You’re given a pair of maintenance trestles to mount on the wings next to your opened engines for a repair or workshop setting.

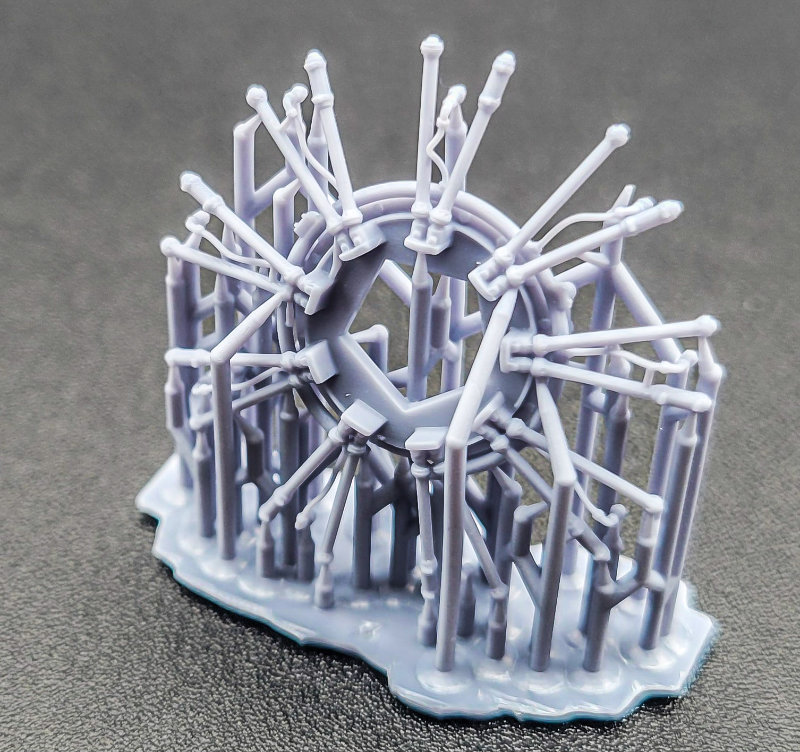
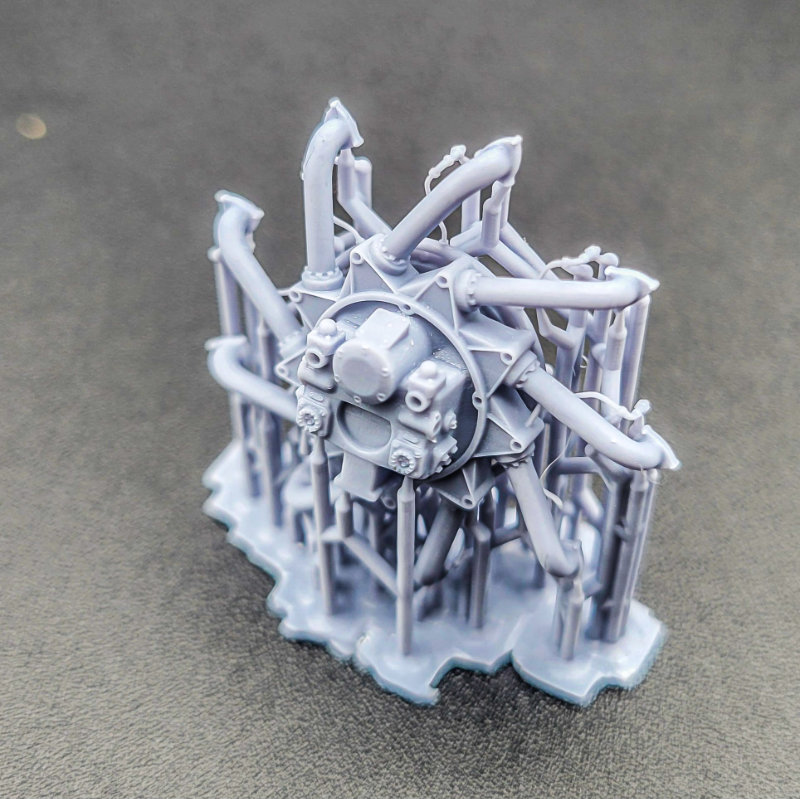
Looking deeper at the engines, each assembly comes together from a dozen or so parts, with the 9 cylinder engines receiving some beautifully fine pushrods and ignition wires and single piece exhaust manifolds at the rear. They basically scream to be left out on display, although the large cowlings do have a wide enough opening to still see the engines inside.
Instructions/Decals
The instructions feature a big step up from prior LukGraph kits as well, with detailed color callouts, helpful tips for the metal strengthening rods, and information about optional assemblies and details.
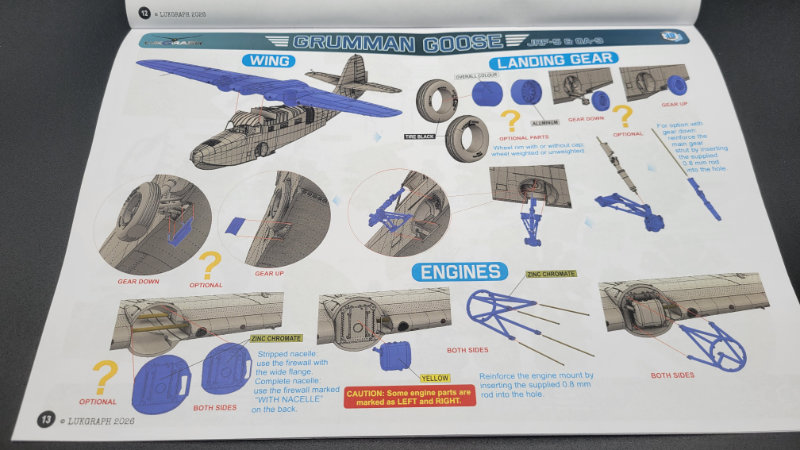
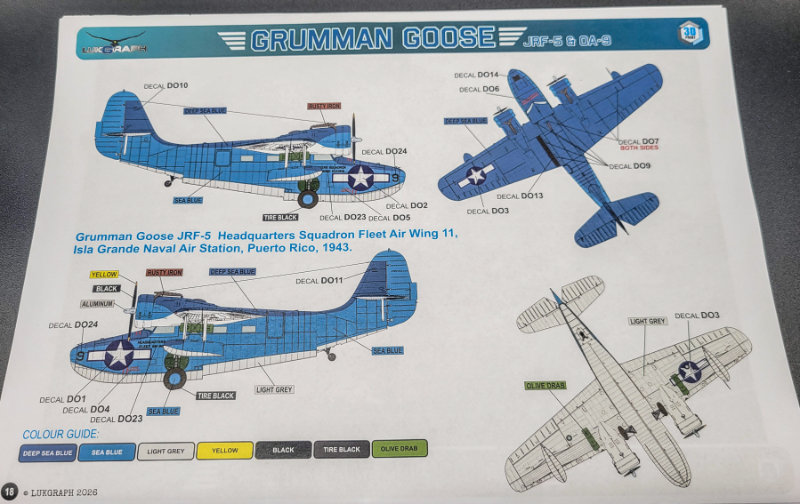
And unlike past kits, the booklet only contains paint scheme info for the relevant schemes instead of all options. You get two options in the US boxing, one pre-war, and one mid-war tri-color option. The Wheeler Field one instantly jumped out to me, which means figuring out the mysterious Light Blue No.23. This is also what the vinyl masks are for, helping you paint the yellow cheat lines along the hull and floats.

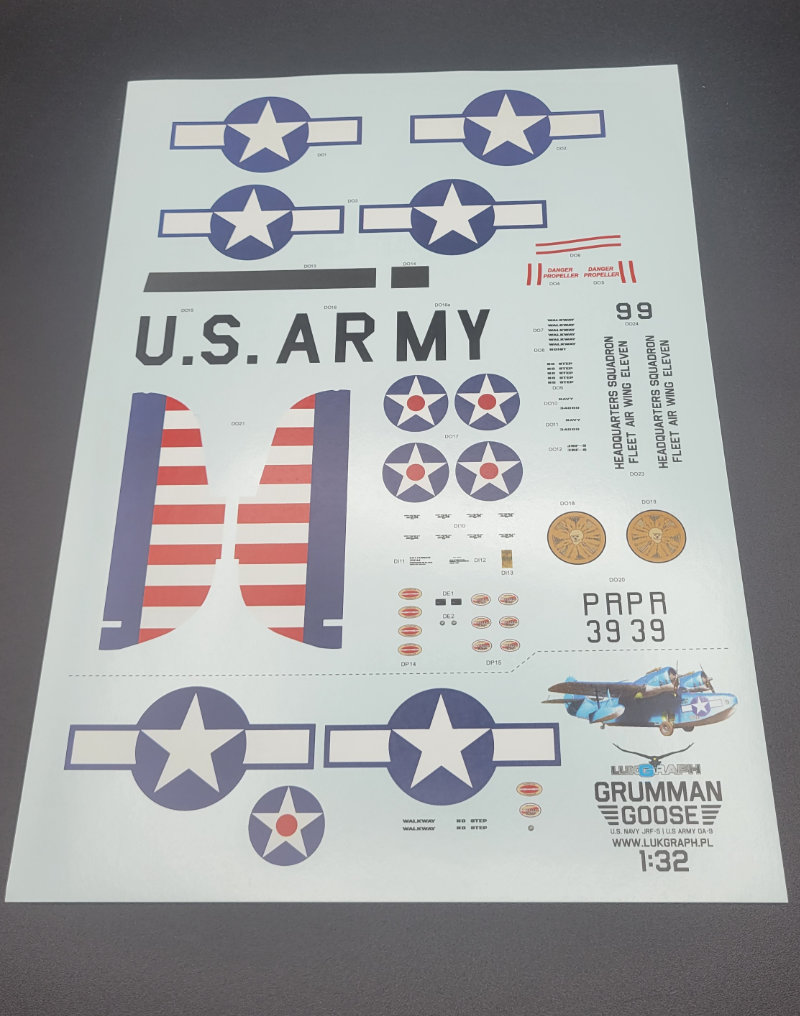
The decal sheet is designed and printed in-house at LukGraph, and they look nice on the sheet. One caveat with LukGraph decals is that they come on a constant carrier film, so it’s up to the builder to trim them close to the artwork to minimize any chance of silvering.
Final Thoughts
Looking through the entire kit, I am quite impressed by everything that LukGraph has offered here. I never thought there would be a 1/32 kit of the Goose on the market, so it was up to a smaller producer to do it. The world of 3D printing though has made it so that manufacturers are able to make kits like this possible.
Now, a kit like this does come with a premium price tag, and it’s hard to square a $500 purchase in any reality. Thankfully, I was able to afford it, but the price discussion will certainly be one for any prospective buyer to mull over before jumping in. It is a kit that I’m very excited to dig into and build, especially since I don’t think we’ll see a ton of these populating contest tables and display cabinets. The civilian and foreign boxings offer their own unique paint schemes and interior options for those looking for something outside of American schemes. At the end of the day though, it’s a 1/32 Grumman Goose, and I doubt that Tamiya or Z-M will be lining up to produce a competing product any time soon.
The options give builders a ton of ways to make their Goose unique, from exposed engines to removed wings to various stages of weathering and paint scheme, and the entire package here exudes quality. The surface detail is wonderful, as are the interior detail and engines. With the ability to open up the hatches and engine cowlings, you’ll be able to put all of that hard work and detail on display. Going off of their recent 3D printed kits, assembly should not be too much of a challenge, but care will of course be necessary with removing parts from supports and cleaning them up. Being a resin kit, the usual health & safety warnings should be observed in terms of ventilation and masks to protect against resin dust.
I’m looking forward to diving into this one soon, and can’t wait to see LukGraph’s next kits of the Avia BH-33 and Blackburn Shark in 2026.
© Matthew Robeson 2026
This review was published on Sunday, March 15 2026; Last modified on Sunday, March 15 2026