
Mini Craft | 1/32 MCC 32001 & 32003 Aces II Ejection Seats
Reviewed by Olivier Beaumont
Introduction
There are a plethora of resin ejection seats for the F-16 available on the market, actually too many to remember which I built and which I did not. One of the latest to offer an ejection seat at the time of writing this review is Mini Craft, a company from China which makes highly detailed 3D prints parts in 1/72, 1/48 and 1/32 scale.
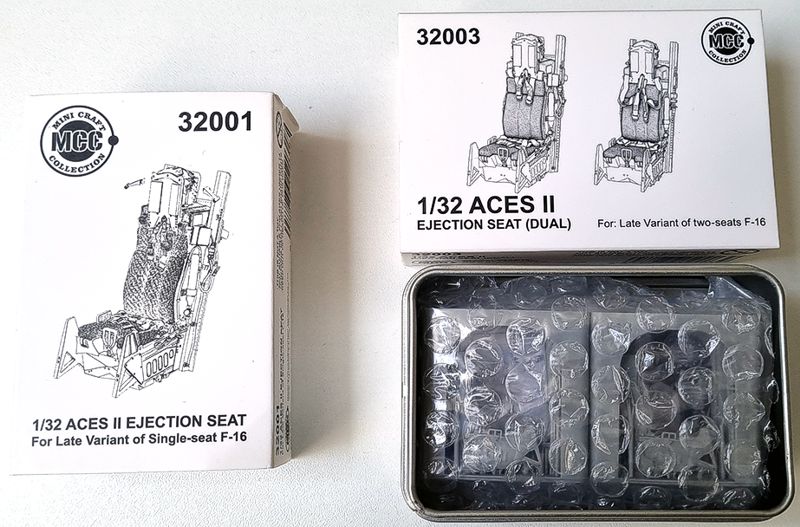
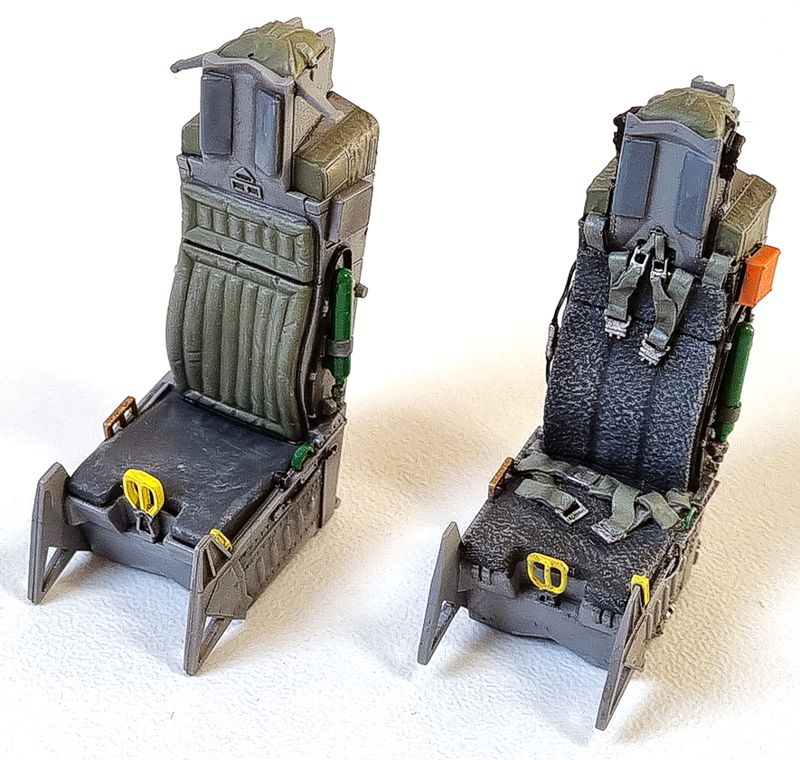
Mini Craft offers 2 options in 1/32 for the Aces2. A single seat (32001) and a dual seat (32003) kit. The dual seat kit is basically twice the same seat except for tiny details which prove that Mini Craft is into accuracy. The Flight Data Recorder which is the rectangular box on the left side of the seat is only featured on the front seat. That is accurate as there is no FDR on the back seat. Mini Craft even designed the seatbelts on the rear seat differently (more loosely) which is a great touch.
The sets are not specific to a F-16 model so they can be used for any Academy or Tamiya or other model.
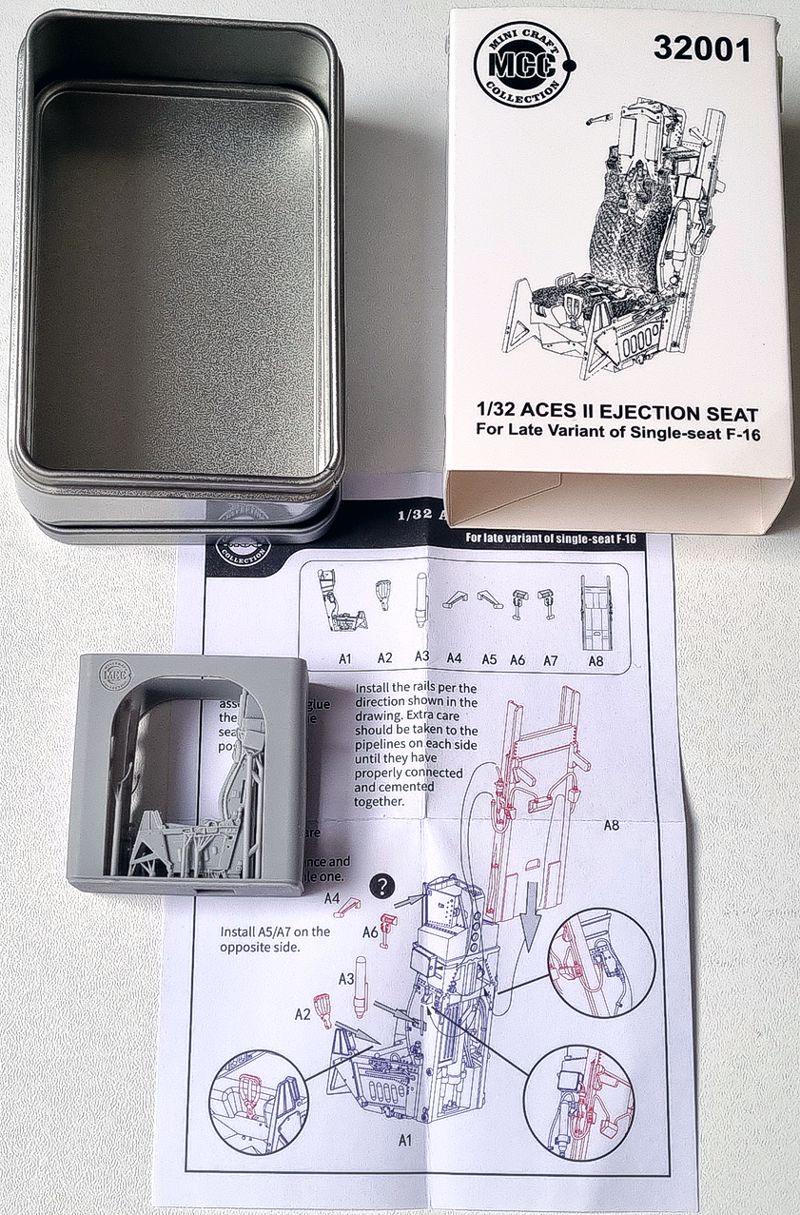
The kits are carefully packed in a metal box which will be useful to hold all the different tiny parts and contains a well-protected 3D block and a comprehensive coloured instruction sheet, no decals though.
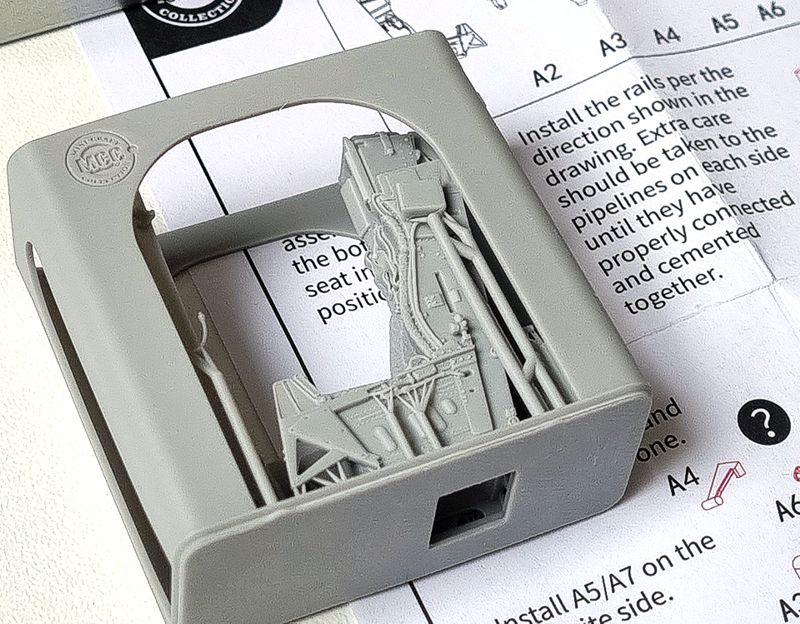
The seat is printed on a resting plate holding many small parts and well protected on the side with a resin cage. That and the extra plastic bubbles in the box should prevent any part to be broken during transport.
The kit includes:
- 1 seat printed with seatbelts and late sheepskin cushion
- 2 sets of old-style fixed pitot tubes
- 2 sets of modern retractable pitot tubes
- 2 ejection handles
- 1 oxygen bottle
- 1 backplate with rails into which the seat can slide up and down which is a great advantage for mounting the seat in the right elevation in the cockpit
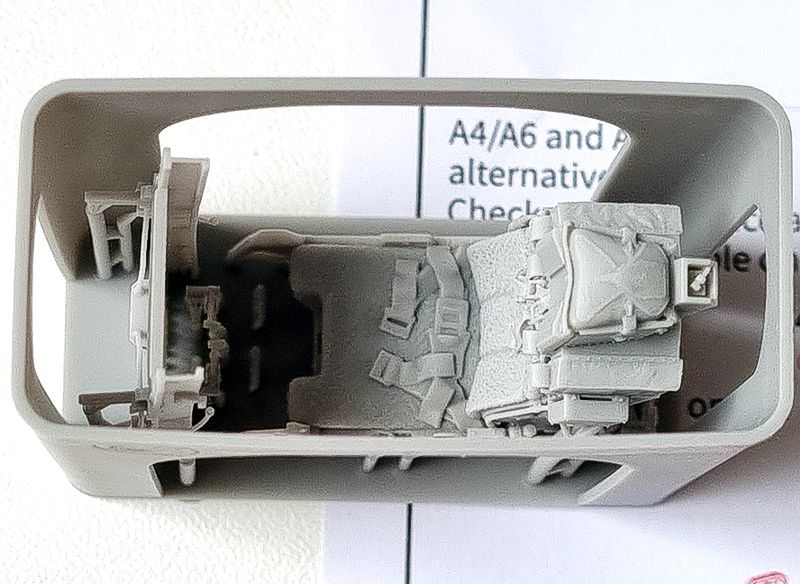
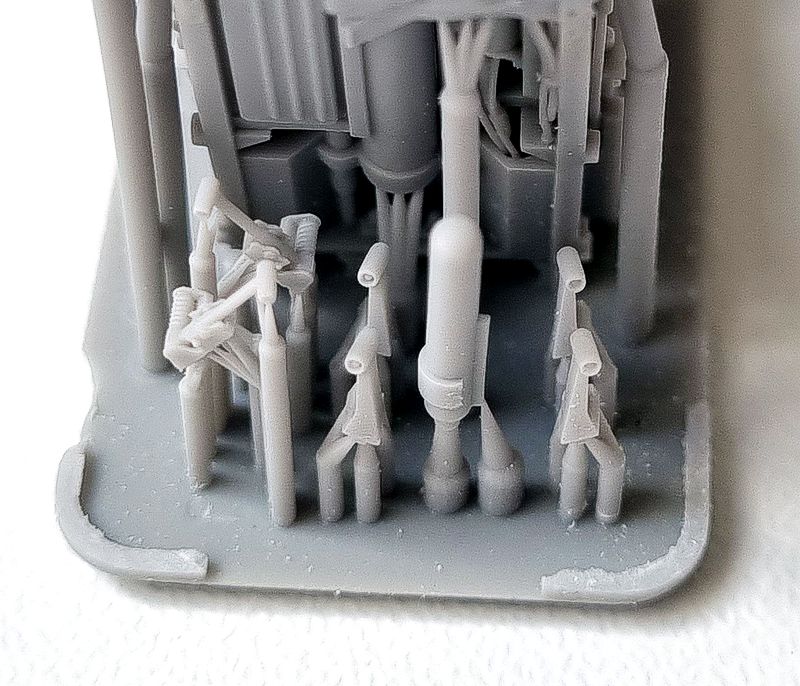
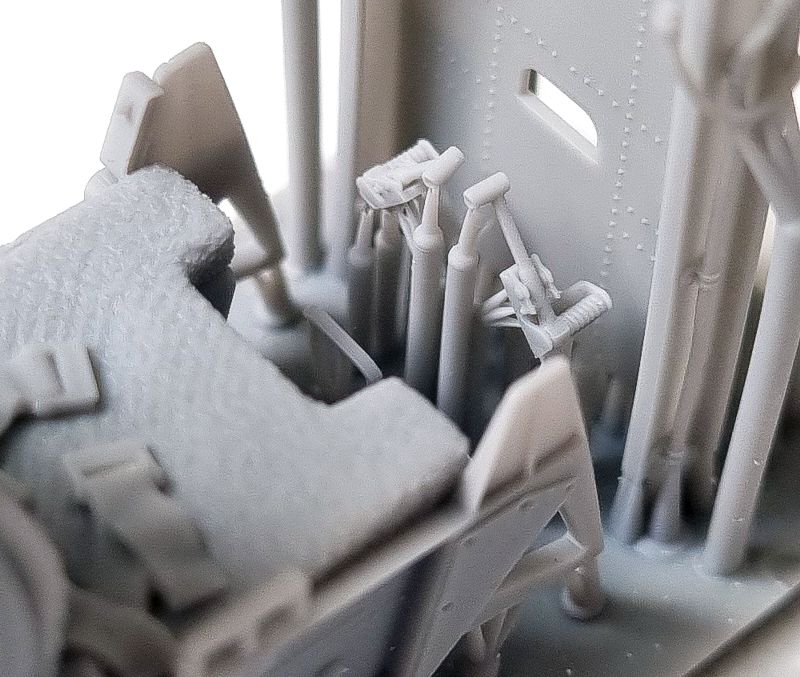
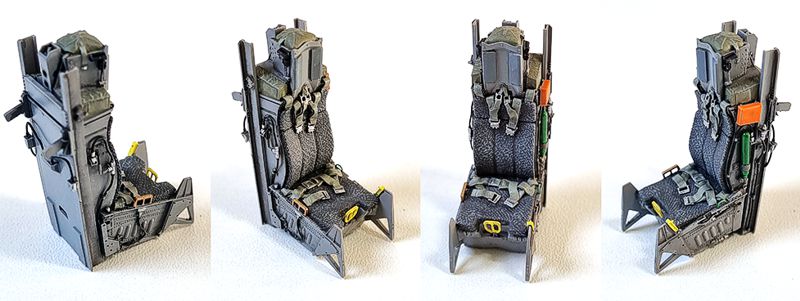
The level of detail is incredible. Resin seats are usually very well detailed but here you get all the wire lines on the sides of the seat and more surprisingly the wires between the rails and the seat. Most of them being separated from the seat and not resting against it. These are VERY fragile but provide great details for your model.
It is honestly the first time I see such a level of detail. This is where 3D prints really stands out from older resin casting. There is no way we could get these tiny wires with a cast resin seat.
Of course, during the print process these tiny and very fragile details need to be supported and the final user will have to separate the supports from the tiny parts. That may be a challenge but is unavoidable with 3D printed parts.
The first step to free the parts is to remove the resin protection cage. This is easily done with a small saw at the 4 round corners of the base plate. The resin is quite thin and it should be much faster (and safer) than removing a resin block from a cast resin seat where it is difficult to ever saw straight and clean.
Old and new pitot’s are provided and are redundant.
Removing 3D supports may seem daunting for some of us. There are multiple techniques that can be used, and you need to adapt your technique according to the location of the support you want to cut and the fragility of the area it supports.
For larger base a GOD HAND cutter might do the trick but I generally would not advise it as the mechanical action might break some parts. Same thing when using a saw, although the finest the saw the least harm you will do. Although not recommended I am guilty of doing it when I am sure I will not break parts (and of course sometimes I am wrong).
For more fragile parts an ultrasonic cutter is the ultimate method but they are expensive and sometimes bulky.
Luckily MCC 3D supports are very thin at the point of contact and I separated them using a simple set of tweezer by twisting them gently. (I want to do that as well on my own designs – but I guess I need to update from free Chitubox!)
It worked for all of them but one tiny wire which I broke in the process. So yes, an ultrasonic cutter might not be a bad idea after all. And it is going to be more and more necessary anyway as it is clear we will have less and less cast resin and more and more 3D printed resin as aftermarkets for our models.
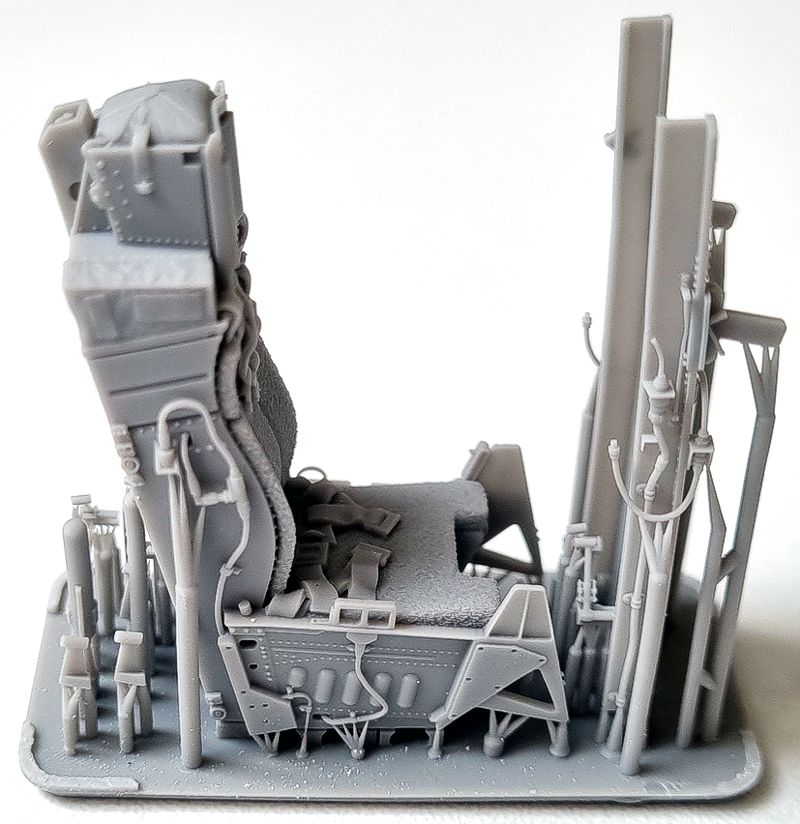
Look at the details on the lower right side of the seat and the precision of the ballistic hoses on the backrest side.
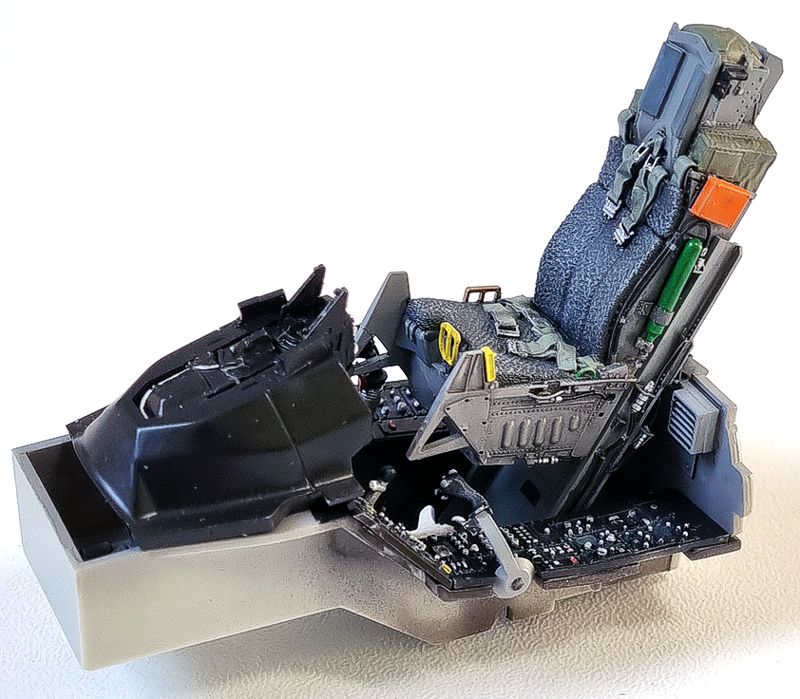
The seat fits perfectly the Tamiya F-16 Tub and is a great replacement for the stock seat which is not bad but cannot compete with the level of details of the Mini Craft seat.
Comparing both painted stock Tamiya seat and the MiniCraft rendition.
The backplate with the two seat rails are placed first and rest perfectly in the Tamiya notches. Then the seat can slide into the rails just like the real thing. The height of the seat in the tub can then be adjusted depending on the scenario of your model.
With such level of detail painting and weathering is very easy. All details are very easy to paint. For instance the wires don’t stick to the seat side making them so much easier to paint, the cushion texture will stand out perfectly after a subtle drybrush. And due to the great definition seatbelts will be equally easy to paint. Finally, the weathering will make so many details stand out that the seat will steal the highlight of the cockpit from your instrument panel.
Conclusion
As I said above, I have never seen this level of detail so I definitely recommend the Mini Craft Aces II seats for any F-16 project.
On the plus side:
- The level of detail
- Well protected in the box
- Smart thin support easy to remove even for delicate components
- Front and back seat accurately rendered with different seatbelts position
- Duplicate parts because you will always loose one of these to the carpet monster after a flight from your tweezers
- Old and new pitot’s
- Seat that slides in the rails and you can adjust seat height
And one minus: The lack of decals.
It would have been perfect with a small decal sheet for the many visible placards of the ejection seat. Not all of them as many are invisible or too small but there are a few that could have been supplied like the Aces 2 logo for the right side, the FDR markings, the headrest stickers, etc.
The review is unsolicited and I bought these items for my own F-16 projects.
When researching a F-16 ejection seat I found MCC website which referenced Oups Model in France as a reseller.
I ordered the product a Monday morning and Oups Model was very quick to deliver as I received the package the Thursday of the same week. 4 days from France to Belgium including order management, pristine communication about the process and shipping.
Kudos to Oups model store in France.
They are very efficient. Compared to Hannants in UK that sometimes need 10 days to ship your order, this was shipped the very same day as the order!
I will definitely buy more from them in the future.
© Olivier Beaumont 2026
This review was published on Thursday, May 07 2026; Last modified on Sunday, May 10 2026