
Jerry Rutman | P-51B Mustang Full Resin Kit
Reviewed by Brad Hagen
Up to now if you wanted to build a P-51B Mustang, the only choice you had was the Revell kit which is terribly inaccurate. You needed to graft on a nose from a Hasegawa P-51D which still left you with an inaccurate wing, a horrible cockpit, and rivets that a Sherman tank would be proud of. It's surprising that no manufacturer ever produced an accurate P-51B since Revell released theirs oh so long ago, thankfully Jerry has come to our rescue with an exquisitely detailed, hollow cast resin P-51B.
Long time readers of our board will remember when Jerry announced this kit and followed along with his progress. A number of times he asked us which way we wanted a certain part of the kit to be made, and he listened to us... there aren't many manufacturers that will do that!! A little disclaimer, I'm not very good with a camera so the parts were scanned in and it's hard to see the intricate detail that Jerry molded in, but I'll do my best to describe it.
Instructions
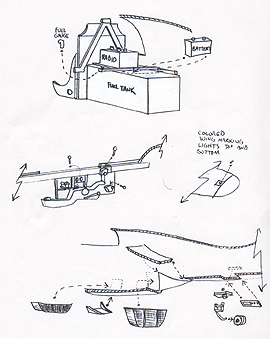
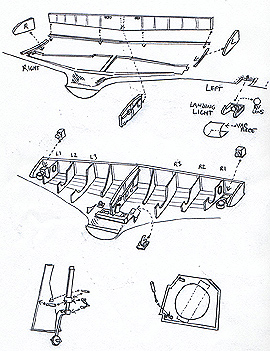
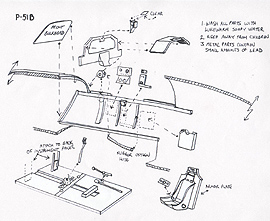
There aren't step-by-step instructions included which is OK as who follows instructions in this scale anyway. What is included are three hand drawn pages which will answer any questions as to where any of the little parts will go. One page shows the main cockpit parts and the right sidewall, the next page shows the left sidewall, the fuel tank, battery, and radio behind the cockpit, and the radiators. The last page shows the building of the wheel wells, the landing gear and doors, and the landing light in the wing. When I first looked at all the little resin bits and pieces, I had trouble identifying some of them, after looking at the drawings it cleared it all up.
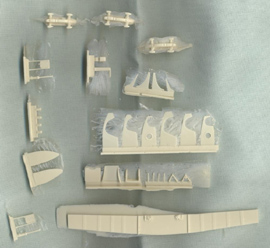
Fuselage
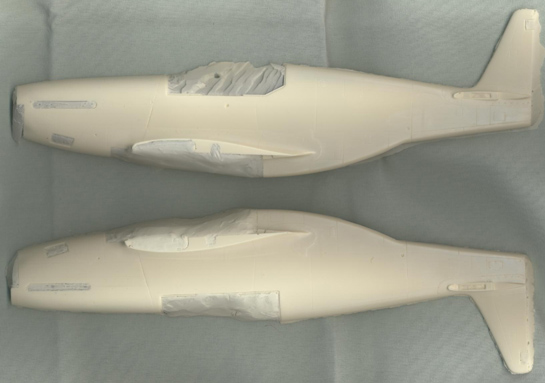
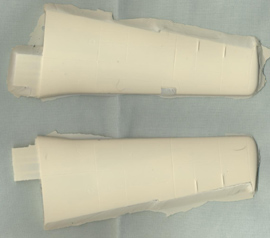
As I mentioned earlier, most of the kit is hollow cast making it very light, the fuselage and wings appear to be thinner than the parts on the Revell kit. The panel lines are lightly and evenly engraved, screw heads are engraved where they need to be and all those nasty rivets are thankfully missing.
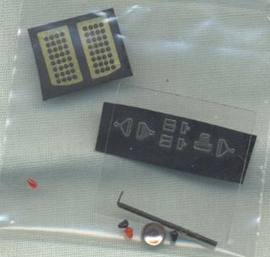
The nose scoop is a separate piece and the lower nose has the correct indentations on each side. The grills on each side of the nose come in photo-etch saving you a lot of time from having to drill out all those holes, plus being so thin it is much more realistic.
The spinner appears to have the correct curvature and is cast in a solid piece of resin with a lightly engraved line for the back plate and four indentations to represent where the propeller blades should go. It looks like the holes will need to be drilled out a little and I will be making a jig to insure the blades are glued at the correct angle. The blades are thinly cast and from my limited knowledge appear to be of the correct shape and width. The cuffs are finally engraved and there is a small pin for inserting into the spinner. On a lot of the parts there is a very thin flash, which is part of the molding process Jerry uses and is very easy to remove.
The exhaust is cast out of resin and will look good on the model, the exhaust by Moskit would look great.
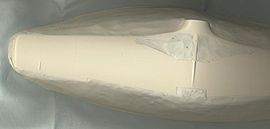
The canopy area on the fuselage has a slight ridge for gluing the canopy on. Where the canopy would open on the port side, the ridge is missing...a nice detail touch if you want to display the canopy open. Instead of having separate rear windows like the Revell kit has, Jerry made it as a separate section to be glued on. This will make filling the gap much easier as you don't have to worry about ruining the rear window, just fill the gap where it meets the fuselage and mask off the windows.
The front of the belly scoop is a separate piece to be glued on and you can see through it. The exhaust doors for the rear of the scoop are nicely detailed and you can also see inside the exhaust door. What makes this so nice is there are detailed radiators for the front and rear of the scoop, a nice touch I wasn't expecting and really shows the detail that Jerry put into the kit.
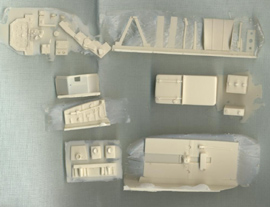
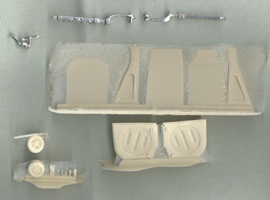
Cockpit
The cockpit is well detailed with many finally engraved parts, the only thing needed to buy are Waldron's instruments, the placards would be an excellent touch though. The seat is well molded and includes photo-etch buckles, you need to supply your favorite seat belt material. The cockpit out of the box will look very good, and a few bits of wire for detailing and you'll have a masterpiece.
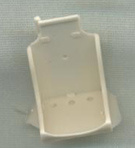
Behind the cockpit is also detailed with the fuel tank, fuel gauge, battery, radio, and the bracing behind the seat. Again, and will look good out of the box, great with a little bit of extra detailing.
Wings
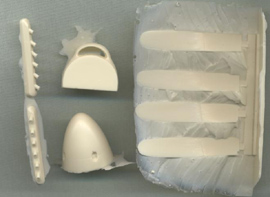
While it's very hard to see in the scans, the wings are as finally engraved as the fuselage is. Being so thinly cast I was really surprised to find that neither the fuselage nor the wings were warped in the least. Included are red and green wing marking lights for the top and bottom of the wings.
The port wing has an opening for the landing light molded in. The landing light area has a small box to be glued in, a silver lens to be glued to that, and then a thin, clear, vac piece.
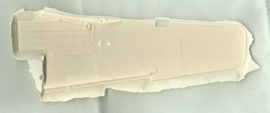
The lower wing on first inspection has a lot of flash on the outside, in fact it looks like a long narrow bowl. On closer inspection, leaving the flash "bowl" on seems to keep the wing stiff and warp free during shipping. The flash isn't thick and will be easy to remove.
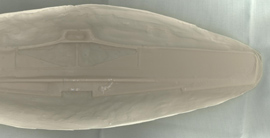
What really doesn't show up in the scans is the finally detailed framework of the landing gear bay. The landing gear bay is made up of many small pieces, around 16 including the landing gear locks. Refer to the instruction sheet at the top of this review to get a good idea of the detail of the landing gear bay. The ribs are very thin, warp free, and will make a great looking bay.
Another nice detail that Jerry included is that the bombdrop tank shackles are molded separately leaving you the option to include them or not.
The landing gear doors are thin and well detailed. The main landing gear legs and the tail wheel strut are made out of white metal with only a tiny amount of flash. There is nice detail molded in, the scissors are made out of resin. They will satisfy most builders, including me, but I'm sure there are some gung ho scratchbuilders that will build awesome looking gear of their own, but that's beyond me.
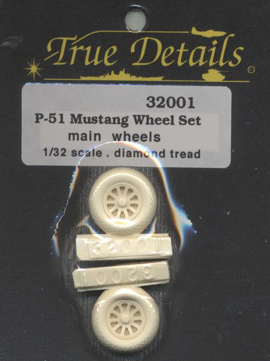
Jerry made his own tail wheel, I did have an extra one included, I am not sure if that's normal though. Instead of trying to reinvent the wheel so to speak, Jerry includes a set of True Details P-51 Mustang wheel set with diamond tread pattern for the main wheels.
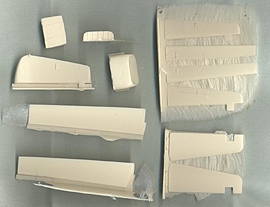
Flying surfaces
All of the flying surfaces on the wings and tail are separate pieces and are solid cast which will save a ton of work, especially with the flaps which are always a huge headache to lower. The rear of the wing where the flaps attach is shaped to fit the lowered flaps saving a lot of time and effort. As with the rest of the kit, the engraving and detail is very fine and well done.
Little parts
All of these parts except one have been mentioned, but here's a chance to see them. The seat belt buckles, grills, landing light, wing marking lights, and the part not mentioned yet is the piece of clear plastic for making the gun site reflector.
Clear Parts
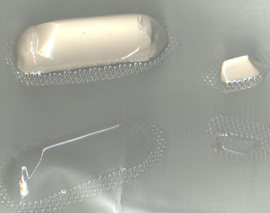
Jerry included two vac parts each for the canopy and the landing light cover. The canopy has extremely fine lines molded in instead of the thick canopy frames so often seen and the canopy is crystal clear.
Also included are solid resin plugs for the canopy and landing light which will make cutting them out much easier. While you can paint the canopy frames, using the canopy plug and forming thin plastic over that, you could make your own frames and highly detail the canopy, even making the P-51B's sliding windows to highly detail the canopy.
Conclusion
No decals come with this kit. National markings are easy to find, stencils may be a little bit harder to find, and I haven't checked the availability of P-51B decals yet as I am looking at three different paint schemes for mine...a 4th F.G., one from the Checkertails, or an air racer in cobalt blue which means I'll probably make my own decals.
This was a long-awaited kit and was well worth the wait. It is finely engraved, finely detailed, and looks like it will build into a great looking model. As the P-51B was used in just about every theater (if not all theaters), plus used in air racing in the late '40s, the paint schemes are almost endless.
The kit is well worth the money, a big thanks goes out to Jerry for making this kit.
© Brad Hagen 2002
This review was published on Saturday, July 02 2011; Last modified on Wednesday, May 18 2016