
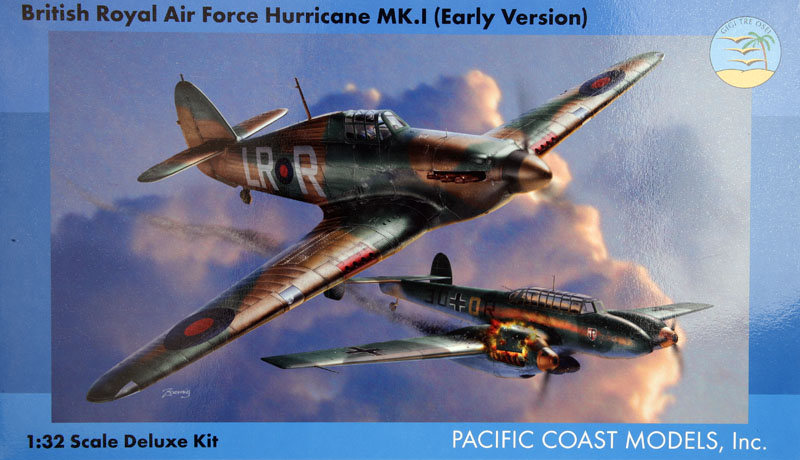
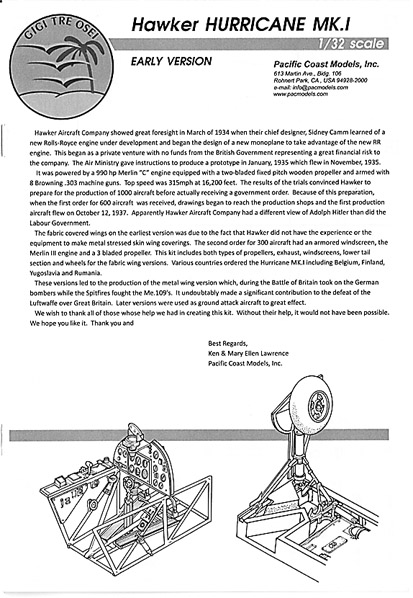
Pacific Coast Models | 1/32nd Hurricane Mk. I Early
Reviewed by Ray Peterson
PCM has just released their latest 32nd scale offering, the Hurricane Mk. I Early. This is the first production variant of the Hurricane, fitted with fabric wings. This version has never been kitted before, although Revell offered a Mk. I Late in the late '60s. Revell's version was later revised to a Mk. II by the simple expedient of grafting cannons to the wings. A new-tool Hurricane has been on modeler's wish lists for quite some time; we will see how PCM's offering fills the bill.
What's in the Box
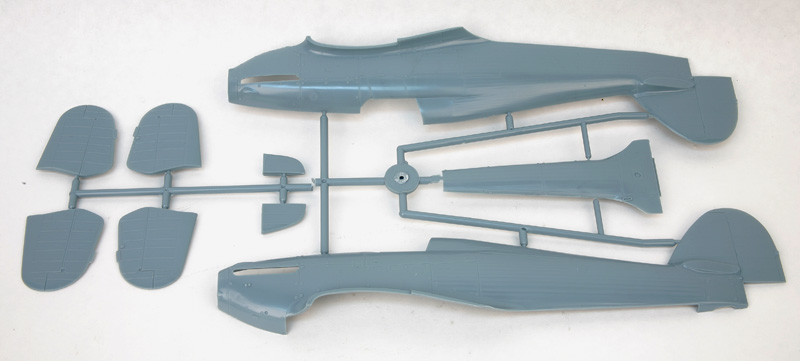
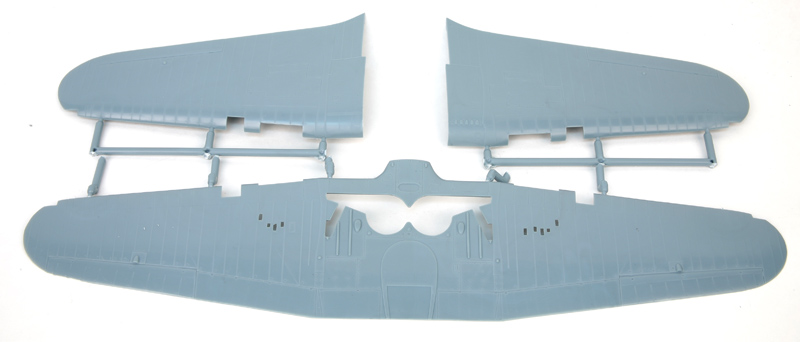
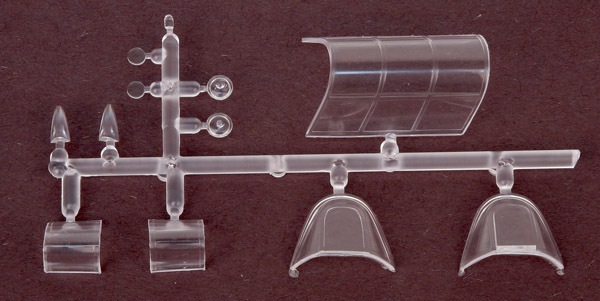
Included in the kit are 3 sprues of shiny grey plastic, including Sprue A for the fuselage halves, fuselage bottom, elevator halves and lower rudder parts; Sprue B for lower wing and upper wing halves; and Sprue C with all the detail parts. Another single sprue contains all the clear parts, including canopy, two windscreens (one with early external armored glass), landing light covers, landing light lenses, wingtip lights, formation light under the wing and on the tail. Sprue B with the wings and Sprue A have been cut apart, I guess to better fit the box. Options included on the plastic sprues include three types of propellers ( Watts 2-bladed, Rotol RX5/2 metal or RX5/5 wooden 3-bladed propellers with choice of round or pointed spinner) and the option to use the lower fuselage/tailwheel fairing or the early retracting tailwheel with rudder lower piece to match. An optional venturi tube is also offered for the port side of the fuselage. The only radio mast included is the "pole" or un-tapered mast. Strangely, it appears to have a bit of a taper but a little work with a sanding stick will take care of that.
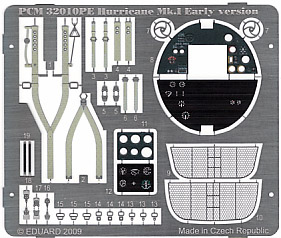
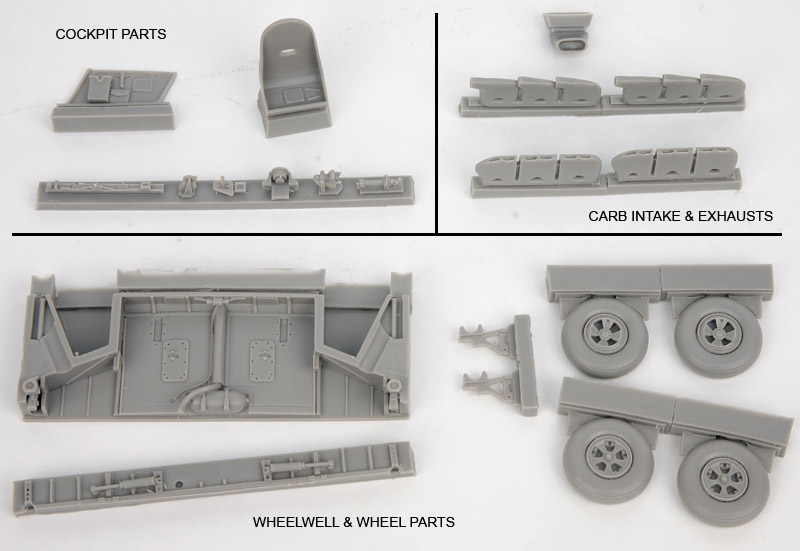
Moving to the multimedia bits, we have a nice pre-painted photo etch sheet with instrument panel and harness in color, plus other details for the inside and outside the aircraft including the correct early radiator front and back screens. Another bag holds the resin parts, including eight parts for the cockpit, the insides of the wheel wells, carburetor intake, two types of exhausts (early kidney and later ejector types), and two types of wheels: 4 spoke and 5 spoke.
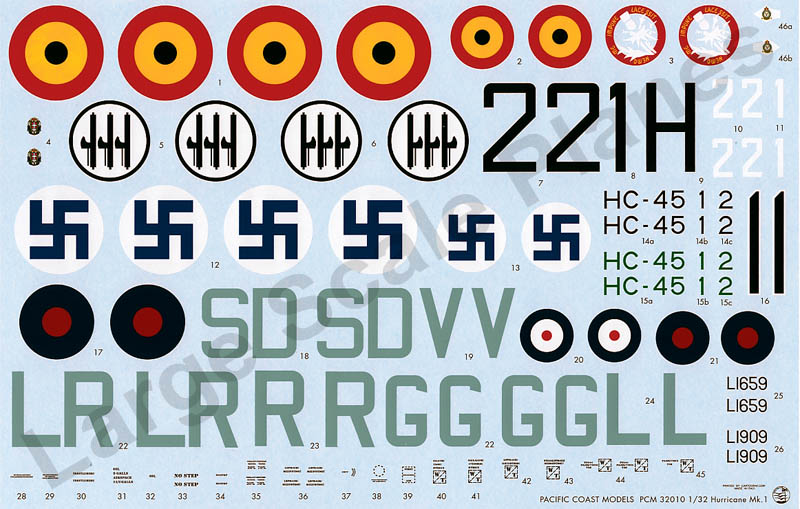
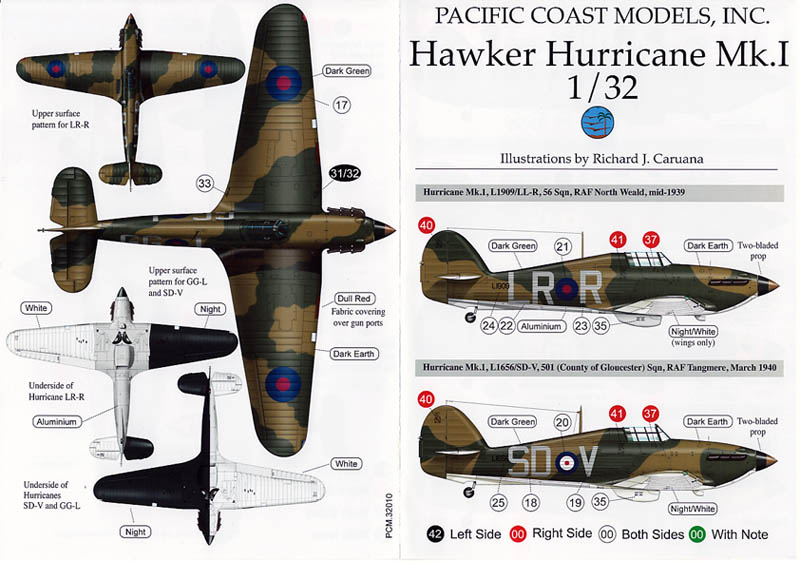
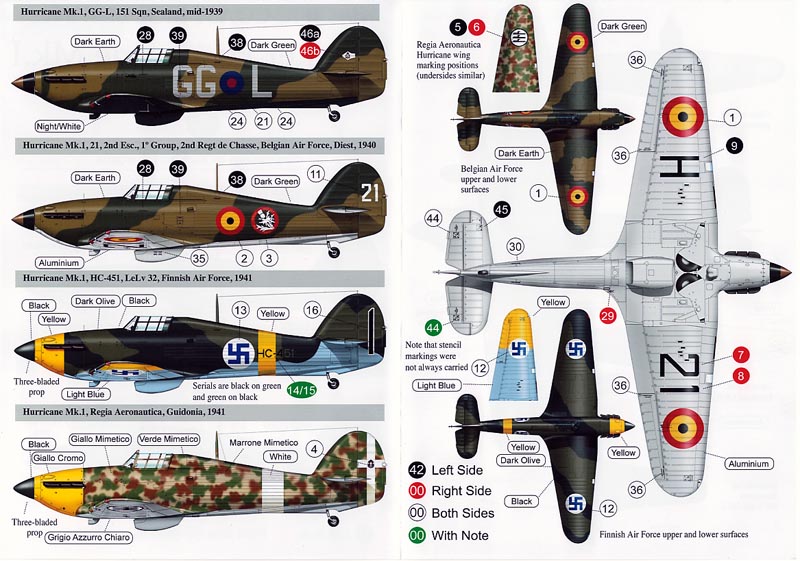
One nice and large set of decals is also included, with markings for British, Belgian, Finnish and Italian aircraft. The aircraft provided for include "LL-R", 56 Sqn, RAF, mid-1939; "SD-V", 501 Sqn, RAF, March 1940; "GG-L", 151 Sqn, RAF, mid-1939; "White 21", 2nd Esc, Belgian AF, 1940; "Black 1", Finnish AF, 1941; and a Hurricane tested by the Regia Aeronautica (Italian AF), 1941. Also supplied are some additional numbers that could be used to create additional Belgian aircraft. Typical Hurricane stencils are also included.

Molding Quality
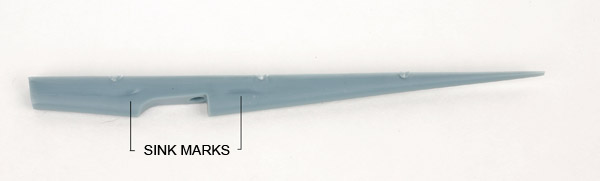
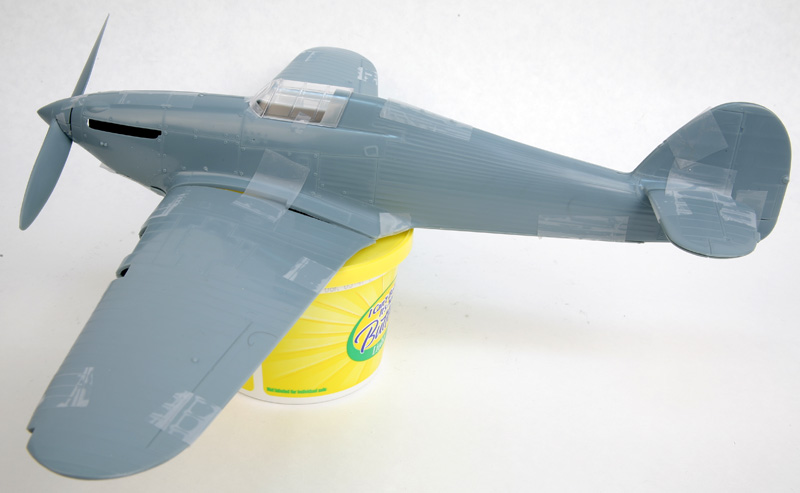
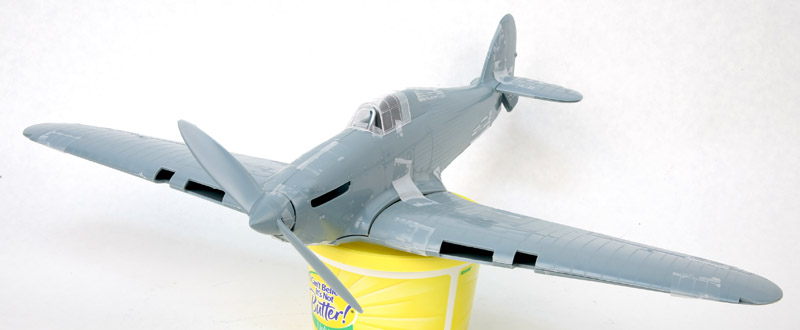
For the plastic, one must remember this is a short-run kit so the quality of the likes of Tamiya should not be expected. That said; this kit is way above a typical short-run kit of say ten years ago. Still, there is extra work involved. Sprue connections to parts are heavier than a typical Hasegawa or Tamiya kit, there is some flash on the smaller parts and at least one of the shell casing chutes on the bottom wings is flashed over. Also, sink marks are on some of the thicker parts such as the tailwheel fairing and wing root tips of the upper wing parts. Mold lines are a little prominent on some parts also. Some of the smaller parts are a little on the heavy side and some smaller details are a little soft. Another typical trademark of short-run kits, there are no locator pins to help with assembly so adding little tabs along joints will help, especially with putting together the fuselage. The lower rear fuselage piece especially could use some help as it took three hands to dry fit it! The elevators are a simple butt join so would benefit from adding some pins for strength and ease of installation. My dry fitting showed a gap and a pretty prominent step (about 1/16") at the upper wing roots so this kit may be a good candidate for fitting the upper wing to the fuselage first, then fitting the lower wing. The clear parts look good, with a thin and clear canopy, although the landing light covers are a bit thick. Note: one of my kits (I bought two) is missing one of the windscreens, there should be two, an externally armored one and an internal armored one. It is probably a random error, but check your kit!
The resin parts are beautifully cast, with no visible bubbles. Pour stubs are a little on the large side; some of the small cockpit details will be a challenge to remove without damaging them.
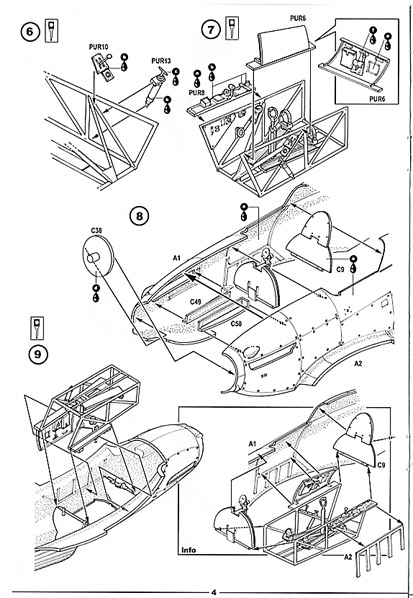
Instructions are provided as a small 10 page booklet with a short historical introduction then assembly instructions as exploded line drawings. Note there are no part numbers on the trees, but there is a numbered layout drawing in the instructions. Instructions look clear, and optional parts are shown where they occur. A nice color sheet is also provided with color profile, camouflage callouts and decal layout.
Accuracy
I will start with the fuselage and a note. I had a heck of a time trying to determine the correct length of a Hurricane. Published dimensions and drawings both differed. Dimensions for a Mk. I were listed as 31'-4", 31'-5", and 31'-9". Even a set of Arthur Bentley's drawings was of no help as either the profile shown was off-scale from the scale shown on the sheet or he used the length of a Mk.II. Also, while it seems most agree a Mk. II is 32'-2.5", it is stated in at least one reference that a Mk. II reached that length by adding a 7" section, which would put the Mk. I at 31'-7.5"! Arrgghh!!! While some of the variation is no doubt due to the various possible propeller and spinner combinations, it has been frustrating trying to determine the 'correct' length and unfortunately the local museums do not have a Hurricane to go and measure. Anyway, for purpose of this review, I will simply state that the kit matches very well to drawings using the overall dimension of 31'-4". The fabric effect is subtle and should look great under paint. Nose contours seem to match both drawings and photos very well. The kit even has the two small blisters in the front of the cowl ring that Revell missed long ago. All the little bumps and panel lines seem to be there and in the right places. Width of the fuselage looks to be correct. The rudder matches drawings and photos very well. To my eye, the fuselage actually looks really good, with just some minor corrections needed.
Those areas in need of correction include:
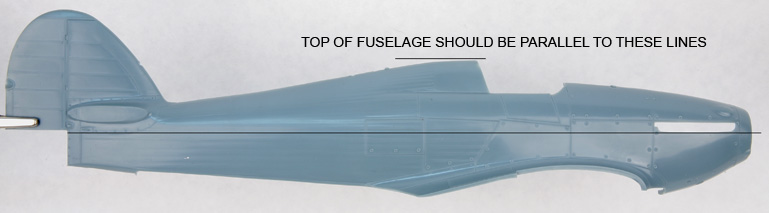
- The spine directly behind the pilot's armor, that area that fits under the canopy when it is open, needs work. The top of the spine should be parallel to the thrust line of the aircraft. Although better than the Revell kit, it still doesn't quite get there. Some time with a sanding stick should take care of it, although you might want to put a little filler inside the joint in case you sand through! This may also help with fitting the canopy in the open position as when I dry fitted it there seemed to be fouling on the spine high point.
- On the starboard side, there is an additional access panel engraved behind the standard panel just behind the cockpit. According to my references, this additional access panel wasn't introduced until mid-1940, which would be after the last fabric-winged aircraft left the factory. So the engraved panel lines should be filled in and the raised fasteners sanded off. It will be a little tricky as this panel is in the fabric area. Note: this may not be so much of an error on PCM's part as a huge hint that a metal-winged variant will be forthcoming as that panel would be on most all metal-winged aircraft.
- The trim tab on the rudder should be extended a small bit with some plastic card. PCM's own color profiles show this and you could go by them to see how much.
- The quick-release fasteners on all the removable panels are represented by rather prominent raised donuts. In reality, they should be a recessed circle with a small hole in the middle. You may want to either knock them back a bit with careful sanding so they are not so prominent, or remove them completely and replace them with the correct circle and small drilled hole in the center.
- The ends of the canopy guides sort of fade into the rear fuselage while photos show there is a distinct end to the guides. Some putty and work with a chisel could easily tidy this up.
Moving on to the flying surfaces. First, the wingspan. Unlike the length of the Hurricane, references and drawings all agree the wingspan is 40'-0". Unfortunately, the kit span is short by about 5/32" or about 4mm. This would be 5" in scale. The wing seems to be proportionally short across the span, inner span details being barely off and then getting worse as you move to the wingtips. Detail wise, it almost looks like a different team did the wing. For one thing, while there is very little rivet detail on the fuselage - just on a few panels in the tail area - all the wing metal panels include very petite rivet detail. In some places, the rivet details fades out a bit, but are really quite nicely done, and accuracy wise look very close to drawings. The machine gun access panels appear correct and the quick releases are flush and engraved! The machine gun ports are on a separate part with the holes correctly just above the leading edge. The fabric effect is also ok where it occurs, with raised lines representing fabric reinforcement strips over structural members, although the diagonal strips that occur where the fabric rolls lapped (Hawker used 48" rolls of fabric rolled across the wing diagonally), fade in and out badly. They are not equal on each side of the wing either as the diagonal strips show more on the starboard wing than the port wing, both top and bottom. The diagonal strips are also a bit short of the 48" apart they should be, though close. The resin parts that make up the wheel wells look very good. The wheel wells do appear a bit shallow, but this is probably a limitation of trying to get parts to fit without a lot of thinning. There is enough detail there to make the wells look quite busy, but of course adding some plumbing and wiring could always add to the effect. The landing gear is ok but the main gear has a little too-pronounced detail, especially right above the oleo; that area should be thinned down. The elevators look very good; very close to drawings with accurate detail. Both the fixed and adjustable trim tabs are there. It wouldn't hurt to thin the fixed tabs a bit as when the two halves of the elevators are put together they are a bit heavy.
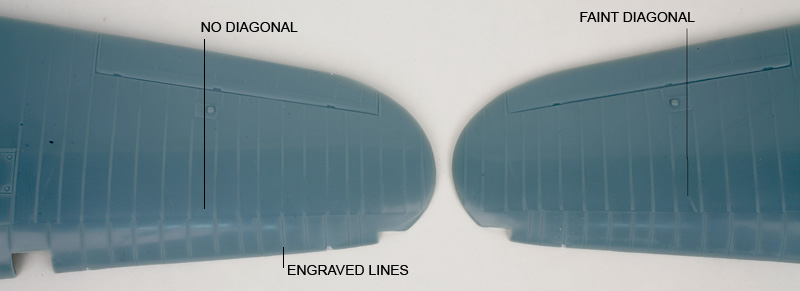
While this is a fabric-winged Hurricane, the leading edges forward of the wing spar were metal skinned and riveted. Then the fabric was continued over the metal skin, with fabric reinforcing strips over the rivet lines and diagonal fabric joints. In photos, these reinforcing strips seem to stand out even more than at the all-fabric areas. However, on these wings the lines on the leading edges are recessed! Also, the structure (and therefore the fabric reinforcing strips) in this area forward of the spar angles slightly to become perpendicular to the leading edge. It is a subtle change, very hard to pick up in photos, but shows up in all the drawings I have. It also can faintly be seen on the well-known photo of a Yugoslavian-bound Hurricane peeling off from the camera, displaying an almost perfect plan view of the underside. A very clear reproduction of this photo can be found in Squadron-Signal's 'Walk Around: Hurricane.' Anyway, these engraved lines should be filled and then new raised detail added with tape, thick decal strips, or masking and spraying with a couple of coats of primer. The same can be done with the diagonal stripe across the wing to accent that feature if desired. Also don't forget to open any flashed-over shell casing ejection chutes in the wing bottoms!
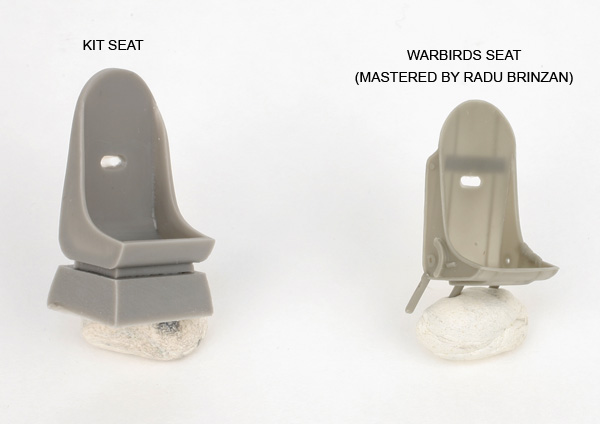
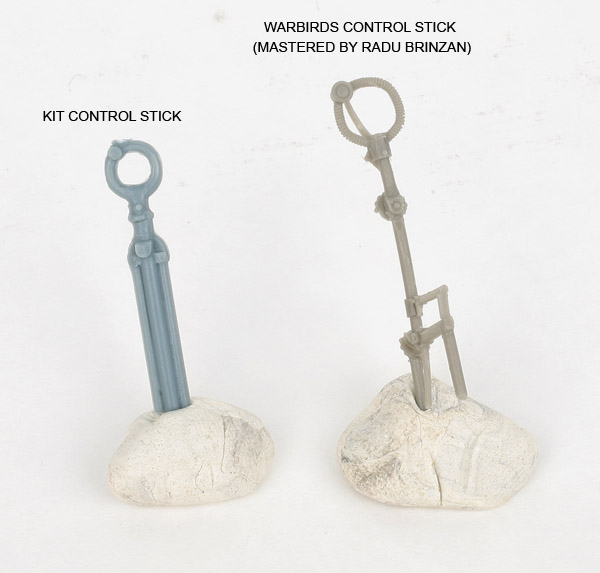
Now, to the cockpit. It is a mixture of resin, photo-etch and plastic parts. Some of the plastic parts are a bit heavy in comparison to the resin, but usable. I do wish the control stick was a resin part; it would have been nice if it was a little more delicate. The control stick could at least use a bit of wire or scrap PE to create a brake lever. Overall though, out of the box the kit provides a nice cockpit with most details looking quite accurate. The instrument panel is in Eduard's typical pre-painted layered style and will look great. Additional wiring and cables could always be added to improve things. Also, for accuracy, there should be a short length of rod added across the top of the rudder pedals, right inside where the photo-etch attaches. Other items of note: I can't find any photos that match the armor plate behind the pilot's head as provided in the kit. Photos show a plate cut in a segmented manner rather than one that matches the curves of the fuselage. These could rather easily be reworked or replaced with one that matches photos. One item that probably should be replaced is the seat. It appears similar to a Bakelite seat from a Spitfire? I haven't found any reference to any Bakelite seat in a Hurricane. The only pictures or drawings show metal seats with different detail than that provided in the kit. A good match is the seat from the Radu Brinzan mastered Hurricane cockpit set of the Warbirds line. I have included a picture of the one from my set which I got from MDC. I believe Grey Matter Figures sells the cockpit sets now, although I heard a rumor the seat was revised somewhat? Hopefully, someone will offer a new seat, and maybe a new control stick to go with it as a package for the new Hurricane?
I know some are wondering if it is possible to add Revell's wings to the kit to create a metal-winged Hurricane. I have looked at the Revell kit, and I think it could be done with some work. If I were to do it, I think I would use the center wing section of the PCM kit by cutting right down the center of the reinforcing strip where the real aircraft's inner wings joined to the outer wing panels. On the Revell kit, I would cut just inside of the reinforcing strip. The Revell kit is slightly narrower in depth than the PCM kit. By adding a bit of material, one could work it to match up to the PCM center wing section, and at the same time allow for a correction of the overall span. The Revell wing would have to be sanded basically down to a smooth surface and rescribed to match the surface detail of the PCM kit, however. A bit of work, but I think a good result is possible.

In conclusion, even with all the issues I have described above, I think this is a good kit and will look like a Hurricane built right out of the box. Most issues are small and can be corrected with a little modeling work. Worst would be the span issue, but it doesn't detract from the overall appearance. Also, the kit has a lot of potential. If PCM does decide to release a metal-winged Hurricane they could easily take care of the span issue and if the metal wing had similar treatment of panel lines and rivet detail as displayed on the metal panels on the fabric wing, they could provide us with a wonderful late Mk. I. Re-do the seat and it would be a real winner!
I give this kit a Recommended, with reservations due to the extra work noted above.
Pacific Coast Models' Hurricane is available direct from the manufacturer at http://www.pacmodels.com/.
© Ray Peterson
This product is available from the following LSP sponsors
This review was published on Saturday, July 02 2011; Last modified on Wednesday, May 18 2016