
Alley Cat | Kawasaki Ki-100-I Ko (Razorback) Conversion AC32002C
Reviewed by Ray Peterson
Alley Cat, a brand of A2Zee Models, has issued a conversion set targeted for the Hasegawa Ki-61 Hein models, creating the late-war Ki-100 aircraft. This aircraft was designed as a stop-gap measure mating a Mitsubishi Ha-33/62 radial engine with the sleek Ki-61 airframe. The Kawasaki Ka-40, a Japanese revision to the licensed Daimler Benz DB601 engine series, could not keep up with production requirements. To mate the round-cowled Ha-33 engine to the sleek Ki-61, fairings were added each side of the cockpit and at the tailplane to help smooth the airflow. Later, the bubble-canopied Ki-61-II was used as the basis for the conversion, designated the Ki-100-I Otsu.
As I just received my copy of the latest Aero Detail, #32 J.I.A. Fighter Kawasaki Ki-100, I decided it was time to review this kit! I also have Maru Mechanic #45 on the Ki-61, as well as the Schiffer book, "Kawasaki Ki-61 Hein in Japanese Army Air Force Service", both of which have sections on the Ki-100.
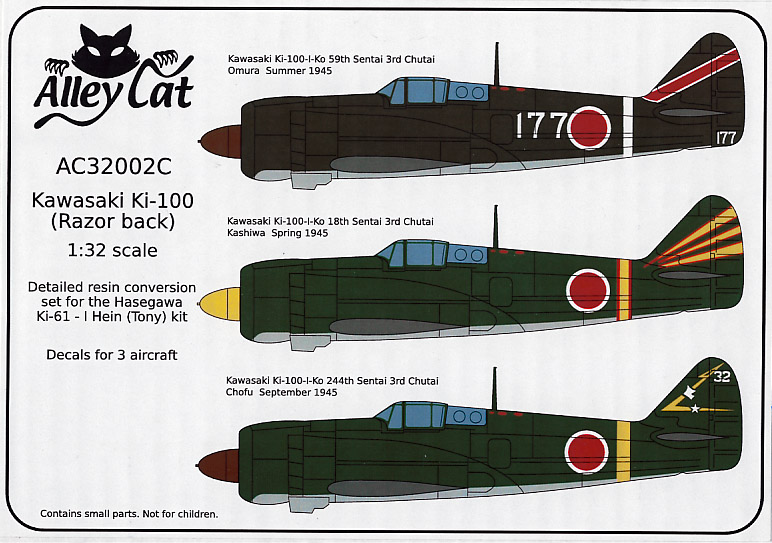
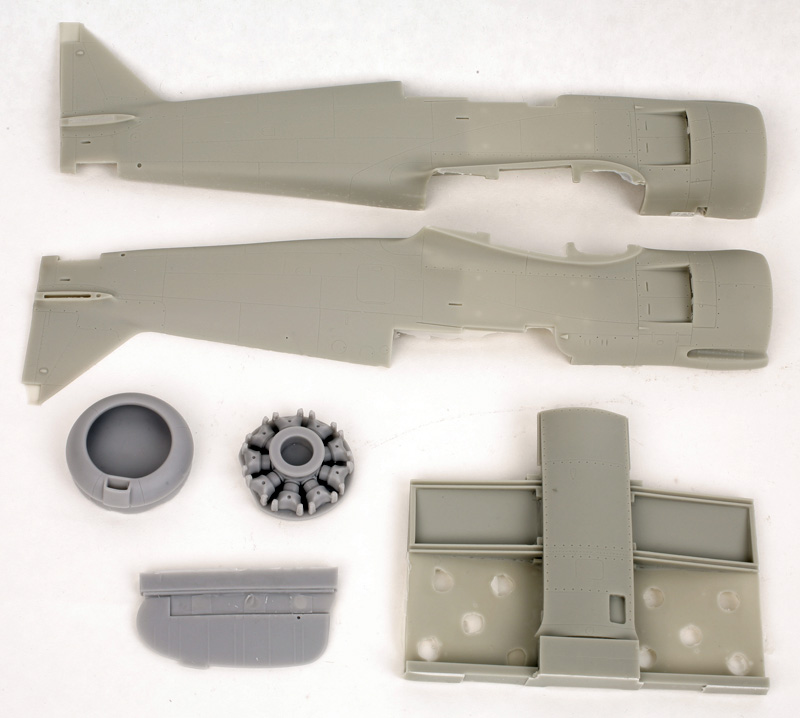
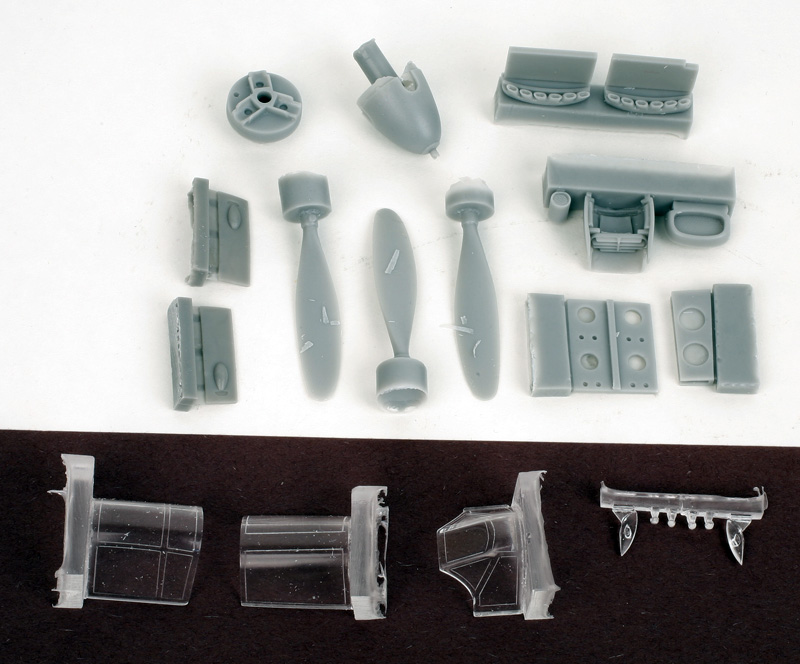
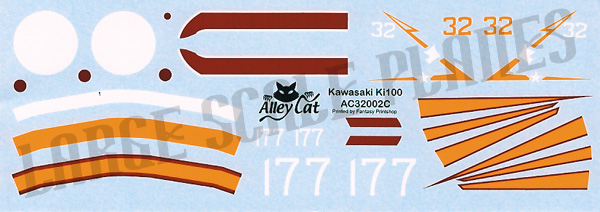
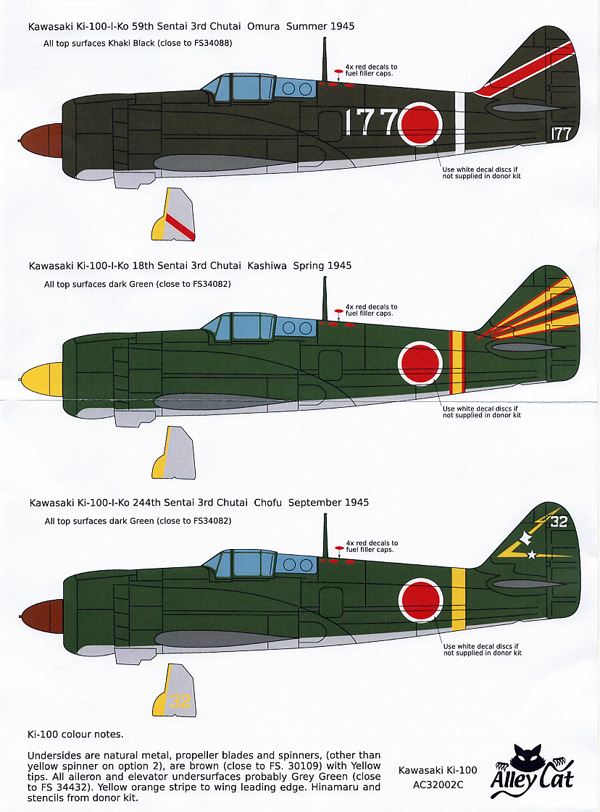
The conversion kit, which comes in a sturdy and well-presented box, is primarily resin. It includes 20 grey resin parts, consisting of two fuselage halves, a new wing spar, lower center fuselage, rudder, cowl ring, prop and spinner, engine face, exhausts, rear cockpit spine, and wing armament panels in case the version of the Hasegawa Ki-61 you are using doesn't have the correct ones. The conversion kit also includes 9 clear resin parts, 3 for the main canopy, the rest being alternative spine lights and wingtip lights. Also included is a length of 0.5mm styrene rod to be used to make engine push rods. The package is rounded out with a two-sided instruction sheet, a color sheet with profiles for three different aircraft, and a small decal sheet with markings for these three aircraft.
The quality of the kit is excellent. Moldings are clean with only a few air bubbles, mainly on the bottom of the fuselage near the seams where you are going to be doing a little filler work anyway. New panel lines and rivet detail is engraved, crisp, and matches well with the original kit. The canopy is remarkably thin and clear for resin castings, although there is a bubble in each of the wingtip lights. Don't think this will be a problem as you can just use the kit parts? The decals are printed by Fantasy Shop and look thin, with good color. The instructions are straight forward with pictures to help with some of the steps.
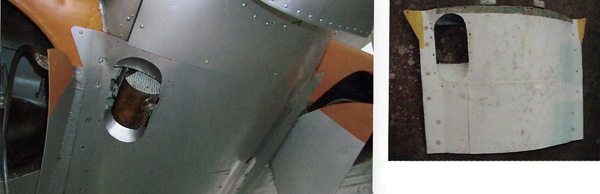
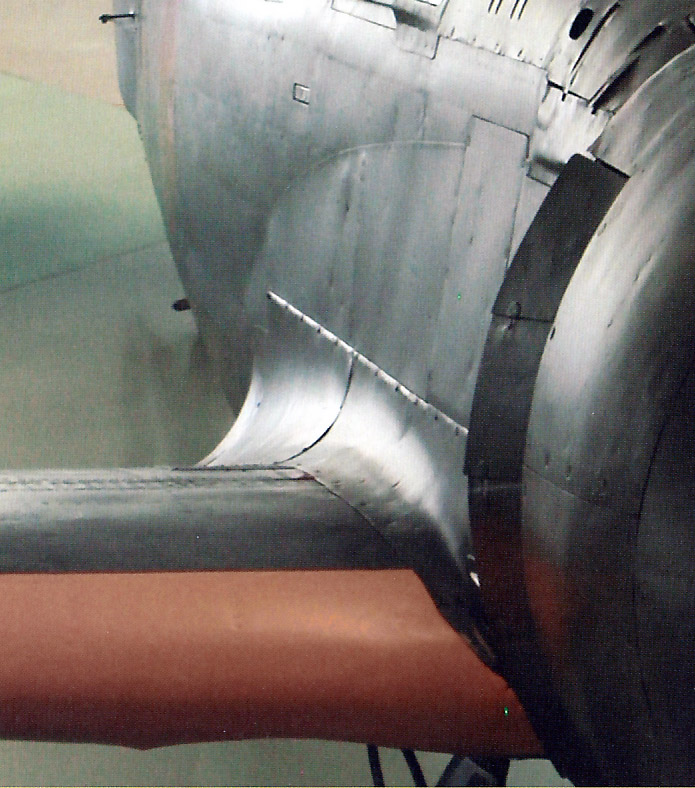
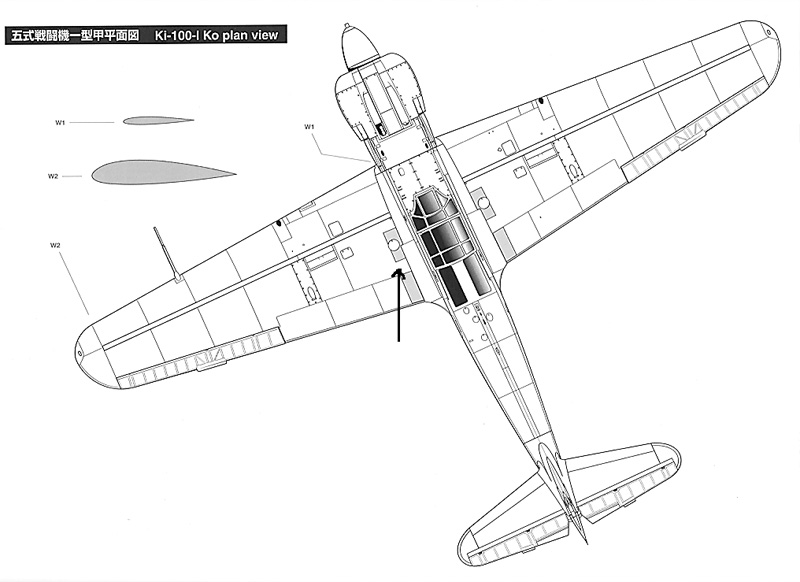
Kit accuracy is on the whole pretty good. I only found a couple issues, although they are pretty major. I can only believe Phil Edwards, the master pattern maker, wishes he had the new Aero Detail book to help him with this kit! The issues mainly deal with the fairings added to the airframe to help with the airflow as it moves around the wide cowl and transitions to the narrow fuselage. Looking at the photos in the book, it appears the fairing adds at least 12 inches (6 inches each side) to the width of the fuselage, tapering from the curving line below the canopy to the thickest point at the wing root fairing. The conversion set's fuselage fairing seems more of a revised panel line; at least it doesn't appear to change the fuselage width much. The conversion kit wing root fairing appears to be the same as the Hasegawa kit's, and the wings attach in the same manner. The actual Ki-100 wing root fairing has a larger radius than the original Ki-61 fairing, ending on the wing along a relatively straight, stepped line. This line extends farther outboard of the fuselage, causing the non-slip walking strips to cross over the circular port each side of the fuselage, whereas on the Ki-61 these walking strips are inboard of these access ports. The plan view and picture of this area (note: pictures other than of my kit and drawing is credited to "Aero Detail 32: Kawasaki J.I.A. Fighter Ki100", by Giuseppe Picarella, ISBN978-4-499-23004-9, Kaiga Publishing and are used here per Fair Use Rules; please respect them.) shows both the revised lines on the wing as well as the change in the cross section as the fairing widens the width of the fuselage. Another detail that appears different is the cutout for the fuel cooling system in the lower fuselage center section. The kit provides what is basically a rectangular cutout as part of the wing spar/lower center fuselage. The photos show an oval opening. I do not know if there were variations in this opening, but I couldn't find any that matched. Also, the fairing at the tailplanes is of a different shape than that shown in Aero Detail for the Ko. The shape of the kit's part is as per the prototype aircraft, and then again the shape recurs with the Otsu variant. As the Japanese were trying different shapes, though, I imagine it is possible some Ko's also had the same fairing. Period photos don't show the tailplane area with enough visible detail that I could verify one way or another. The only other comment I have is the cockpit. The conversion kit has you simply use the Ki-61 cockpit. From the photos in the references, while the cockpits are based on the Ki-61, there were variations for the Ki-100. Problem is it appears the cockpits varied across production of the Ki-100, seemingly using what was available and needed rather than any particular setup. It appears in many cases Ki-61 panels were used and modified as needed, sometimes with empty holes where instruments weren't installed. So I suggest picking out a photo and making your own modifications to the kit panel to suit. The rest of the kit matches pretty well to the references. The partial engine will look the part with what little can be seen around the spinner. The instructions also show where to fill some of the ammunition access panel lines, but I would check references and use those instead.
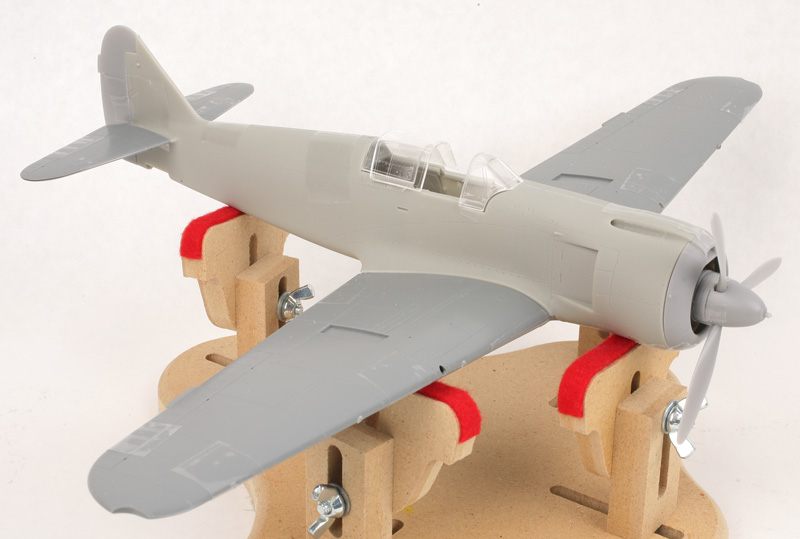
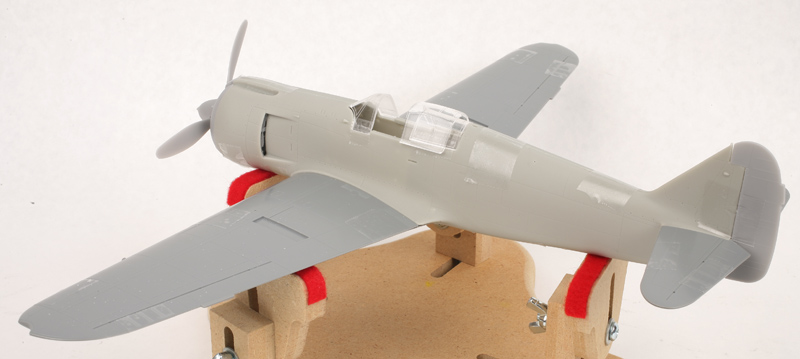
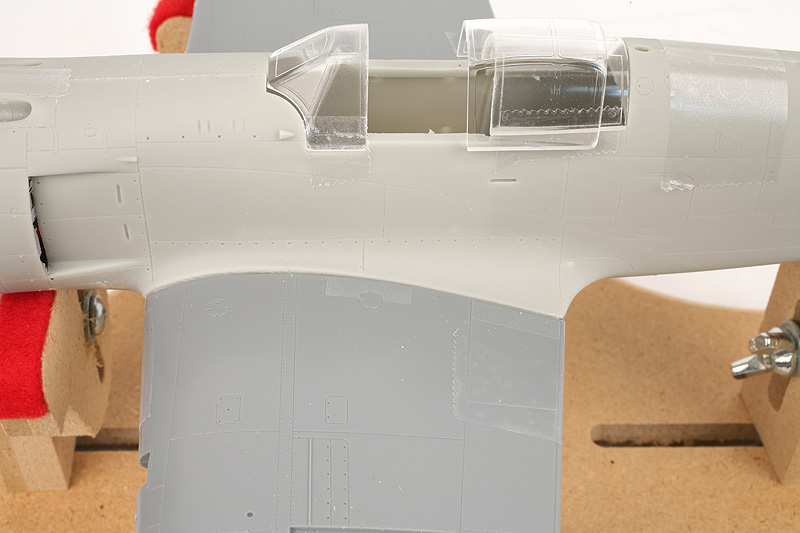
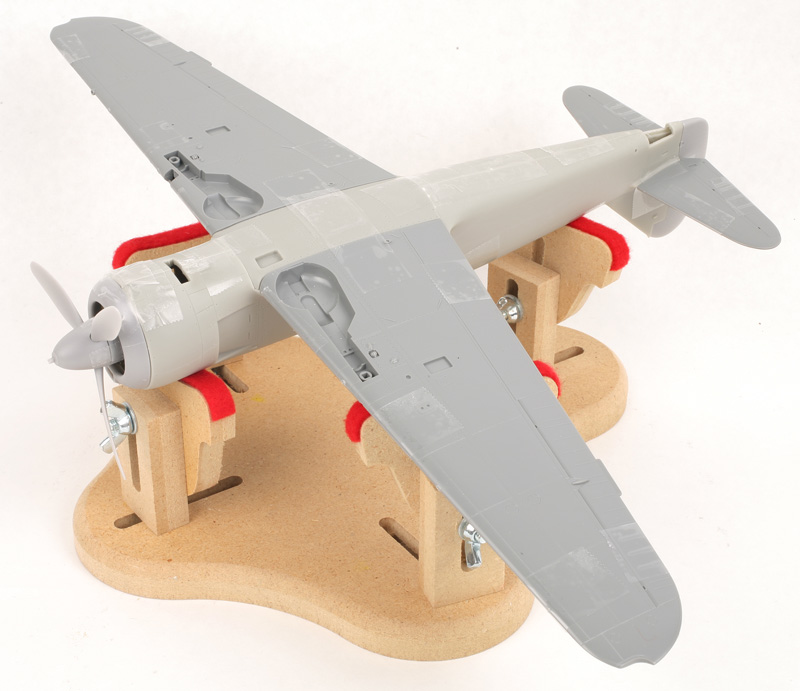
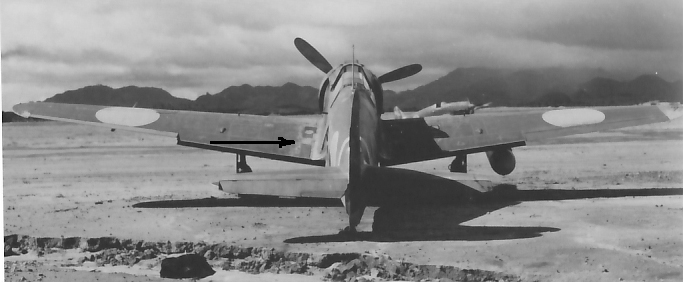
I cleaned up and test fitted most of the major parts of the model to see how well it went together with the Hasegawa kit. For your reference, I spent about two to three hours of cleanup to get to what you see here which is pretty darn good when you are dealing with resin. As you can see in the pictures, it fits pretty darn well with the kit parts. The conversion kit uses a similar type wing spar as the Hasegawa kit, and uses the small kit spar for the horizontal tail plane (don't forget to put in inside before you glue the fuselage together!). The connection of the spar/lower center fuselage and the fuselage halves and wings do take a little fiddling to get everything fitting and together without large gaps. Some putty will be required, too, although I probably have a little more fiddling to do. It does appear there will be a bit of a seam to putty at the wing root, but I would suggest taping the wing along the correct seam lines as per drawings, and working something like Milliput into the roots to both fix the seam and correct the shape of the fairing. That would go a long way to making the kit look more like a Ki-100. The prop may look a little screwy in the photos as a couple of the blades are warped and I haven't straightened them with hot water yet. One problem I did have was with the canopy. The windscreen seems a little wide, but fitting the cockpit or using a spreader should solve this problem. Worse, the sliding canopy simply won't fit over the rear cockpit section. However, the sliding portion appears to be the same as the standard Ki-61 canopy, and the kit part is wider, fitting better. It might take a bit of sanding of the rear section, but appears to fit much better and it is that part I used in the photos.
In conclusion, I recommend this model to all Japanese aircraft fans. It misses a 'highly recommended' due to the fairing/wing root issue, but it still is a very nice conversion kit.
Kit is available from A2Zee Models, http://www.a2zeemodels.co.uk.
© Ray Peterson
This review was published on Saturday, July 02 2011; Last modified on Wednesday, May 18 2016