
Tamiya | 1/32 Mitsubishi A6M5 Part 1
Reviewed by Rato Marczak
I´m sure that most of you 1/32nders are by now aware of Tamiya re-entry in the big scale. When released in 2000, this kit caused quite a lot of furor. Rumors state that Tamiya doesn´t give a damn for foreign market. Given the subject - a truly Japanese symbol, the folks there were clearly thinking in domestic market to ensure a complete sold out of the first batches.
Whatever is the case, Tamiya proved that doesn´t fear its rivals since there are at least three other Zeros in 1/32 around. But more importantly, this kit seems to inaugurate a new standard for high quality large scale models. In addition to the superbly accomplished moldings, the kit comes from the factory with metal rods, synthetic rubber tires, photoetched parts and several working features (not only control surfaces, but also a spring equipped landing gear suspension!).
Yes, at a cost... But think in this kit as belonging to a different vein than the one chosen by Hasegawa, for instance, in its recent releases (Bf 109G and Fw 190D). If it is not cheap, that is because you don´t need to add absolutely nothing to your model. No additional resin or PE set. OK, the purists always leave their mark in any kit, but if this is your case, think twice because your add-ons have to be more convincing - or at least at the same level - than what is in the box. And that will not be an easy task... Let´s put this way: this is a 1/32 model which, once well finished out of the box, will be virtually unbeatable in every aspect concerning the manufacturer.
Considering the current mass production technology of plastic models and its limitations, I believe the Tamiya Zero is the closest thing we can expect from a perfect model.
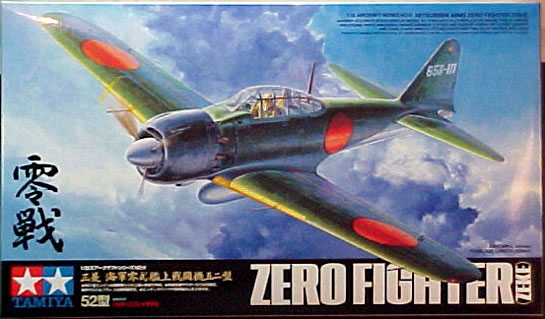
Box art.
GENERAL
The kit comes in a big box when compared to Revell or Hasegawa Zeros. The assembly instructions come as a 32 pages (!) booklet with very well done drawings for the 53 assembly steps, painting and decal placement diagrams. The last pages bring B&W walkaround photos of a preserved Zero. Nice touch! The folks at Tamiya even stuffed "tech tips" along the text to help beginners on glueing, masking, painting, etc.
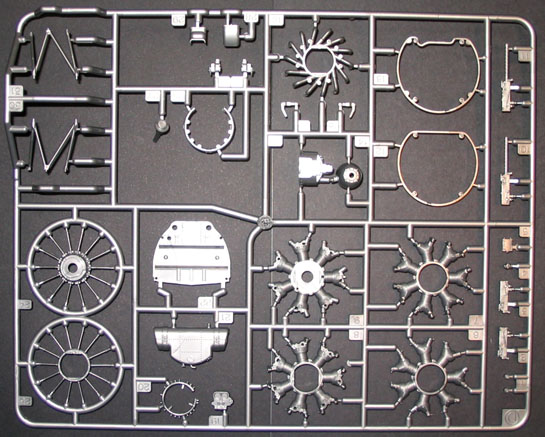
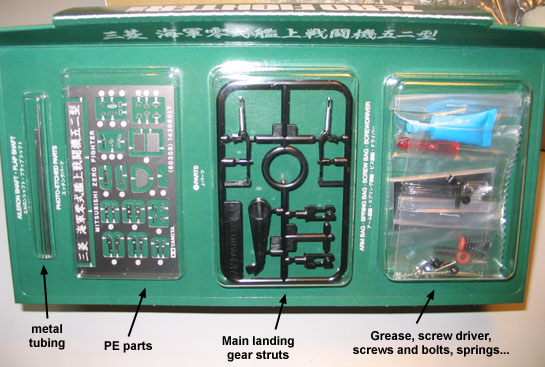
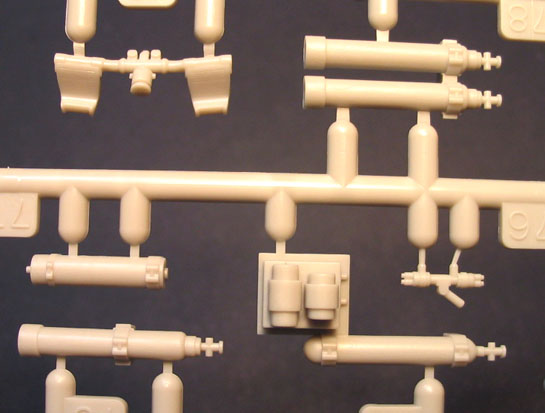
The kit comprises about 300 light grey and silver parts, not counting the metal bits.
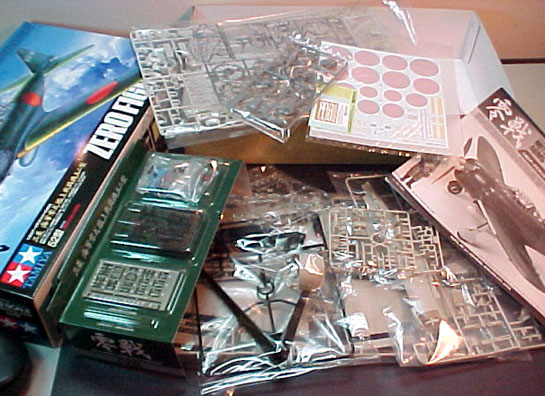
This is what you get once you open the box.
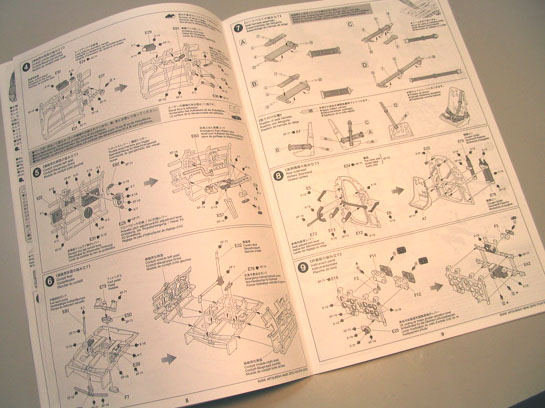
A sample of the instructions booklet.
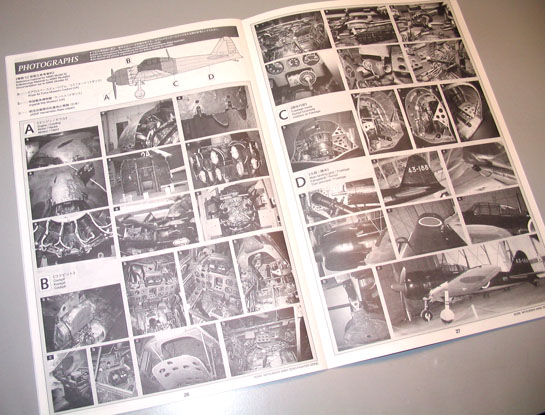
See this? Model manufacturers should adopt the idea as standard in their instructions.
One of the high points of the kit is the quality of the moldings itself. All panel lines are recessed, as one would expect these days. The rivets are recessed. Fasteners, bolts, armoured plates and bigger rivets are raised where they should be. The same is true for reinforcements, access hatches and overlapping panels. Tamiya is actually raising the bar here. If you know their 1/48 kits you know what I´m talking about, but in 1/32 surface details do not appear oversized as often is the case in other scales. And given the excellent parts fitting reputation of Tamiya kits, I guess you will not lose much of them sanding the seams.
The parts breakdown is more or less classic: two fuselage halves, two upper wings and a single lower wing. The fuselage halves are subtly molded with structural details on the inside, and they have not forgotten the tail wheel bay. The wings are strongly reinforced on the inner sides to provide better stiffness and reduce the risk of warping. Interestingly, the rudder fin is separated, but fear not, as the parts come with a large slot to ensure the proper alignment with the fuselage.
All control surfaces are separated, including the flaps. Most of them are hinged by metal parts. Overall the kit is cleverly engineered, with many parts breakdown along panel lines and common usage of slots and other alignment devices to provide the best possible fit. I´ve been reading many construction articles claiming no use of putty at all throughout the assembly.
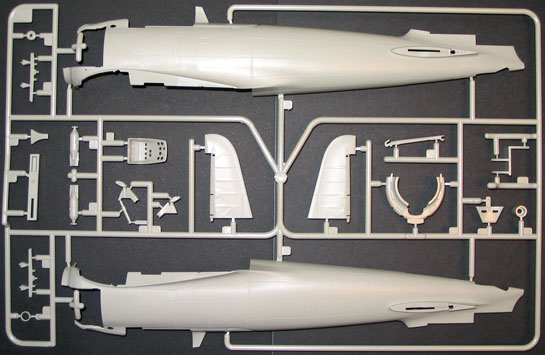
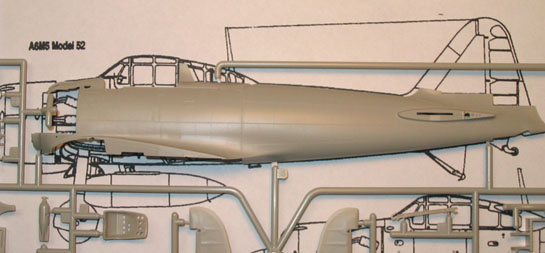
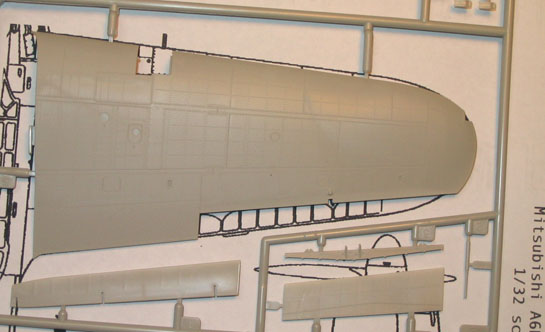
Sprue 1.
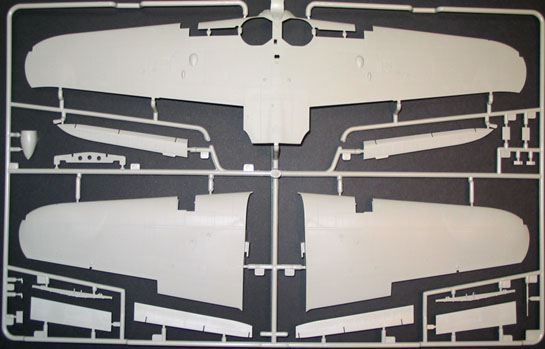
Sprue 2.
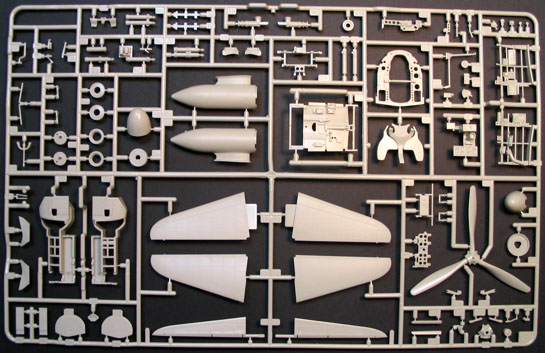
Sprue 3.
Sprue 4.
The engine sprue is molded in silver. Another nice touch, although not strictly necessary for the serious modeler. Everything from the firewall on is in the kit. Here again we find another characteristic of old large scale models being recovered by Tamiya, since the deletion of complete engine compartments are becoming usual in other recent 1/32 releases, as a questionable cost saving measure.
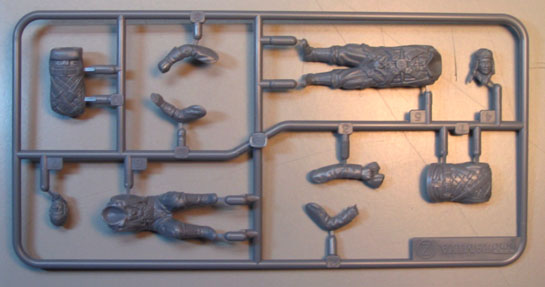
Two pilots are included: one seated (to be installed in the cockpit) and another standing. Both are crisply molded with full combat gear, including helmets and parachutes.
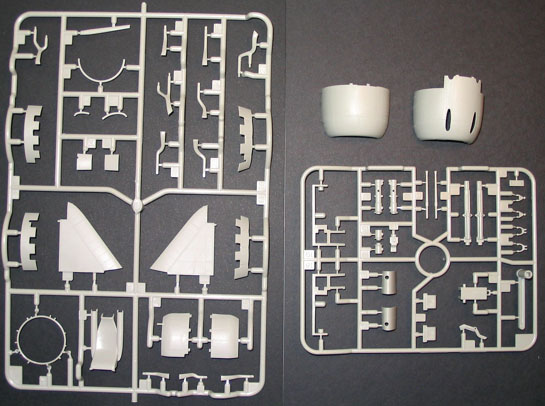
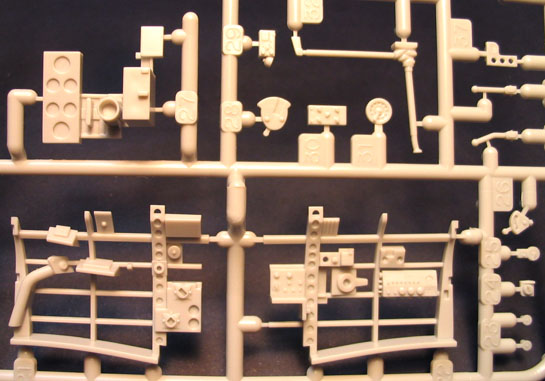
Sprue 5.
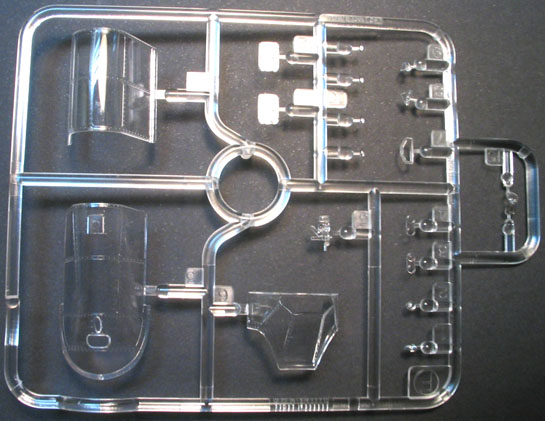
Sprue 6.
Sprue 7.
Tamiya has included a respectable number of multimedia parts. The most evident are the synthetic rubber tires and brakes hoses. There is no optional plastic counterparts, but I doubt these tires will melt into a sticky gum as they age (you know what I mean).
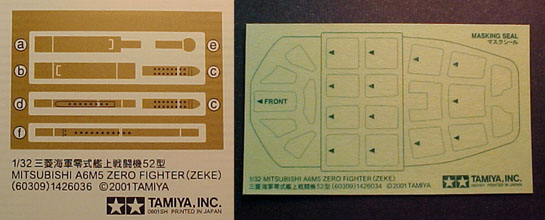
The other novel (when the kit was released) approach are the ´hardware bags´ included in the kit. The first one has all metal wires to be used with the movable control surfaces. The second sturdily protects the photoetched fret - grilles, control surfaces arms, two armor plates and buckles. By the way, the PE parts are made in Nikel-Cadmium steel - much better than the usual brass alloy. The other bag brings the working landing gear struts while the last one includes a mini screw driver, a grease tube (yep, grease - to lubricate the movable parts of the landing gear) and an assortment of smaller bits: screws, nuts, washers, poly caps, springs, stopper pins, o-rings ... everything but aviation fuel. More about these items later.
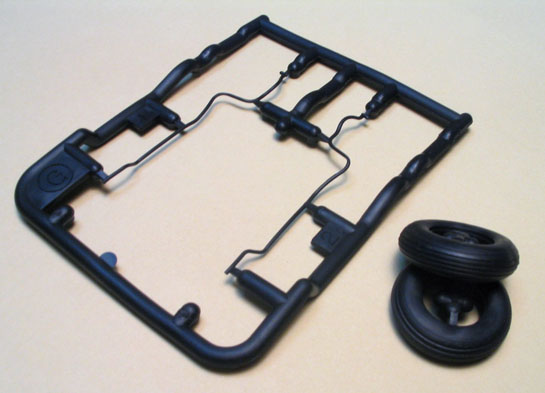
Sprue 8 - The rubber parts.
Sprue 9 - Assorted multimedia parts.
Two other novel approaches in this kit are the paper seat belts and the canopy masks. The belts must be cut and glued on the pilot´s seat. They are very well printed, but I know some of you won´t like the idea that much. Whatever method you choose for the belts, don´t forget the PE buckles, as they are very nice. As for the canopy masks, be aware that they are not pre-cut. You have to cut panel by panel scoring a sharp knife along the lines. Boring, but it is better than doing everything by yourself. Anyway, this is a good example of an inexpensive addition to a plastic model that will save us a lot of headache. Other manufacturers should adopt the idea.
Extras - Seat belts and canopy masks.
SURFACE DETAILS
I think it is worth to stress the high quality of the surface details. As I mentioned before, the panel lines and rivets are perfect for the scale. It is interesting to note that these details are about the same deepness of most 1/48 kits. This is probably due to a manufacturing limitation, but they will generally result oversized in 1/48 and smaller scales. This may explain why many manufacturers elect to not include rivets in their models, even in those aircraft which had them very prominent. Anyway, I suspect that after primer, camouflage, gloss coat and flat finish the surface will be even more in scale.If you don´t know, the release of this kit was postponed almost two years from the original release date. There´s a rumor claiming that, after the first test shots, Mr. Tamiya himself has detected an incorrect number of rivets in some stations, as well as slightly misplaced lines of them here and there along the wings and fuselage. Being the Zero a national symbol in Japan, he immediately ordered to scrap the offending molds and Tamiya started to work on new ones, this time following even more faithfully the factory drawings. Go figure. Now call me a ´rivet counter´...The subtlety of the surface details can be observed in the pictures below. Pay attention to the overall silver Zero of Matsumoto Naoto published in LSP some time ago. See the rivets?... What about?
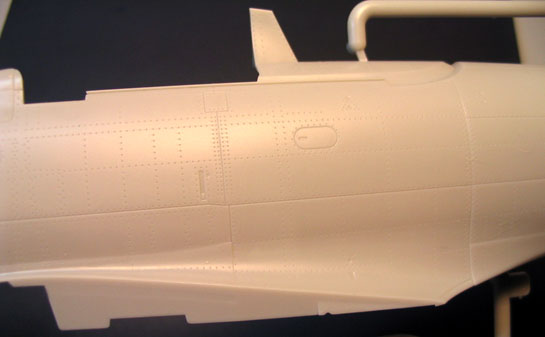
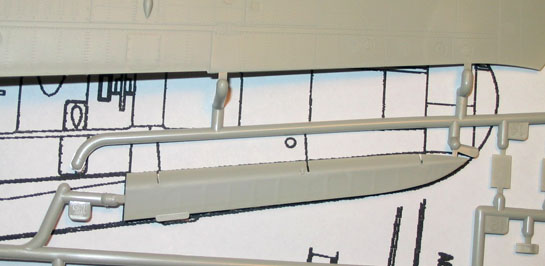
Surface detail at a glance (right fuselage).
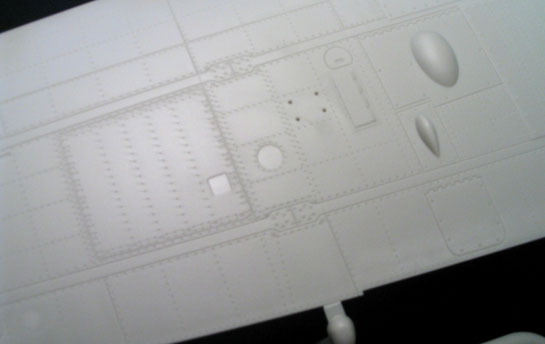
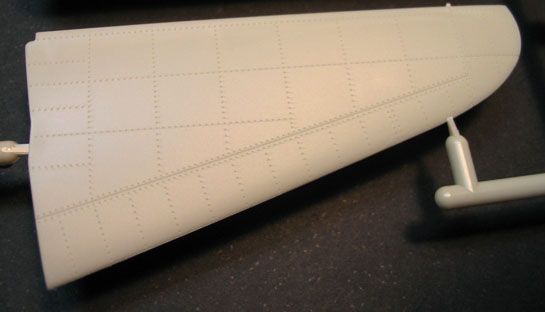
Surface detail at a glance (lower wing).
Surface detail at a glance (horizontal stabilizer).
Matsumoto Naoto´s Zero in overall silver finish. Note the petit rivet details.
SHAPE AND DIMENSIONAL ACCURACY
Yes, I dared to check the shape/dimensions accuracy of this kit. We modelers are getting used to rely blindly on Tamiya models. I know they have incurred in slight deviations in their 1/48 Fw 190 and Spitfire kits, but the Zero is a different story. Suffice to say I didn´t find any significant mistake. To be honest, perhaps we should use the kit to check the accuracy of the drawings...
Checking fuselage accuracy.
Checking wings accuracy.
Checking aileron accuracy (a common source of error. Well, not in this case).
COCKPIT
The cockpit is a kit in itself. Everything is there: throttle, oxygen bottles, pressure tanks, radios, handles (every and each one of them), not to mention the structural detail molded on the fuselage halves. The whole cockpit phase will take your attention during the first 13 assembly steps - need to say more? Interestingly, it is to be inserted from the bottom once the fuselage halves are glued (step 13). But before you glue them, be sure you added the spring loaded mechanism which locks the tail wheel and arresting hook (step 2).
Tamiya adopted an interesting method to make the control panels. The control panel themselves are molded with holes in each dial. Then you have to insert behind them the clear parts that will make the glasses of the instruments. And behind the clear parts you apply the instrument decals, which were printed ´reversed´ to stick on the back of the clear parts (step 9). It´s kinda Tamiya´s variation for the ´sandwich´ method that the scratchbuilders know so well.The engine firewall and oil tank are assembled with the cockpit, just in front of the control panel (step 12). The two 7.7mm Type 97 machine guns are mounted atop the firewall, and their breeches are quite evident on each side of the control panel, just like the real thing.
It is not worth to take longer on this. But one of these cockpits fully assembled and painted could be enough for many cockpitaholics. Of course there is always room for some plumbing, cables and other details impossible to be injected. Given the colors indicated in the instructions, Tamiya clearly referred to Nakajima built Zeros.
Some cockpit details. Note the sidewalls.
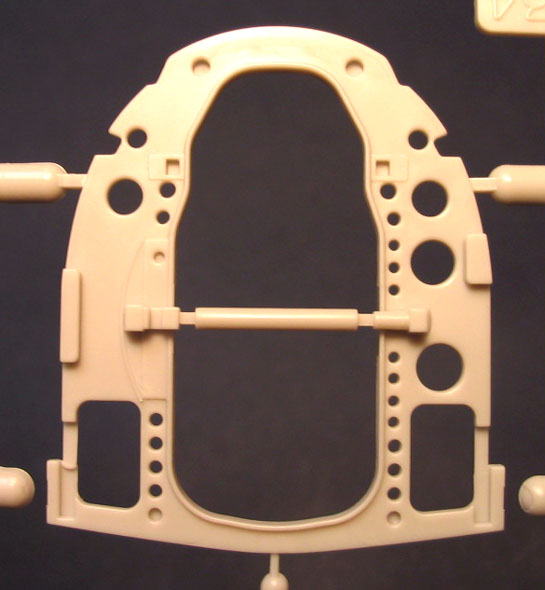
The cockpit floor.
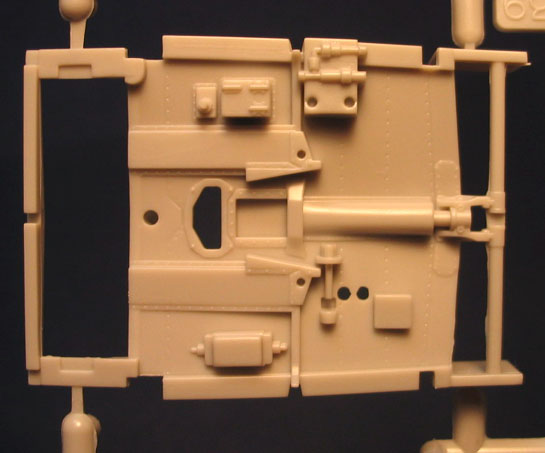
The cockpit rear bulkhead.
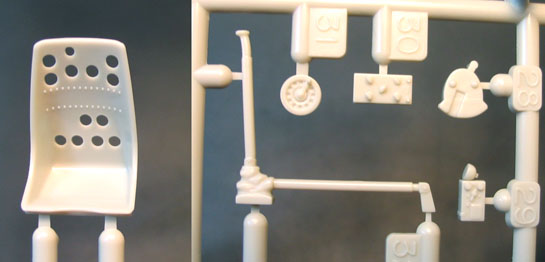
Cockpit assorted details: seat, control column and other smaller parts.
Rudder pedals and various bottles.
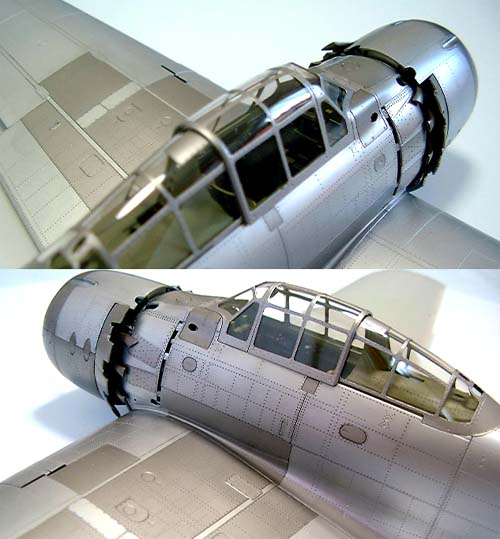
I collected some photos of finished cockpits found in the Internet. You can compare some outstanding works achieved with this kit in the pictures below. Compare them with the A6M5 preserved in the Kanoya Naval Aviation History Museum, one of the few still equipped with the original cannons.

Some samples of the kit cockpit. Control panel and sidewalls by Bernard Schrock. The finished cockpit on the left lower corner was done by LSP contributor Matsumoto Naoto.
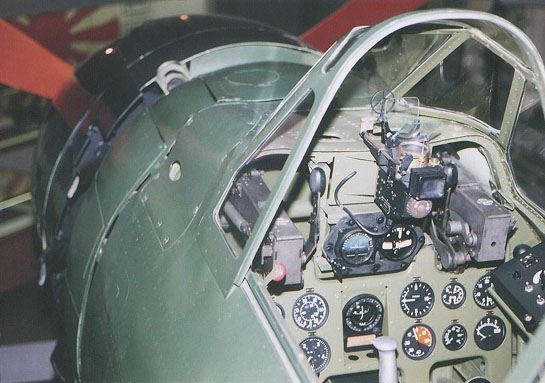
Cockpit of a real Zero preserved at the Kanoya Naval Aviation History Museum. Note the cannons´ charging handles (photo credit unknown).
© Rato Marczak 2003
This review was published on Saturday, July 02 2011; Last modified on Wednesday, May 18 2016