
Velocette | 1/32 Vac North American AT-6/SNJ-3 Texan
Reviewed by Lars Qvarfordt
The Vacs
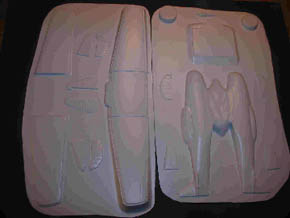
You got two sheets. Thickness of the plastic is 1 mm. The vacs are made negative witch will give you some small dots too sand away. The positive side off this is that the vac is sharp. You almost get a Dynavector sense. The body and wings have small noticeable panel lines. What do you get in the plastics? The upper sheet in the photos shows two fuselage halves. The centre under wing. Engine cowls and rear wings halves. The ailerons are separated. Two rudder halves.
The second sheet gives you the upper wings, under wings, and the rest of the rear wing halves. The upper wing is in the right angle, so be careful to recreate this angle in the building steps. You've got to cut out for the wheels. The instructions give you information's here. There is no wheel bay present, so you have too build these.
Clear Vacs/Canopys
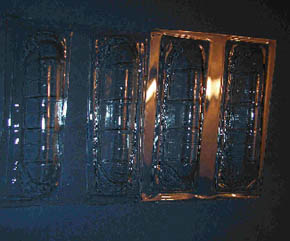
You've got four sets of canopies. This gives you alternative planes too build. The clear peaces are not the best of standard, you could not see/read thru it. But I think its okay, if you present the kit with open canopies.
White Metal & Resin Parts
The instruction sheet never gives you no information if the pieces are from Roberts models, But the feelings are there. The engine is not that good. The crankcase and cylinder is cast in one piece. My first plan was too change the cylinder heads, but in my opinion its best to change for Engines and things P&W 1340, item number 32030. The retail price 13.65 us dollar, a bargain in my opinion.
The landing gear is a little plain. Cast in white metal. You get the main gear end a scissor spring separate. The detail is noon here. Depending of the level you chose too build the kits, its up to you if you leave it, or make same new from brass tubs. Get references, my tip. The third wheels are injection plastic I think. Its okay, but with good references you could build a better one.
Wheels come in halves. They are textured, just sand them flat end glue here. If you want some weight on them, you have to do it your self.
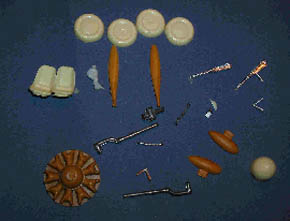
The propeller is two resin blades and one metal centre. Seems good, but could need some extra detailing in the centrepieces if you choose a spinner less aeroplane. I go with the spinner. The spinner itself is a thick piece of resin. I'm sure of it needs some surgery too take the propeller centre. I've not measured the propeller to see if it's correct yet.
There are two seats in resin for the office. They are thin in casting, and only required some seatbelts. This you could take from Eduards range or Waldron's US belts. The bag also includes two guns in metal and a resin pod to put behind the canopies.
Instruction Sheets
This is good. You get a general story of handling vac building. The building stage is Wing assembly, Canopy, Fuselage, Wings, Cockpit and Engine cowl. A couple of templates are included.
The Cockpit
Velocette gives you a template for the fuselage frame and floor. It's not much for a big office like this but it's something too start with. Their no template or information on the instrument panel, so you have too seek this in your own reference library. There two bulkheads templates for the fuselage. This will stiffen the fuselage good I think.
Decals
Decals are not included. I've never seen aftermarket decals for this warbird in this scale. You have to talk kindly to someone who has an ALPS printer. I will.
Verdict
It's a good quality vac. It's not Dynavector quality, but I have seen worse. It's a little "you see what you get". Do not be afraid of the vacs, they are nice. You only need some experience. And this you get in this kit. You have to stiff the fuselage and wing area, because this is a big kit. And who wants a master model with slacked wings and warped fuselage. Those "shake and bake" kits are very nice, but this is plastic model building in its essence. Here its up to you what level of detail you want.
In the Swedish airforce the Harvard serviced for many years as a trainer. There is one present at the >airforce museum near my hometown.
© Lars Qvarfordt 2003
This review was published on Saturday, July 02 2011; Last modified on Thursday, April 17 2025