
Williams Brothers | Firecracker
Reviewed by Brad Hagen
History
Keith Rider built a number of successful racers in the 30's starting with the R-1 "San Francisco I" in 1931 powered by a Menasco C6 and was a successful little racer. His next racer was the R-2 "San Francisco II" powered by a Menasco C4S, and was all successful. His third racer was the R-3 in 1934 powered by a R-895 Wasp Jr. but didn't do to well, flipping over on takeoff at the start of the Bendix, killing the pilot.
He built the R-4 for the 1936 races, powered by a 6 cylinder supercharged Menasco C6S. The Firecracker was a pretty conventional aircraft, steel-tube fuselage with wood formers and fabric covered, the wing was plywood covered with very small retractable gear and an even smaller tail skid. It had a large canopy and was painted overall white with purple trim. It had an 18 foot wingspan, it was 19 feet 9 inches long, weighed 925 lbs. Empty with 330 hp….a potent little plane!!
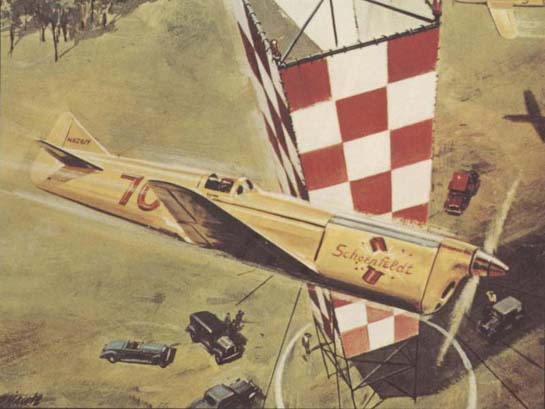
Roger Don Rae won the Shell Speed Dash in 1936 at 225.549 mph, and came in third in the Thompson at 236.559. "Gus" Gotch took over in 1937, it was now called the Schoenfeldt Firecracker, received numerous airframe modifications, painted overall yellow with red trim and "Gus" won the St. Louis Air Races at 251.6 mph, but didn't do well in the Thompson at the National Air Races coming in seventh at 217.810 mph.
Tony LeVier took over in 1938 winning in Oakland at 260.762 mph. The National Air Races at Cleveland reduced the number of events and doubled the prize money to encourage more development. Tony entered the Greve, a 30 lap, 300 mile race, both he and Art Chester in his Goon swapped the lead during the race with Tony winning at 250.9 mph, but he landed downwind, crashing, damaging the racer putting it out of contention for the rest of the races.
Firecracker came back in 1939 with even more modifications. The Greve was now a 20 lap 200 mile race, Miss Los Angeles pulled in a tight turn at the scatter pylon, going into a high speed stall and crashing, the Goon lead but Tony passed him before mechanical problems forced him out on lap eleven. The Thompson (unlimited, anything goes) pitted the small inline racers against the big radial powered racers. Tony took the lead, but was finally overtaken by Roscoe Turner in his 1,000 hp LTR-14, Roscoe won and Tony came in second at 272.5mph.
1939 was the last year for the pre-war races and ended the careers of all the racers….except Firecracker. After the war, Firecracker was bought and the incredibly strong wing was removed and put on a glider called Unstable Mable!! It was towed up, then would go through wild aerobatics and was said to sink like a rock. Ed Maloney found the glider in the 60's and the owner donated it to Ed's The Air Museum, Ed continued following leads on the fuselage, finally locating it. After a lot of work, it is now rebuilt to it's glory days and can be seen at The Air Museum in Chino.
General
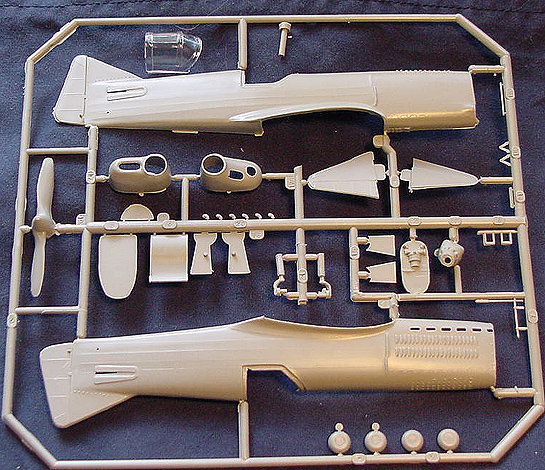
The kit comes in a box that opens on each end and has really nice artwork of the Firecracker bending around a pylon. There's around 35 parts with minimal flash molded in a medium gray plastic and as usual with Williams Brothers kits, there are no locator pins. With the small amount of parts, it could make for a quick, simple OOB build, or you could go to town detailing it...more on that later.
The Firecracker flew for four years and there were changes to the canopy, cowling, and paint job, so you will need to decide on the version you want. Williams Brothers supplies parts and decals for the 1938 - 1939 seasons.
Instructions

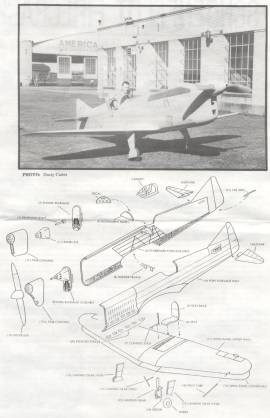
The instructions are well written with clear and concise building instructions and painting information. These aren't beginners kits and don't have numbered step by step instructions, but instead have an exploded view so you will need to plan in advance how you'll go about the construction. There is a nice set of 3 view drawings with detail drawings to make figuring out the modifications for the particular year easy. There are three photos of the real plane included.
Cockpit
Here is the real downfall of the kit in my opinion. Instead of their usual built-up cockpit with a tube frame holding the whole cockpit, then inserted in the fuselage, the tubing is molded into the fuselage sides. With careful painting, it could look nice, sanding the molding off and scratch building a cockpit would look really great…on the other hand, it's a lot of work which will be hard to see as this is a tiny airplane. The rest of the cockpit is pretty simple, consisting of a seat, stick, rudder pedals, instrument panel, and canopy, then again, these were no frills airplanes.
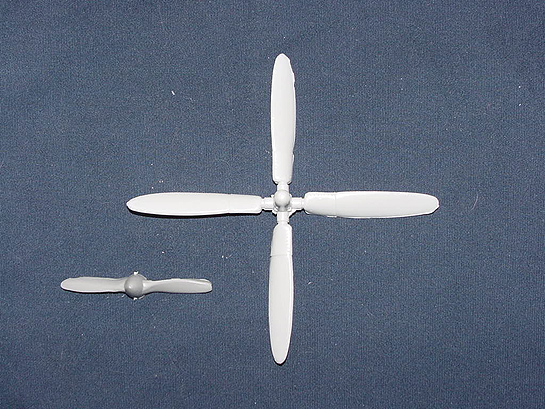
Engine
Nothing much here, just a bulkhead with half a cylinder molded in. don't need to do much detail painting as you're not going to see much through the cowl openings.
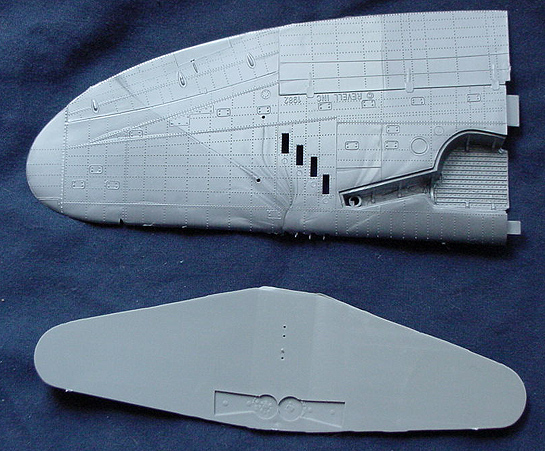
Fuselage
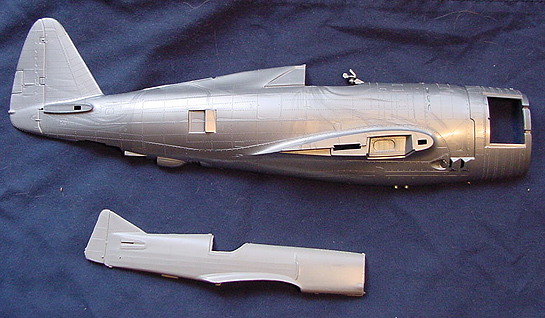
The fuselage captures the look of the real Firecracker pretty well with the metal panels up front and fabric covering on the rest of the plane. The top of the cowling served as the oil cooler and was left in natural metal on the real plane. If you want to really detail the model out, you'll need to make a very narrow opening behind the cowl sides as that was the air outlet. If you want to do a quick simple OOB build, a wash will more than suffice. There are two nose cases to choose from for the different years, check your references as the cowl openings changed a lot in the pursuit of cooling vs. speed.
Wings & Landing Gear
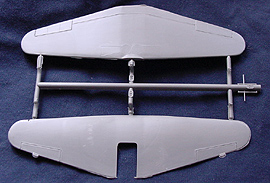
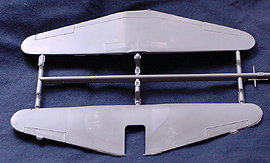
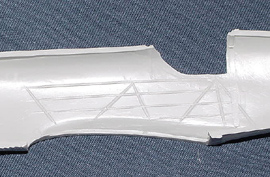
The wings are really simple, 2 pieces, no engraving as they were wood covered. On first looking at the kit, I thought something was wrong as the wheel wells have a thin sheet of plastic over them. A quick read of the instructions showed that was done on purpose to facilitate making a wheels up or wheels down model, the sheet is very thin and will be easily removed. There are no rubber tires with this kit, only plastic ones. The landing gear struts are the same for each year, but there were different landing gear doors.
Decals
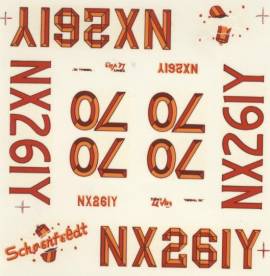
Not much to say on the decals as the Firecracker had a pretty simple scheme. There are decals for the 1938 and 1939 versions done in red, or red/orange depending on the year and are in perfect register. I bought my kit off of eBay and the decals had been folded in half and were brittle. I emailed Williams Brothers for replacement decals and inquired as to the cost explaining it wasn't their fault in any way, they asked for my address and new decals were on their way free of charge! That's customer service you don't see much anymore.
Final Comments
If you're burned out on detailing and want a simple kit that can be built OOB, this is a good kit for that. Simple paint scheme and will look good and different on your shelf. If you want to go all out detailing the cockpit, it still would be much simpler than a WW2 cockpit, but you'll have to way that against having a hard time seeing anything in the cockpit due to its size.
Think it's not a small plane? Here's three photos comparing it to Revell's P-47 Razorback…yes, both are 1/32nd scale! Aviation took a giant leap in a few short years.
© Brad Hagen 2002
This review was published on Saturday, July 02 2011; Last modified on Wednesday, May 18 2016