
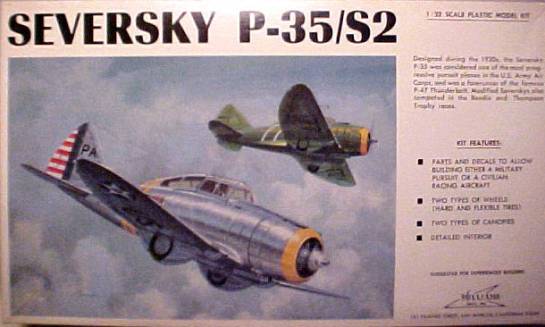
Williams Brothers | Seversky P-35 / S2 Racer
Reviewed by Rato Marczak
AN 'IN BOX' REVIEW
Williams Brothers is very known by modelers dedicated to the golden age aircraft and pre-war racers. The long forgotten P-35 belongs to this category, and I think it is the only model produced by WB that actually saw combat during WWII. Well, at least half of the kit, since a S2 racer can be assembled from this kit too. Ok, if you want a P-35 in 1/32, this is the only game in town. It's a nice kit, but be prepared to do some work. Nothing special if you get used to detailing Revell offerings in this scale.
GENERAL
The kit comes in a small box for a 1/32 model, but remember that the P-35 was a small aicraft. The box art depicts both versions that can be built in flight. Assembly instructions are in the form of a single exploded view. Also included is a double page with a general (well written) text describing assembly steps and painting details. I wish Revellgawa painting instructions came with similar texts. I didn't count, but the kit consists of around 70 parts divided into 5 trees. One of them contains the clear parts wrapped in a plastic bag. The remaining trees are injected with a very soft white plastic. Lots of easily removable flash and lots of (not so easily fixable) sink marks. An additional feature is the inclusion of rubber tires for the main wheels. The decal sheet is almost an A4 sheet size. There is almost no locating pins and the fit is generally loose.
All panel lines are raised, and there's no rivets. The soft nature of the plastic used by WB makes rescribing a bit more difficult than the usual because the cleaning process in not so straightforward. On the other hand, it makes the removal of flying surfaces a real breeze - a couple of passes with a needle and they're off the main parts.
I did an in box measurement check against Squadron/Signal Mini - In Action #1 and the overall dimensions/shape for the fighter version are good. I can't say a word about the racer because I got nothing in addition to the data provided in the kit instructions.
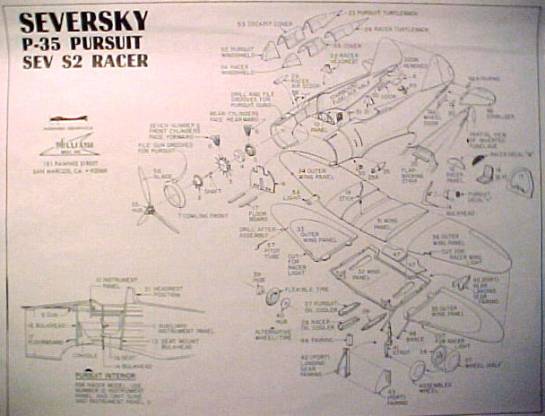
The exploded view-type instructions
COCKPIT
Almost nothing. If you are planning to leave the canopy open, be prepared add some basic details here. The kit supplies the bulkhead, control panel, seat, foot rails and some minor details. They are very crude and, since there was no floor in the real aircraft, some scratchbuilt items would improve a lot this area. Considering that the P-35 cockpit was mostly painted Aluminium, you can't count on the shadows to hide the details. A nice touch is the .30 /.50 cal. MG's pair (which were manually charged by the pilot) provided in the kit. Both MG's are identical in the kit tough. They are clearly visible on both sides of the control panel. The muzzles are mounted unfaired in the upper engine cowling, so consider replacing the kit muzzles for metal tubing.
The control panel is provided as a decal. Pay attention here because the racer panel is different form the fighter version.
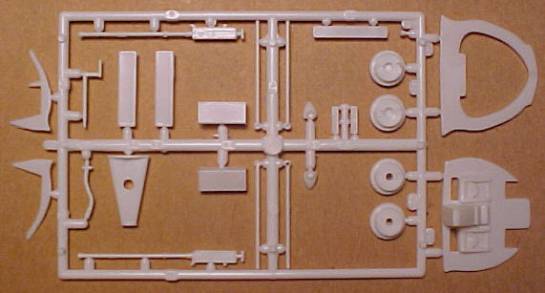
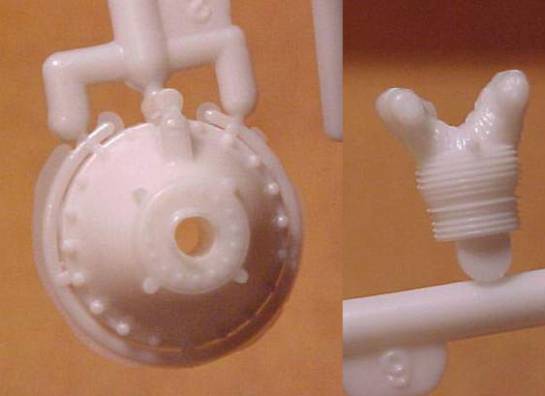
Some of the detail parts
ENGINE
Maybe the strongest point of the kit. The P&W 1830 Wasp is almost a kit itself. All 14 cylinders are moulded separately (with nicely done cooling fins), plus the crankcase and the pushrods ring. There's no exhaust tubes for those of you planning to open the cowling. Anyway, ignition wiring and carefull painting is all you need to make a real gem using the kit parts.
The S2 racer used a P&W Cyclone 1200 hp engine, and I don't know if externally it differs much from the P&W 1830.
The propeller blades are moulded separately from the hub and they have deep sink marks that can be easily filled with super glue and sanded.
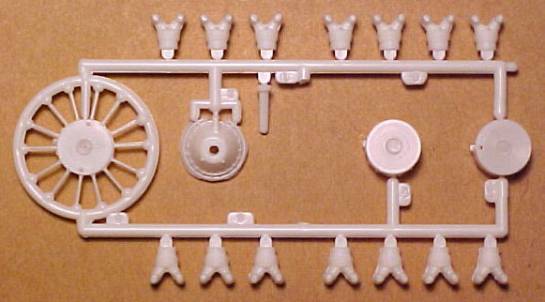
The engine parts come in a separated tree
Crankcase and cylinder heads
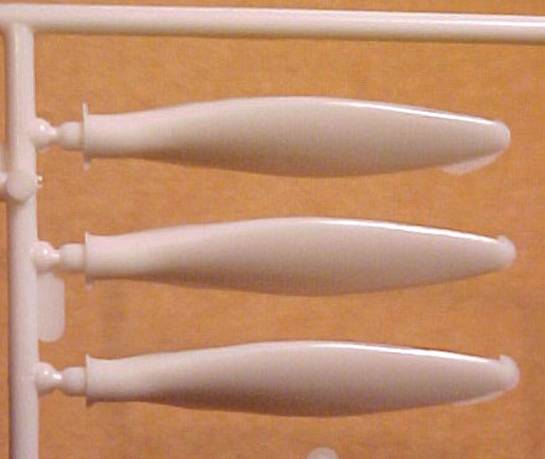
Propeller blades (the sink marks are on the opposite side)
MAIN PARTS
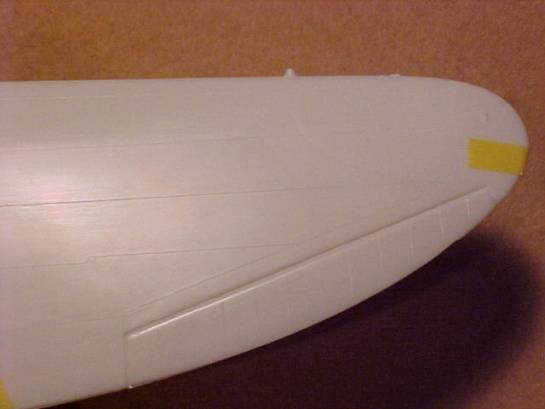
The bulk of the model is composed by ten parts: two fuselage halves, left, center and right wings (upper and lower parts) and the horizontal stabilizers (each one moulded in a single part). The panel lineas are raised, and rescribing is almost unavoidable here.
An area that deserves some attention is the engine nacelle, which is moulded integrally with the fuselage halves (except for the cowling front ring). The cowling flaps are moulded as raised lines and detract from the overall appearance of a radial engined aircraft. To depict the cowling flaps in open position, there's no option other than to remove the cowling, add a firewall to the fuselage and work on the nacelle as a separate part. The vents behind the cowling can be improved too.
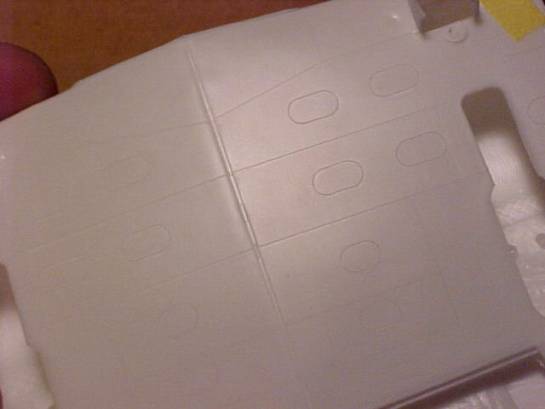
You will need a template to scribe dozens of oval access panels on the bottom part of the wings (typical of Seversky/Republic aircrafts). A test fit showed that with carefull alignment you can reach the correct dihedral of the outer sections of the fighter version with minimal filling/sanding. The racer versions had an almost null dihedral, and some plastic strip insertions will be necessary. Another option here is to assemble the center section and sand the surface where the outer sections are attached with a square angle.
As I mentioned before, if you want to remove the flying surfaces this can be easily done before glueing the main parts togheter. I suspect that they can be removed without any scribing at all so thin is the plastic in the ridges. The flaps are separate parts and can be assembled deployed. In this case you will have to add the characteristic ribs on the inner side. On the other hand, very few photos of the P-35 show them in down position.
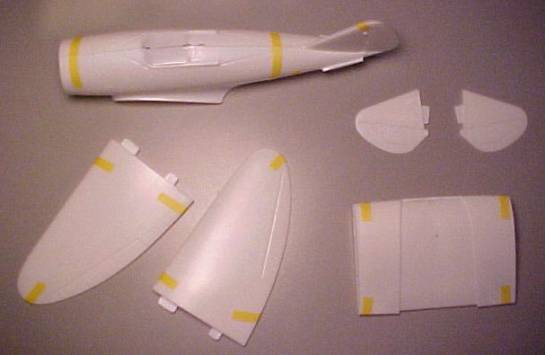
The main parts test fitted
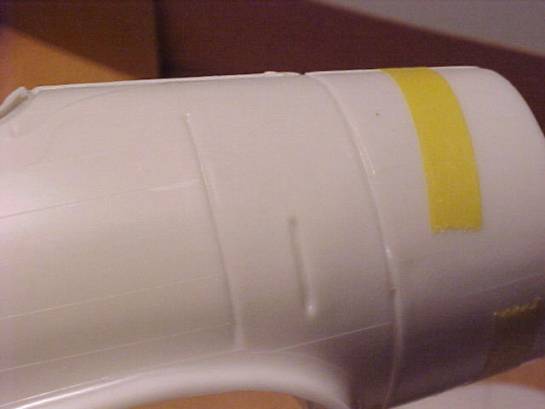
The cowling aft-fuselage transition
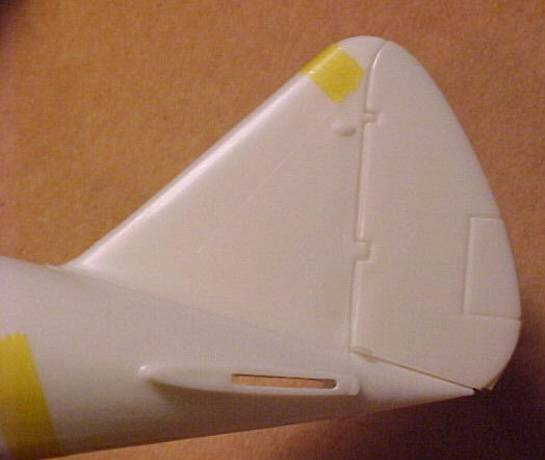
The rudder / rear fuselage area
Be prepared to rescribe all the access hatches. Note the open wheel bays devoid of any detail
Outer wing section
LANDING GEAR
Main landing gear parts are very basic, consisting of the gear legs, retraction arms and the wheels. Most of the gear legs can't be seen from the front after installing the proeminent fairings, but some detailing can be done here. Take your time filling the sink marks. The wheel bays are devoid of any detail, and some plumbing can be added. My major problem was to find pictures of the real aircraft showing details of this area. You can choose to use plastic parts or the rubber tires. In the later case, just paint the wheel hubs and snap them in the corresponding recesses of the tires. The tail wheel comes in a single part, and detail fanatics probably will remove the wheel from the fork and scratch a new one.
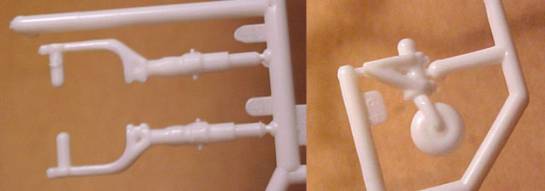
Landing gear parts. Lots of sink marks
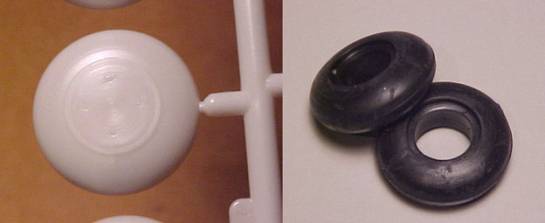
The injected wheel and the rubber counterpart
CLEAR PARTS
Apart from some smaller parts and the paint finish, the racer version differs externally from the fighter by using a more streamlined canopy. Both versions comes with the kit. A bit thick but usable, although not much translucent. Some fine sanding and a bath in Future will leave them in much better shape. You will spend some time filling and sanding the rear canopy to make it flush with the fuselage surface. The sliding section comes as a separate part and can be installed in open position. The lens for the wing lights are also included.
Clear parts. Fighter version (top left) and racer version (bottom left)
DECALS
Another strong point of the kit, specially if you are going to the racer version. Signed by Scale-Master, the decal sheet is well printed, and surely can be used throughout. The fighter option depicts a very well known aircraft flown by the commander of the 27th Pursuit Squadron, based on Selfridge Field, Michigan in 1938. Some of you will prefer to paint the red/white bars on the rudder, as well as the anti-slip stripe on the wing root. Most stencilling are provided, and they are perfectly readble. I know a couple of guys who would buy this kit only to take the Hamilton-Standard propeller logos.
The racer option depicts the metallic green aircraft that Frank Fuller flew to win the 1939 Bendiz Race. These decals are bigger and will require some care to be aligned correctly. I loved the Pratt & Whitney logo...maybe I can use it on a 1/32 P&W R-2800...
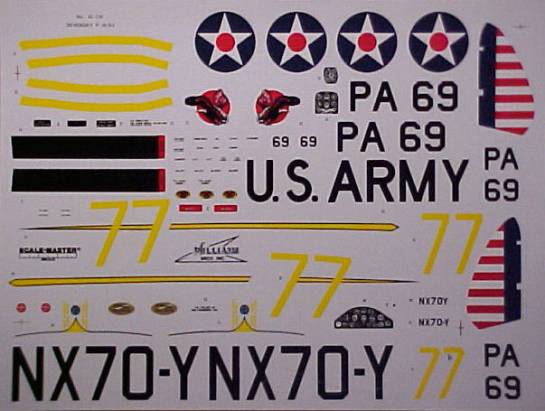
The decal sheet

A zoom on the decal sheet
FINAL COMMENTS
This kit can be used to built several interesting aircraft. The fighter version that comes with the kit decals will test your skills on NFM. Aircraft from late '30s were kept in good condition, and constantly polished. Keep this in mind and do not overdo any weathering. If you go for the racer version of the kit, you will need skills on metallic paints, and I'm the last person in the world that can help you on this.
The P-35 was relegated to non-combat roles during the early years of the war. From 1941 on, they were painted in Olive Drab 22 with Neutral Grey 32 and used on AAF ground schools. This is another very interesting possibility for this kit, specially if you, like me, don't like to struggle with NMF finishes. Ah, and there are also those washable painting schemes used during the war games of 1940 that simply didn't stick well. It would be great to see this kit in such scheme, full of paint chipping.
Now if you want let us down, you can increase the fuselage length, add the faired .30 cal. guns on the nose, scratch the carburator/underside air scoops, add the wing mounted .50 MGs with the shell collector cases, add the window on the starboard fuselage and paint it with the markings of the P-35A flown by squadron commander Lt. Boyd "Buzz" Wagner, 17th PS, Nichols Field, 1941. Geez...And I know what I'm talking about... I saw one of these once.
This model is not difficult to be found. For the records, this kit can be obtained from the Williams Brothers web site.
SUMMARY
Williams Brothers has all the merit for producing model subjects generally overlooked by major manufacturers. The P-35/S2 is a good example. The fit of the parts seems to be a major fault, but even this is comparable to most Revell kits and will require only basics to correct. Scribing can be tedious (if desired), but are absolutely not necessary. I'd recommend to add some cockpit details, wheel bay plumbing and scratch the engine cowling flaps in open position for the more avid modeler. Given the small number of parts, it will make the inexperienced modeler happy. In the hands of a skilled person, however, it can be turned a real show stopper.
I've never recommended a kit because it is the only game in town. I do recommend this one because it is a good kit.
© Rato Marczak
This review was published on Saturday, July 02 2011; Last modified on Wednesday, May 18 2016