
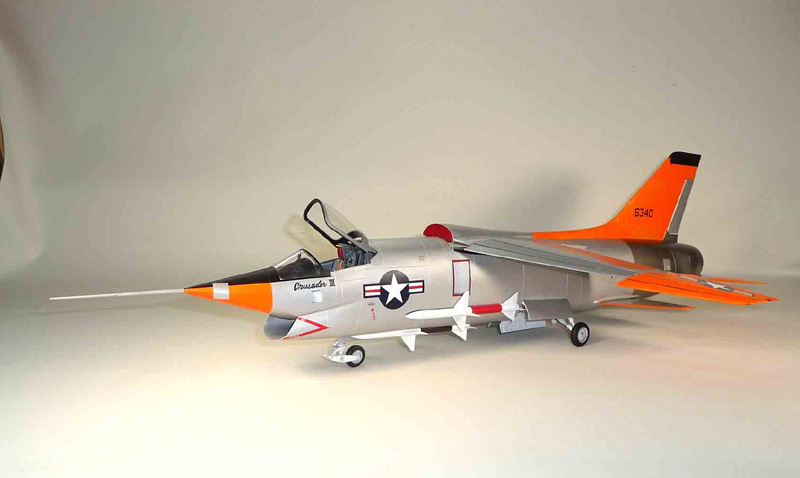
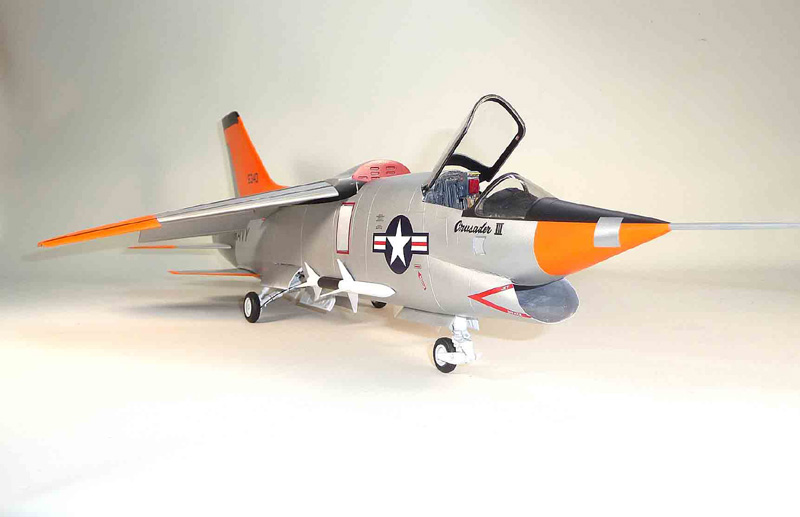
1/32 Scale Vought Crusader III
By Frank Mitchell
The impetus for this model was the recent publication of the Ginter book on the Vought F8U-3 Crusader III, which competed with the F-4 Phantom for production (it lost). The more I looked at it, the more I thought it could be done fairly easily by utilizing some (or a lot of) parts from the Trumpeter F-8J kit. Turned out that it could be done, but I am not sure "easily" is a good descriptor.
As is usual, the photos will tell most everything, but I will provide some narrative to help explain why I did what I did.
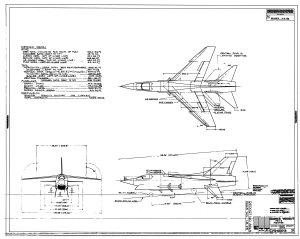
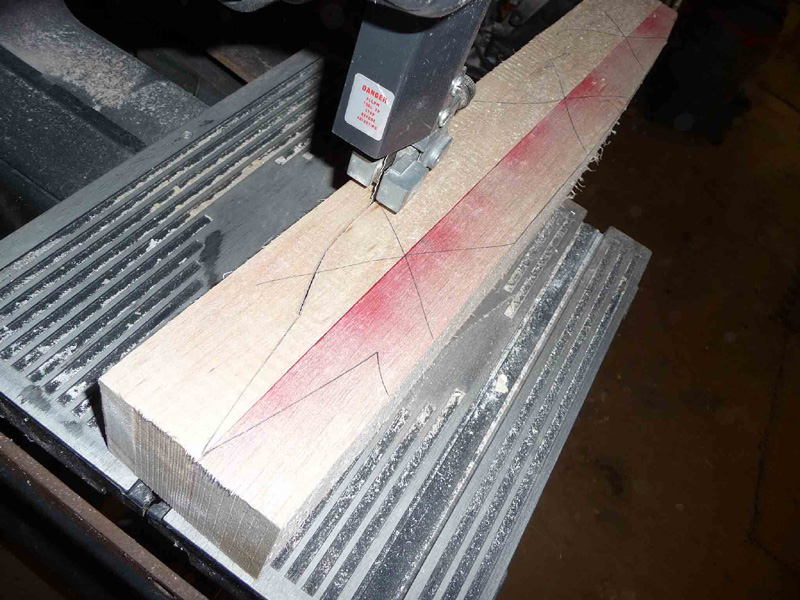
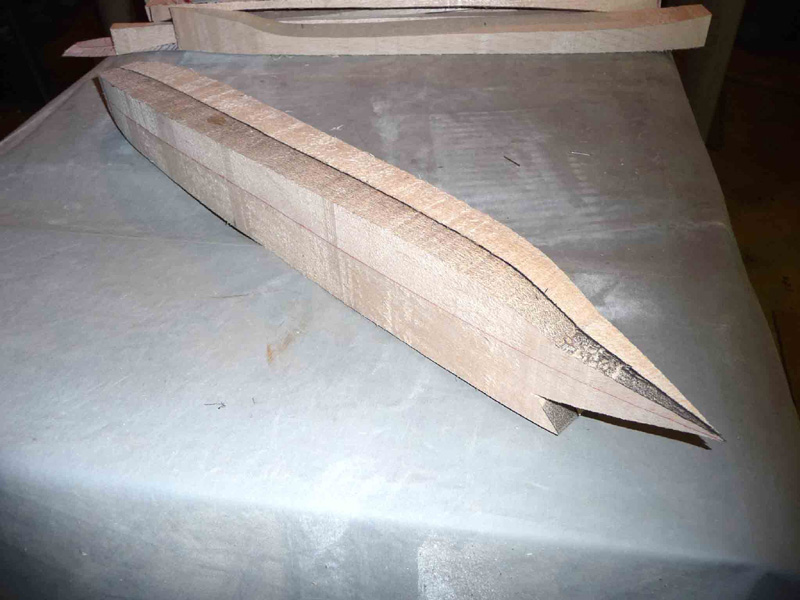
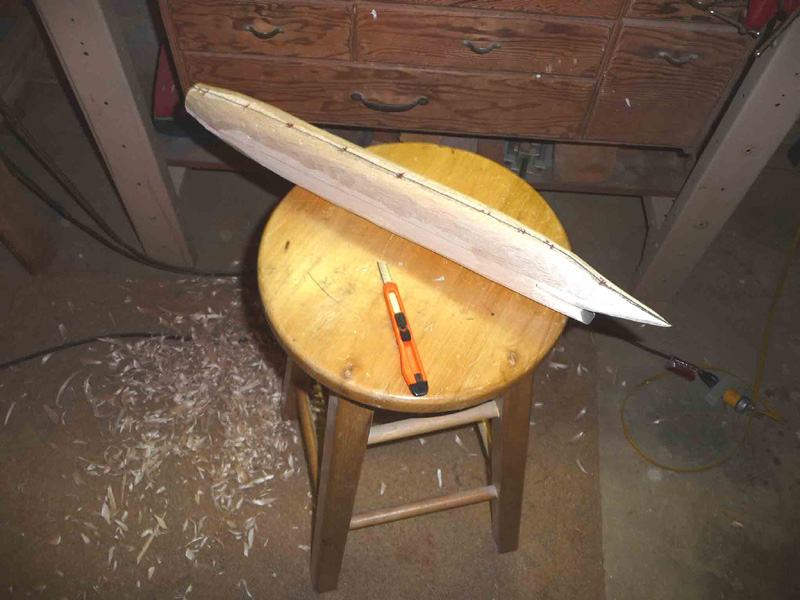
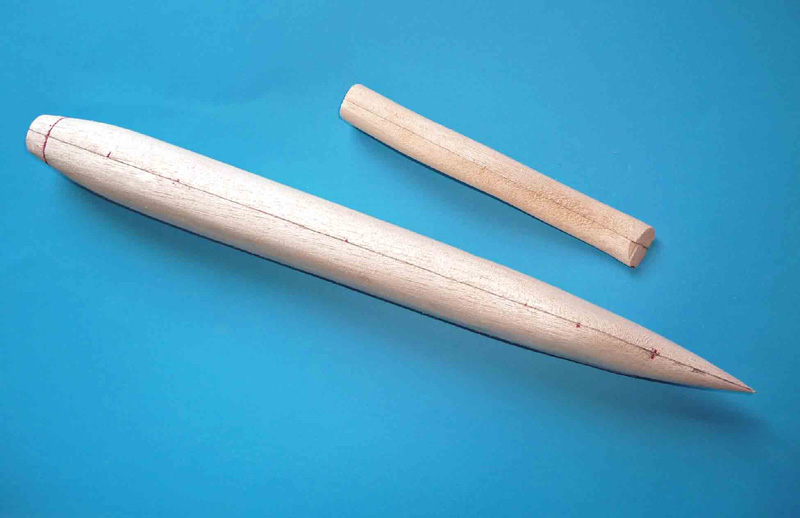
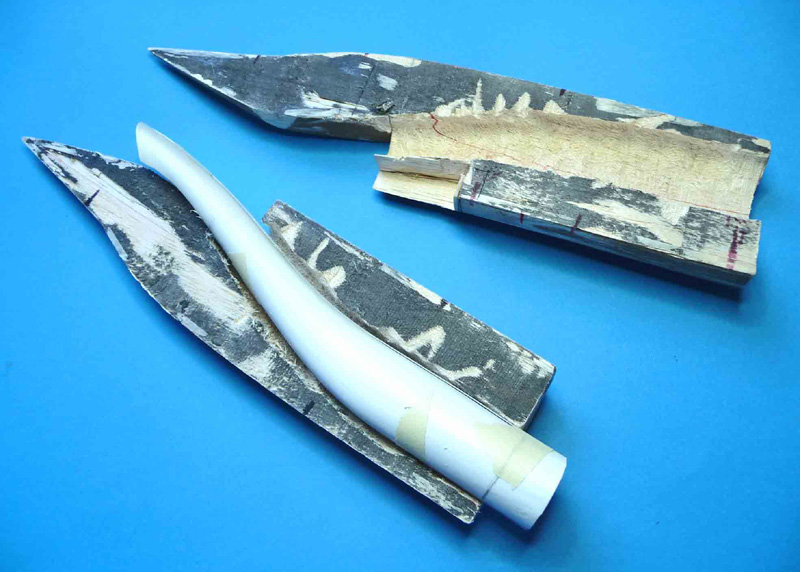
To start, the molds for the fuselage, vertical tail, and the intake duct were carved from balsa and sanded to shape using drawings found on the Internet (http://www.up-ship.com/drawndoc/adwg14ani.gif).
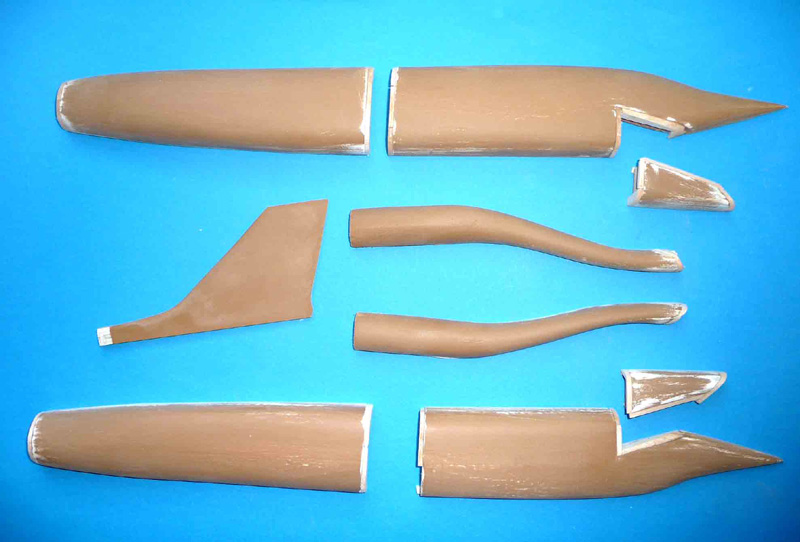
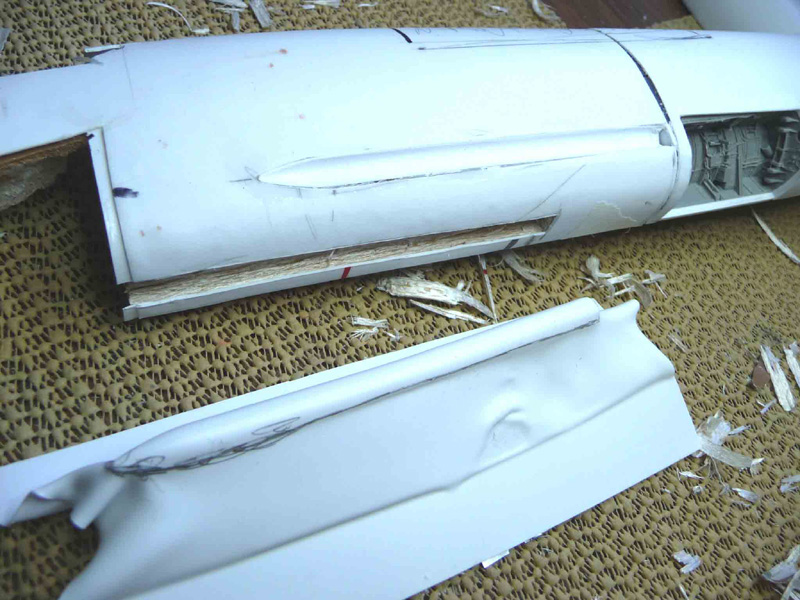
The brown-primed molds were vacuum-formed of .030 styrene on my 40-year-old home-built vacuum boxes (after the fuselage was cut in half length-wise simply because it would not fit my forming frames). After the parts were cut out, the intake halves were assembled and cleaned up on the inside.
The space for the intake was ground out of the balsa fuselage molds using a Dremel tool with a very coarse sanding drum. Took some time (and generated a mess), but I did want to keep what balsa I could to, again, add strength.
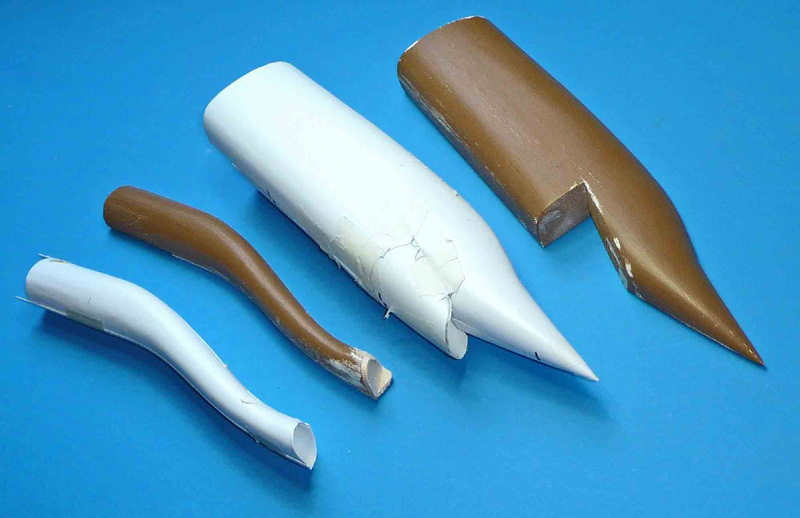
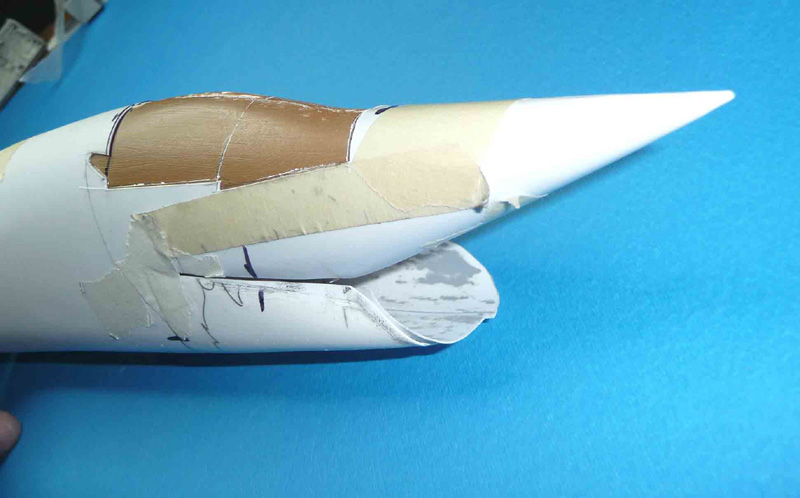
The entire canopy/windscreen area was cut from the fuselage mold to eventually be used as the mold for the clear parts. Other areas had to be removed for the wing, engine (really only the tailpipe), gear wells, the small fuselage openings under the wing, the spaces for the three Sparrow missiles, and the tail hook. Since not a lot of balsa remained after all that, things had to be handled a bit carefully.
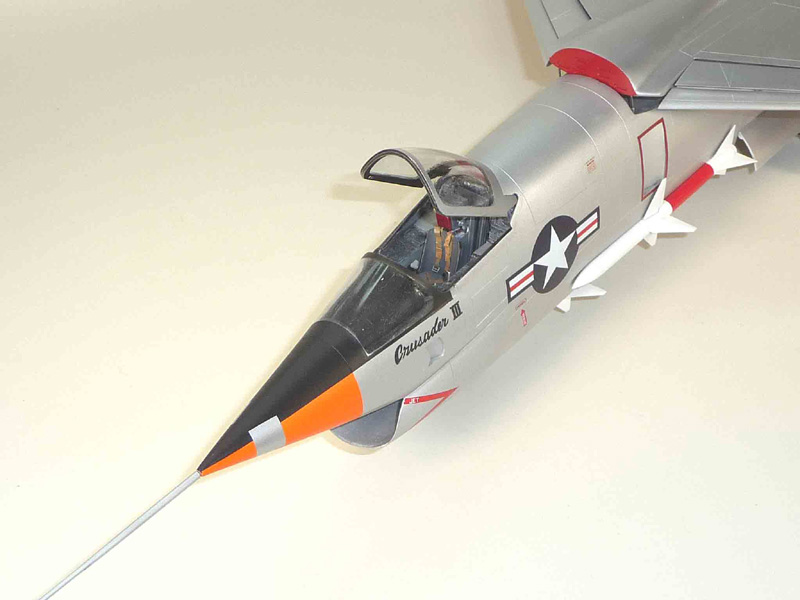
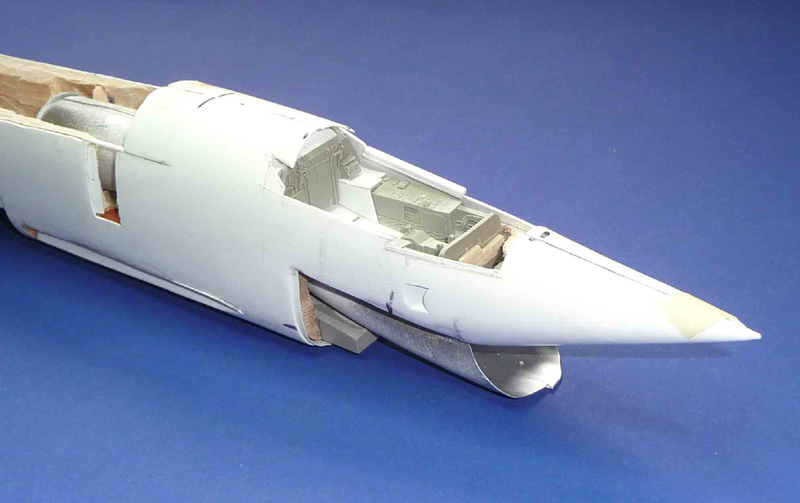
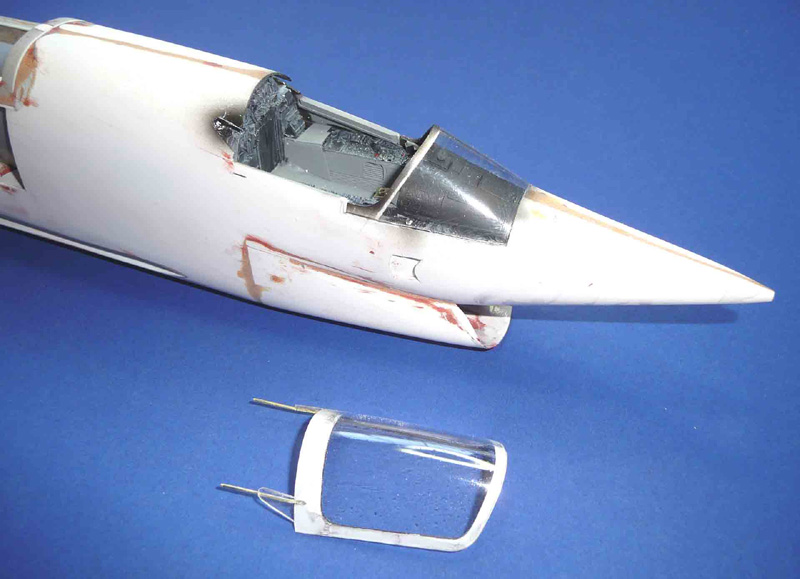
There then ensued a maddening period of making sure that the intake would fit the fuselage correctly, while also making room for the cockpit tub (part of a left-over Phantom resin piece) and the nose wheel well, which is offset to the right side of the airplane to make room for the bottom Sparrow well. The rest of the cockpit and seat were scratch built. This was a bit fiddly and time-consuming, but everything was finally wedged into place.
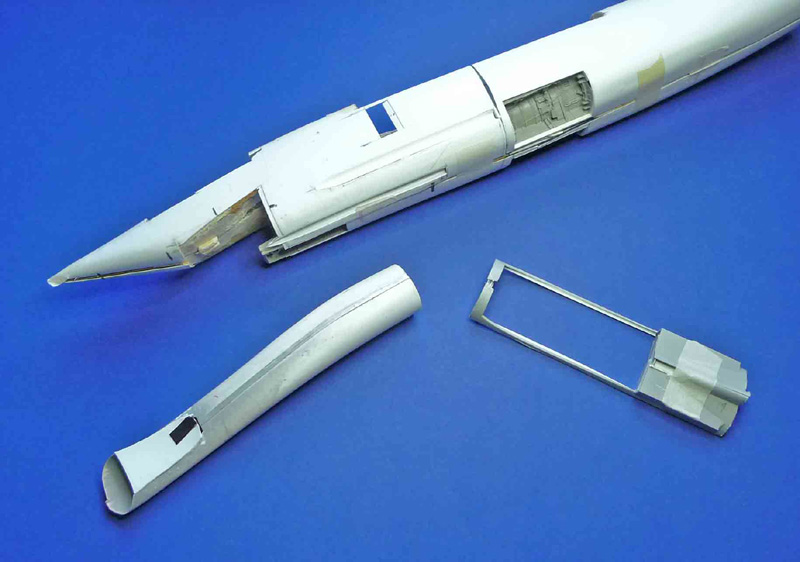
Since I had a set of Aires F-8 wheel wells, those were used after cutting them apart and adding spacers to conform to the considerably widened fuselage of the "III".
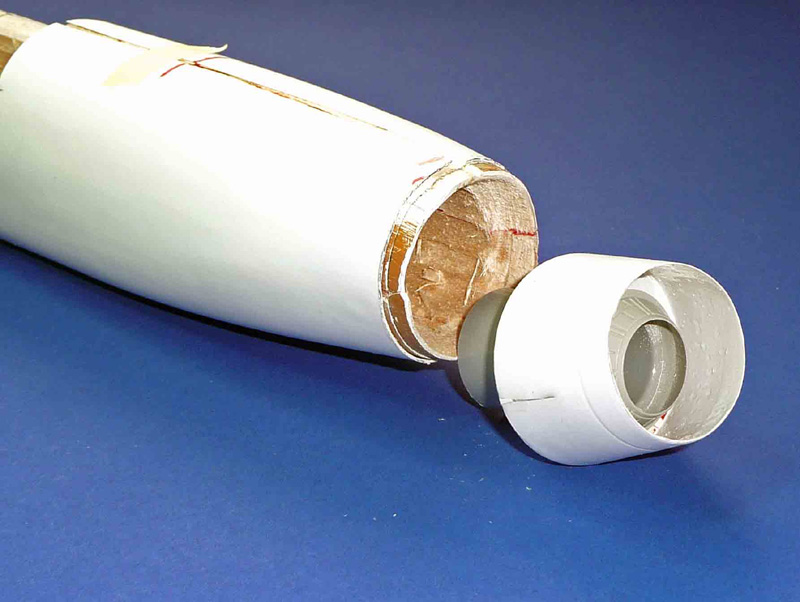
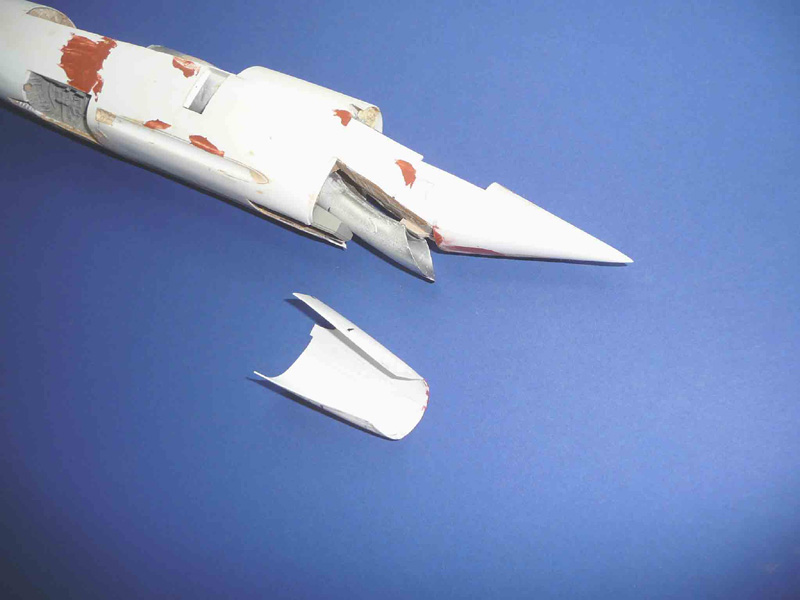
The exhaust in the F8U-3 was a bit different. The actual rear of the fuselage was quite wide, but it contained a cone-like structure that surrounded the actual engine outlet. To make those, a mold was turned from basswood and two copies were vac-formed, one of which was greatly modified to slide into the outer portion and serve as the "shroud" for the afterburner outlet.
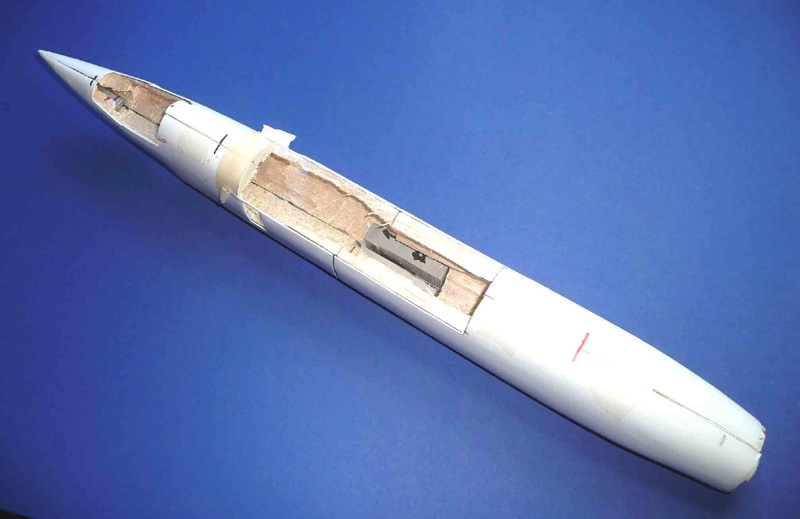
After all this, the fuselage moldings were finally epoxied place and the whole fuselage was cleaned up. It wasn't until this point that the forward intake was finally glued into place and the outer edge thinned and cleaned up. Glue was applied to the rear of the intake through the wing opening and a cover was molded and placed over that area.
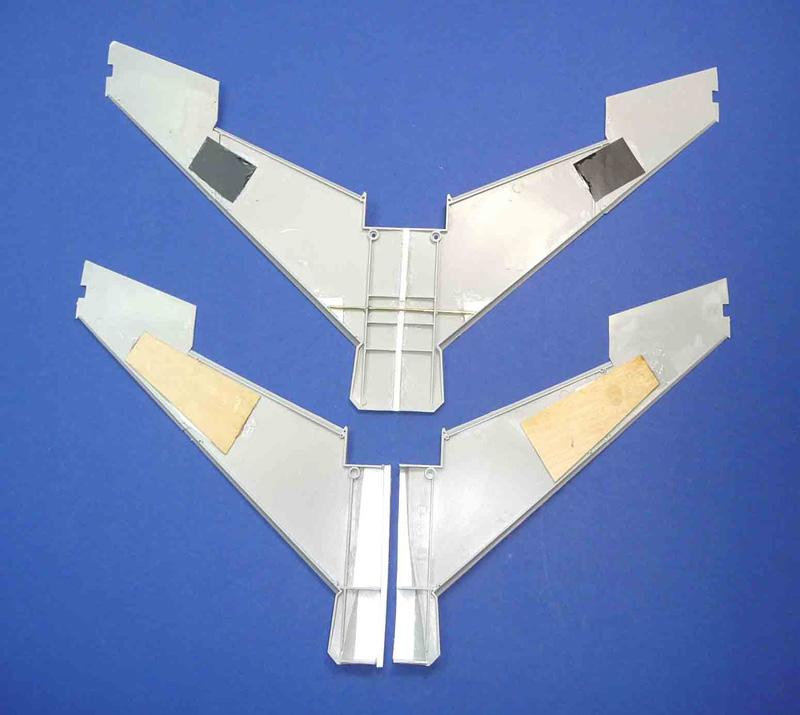
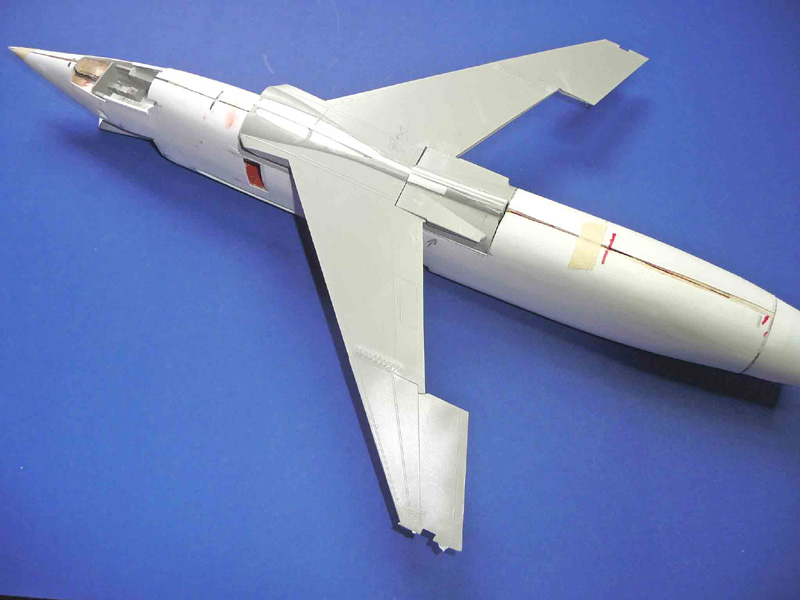
Since the fuselage in the Crusader III was wider than that of the earlier F8Us, both the wing and the saddle area of the F-8J fuselage parts had to be widened and reshaped to fit the new fuselage.
The new fin skins were epoxied to the mold and fitted to the new fuselage. The auxiliary horizontal tail surfaces were modified from a couple of donated A-7 pieces (Thanks, John), and the fairings added from styrene. By the way, those auxiliary surfaces moved down to near vertical when the gear was retracted.
The windscreen was fitted and the canopy built from two moldings: one the outer surface and another which had the "clear" area removed and then painted black then glued to the inside of the outer molding. This serves two purposes, 1) To give the realistic thickness of most canopies, and 2) To help mount the canopy to the fuselage.
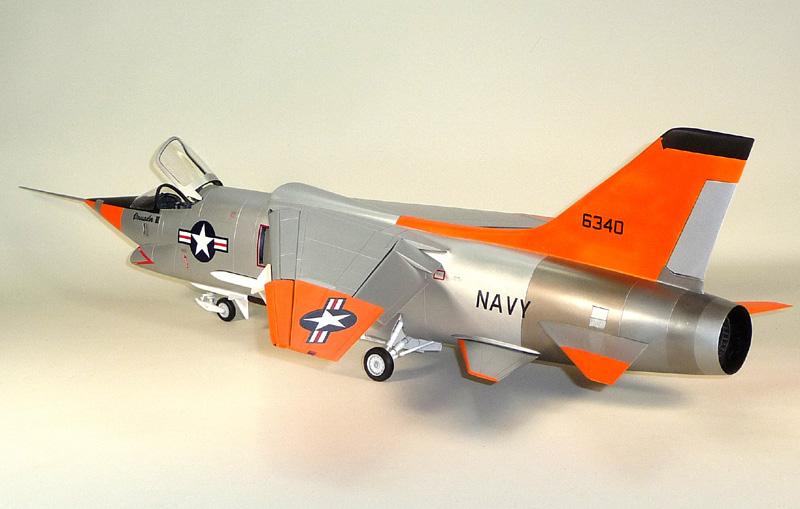
After priming, sanding, scribing, etc., the final finish was fairly simple: An overall coat of a brew that I often use consisting of about equal parts of Tamiya Flat Aluminum and Floquil flat finish (covers very well and allows you to mask without marring the color). Then the appropriate areas were masked off and sprayed with Mr. Color (Gunze) Fluorescent Orange. Because I was afraid the orange would show through the white of the decals, I used some frisket to make masks for those areas on the wing. The rear of the fuselage was natural metal, so this was applied using various shades of Alclad. An overall coating of Mr. Color Gloss (spray can-the stuff is marvelous) finished things off.
One of the nice things about prototypes is that there not very many maintenance markings, so those that were used came from the scrap box.
In summary, although this project was not as easy as I originally thought (they never are), and despite some glitches that still remain (they will not be pointed out), I am pleased with the result.
If anyone has any questions, please send me a message through LSP.


© Frank Mitchell
This article was published on Friday, September 27 2013; Last modified on Saturday, May 14 2016