
1/32 Luftwaffe F-4F Phantom
By Dr Menelaos Skourtopoulos
Introduction
At last, a German Phantom! After converting 5 F-4F kits into 4 F-4Es and one F-4EJ, I thought it was time to build some real good F-4Fs!
In 1973 the first of 185 F-4F delivered to Germany (to George AB for the training of the first German crews). The F-4F due to financial and political reasons was a simplified version of the Phantom. There was no Sparrow firing capability and the No 7 fuel tank was gone making the "F" 3300 lbs (ca. 1.5 tons) lighter as the normal F-4E!! The F-4F was called logically "the poor mans fighter!" Other features of that version were the non-slated stabilators but it was the first version to be equipped with the leading edge maneuvering flaps (tested first in the project agile eagle). Four years later the "F" equipped with more advanced systems and could fire the AGM-Maverick.
4 Wings equipped with the 175 aircraft, two in the interceptor and two in the fighter-bomber role: The JG 71 (Jagdgeschwader) "Richthofen" in Wittmund, the JG 74 "Moelders" in Neuburg, the JaboG 35 (Jagdbombergeschwader) "Steinhoff" in Laage and the JaboG. 36 "Westfalen" in Rheine/Hopsten. In 1991 the JaboG 35 and 36 change their role to interception and became the JG 73 and the JG 72 respectably. Due to delivery delays of the Eurofighter the German Luftwaffe began in the 90es with a program called KWS (Kampfwertsteigerung) or ICE (improved combat efficiency) to make their Phantoms flyable until the next century. A new radar (APQ-65), AMRAAM capability and many more improvements, made the F-4F ICE a very dangerous adversary. The mud moving F-4Fs (Jabo) have not the new radar but improved bombing delivery systems. The Hellenic Air Force selected this version too and together with EADS improve it further and update their Phantoms (for the Peace Icarus 2000 program; see Part II). The F-4F ICE is the best, but the F-4E PI is the best of the best Phantom ever build!
Today the F-4F is at the end of its career and the first Phantoms (the MiG 29 too) going out of duty (first the non ICE aircraft of JG 72) to be replaced soon from 180 new Eurofighter-Typhoons (if you want to see some pics of the JG72 take a look at: "A day with the JG72").
Only three Jagdgeschwader will remain active and the JG 72 will disband by 2006...we all hope not...

Building the F-4F
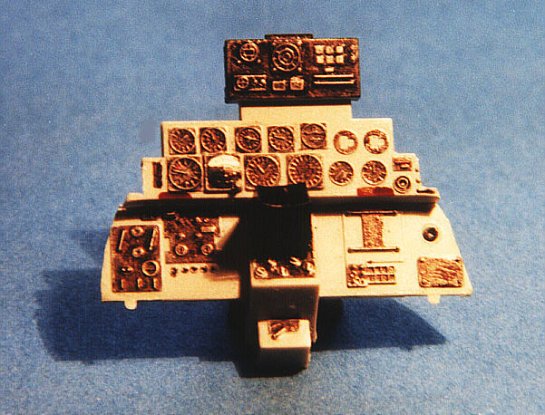
For that reason I used once more the Revell F-4F in 1:32 scale (kit No. 4785). The F-4F kit offers very good seats but not so good instrument panel for the front cockpit as the F-4E kit and the fin tip has also a wrong shape. One more problem is the wrong radome of the F-4E/F kit, so I had to rework it to make it looking right. The Kit offers the APG-65 antenna of the ICE, AMRAAMs and the F-15 style centerline tank. As I wrote before the kit has its problems and here is what you have to do to make it looking right:
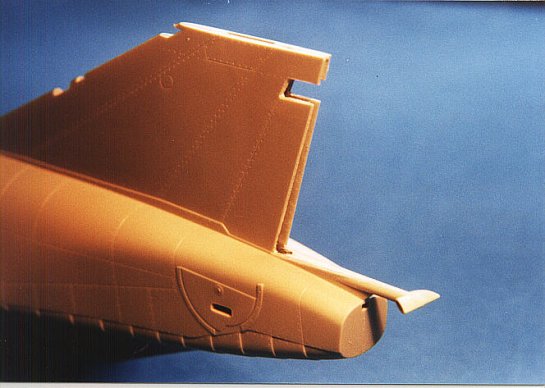
- The upper part of the fin (part no. 208) is not correct and I had to rework it, or order it from Revell-Monogram (in the F-4E kit you'll find the right one!)
- I cut off the rudder and flaps and glue them in an other position.
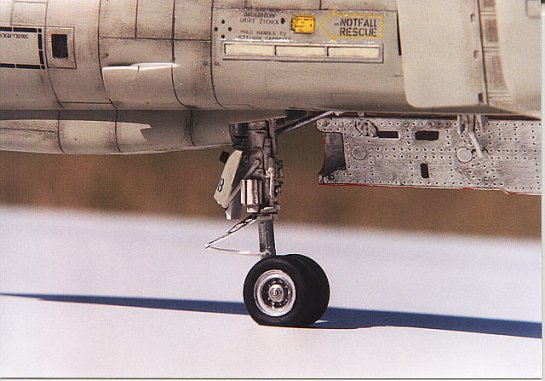
- I had to build the nose gear leg from scratch, because it is out of scale. (see part I and II for further information).
- You have to cut off 0,3cm of the main gear legs, because the Model seats too "high" in its main gear. I had to drill a hole in the middle of each main wheel to make it looking better; otherwise the main gear legs are done very well.
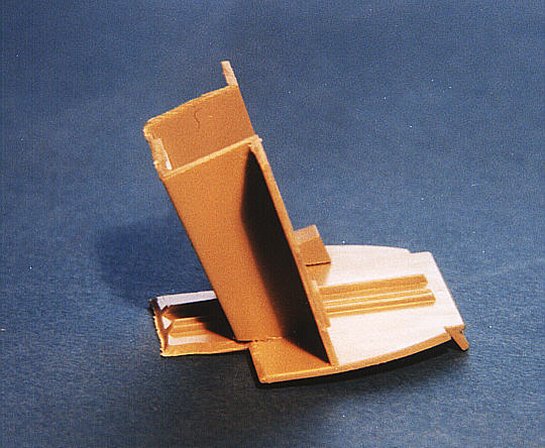
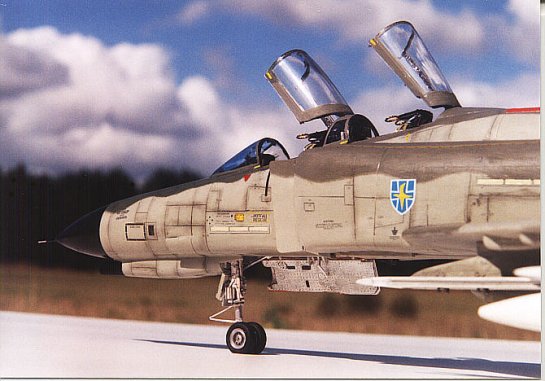
- Once again the back cockpit is too deep and I had to rework it. I had to cut it away from the front and back wall, and glue it again 0.5cm higher. If you don't change it, you'll have to put the seat much higher and it doesn't look right ... otherwise the situation in the cockpits is OK.
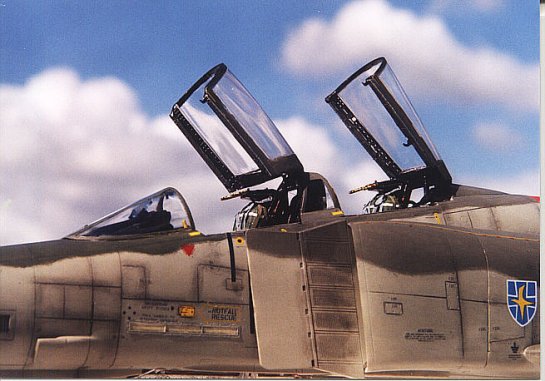
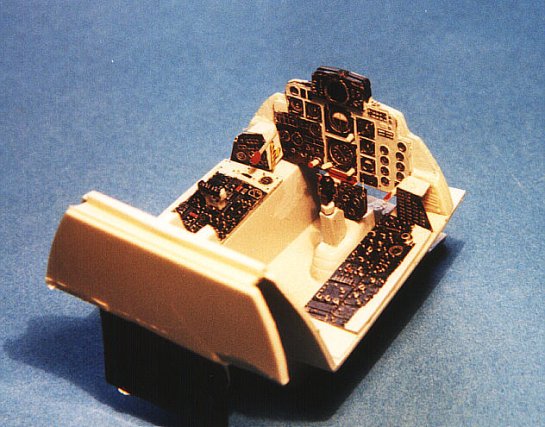
- The cockpit detail sets of Eduard (032-24 and 032-32) were used to show the high degree of details, that you see on the Phantom in that region. I also added some cables in its back to simulate the typical F-4 ... cable chaos there. For the canopy rails I copied the brass set of Hasegawas F-4 special series in 1:48 up to the 1:32, and used that copy to simulate the canopy rails I copied the brass set of Hasegawas F-4 special series in 1:48 up to the 1:32, and used that copy to simulate the canopy rails…
- I had to rework the radome to make it looking better.
- I also had to make some work inside the canopies. I used sheet styrene and putty to represent the structure of the front and the back canopies.
- I had to open the bleed air doors under the fuselage between the centreline-tank (do it before you glue the fuselage halves with the wing) and glue them in the open position.
- The air intakes are somehow too long (2-3 mm) but I can live with them.
- I had to make the afterburner cans deeper. For the cockpits I used the Eduard set 32-024 and the MB-GH-7 seats from the kit. I just put the seats belts on them (Eduard set 32-032). The seats are really good and Revell noticed the differences to the US MB-H-7 seats (see part 3).
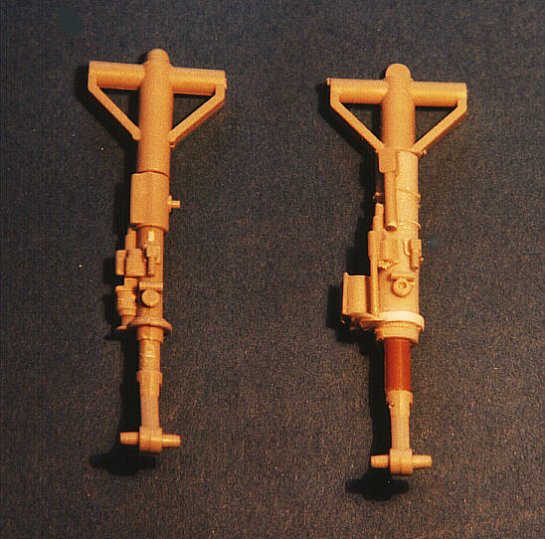
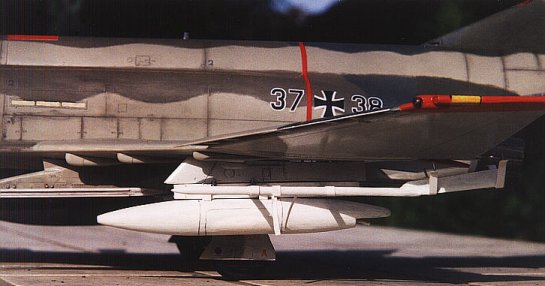
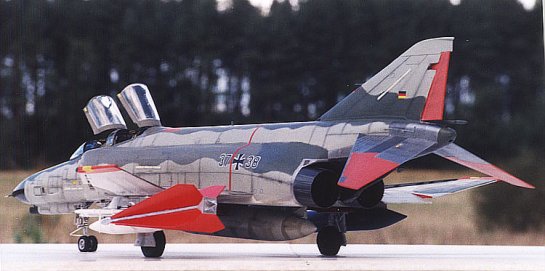
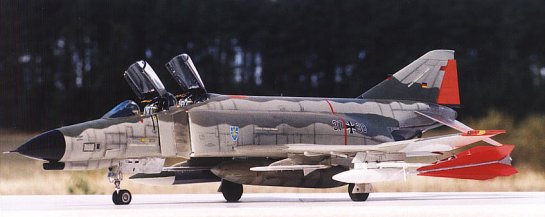
The TDU-10B aerial target
I wanted to build a F-4F that carries the A/A-37U15 aerial tow target. I had some good pics of the whole thing but no drawings. Then I found and scaled up the drawings from Hasegawas building instructions of their F-4EJ kit in 1:48. These drawings are in 1:135 scale and I have to copy them up to ca. 240%
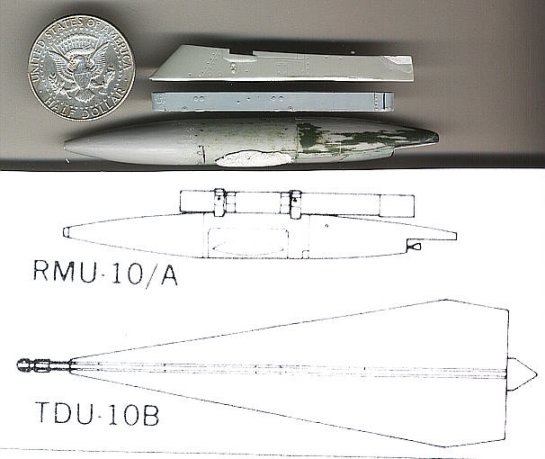
The whole system consists of the outer wing pylon of the F-4, its own pylon, the RMU-10/A (the unit, that carries the cable) and the TDU-10B tow target, also called "Dart". That's fine, but how the hell could I build such a thing?
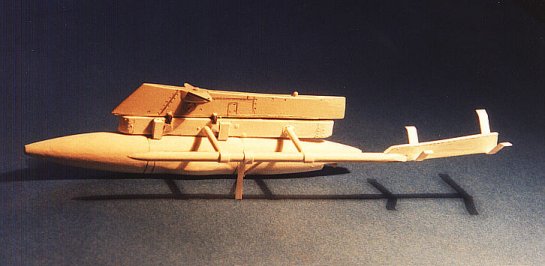
Well, I first started with the F-4 pylon. The Revell kit hasn't such a pylon. The only pylon, that looks about the same is the pylon of the wing tanks. I cut out that pylon and make some changes on it with putty. I found then the pylon of the RMU in the spare box. There it was, the pylon of the Hasegawas F-16 for the centerline tank! It was a bit too long, but no problem; cut it and make it shorter!
Next problem was the RMU. I went through my spare box many times, but no luck….then in the middle of the night (I think it was about 03:00 am!) I jumped out of my bed and said: "the 1:48 Phantom tanks"!!…(my wife still thinks I'm a bit paranoid…but it doesn't matter). The next morning (I didn't want the divorce yet…) I searched my 1:48 Phantom spare box and there it was a beautiful 1:48 wing tip tank. I removed the pylon and found out, that it was too long… but again, no problem. I had to change its shape a bit and for that reason I used my dremel. I put some putty on each side to simulate some bulges there, and that's all.
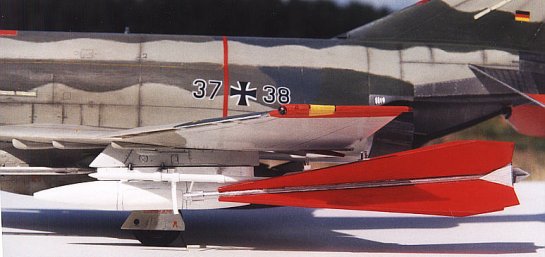
Next point was the attachment mechanism of the Dart itself. I made it from some pieces of plastic frames of the kit. The photo material helped me a lot in that point. The Dart itself was an easy story. I made it from plastic sheet and painted it red.
Painting and decals
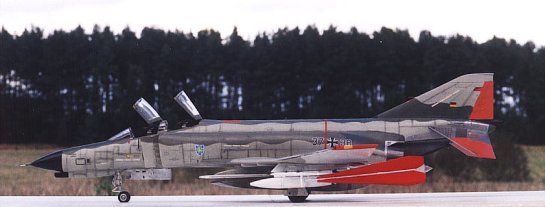
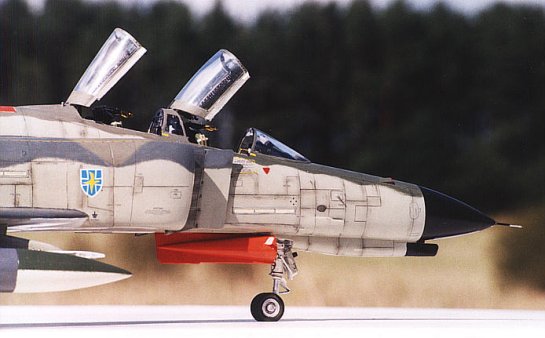
The German Phantoms carried three major color schemes during their career. The first official scheme called Norm 72 and was a green-gray, gray scheme in a splinter form ala WWII with large crosses, numbers and unit badges.
In the '80s the Norm 81 (A version1 and 2, and B version 1 and 2) replace the Norm72 scheme. It was a complicated scheme with many grays, blue-grays and green-grays. This is the point where the paint instructions from Revell didn't help me a lot…! There are some mistakes about the colors and where they suppose to be. I had to study extensively many photos I had, to find out the right color tone and its position on the F-4. That means I had to mix at least one of the colors, because it's difficult to find them ready to use.
Color Chart
| Upper surfaces: | RAL 7030 | (Humbrol 141 or 162) |
| RAL 7012 | (Revell 77 or Humbrol 27) | |
| RAL 7039 | (Mix Humbrol 141 with black and green) | |
| RAL 7009 | (Revell 67) | |
| RAL 7037 | (after extensive study of photos, I used RAL 7030 in these positions) | |
| Under surfaces: | RAL 7030 | (Humbrol 141) |
| RAL 7035 | (Humbrol 196) |
The latest scheme is the Norm 90J. It is a mixture of 4 greys, but I will write more about that scheme in future articles!
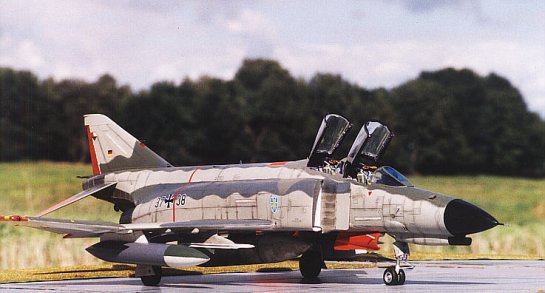
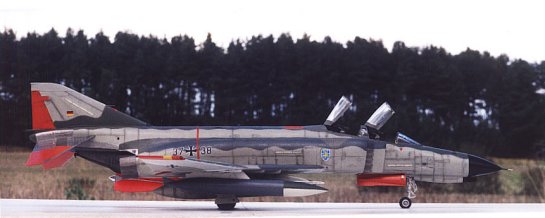
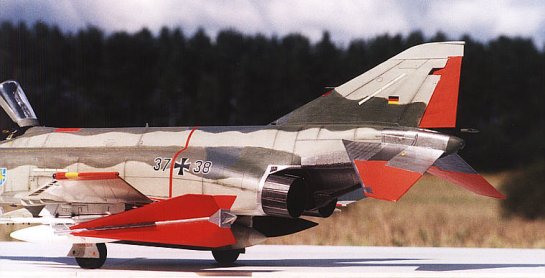
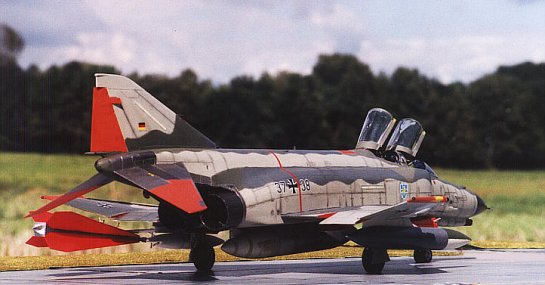
I chose the F-4F 37+38 of JG 73 in the Norm 81B version 2, because I had some good pics of it. Today the aircraft still serves as a non ICE by JG 72.
Every year the Bundesluftwaffe sends 10-12 F-4Fs to Goose-Bay in Canada for training and for safety reasons (there are only 0.14 residens/Km2 there compare to the 225 residens/km2 in Germany!!). These aircraft had often their fins, stabilators, wing-tips, upper fuselage and nose gear door painted red, blue, yellow or green for high visibility reasons making their appearance very attractive. I choose the Humbrol satin red 132 to paint those surfaces because it's a light red/orange and looks like a weathered color.
I used again no spray guns, everything is made by brush.
Photography
I used a Canon T70 camera and two lenses: one zoom (75-210mm) and a wide angle (28mm) in combination with two close-up lenses (2+ and 3+). Film was a normal ISO 200.
Conclusion
I like the F-4F with the Dart. It makes a fine looking model beside the other Phantoms of mine. In the next part will take a further look in the color schemes that carried by the German Phantoms, so guys do me a favor and stay tuned!!


References
- F-4 Phantom ( Kostas Dimitropoulos) (Costandinidis Publications)
- Machitika Aeroskafi Polemikis Aeroporias (Combat Aircraft of the (Hellenic) Air Force) (in Greek) published from the Model magazine "Modelling"
- Flug-Revue (Maerz 1997)
- Tag der offenen Tuer 35 Jahre JG 72 (31 Aug 1996)
- F-4 Phantom II in detail and scale (Part 2, 1, 3)(Bert Kinzey)
© 2006 Dr Menelaos Skourtopoulos
This article was published on Wednesday, July 20 2011; Last modified on Saturday, May 14 2016