
Trumpeter 1/32 F4U-4 Corsair (Korean War)
By Mike Prince
Introduction
Although the F4U Corsair was created as a pure fighter aircraft, by 1950 jets were appearing on the scene and taking over this role. In today’s terms the F4U-4 and F4U-5 were multi-role aircraft, with the Navy responsible for Fleet defence and operating from the carriers. In contrast the Marines were responsible for ground support with these and their later specialised close support versions, generally operating from bases ashore. However, the direct threat to the Fleet was never strongly realised, so many Corsairs joined other Naval aircraft in attacking targets ashore. The only Corsairs to be used in the pure fighter role were a small number of F4U-5N, deployed ashore to deal with slow flying night intruders. Other Naval Corsairs operated from shore bases on a more ad-hoc basis, either to increase their combat radius, or as a result of damage.

The Kit
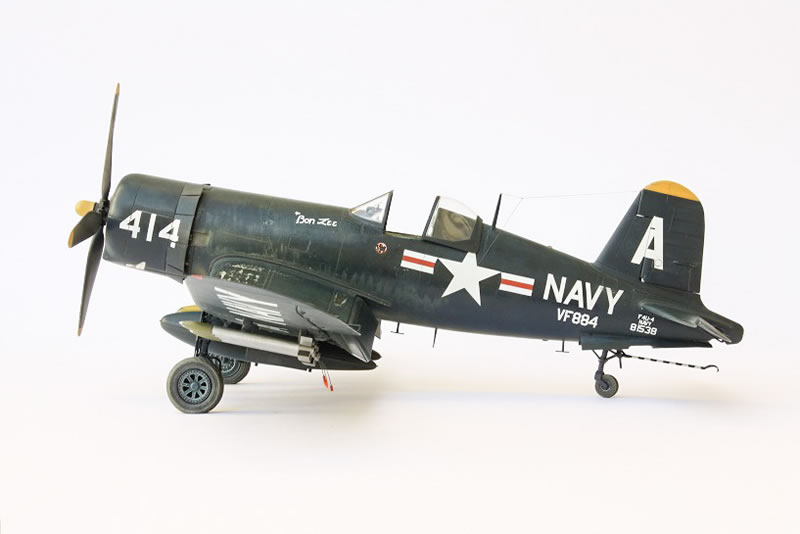
The Trumpeter F4U-4 kit is the only injection moulded option for a later mark Corsair, with Tamiya clearly leading the field for the F4U-1. Trumpeter’s overall shape is fair, let down by shape issues for the cowling, the forward lower fuselage, the wing radiators, heavy ‘fabric’ effects on the main-planes and rudder, skinny wheels and tyres and those horrible hinges for attaching the flaps. As I wanted to have something that could reasonably sit beside a Tamiya Corsair, AMS demanded I address these shortfalls. The only aftermarket items used in this build were G-Factor metal undercarriage legs and resin wheels, using wheels intended for a Hellcat (the only Corsair ones available were very poorly cast and unusable).

The Improvements
Cockpit
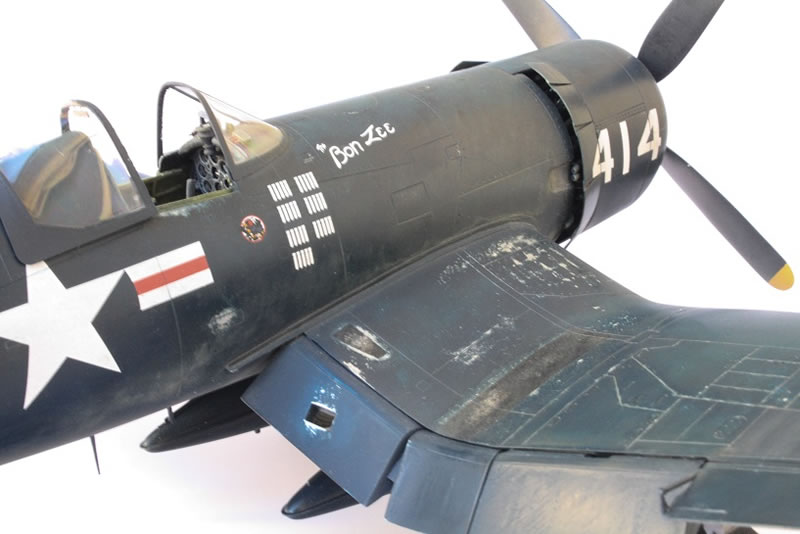
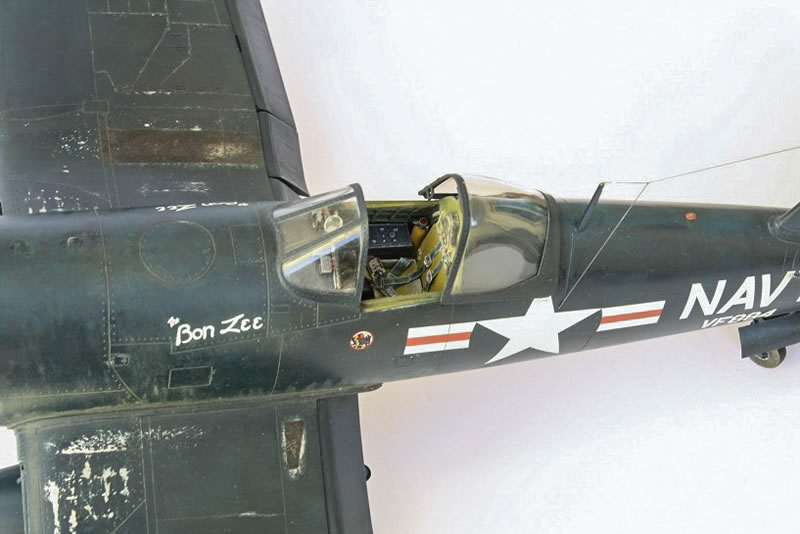
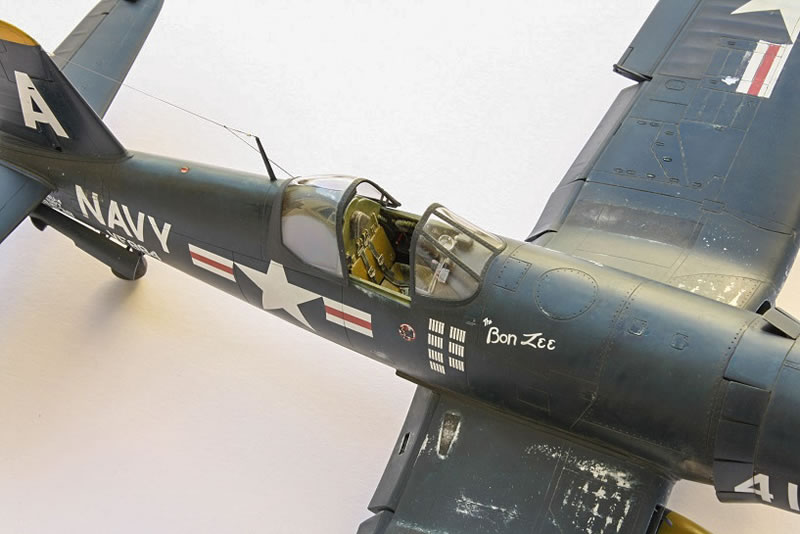
Trumpeter offers a pretty good cockpit. A few levers were added, side wall detail extended to cover all visible areas, an oxygen hose added on the port side (fine wire wrapped around thicker solder wire), and a coffee pot added on the opposite side to fill a gap (because I could). Colour variations between the various seat and back panels and a decent set of belts help bring the cockpit to life. Various switch boxes were added to the forward cockpit coaming, while the thickness of the plastic fuselage coaming was hidden by wrapping it in a foil strip to replicate padding along the edge (not strictly correct, but easier than filing it all down). The canopy runners were realigned as much as possible to look parallel and therefore functional.
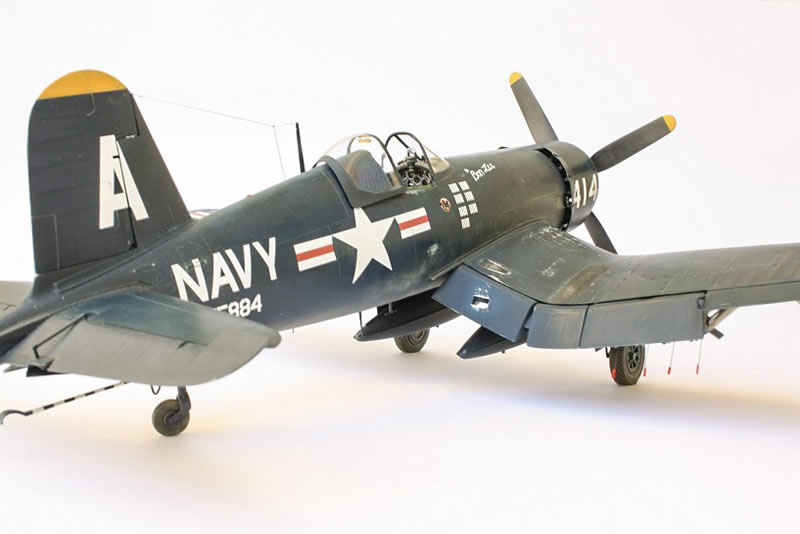
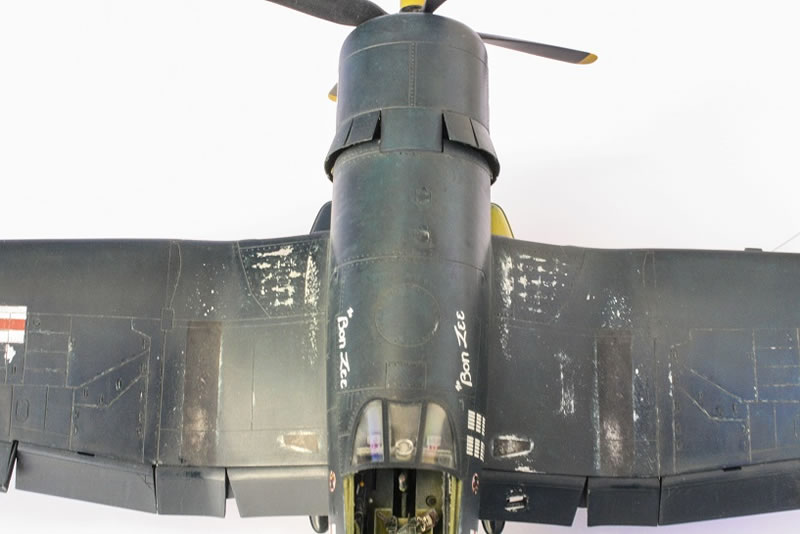
Cowling
The chin scoop was revised to remove the ‘smile’ shape, make it deeper and make it look more correctly like something added on below the main cowl ring. Sheet plastic was added inside the lower cowl to represent the intake trunking leading from the chin scoop under the engine.
Engine
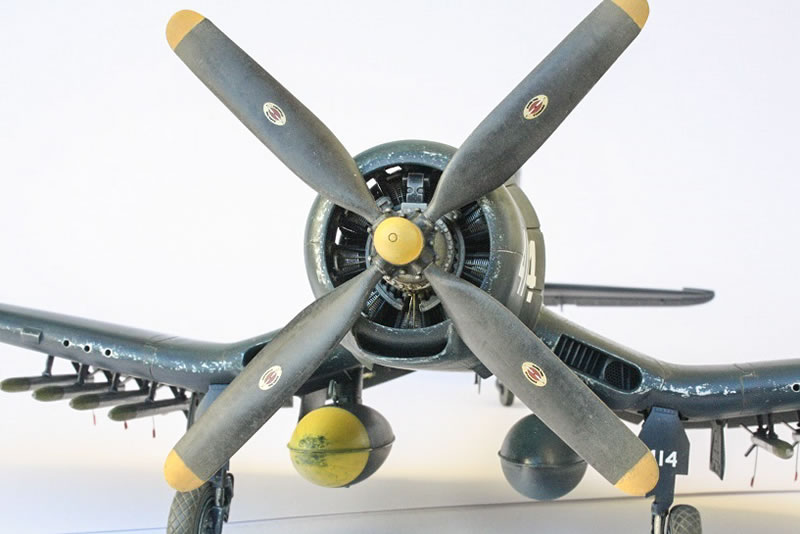
This is really quite good. All I added were ignition wires from fine brass wire (unravelled picture hanging wire).
Lower Front Fuselage
Quite simply, the cross section of the lower front fuselage is very different to the corresponding area on the cowling; it barely fits behind the cowl flaps in the open position, let alone if they were closed. I removed the fuselage area immediately ahead of the wing roots and rebuilt it to a much rounder cross section using layers of sheet filed to shape.
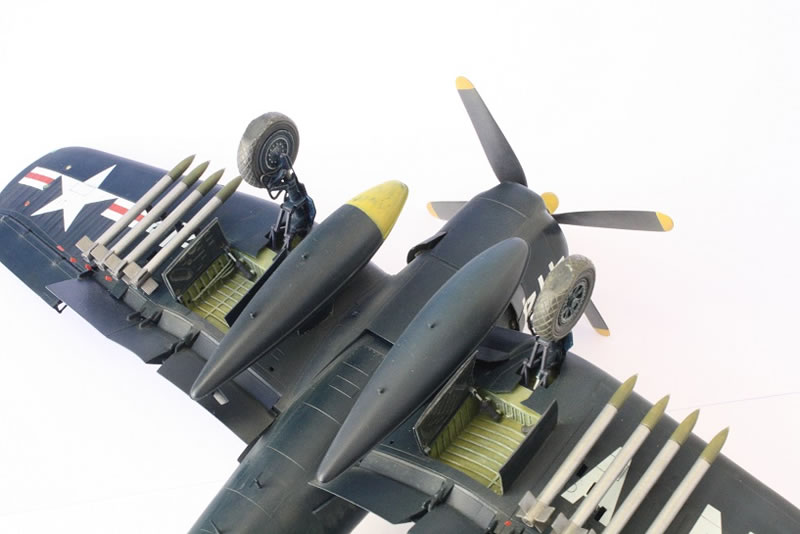
Wings
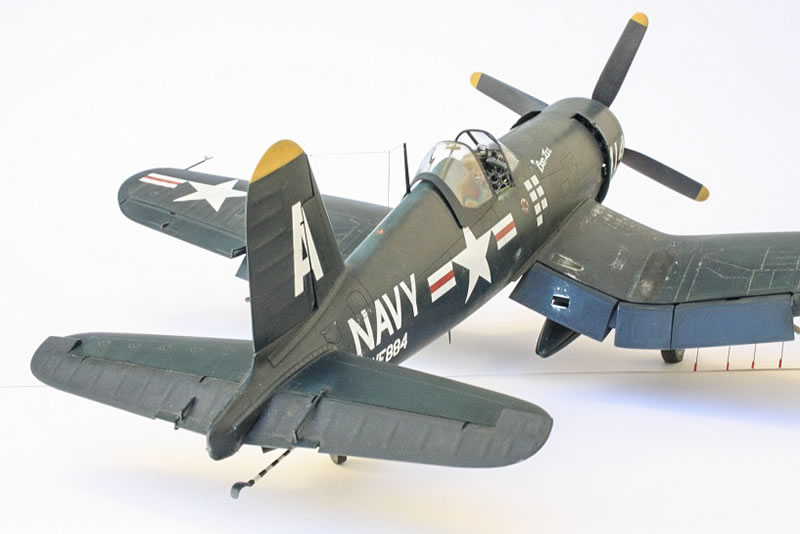
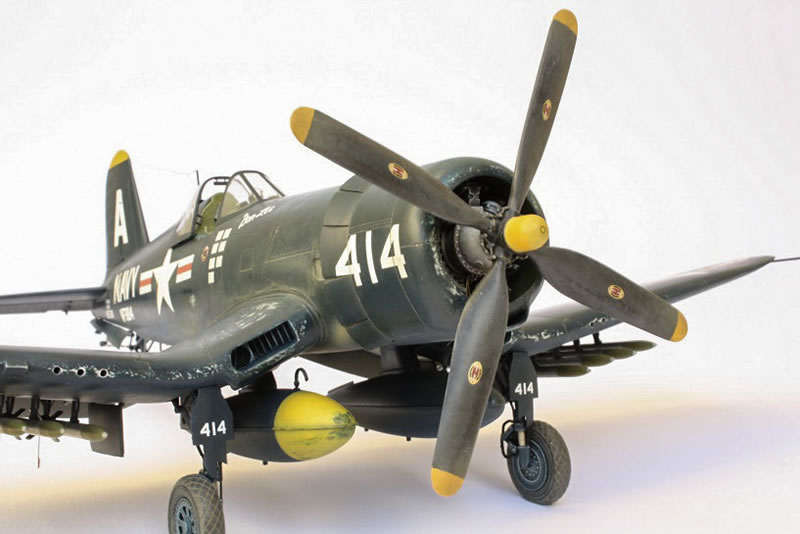
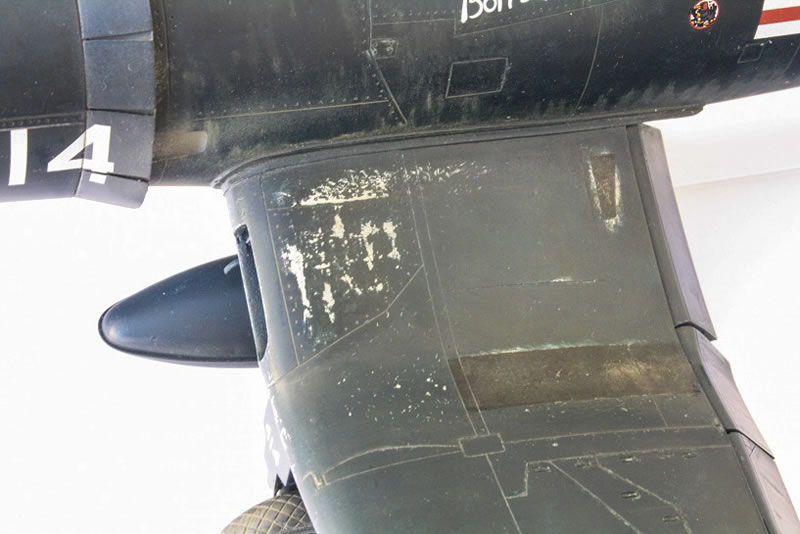
Firstly, the inner and outer panels were joined together with reinforcing on the inside, before the upper and lower surfaces were joined as normal. The easiest way to deal with the gun access panels was to fill the joins completely then scribe new panel lines. The ridges for the fabric effect on the outer wings were sanded down significantly. The metal control surface hinges were simply left out, instead creating a straight surface inside flap hinge line to glue the flaps to directly. This gives both a stronger result and a much more consistent alignment. On the lower surface the wing radiator tubs were made deeper by about 2mm as otherwise they are barely any thicker than the wing they’re mounted to. (In simple terms, make them look more like the ones on the Tamiya kit.)
Tail
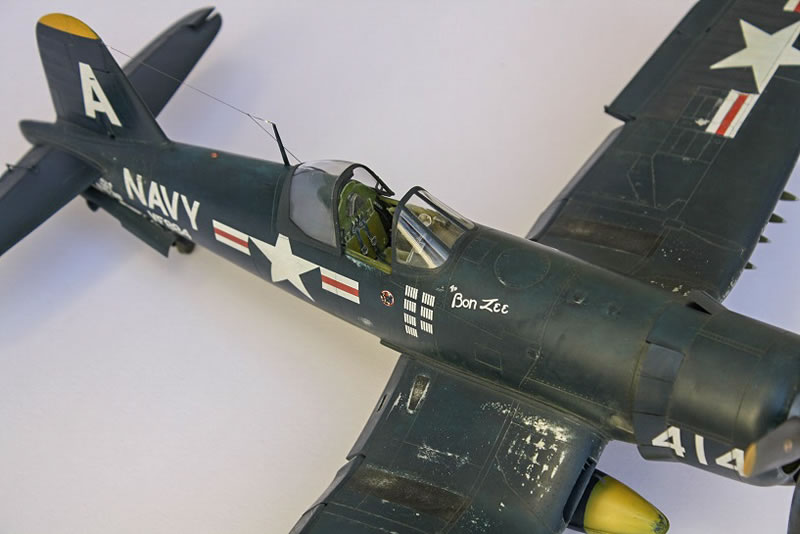
The rudder was thinned significantly and the fabric effect replaced to match the new subdued effect on the wings. The various trims on the elevators were repositioned to match elevators drooped from the neutral position.
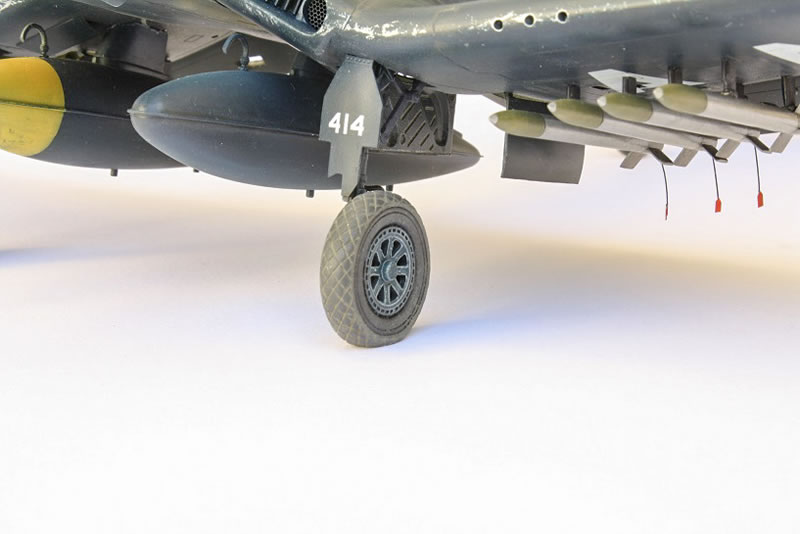
Undercarriage
Trumpeter's undercarriage is actually fairly good. Unfortunately, it can't withstand supporting an aircraft knocked off the table by the family cat. G-Factor makes a very fine set that includes brake lines.

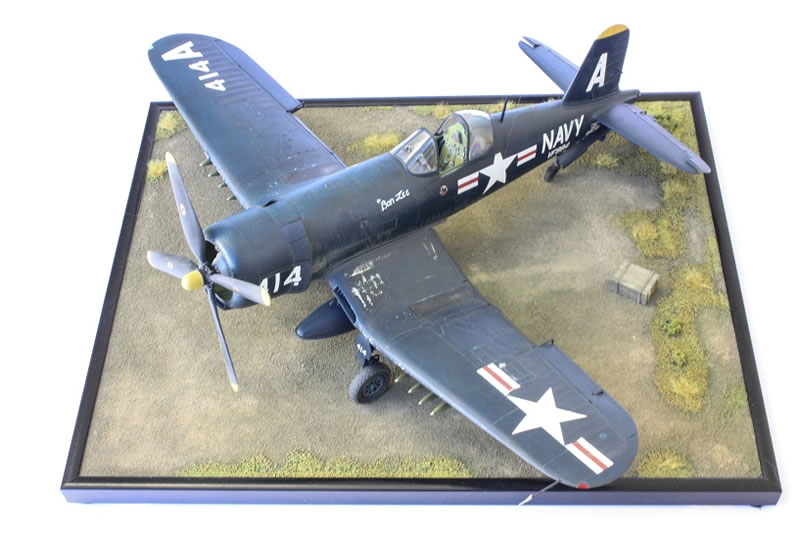
Painting
This was the part I enjoyed the most. The challenge was to create a finish representing Glossy Sea Blue all over, while avoiding a monochrome colour. The effect therefore had to progressively reveal layers of weathering and fading as a viewer gets closer. All painting was done with enamels aver a base coat of silver, protected with a heavy coat of “One-go” (like Future). Some of the effects were achieved with very different colours including a bright light blue applied as a stippled and swirled wash on high points and areas subject to fading. Panel lines and wear areas were chipped, scraped and sanded into the Glossy Sea Blue while the paint was still soft, revealing the silver underneath.
At this point the decals were added between the usual gloss coats. Next, dirty black walkways were then added, leaving worn paint and bare metal showing in places along their edges. Panel lines were then highlighted with light brown. The fabric areas also masked and the same light brown mix was lightly sprayed over these areas fabric areas, then polished off the high points with micro-mesh cloths.

Markings
Markings came from Flevo Decals and worked brilliantly.
Conclusion
Overall, the build reflects that this kit is one of Trumpeter’s earliest releases. In isolation, some of the modifications made may be unnecessary, but most are self-evident whether or not the kit is to sit near grander company. However, the painting was the challenge I enjoyed most as I love making an aircraft kit look used but not too abused.
© Mike Prince 2014
This article was published on Saturday, July 05 2014; Last modified on Saturday, July 05 2014