
DH82 Tiger Moth – Then and Now
By Mike Prince

Introduction
The Royal Australian Air Force (RAAF) was one of many services around the world to use the Tiger Moth for pilot training during WW II, contributing 12 flying schools to the Empire Air Training Scheme.
Tiger Moths first made their appearance in Australia as civil aircraft for a number of flying clubs. By 1935 the RAAF was looking for a new aircraft as a follow-on trainer for students who had completed ab-initio training on the Gipsy Moth trainers, at first choosing the Avro Cadet over the Tiger Moth.
However the need to rapidly expand training capacity via the ambitious Empire Air Training Scheme, and the presence De Havilland’s own manufacturing facilities in Australia, resulted in production of Tiger Moths in Australia from 1938. The first 20 were built up from fuselages manufactured in the UK, with the first fully Australian manufactured airframe being A17-21. This was delivered to the RAAF in June 1940. A further 1070 aircraft followed between 1940 and February 1945, including aircraft for seven other air forces.
In RAAF service Tiger Moths served in the 12 Elementary Flying Training Schools, as well as in roles as diverse as communications, reconnaissance, air ambulance, VIP transport and squadron hack.
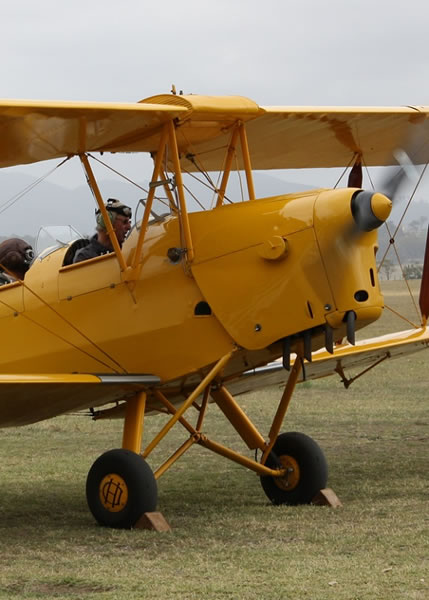
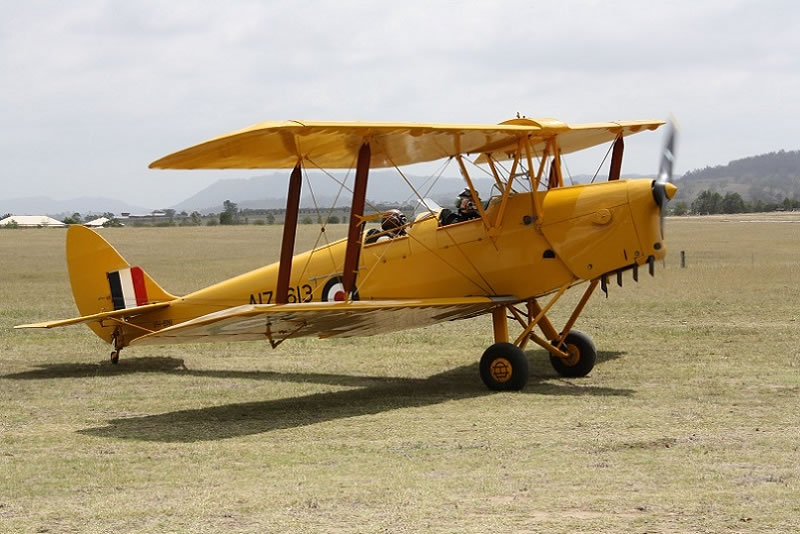
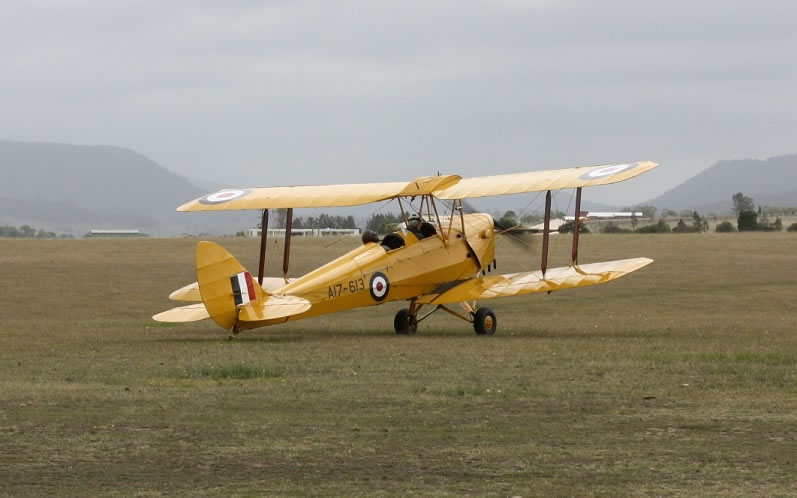
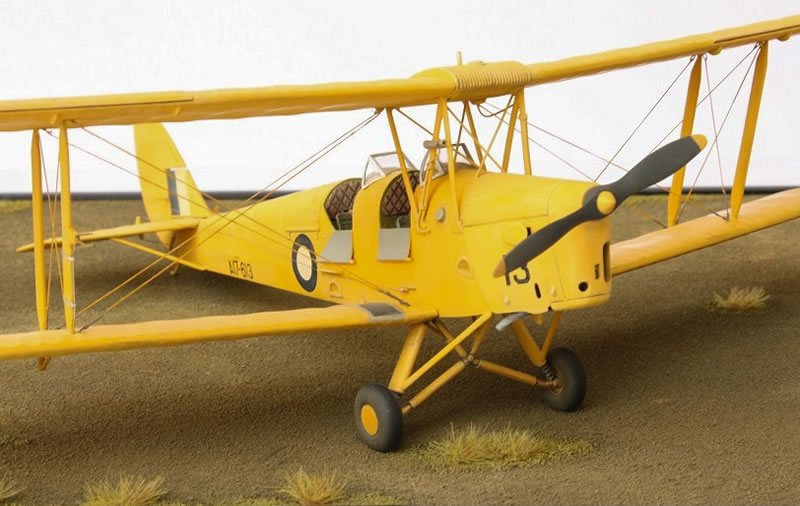
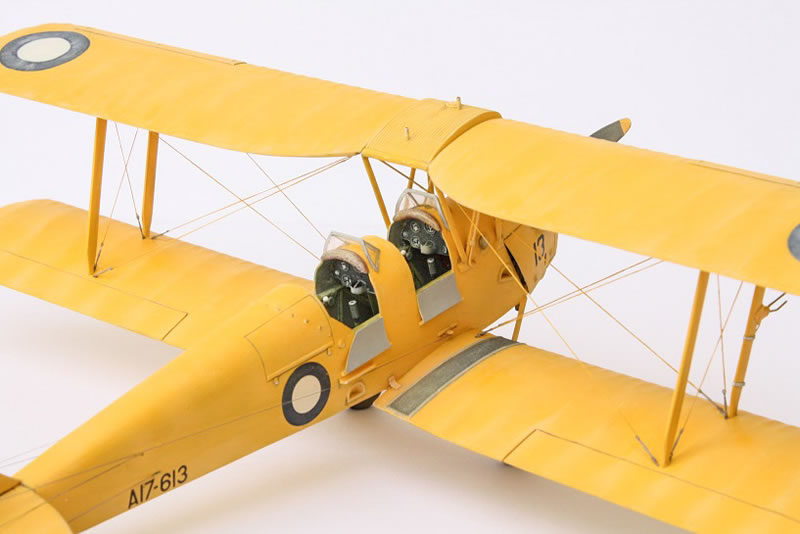
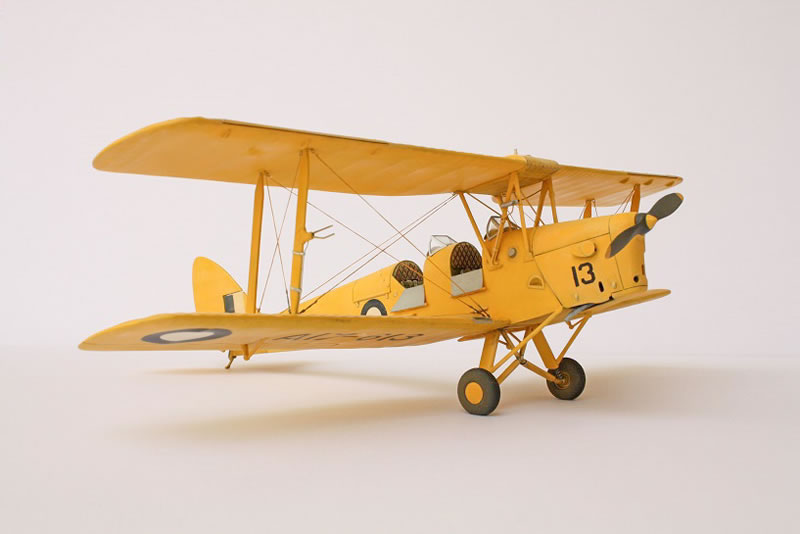
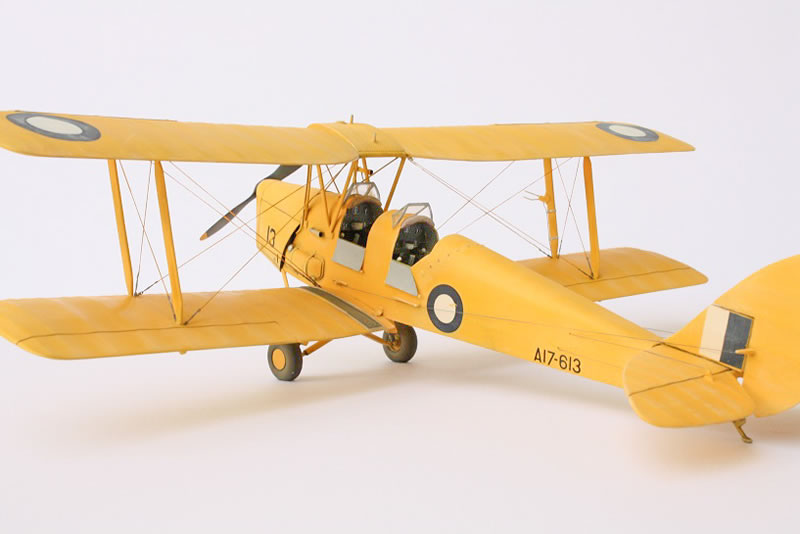
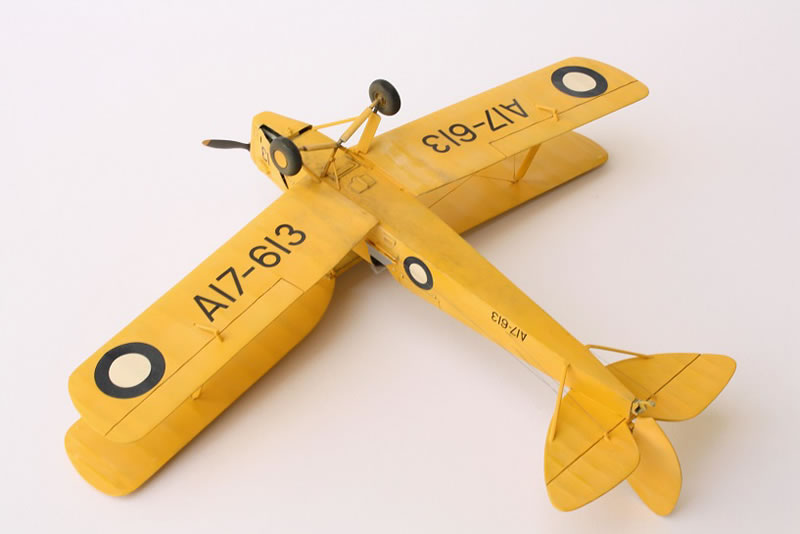
A17-613 was delivered in August 1942 and sold out of service in 1946. It still flies today near Newcastle on Australia’s east coast. It is in absolutely immaculate condition, owned and flown by a recently retired Boeing 747 training Captain (and former RAAF Mirage pilot). Most importantly, he loves to “commit aviation” with an appreciative passenger in the front seat.
The Kit
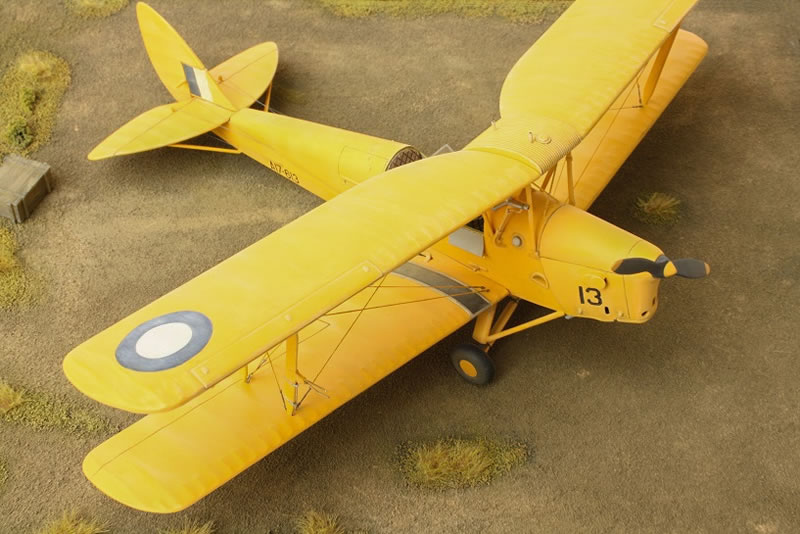
The Revel kit is a re-release of the old Matchbox kit, dating from the late 1970s. With just a little extra work it can be brought up to something that will not look out of place even in the company of much more modern kits. It’s also still the only option for a Tiger Moth in this scale. It makes a good first kit for those considering getting into biplanes and looking for something on which to develop new skills.
The Improvements
What follows is a description of the additional work I chose to undertake. However, please don’t take my modifications as definitive, as some of the configuration I have chosen reflects A17-613 as it looks today, even though I have modelled it with the markings it would have had during the second half of WW II. The principal modern difference is the inclusion of a fuselage fuel tank with a filling point on the starboard side of the forward fuselage and a consequential relocation of the venturi intake onto the cabane struts. The padded headrests may also be a post-war feature only as well.
Aside from these, my changes (from nose to tail) were:
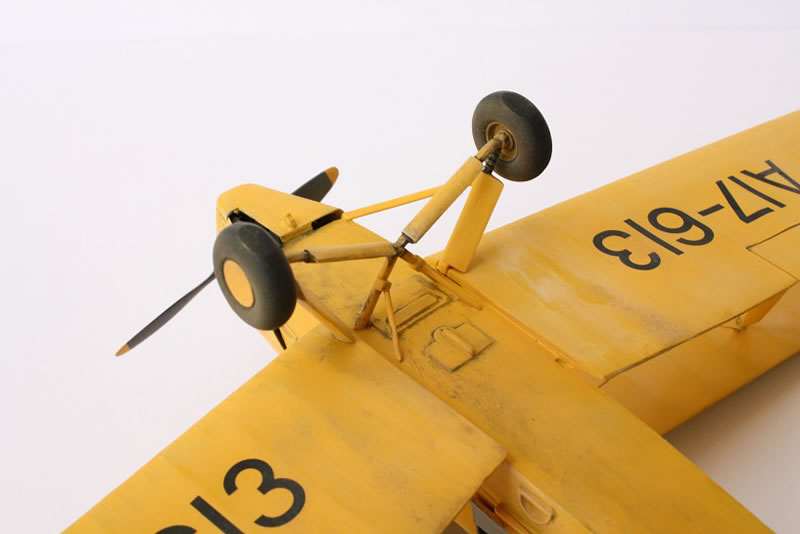
- “Australian” style intake on starboard cowling (filed from a resin casting block offcut, with a sheet plastic disk on outside)
- Wheel covers (sheet plastic disks)
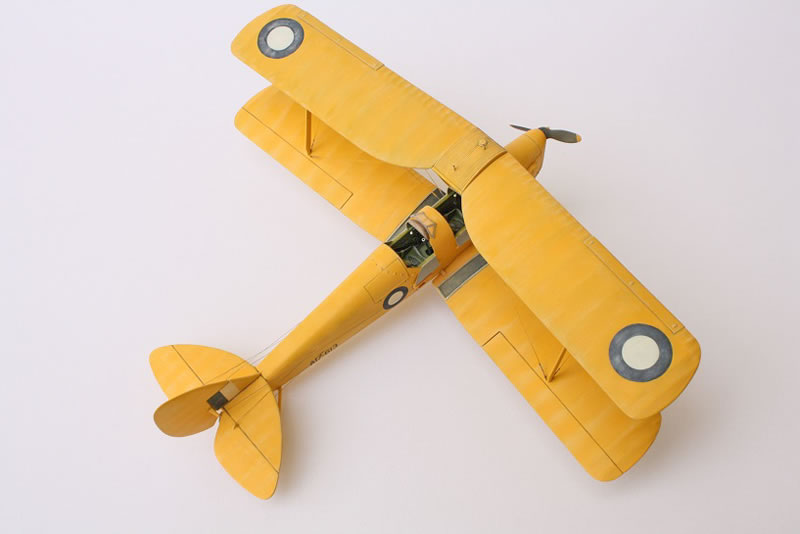
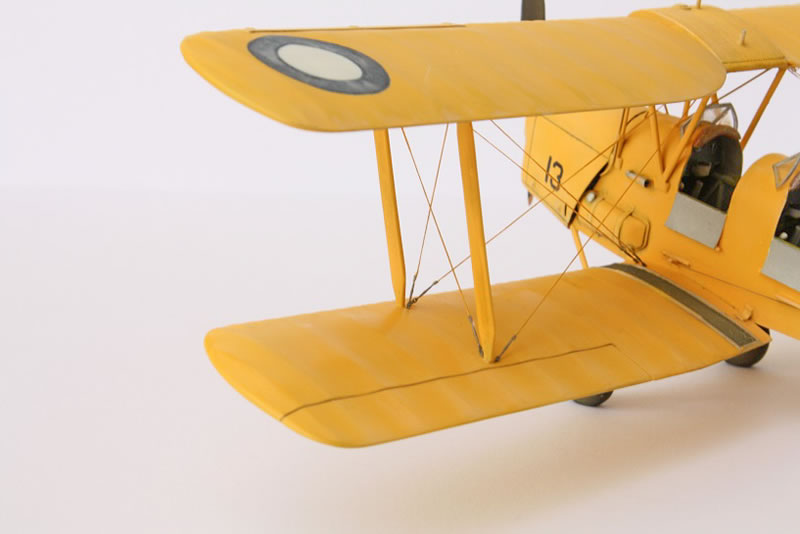
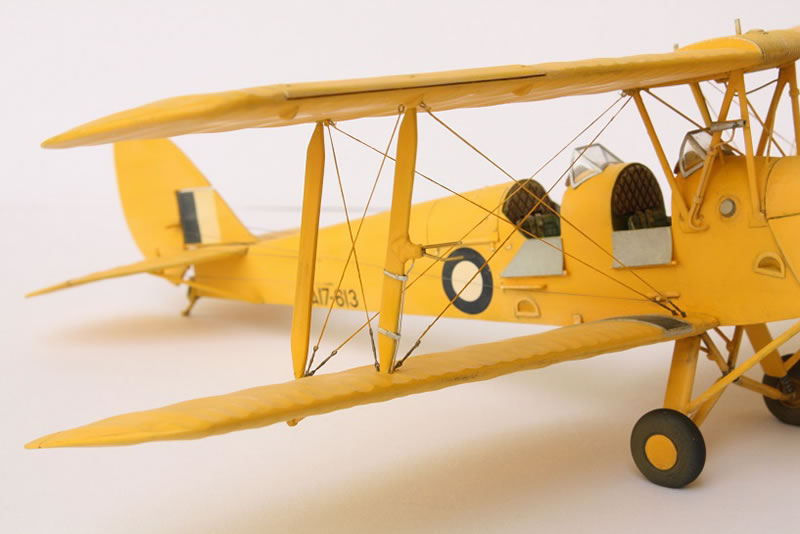
- Wire bracing to keep the upper wing centre section very rigid (fine brass rod)
- Straps over port side oil tank (thin aluminium strips*), filler and drain (short plastic rod offcuts)
- Engraved deeper corrugations in the fuel tank
- Pitot sensors on starboard wing struts (fine wire)
- Slot in fuselage side for rudder bar, rudder cable attachments (sheet plastic)
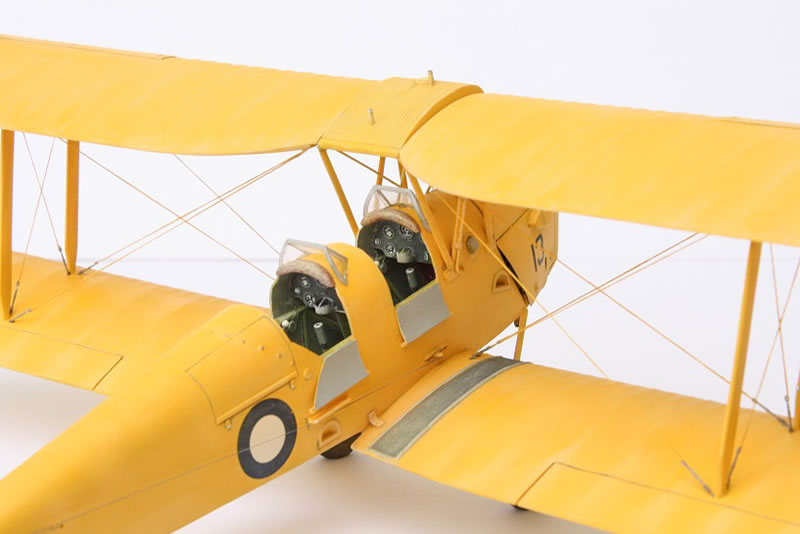
- New cockpit access doors (sheet plastic, curved)
- Cockpit engine and trim controls replaced *
- Fuselage behind each cockpit trimmed flush with each rear bulkhead
- Corrected hinge line for baggage compartment, reinforcing and latches
- Step low on starboard fuselage side (same as behind cowling)
- Guards below student cockpit to protect rudder cables (sheet plastic)
- Lower wings thinned to match ailerons better, all trailing edges thinned
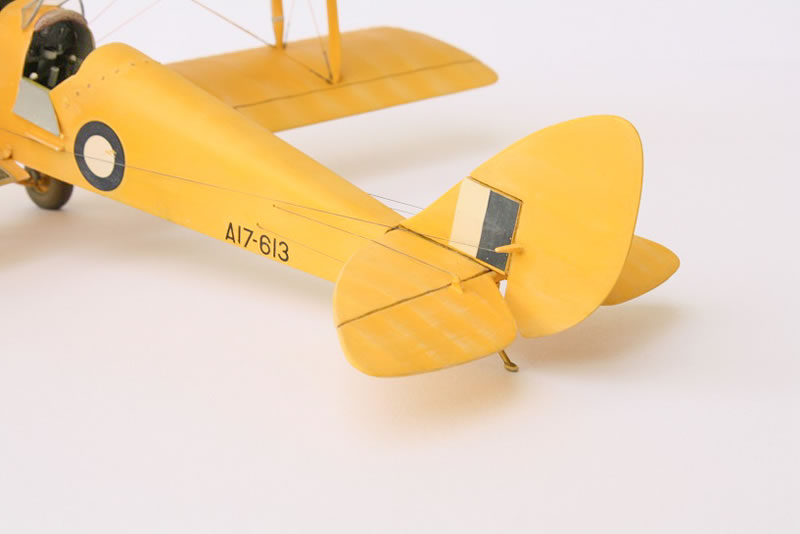
- Studs over rear fuselage to secure the blind flying hood (copper wire CA’d into small holes then snipped short)
- Join between tailplanes and fuselage corrected (it should go straight across, not have a curved fillet blending it into the fuselage)
*Tips: My source for thin sheet aluminium is the membrane inside the lid of a ‘Milo’ tin / can, while round control knobs are built up from white wood working glue.
Rigging
My biggest ‘unknown’ was rigging, however I think it worked out ok, with only 4 of 10 done twice, and this was my first attempt. Rigging is “Prym knitting-in elastic” (from Wingnut Wings), with Gaspatch turnbuckles for the standing rigging, and Ezyline for the control cables.
My starting point was to very securely mount the upper wing centre section so that the rigging didn’t need to be functional. Instead of using thread for the cross bracing between the cabane struts (the ‘N’ struts in front of the forward cockpit) I used four lengths of very fine brass rod. Once the CA glue was dry this arrangement was remarkably strong and resistant to twisting.
Before the remainder of the upper wings were fixed in place holes were drilled into (but not through) both the upper and lower wings to take the rigging. All holes were aligned to the direction of the rigging, though this didn’t need to be exact, as things could be adjusted later.
For the rigging mounts beneath the upper wings I created very small eyelets from fine brass wire, so that I wasn’t limited to a single attempt to glue rigging directly into a hole in the wing.The eyelets were created by looping the wire around a 0.5mm drill bit, then twisting both ends of the wire together and finally trimming them to about 3 or 4mm long. These were glued into the holes already drilled into the upper wing. This made my subsequent trial and error learning about rigging fairly painless as I could simply snip off the failed attempt and do it again, while the turnbuckles into the lower wings could be pulled out and reglued easily.
Next, lengths of Prym elastic were threaded through the upper end of each Gaspatch turnbuckle and glued with CA. This elastic replicates the streamlined rigging used on British aircraft because of its slightly flattened cross section, but this does mean it needs to be rigged without twists. The turnbuckles were then glued into the holes in the upper surface of the lower wings, pointing in the general direction of the rigging, with final alignment done by carefully bending the turnbuckles only once rigging was complete.
Once each turnbuckle was secured to the lower wing, the elastic thread was run through the correct eyelet below the upper wing, pulled taut, checked for twists, then secured with a tiny spot of CA glue. As things got better with practice, I chose to replace a few of my earliest attempts – using eyelets in combination with the turnbuckles made this easy. In contrast, I suspect repeated attempts would have been impossible if I was directly gluing the elastic into holes in the wings.
Control wires to the elevators and rudder were from Ezy-line, also from Wingnut Wings. To get finer representations of wire I actually split the elastic into several threads (but this needs good eyesight or great glasses). This was first threaded into holes in the fuselage sides, again glued with CA, then stretched over the control horns, glued and the excess snipped off.
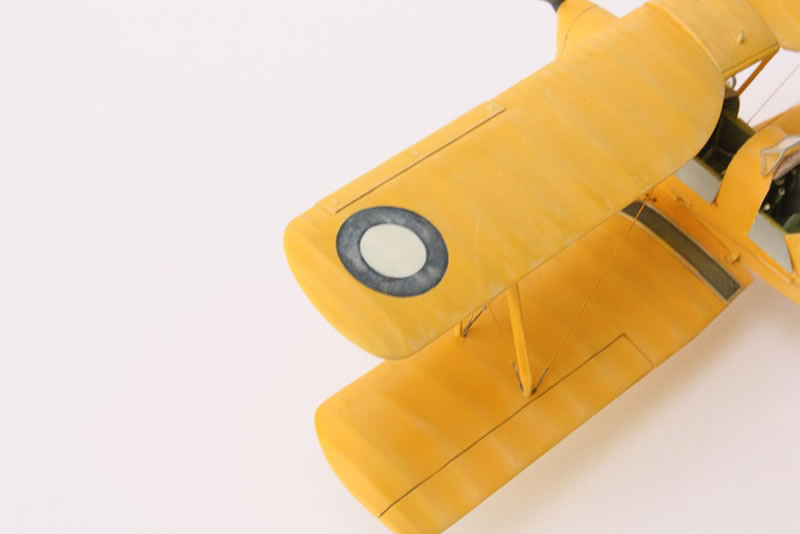
Painting and Markings
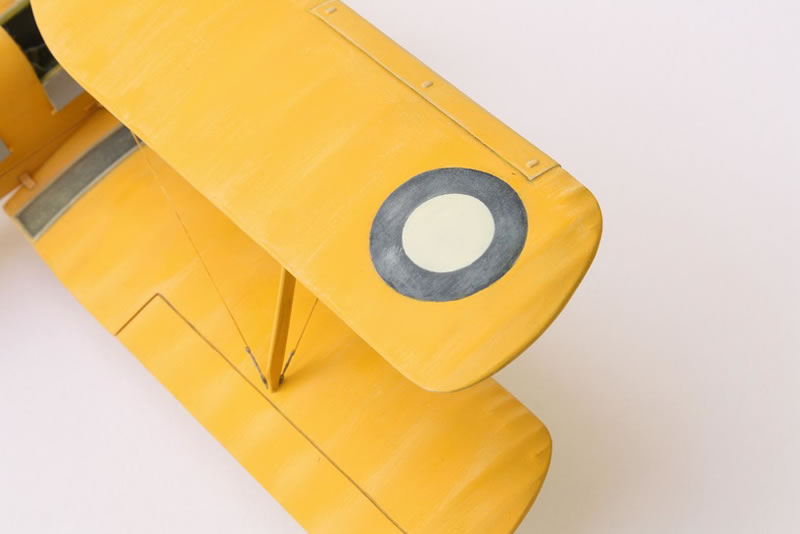
All painting was done with enamels. The major colour is Humbrol gloss yellow, weathered and faded with Revel white (it stays white). The upper wing roundels were painted using home-made masks as this permits more weathering effects than decals alone, and the blue used by the RAAF was known to fade badly. Serials came from generic sheets. Only very limited use was made of darker weathering colours for exhaust, mud spatter, dust and oil residue as the main effect being sought was sun bleaching. Finally it was all tied together with a matt finish.
Conclusion
Overall, I was surprised at how well this kit responded to just a limited amount of refining, as the original mouldings are still surprisingly good. As a learning exercise for rigging it’s great as it has a fairly simple scheme and, being relatively cheap, I wasn’t put off by the thought of making a terminal mistake. Being bright yellow it’s also my only kit not banished forever by my wife to the hobby room - a major achievement for me.
References
Tiger Moth, CT-4, Wackett and Winjeel in Australian Service, Stewart Wilson, Aerospace Publications
© Mike Prince 2014
This article was published on Monday, September 15 2014; Last modified on Monday, September 15 2014