
Building the I.D. Models Canberra
By Jack Gryskiewicz
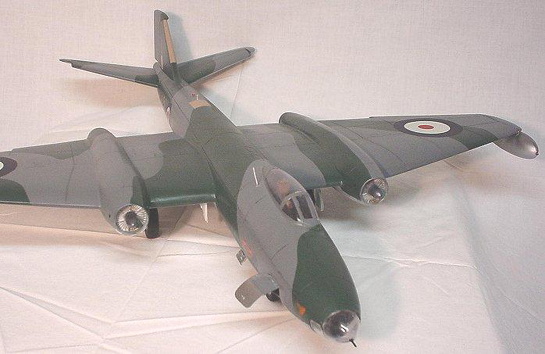
I enjoyed working on this model very much, especially since the real aircraft actually triggered my love for aircraft models and aviation in general because I grew up close to an RAF Germany station (RAF Geilenkirchen, nowadays home to the NATO AWACS force) and my childhood "airborne" memories are filled with Canberras passing by on their final approach.
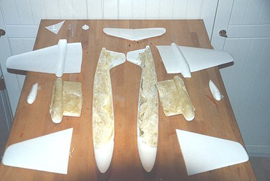
The individual parts cut out, and partly filled with foam as strengthening material. (I must say I used expanding foam, whereas the "pouring" type might be better, to avoid possible distortions in the forms itself...)

The internal detailing of cockpit and navigator space, this being divided in an upper left-hand part of the fuselage for the pilot and a righthand lower section and frontal section for the navigator/bomb aimer. All the parts were scratchbuilt with spare parts, except the "bang-seat" which was an "adjusted" white metal Martin Baker example (I don't recall its origin...) and gauges and stuff from Reheat Models.
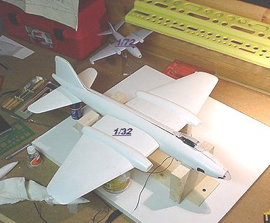
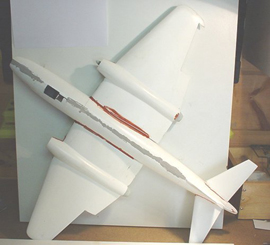
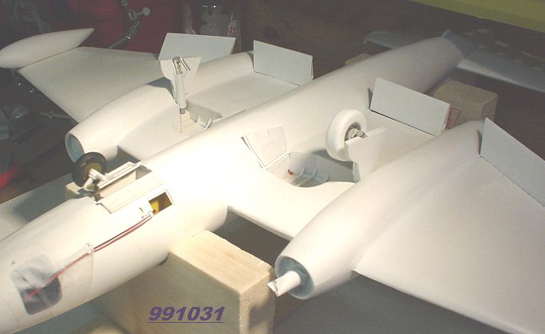
Roughly "assembled" parts, compared to the 1/72 model in the background.
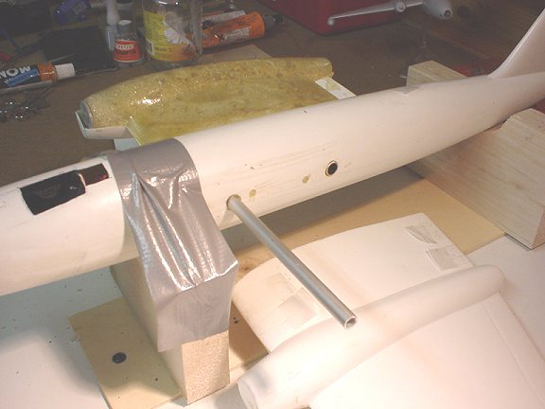
I made use of hollow aluminum rods, being able to slide into each other, and epoxy-glued into drilled (tight fitting) holes in both the fuselage mid section and the wing roots respectively.

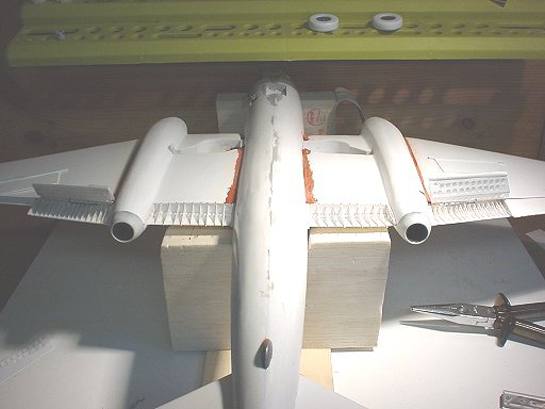
The boxing-in of the wheel bay area went pretty well because of the hardened foam in the wing root. The unnecessary foam can be easily cut away with an x-acto knife and the remaining part of it being used as a solid underground on which to glue the side and bottom walls.
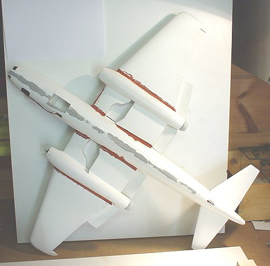
Upper and lower view of the assembled "basic" kit, with here and there some putty, and all wheel bays visible as well as the open parts for ailerons and flaps...Still a lot of filling, scraping and sanding to do ...:O)
As for the turbine insides: I could have tried to scratchbuild at least one "open" engine bay with all the details, but again due to lack of time and of course inspiration (don't underestimate that virtue....:o(....) I just concentrated on the engine intakes itself and found the compressor blade arrangement almost the same as in the Revell 1/32 Hunter engine (this also being an Avon....) and so I used them (I had two spare items...). I used some scrap material (adjusted "bomb"tops) as central fairings.
The inside of the frontal part of the intakes were made of circular plastic parts in which the compressor parts were glued and faired in with the inside of the engine bays...fairly basic I should say!!!
The starter cartridge exhaust outlets on both frontal parts of the engine bays can either be made by actually drilling and sculpting holes of proper sizes, or making slight indentations in circular form and painting them blackish... As on the scribing problem: the layout plans provided by ID MODELS give ample information on how panels are situated on the aircraft, so it's fairly easy to copy them with a pencil on the unpainted (but for the rest prepared..) model and then comes the (to me at least) sometimes difficult task of scribing every line... this is were my inexperience sometimes collided with the dos and don'ts of properly scribing an aircraft model.
The straight lines on flat surfaces were no problem but you can imagine some curved ones.
I have some stencil guiding material, but I tried to scribe the curved lines (either being curved themselves or straight lines on a curved or complex area) by means of some homemade moulds, e.g. an aluminum cola or beer can cut in slices and using these strips around curved objects, especially the fuselage and engine bays.
It worked rather well, but sometimes it was too ragged, and sometimes I slipped and broke out of line, so I had to fill it with superglue (which didn't help much actually...), so the scribing job, even after cleaning up, is not to my satisfaction.
I scribed with a normal scribing pen.
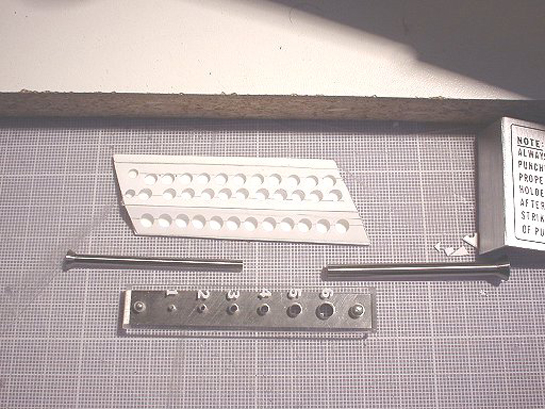
Making a flap with its typical inside by using a Waldron Punch and Die set. Inside of flap area with the ribs visible, and the two outer flaps in place.
Dry fitting of under wing assemblies.
The line coming out of the opening next to the nose wheel bay, is a battery line hooked up to tiny light bulbs in the cockpit area and nav-space to be able to show some details afterwards...I didn't use it yet, I still have to scratchbuild an RAF power unit in 1/32, which will hold the batteries.
One of the downfalls in the kit, viz. the cockpit canopy, which on the windshield part is pretty good, but the aft part is too shallow, it doesn't have the typical curve towards the end. I imagine this can be corrected by producing a new vacformed cockpit, with a better mould, but I'm not into those fancy things yet...Another imperfection I found, would be the engine bays, which are a bit too bulky to my likings (they almost look like Meteor engine bays...), but that is a matter of taste.
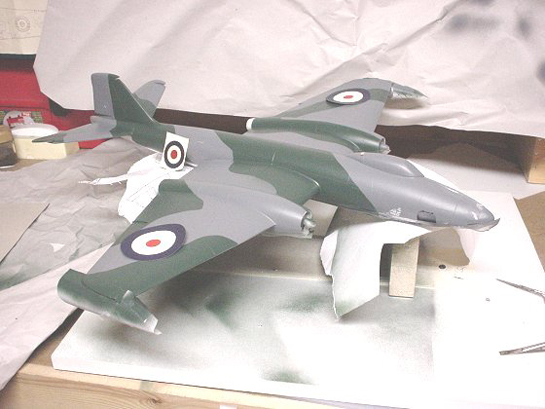
Finally the paint job is done in the normal way by spraying a base coat after total preparation of the model and thereafter spraying the camouflage pattern (indicated with Frisk film) with Tamiya Color AS-10 (RAF ocean grey) and AS-1 (dark green). After a gloss finish (to prepare for the decalling) I had to make a decision on which Canberra it would represent.
I had been planning on the type being displayed at the museum, of which I had the pictures taken, but again (sadly...) due to lack of time and lack of sufficient decals, i used parts of the 1/72 decal sheet supplied with the Revell B8 Canberra, which nicely fitted on certain positions on the 1/32 version (for instance the 1/72 wing roundels could be used as 1/32 fuselage roundels, and so was the same for fuselage identification and nose wheel door decals, etc.etc.)
The upper wing 1/32 roundels were found in a shop for radio-controlled aircraft models. The rest of the stencilling will still have to come from either dry transfers or hand painting. All the wheel bays, front and wing, were painted white with aluminum and silver detailing for landing gear struts and such.
As on the "research" side of my Canberra project I used the following:
- The publication on E.E.Canberra by Delve, Green and Clemons.
- No.7 Aeroguide on the Canberra.
- Canberra descriptions in "Flug-Revue" by Redermann
- My own photo "session" on the B(I)8 Canberra displayed in the Hermeskeil museum in Germany, especially the cockpit and navigator space. (Jack offered to share this photos with anyone interested!!!!)
- Various website information pages and pictures on the Canberra.
Well there you have it!
My profession is also in aviation, being an air traffic controller for over 24 years, at first in the Dutch Air Force and later on as civilian at a regional airport in the south of the Netherlands.
I hope this resumé isn't too loaded with information, anyhow I wish you lots of success with the "32nd" website, you're doing a great job for the big scale community.
Until next time.
© Jack Gryskiewicz
This article was published on Wednesday, July 20 2011; Last modified on Saturday, May 14 2016