
Revell 1/32 P-40E, AVG China, “TIGER 104”
By Suresh Nathan

Introduction
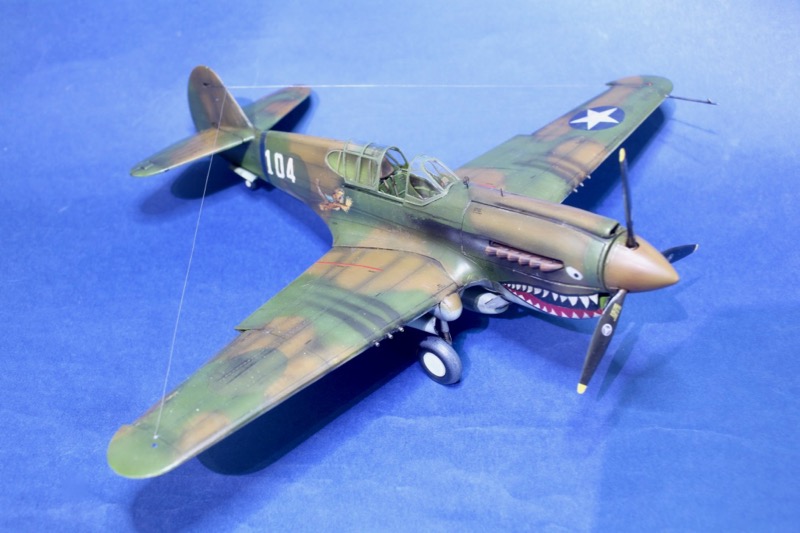
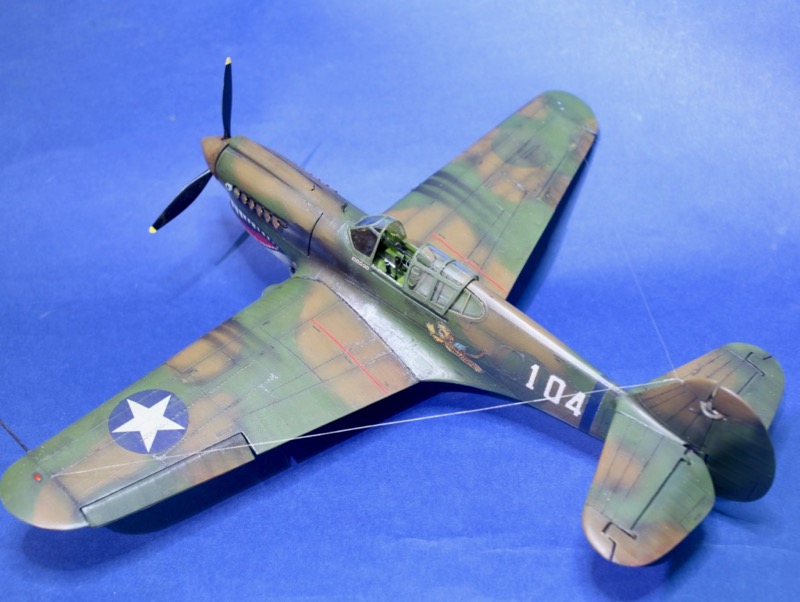
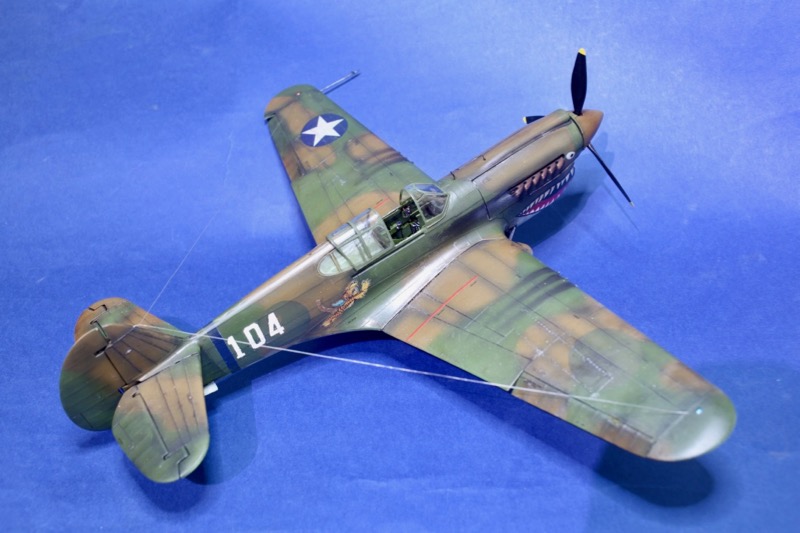
This is my rendition of an AVG Tiger. It stands out for a number of reasons – it was flown by Major Edward Rector as part of 76th Squadron, 25th Fighter Group circa 1942 (?). It still carries USAAF Roundels and the wing and fuselage roundels were painted over. Having just completed the too long in making Get to da CHOPPAH diorama, I was looking for a nice speed build. This was the old Revell kit that I had raided the Allison Engine for my P-39 Airacobra and it was going to be nice to get back to it and finish the job.
Models
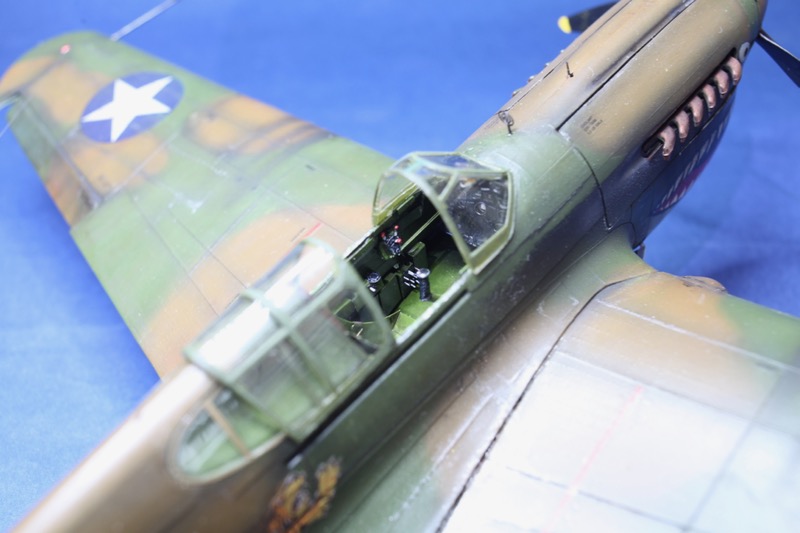
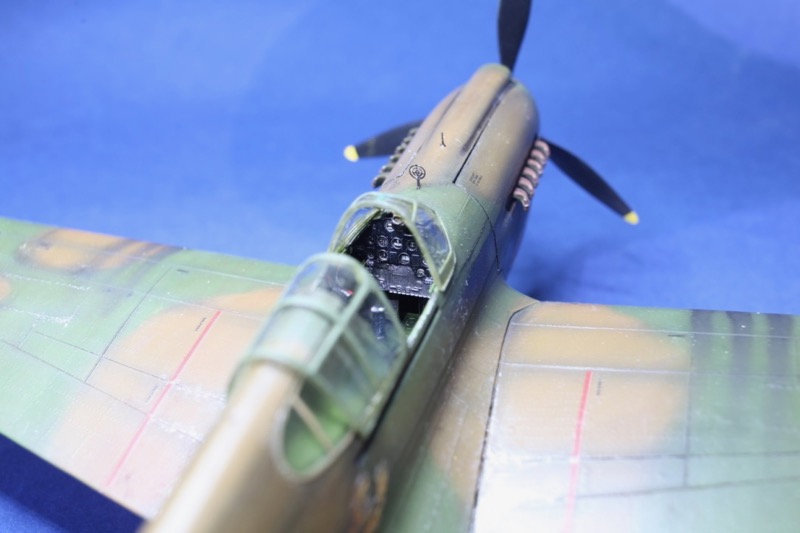
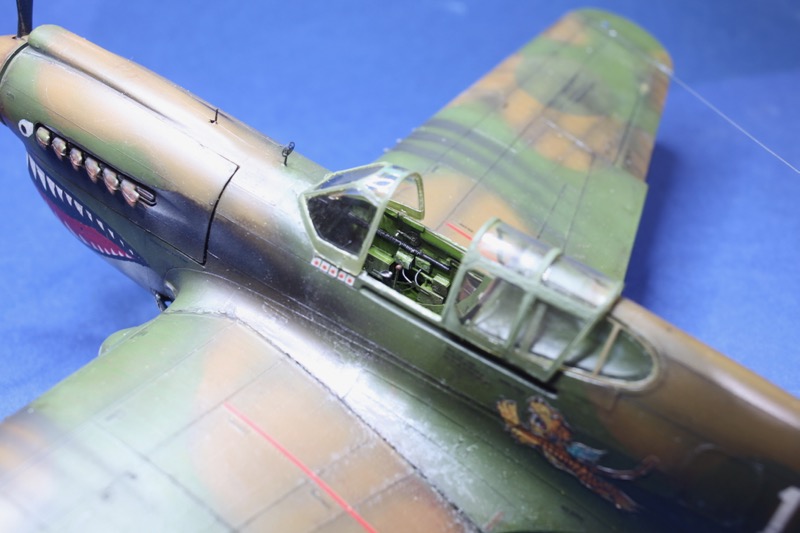
The Revell P-40E is a classic. Fine panel lines with overlapping panels, movable control surfaces, fine (and accurate) raised rivets. This required some minimal re-scribing for accuracy (Figure 1) but I really wanted to retain the moulded in details. I used the Eduard detail set as well as some scratch-building. The Eduard parts are typically flimsy but with accurate folding and painting with additional scratchbuilding turns out very nice (Figure 2). The shape is accurate but it is still worth doing a trial fit (Figure 3). The cockpit will need to be refitted as the fuselage halves come together as they do not fit perfectly. Do note that the kit has a strange tendency to crack on its left underside and this should be planned for (I didn’t). Again the Eduard parts are not enough for the wheel wells and they need some scratchbuilding (Figure 6). Machine guns were redone with brass and copper scratch-building (Figure 7).


Painting
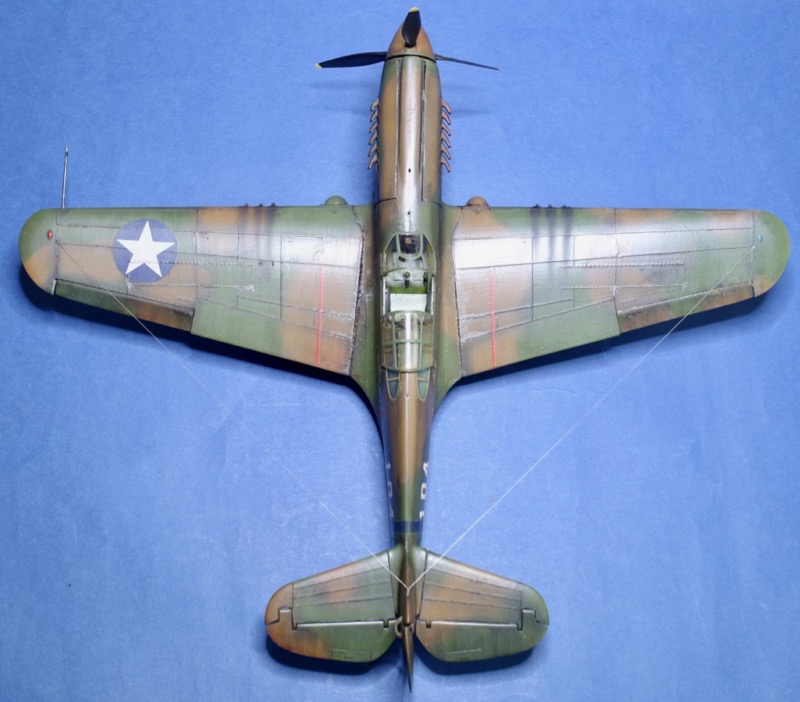
The whole point of the Flying Tiger is the sharkmouth and I did a mockup on the computer and printed my own but this turned out to be the wrong type of sharkmouth for the Flying Tigers (there are nearly 10 variants of sharkmouths for the P-40) and so I hand painted the rest (Figure 8). All unit markings were either home printed or handpainted. The stencils were from the Revell kit and for their age, Revell constantly amazes me with the quality and comprehensiveness of their decals. I painted in enamels, varnished with Future-Tamiya Flat acrylic (Figure 9a), weathered with turpenoids and drybrushed sparingly (9b). I used oil washes for weathering (9c) and drop filters (9d) for color variation.


Conclusion
This was a speed build that took about 2 most enjoyable weeks to complete. I am going to complete my Hawk collection with the Trumpeter P-40B next!
References
- P-40 In Action from Squadron/Signal Publications
- Aircraft Anatomy from World War II from Chartwell Books Inc
- Cockpit from Airlife
- Allied Aircraft Piston Engines of World War II from SAE International
- Flying Colors from Tiger
- P-40 from the Planes of Fames Museum, Chino, California
- The P-40 in the Smithsonian (Udvar Hazy Wing hanging from the roof)
- The P-40 at NZ MOTAT
© Suresh Nathan 2017
This article was published on Tuesday, May 30 2017; Last modified on Tuesday, May 30 2017