
Kitty Hawk 1/32 F-86K “Sabre Dog”
By Steve Evans
The F-86 Sabre has to be one of the most beautiful aircraft ever built but I’ve never been a huge fan of the “Dog” with its slightly comical nose. However, after seeing one of these Kitty Hawk models made up at a show (John “Tigger” Wilkes was the culprit) I decided I just had to make one.

The box top art is a little simple but the overall design is enticing…and it’s a big box!
I don’t have a great history with Kitty Hawk; the first one of theirs I built was the 1/48 MiG-25 Foxbat. It was dreadful. Truly dreadful. But, they say time heals all wounds and so I handed over my hard earned cash and got myself an F-86K “Sabre Dog”.
On opening the rather large box I was surprised by two things; first of all just how big this version of the Sabre is, that fuselage has got really porky and second was what a good looking collection of plastic you get for your money.
There are 7 sprues of light grey plastic with some really neat detail work in the mouldings. The exterior is covered in subdued rivets, with crisp clean recessed panels as well as very sharp looking raised detail where appropriate.
Also in the box is a single transparent sprue with nicely clear canopy parts, you get a tiny etched fret with 7 bits to play with and then a huge decal sheet, for the 5 versions of offer and a separate smaller sheet for the unit badges and instrument dials. The instruction booklet is excellently drawn, with 22 build stages and 4 pages of full-colour art at the back and a big, double-page Luftwaffe spread at the front.
The options available to you are: German, Italian, French, Norwegian and one for the USAF. All of which look beautiful in natural metal, apart from the Luftwaffe one in its subdued camouflage. (A word of warning here though; if you plan to do the USAF version out of this box, then please don’t as the markings (FU961) are for a “D” and not a “K”.)
Construction starts with the interior, as usual and the good-looking mouldings fit very well indeed. The seat, made of 11 plastic bits and 4 etched parts for the belts, looks good and the sidewall detail is so crisp and well formed that it would be a shame to use the decals to cover them. The same goes for the main instrument panel, so a bit of careful painting is called for here.
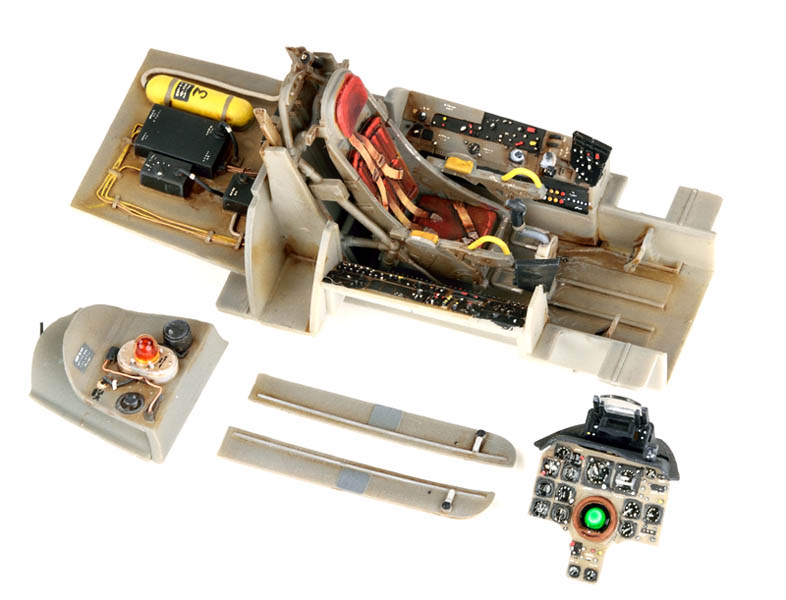
The interior is pretty good, with nice raised detail. I have added the pipes and wires on the rear equipment bays.
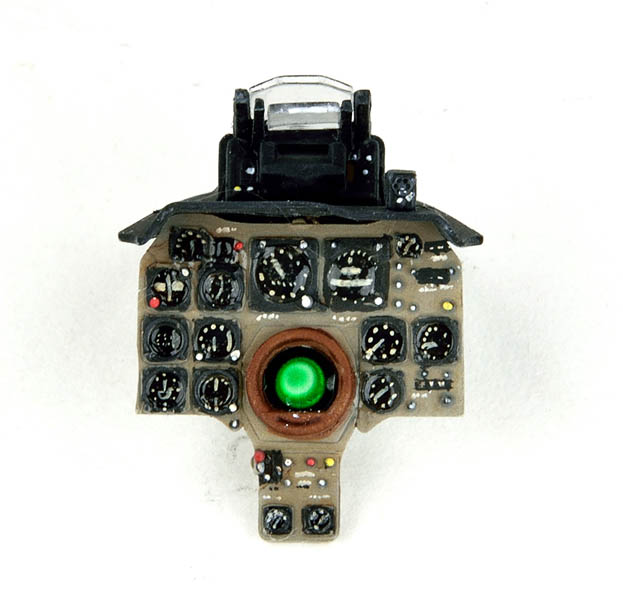
The main instrument panel comes with a decal but the raised detail is just too good not to paint.
The interior detail for this kit doesn’t stop at the cockpit though; you also get a full engine and both gun compartments to build. It has to be said that the engine is a bit of a waste really, because it’s an integral part of the kit and there is no way to display it once built into the model, so what’s the point of those 70 odd parts?
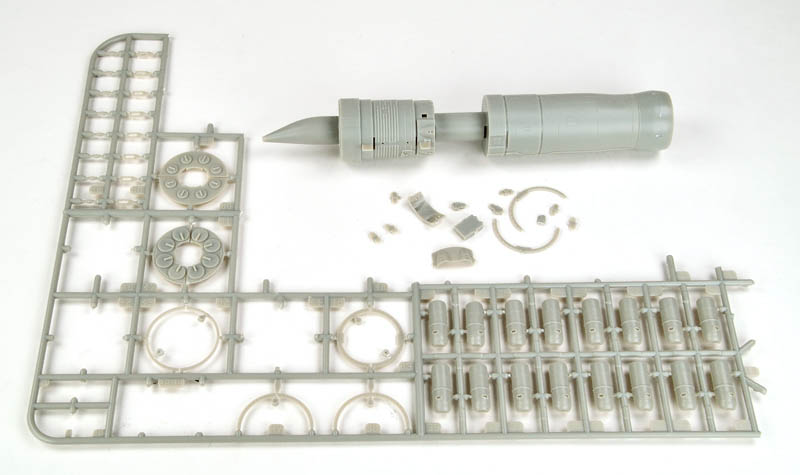
The engine comes a complete unit and is a total waste of time and effort as none of it can be seen on the finished item and you can’t leave it out because it is an integral part of the build.
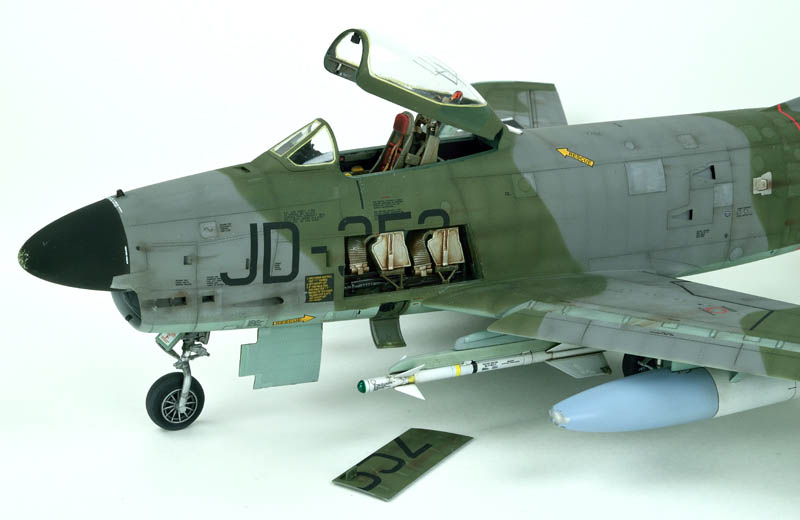
The gun compartments have some nice detail work and once again, a very good fit of all the parts. If you intend to open them for display, the plastic parts make a good start but to be honest, in this scale, you need to add a lot more wiring and bits and pieces to make it more lifelike.
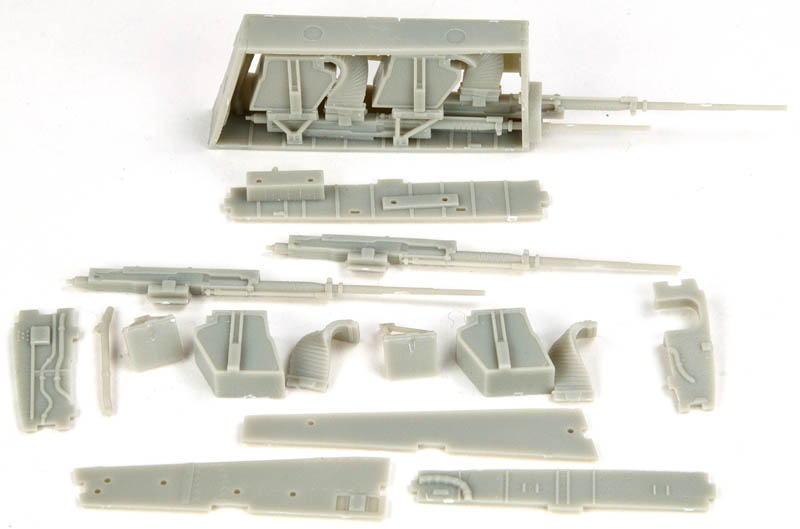
There is a gun bay on each side and both can be left open, once again, good basic detail but you’ll need to add a fair bit if you want them on show.
If you read the various Internet and forum pages about Kitty Hawk kits you will find a lot of negative comments about the fit of the major sub-assemblies. Getting the fuselage halves together and then the rear tail section fitted is a bit of a nightmare apparently. Well, I’m here to tell you that that is total nonsense! To get a great fitting kit, all you have to do is completely ignore the instructions. Just don’t build it in the sequence that Kitty Hawk suggests and everything will be fine.
Forget the build process in the instructions and make two fuselage halves. Here I used the bulkhead, cut in two as a reinforcing piece for the joint.
Basically the problems come from trying to fit the whole of the interior into the fuselage as a single assembly; it won’t work that way. Build it so that you put the front and rear sections of each side of the fuselage together first, then add the engine, cockpit and intake trunking as separate bits. This allows you to adjust the fit of each assembly as you go and the two fuselage halves now fit perfectly.
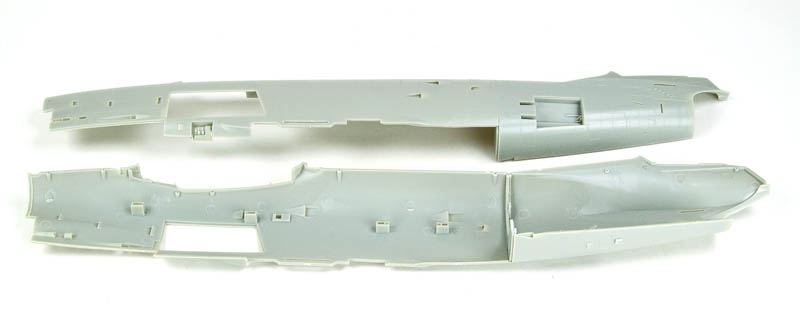
Doing it this way will solve an awful lot of problems later in the build.
In fact, the fit of the parts is really good no matter how you look at it, so much so that in the end I didn’t need to use any filler at all. The only difficult joint was on the underside of one of the wings where it meets the fuselage. I have a nagging suspicion that even this is down to my not getting some of the parts properly aligned.
It’s not all good in the garden though, there are some nasty little weeds sprouting up amongst the roses. First of all are the pointless engine and radar parts, what a waste of time and effort. The Sidewinders in the kit are rubbish, with poor detail and not a hint of a Rolleron to be seen. The decal mishap of having the wrong mark of Sabre doesn’t do it any favours and the crazily huge ejection pins and some very intrusive sprue gates are also annoying, as is the constant errors in identifying the parts in the instructions, with lots of confusion over sprue numbers and left and right hand items.
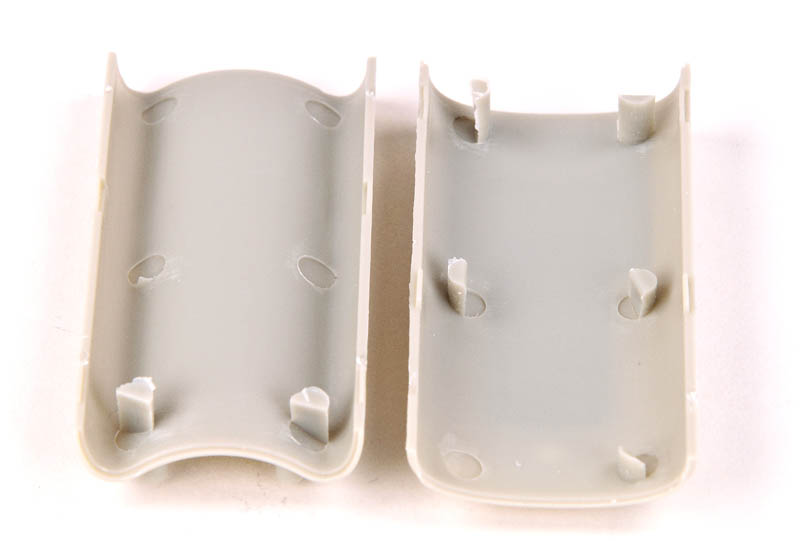
These are some ferocious injection gates/ejector pin stubs. Possibly the biggest I’ve seen on any kit and they are everywhere; in this case it’s the inside of the air intake trunking.
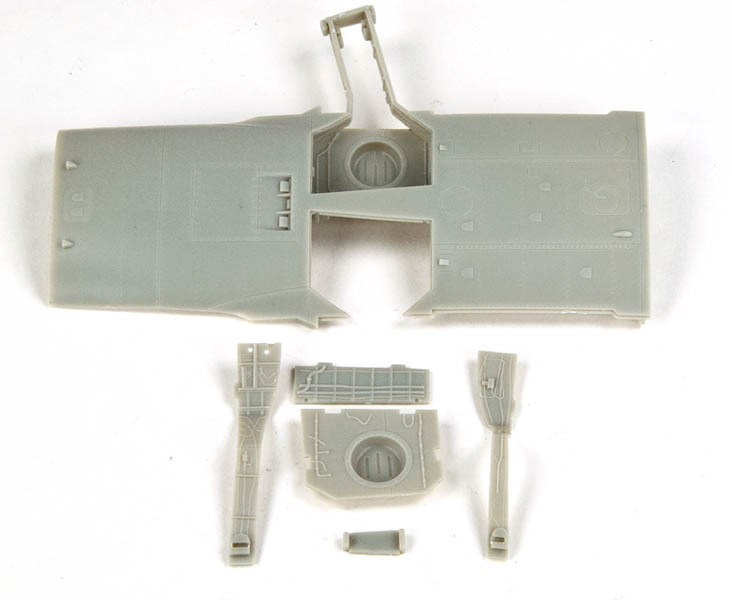
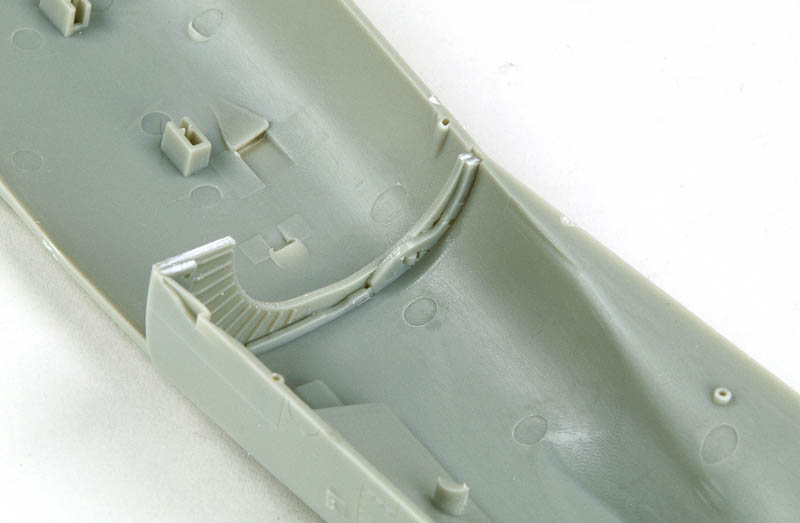
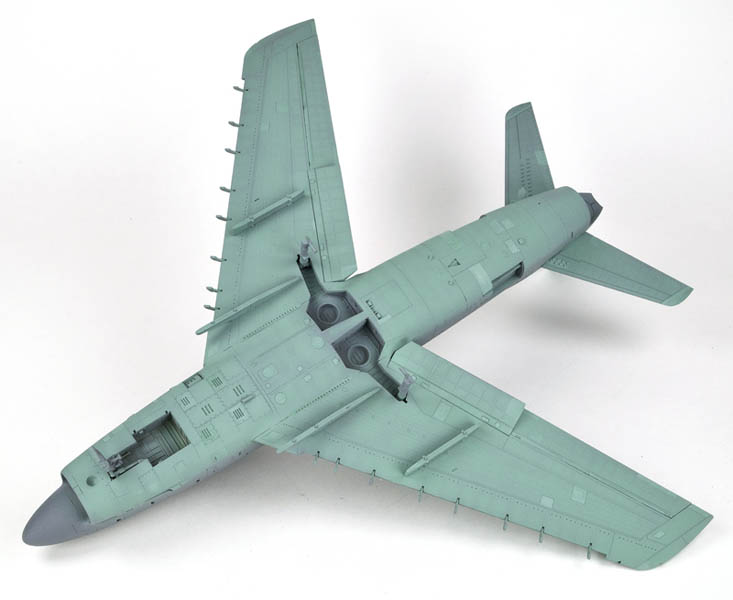
It’s an odd way of making the main wheel bay but take your time with positioning the parts correctly and it works.

The main gear legs are split at their base and the pin is loose, so you need to do a couple of dry runs to make sure everything lines up properly before the glue sets.

Once again, ignore the build process instructions and add all the internal pieces as separate sub-assemblies; it works beautifully.
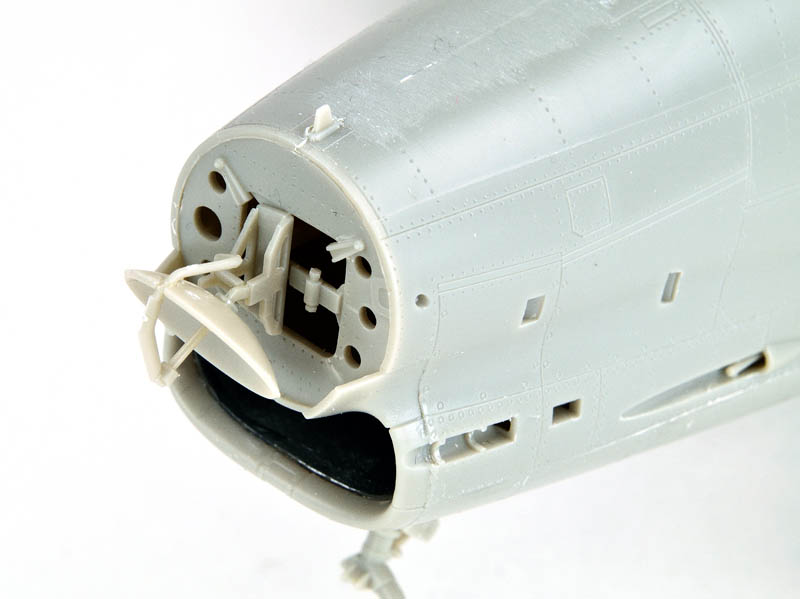
Another pointless bit in my view because not only do you have to add a mass of wires and fittings to this to get anywhere near reality but it also allows unobstructed views into the blank fuselage interior.
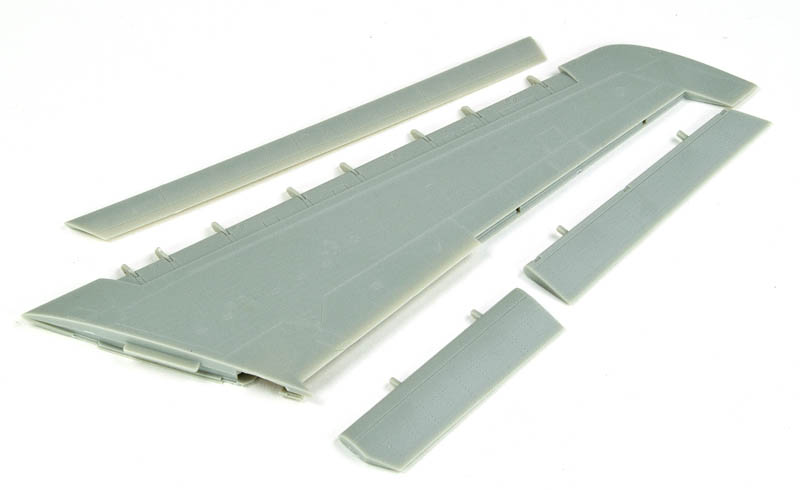
The wing comes complete with fully separate control surfaces to pose as you see fit.

This is the only really bad joint on the kit, where the starboard wing sits against the fuselage. It’s not the same on the other side at all, so it will probably be down to my positioning of the other components.
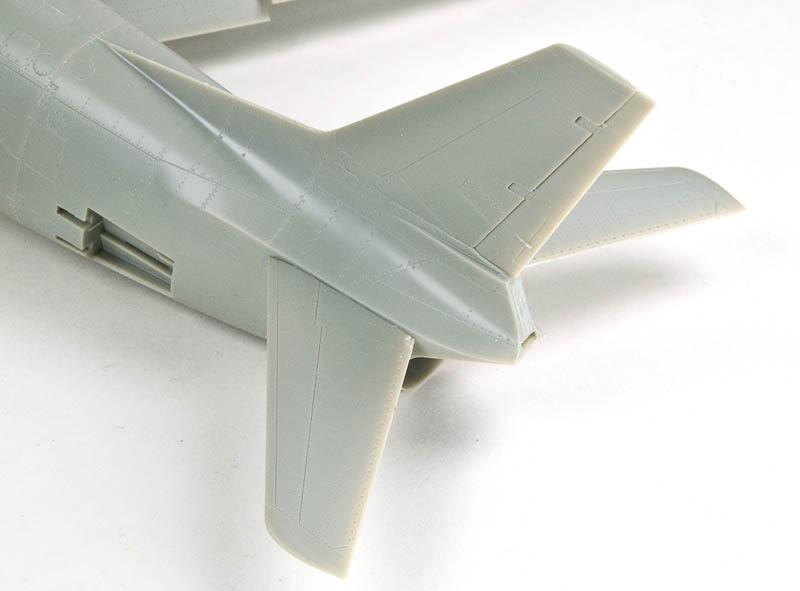
The vertical tail is separate, as is the rudder and everything fits really well.
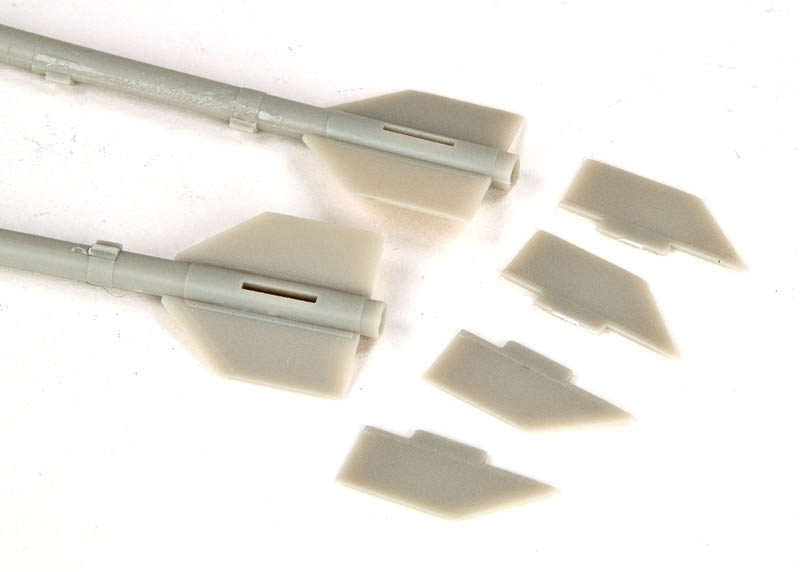
Not so good are the rather poor AIM-9B Sidewinders. Very poor details, especially as there are no rollerons, a characteristic of this missile. I suppose they could be dummy rounds?

The glass work is nice and clear and fits really well, no complaints here.
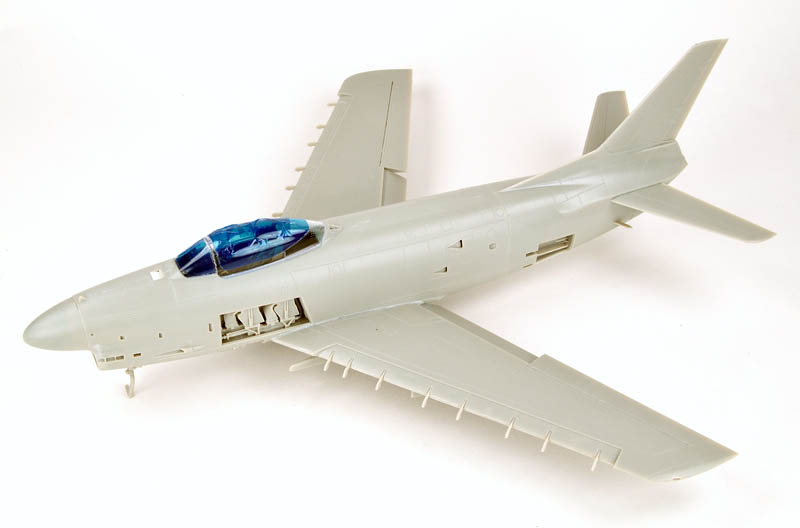
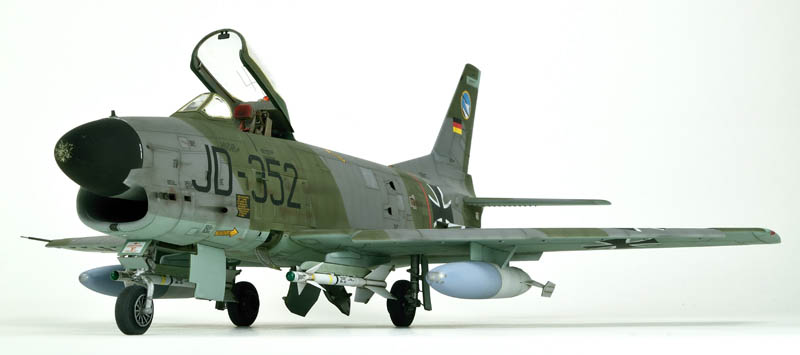
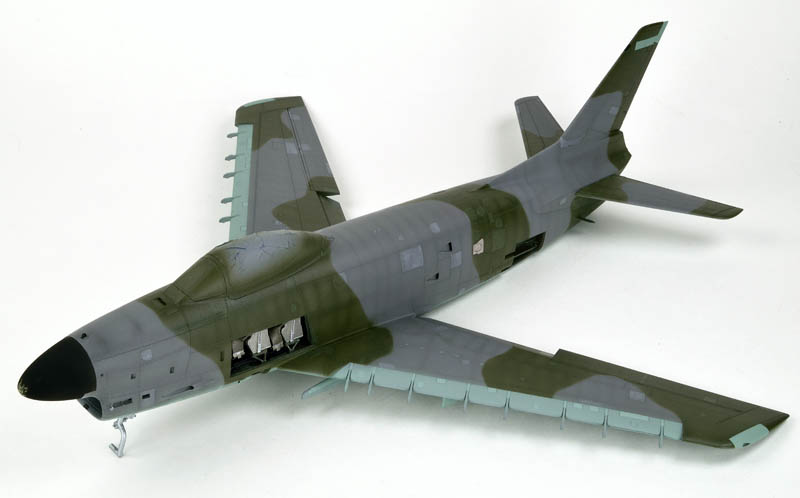
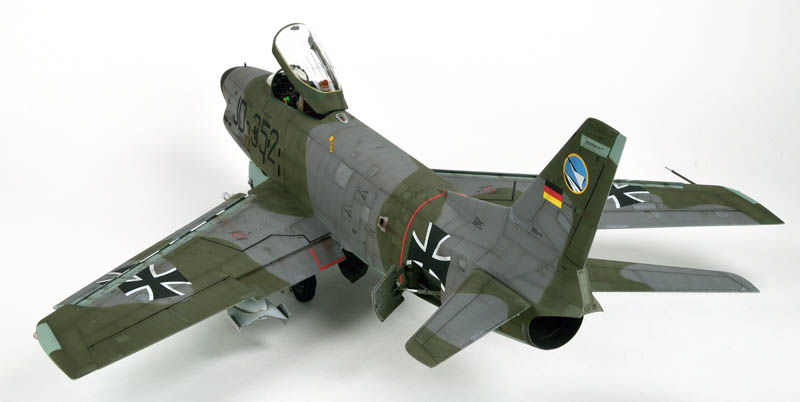
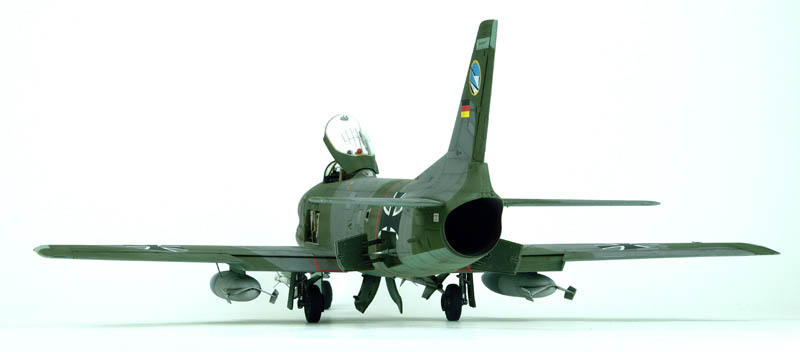
Once it’s all together you get a sense of how big this aircraft was. Kitty Hawk have definitely got the shape right.
All of those little things pale into insignificance beside the real error in this kit and that’s the positioning of the open air brakes. Everyone knows that the air brakes on the Sabre droop down when they are open don’t they? Apparently Kitty Hawk doesn’t. This is a careless bit of design work and it’s so surprising considering the high quality of the rest of the kit. What makes it even worse is the fact that I didn’t know this until after the paint, weathering and decals had been applied and I was doing the final assembly.
After much cursing and a bit of butchery I got the air brakes to droop at about the right angle and with the paint touched up they don’t look too bad but this is a point to address before you get too far down the build route.
Colouring In
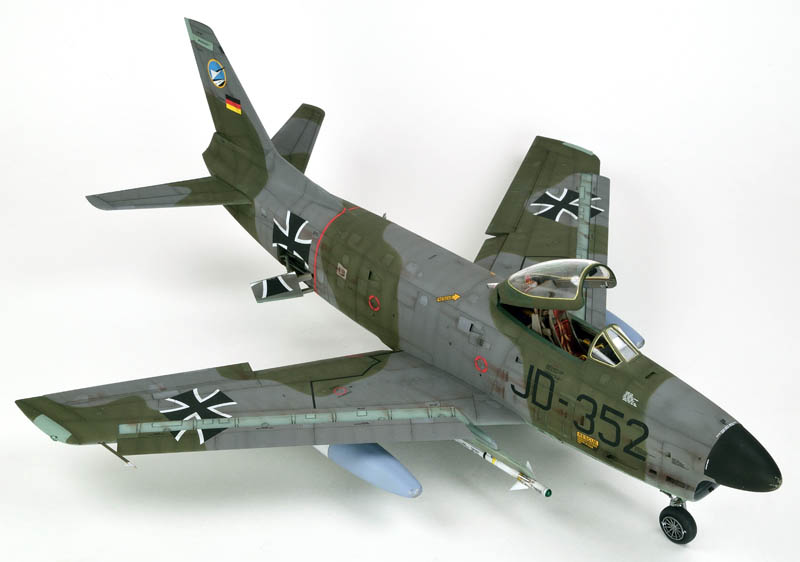
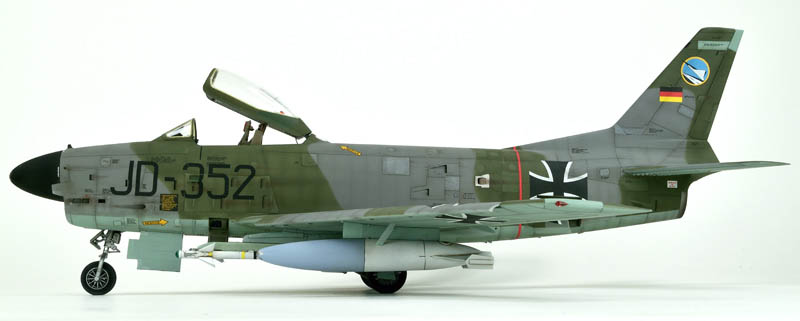
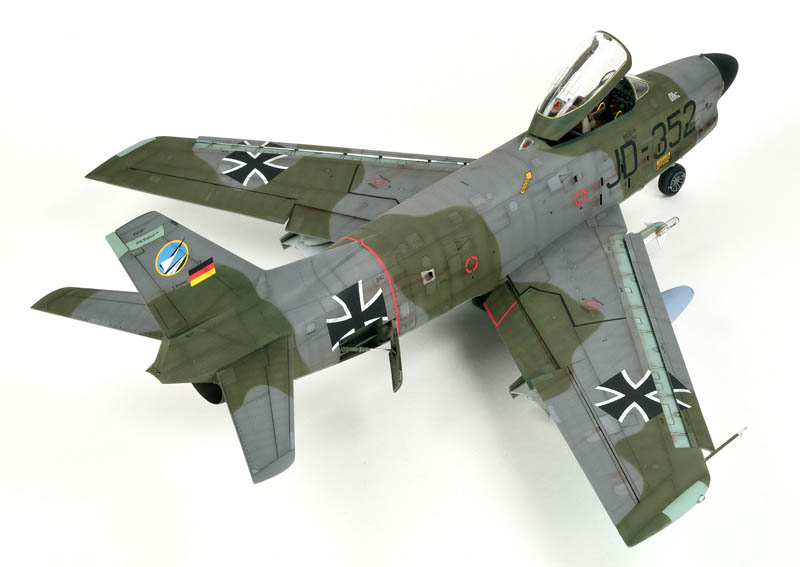
I’m not going to labour the description of painting this one too much; I’ve already rattled on far too long. Suffice it to say that whichever option you chose from the box, you’ll end up with a great looking Sabre. Obviously the rather fetching USAF version is out but it had been my intention from the beginning to do the camouflaged Luftwaffe version.
The Kitty Hawk instructions are a bit vague about the actual colours, not telling us the real European RAL specifications but a mis-match of old RLM, RAF and FS numbers instead. It’s especially confusing on the underside as it gives two entirely different greys to use.
I used Gunze Aqueous Hobby Colours, sprayed through my trusty Iwata HP-B airbrush. Thinned with the Gunze thinners they work beautifully and are easy to mix different shades of the main colours, to highlight various panels and details. My only divergence from these paints is for the white and black areas, done with Tamiya acrylics and the blue of the drop tanks, done with White Ensign Colourcoat enamel Azure Blue.
Underside grey, this is a contentious issue with at least two greys quoted in the painting guide but it should probably be RAAL 7001 Silbergrau. With a few lightened panels just to liven it up a bit.

Upper surface RAAL 7012 Bassaultgrau, the shading is done purely by varying the thickness of the paint, letting the primer show through for the lighter spots.
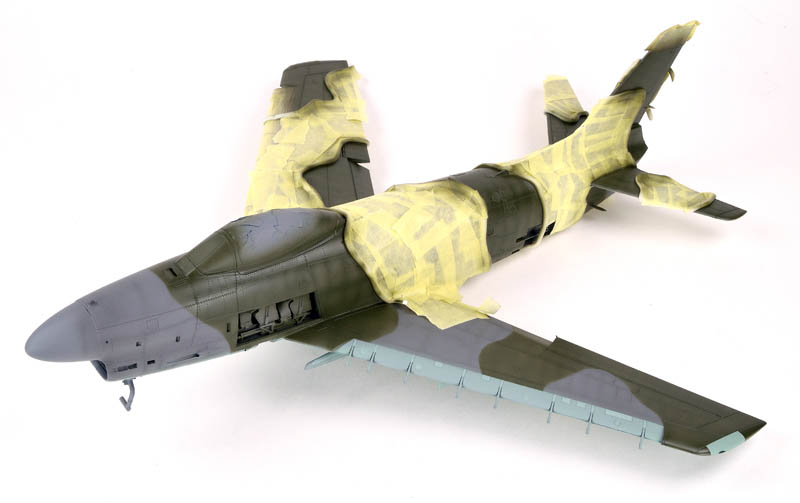
Picture putty worms for a good demarcation line and the Green is RAAL6014 Gelbolive, once again shaded by different paint thicknesses.
Full colour with detail painting done, ready for weathering and decaling. There is a lot to do yet.
There are a couple of errors on the painting guide to point out as well. Firstly the metal jet-pipe under the tail shouldn’t be anywhere near as large an area as it’s shown and the tip of the fin on the right should be grey and not green. Apart from that it’s fine.
Weathering is mostly pastel dust, followed by Tamiya Smoke along he panels and then a little bit of an oil wash, here and there in the dirty bits. This is sealed in with some Tamiya X-22 Clear gloss and it’s time for the decals.
The decal sheet is randomly laid for the stencils, which is a pain trying to cut them out from in between all the other markings and there is a slight mis-register on the black. These problems are easily overcome of course, so the performance of the decals is the most important thing. Luckily they work quite well.
The release from the backing paper quickly in warm water and are tough enough to cope with being handled but they do want to grab onto the glossy surface, making them difficult to move sometimes. They react reasonably well to Microscale Softening solution but they need a bit of work to get them to fully conform to the recessed detail.
This means there is a little bit of silvering to cope with once they are dry. The areas under the carrier film, especially around the big nose numbers, ended up with quite a bit of silvering to sort out, which is not so good. After a day or so of drying and sorting out the blemishes, they were brushed over with some grey pastel dust to get them to fade into the paint a little and then another coat of Tamiya X-22 clear gloss was applied to seal it all in.
This means we’re onto the final bits and there is a lot to do at this point. Check out the photograph of the pile of stuff left to do and that gives you a sense of just how involved it all is. Thankfully the fit of most of the parts is straightforward enough, it just gets a bit fiddly, especially trying not to ruin the paintwork with glue and messy fingerprints.
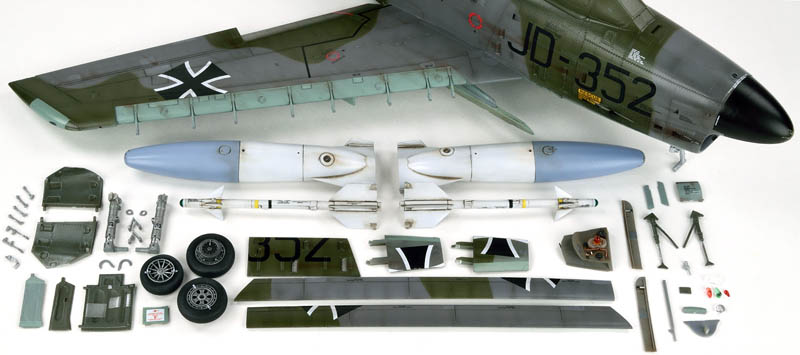
The end process of this one took nearly two full days of modelling to get everything in position and touched up before the final surface weathering and sealing.
Once that lot are fitted, the final surface finish of Xtracolor XDFF Flat varnish is applied and then the canopy is demasked, assembled with it’s own detail parts and put into position, making that one complete “Sabre Dog”.
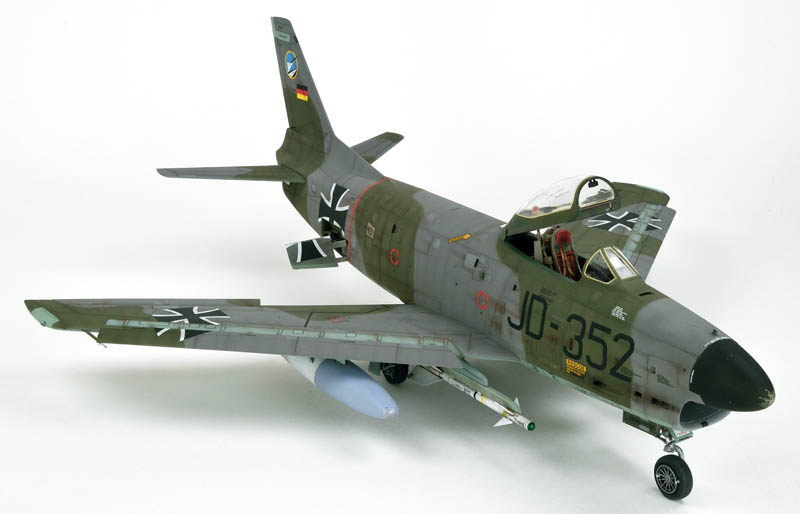


Verdict
This is a whole lot of kit for your cash. The finished result is big and impressive, with so much fine detail to look at. It’s easy to build, as long as you ignore the build sequence according to Kitty Hawk and the fit and finish of the parts is as good as anything else out there. It’s not perfect, with a couple of little stupid errors to take the shine off it but there is nothing to really detract form what a good kit this is. Well done Kitty Hawk, this isn’t a bad effort at all.
© Steve Evans 2018
This article was published on Friday, May 25 2018; Last modified on Friday, May 25 2018