
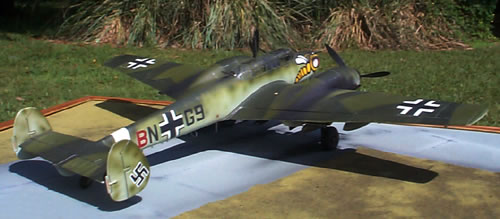
Bf 110G-2 of II/ZG 1 "Wespen" Second Formation, Italy
By Charles Wissig
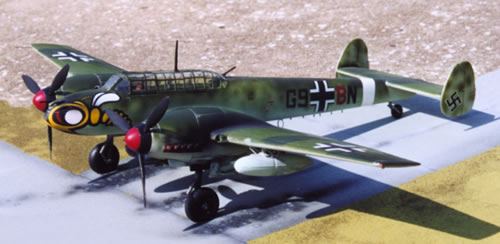
This started out as the Bf 110G night fighter offered by Revell in 1/32. I preferred the green paint scheme and chose to make this a day fighter. There are a number of differences between the day and night fighter so this kit required some modifications. The first was to reshape the nose. Early 110s had 4 machine guns in a sleeker looking nose with a square intake on top.
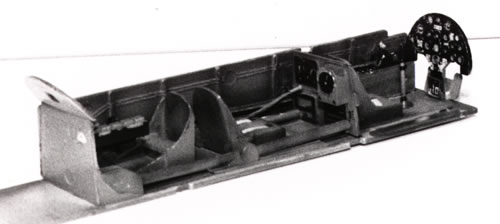
Night fighters had a crew of two whereas the day fighter had a crew of three. By today's standards, the cockpit is no work of art but 12 years ago I was quite proud of it. All the bezels where created by cutting thin slices of brass tubes and sanding them down. I drew the instruments with a technical pen on vellum and reduced them with a stat camera.. I laminated the stat to the dash and glued the bezels on top. I then put a drop of clear glue in each bezel to create the lens. Knobs and switches where made with a drop of crazy glue on the end of a thin wire. I drilled holes in the dash and side consoles and inserted the various knobs in place.
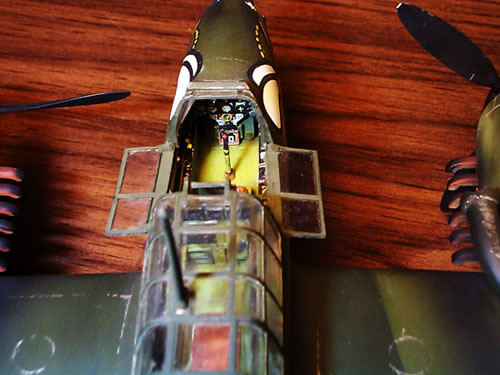
The front canopy has three panels and opens properly but the rear canopy is hinged in the wrong place. The model has the canopy hinged sideways at the base of the canopy but the real aircraft hinges toward the top on the opposite side that opens.
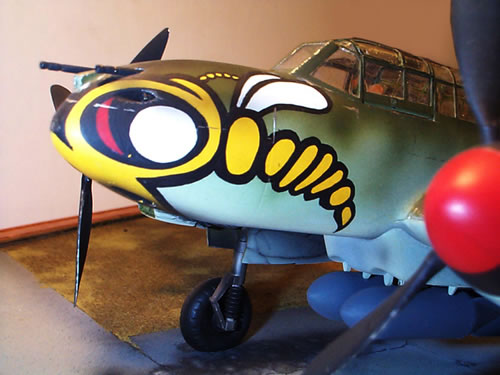
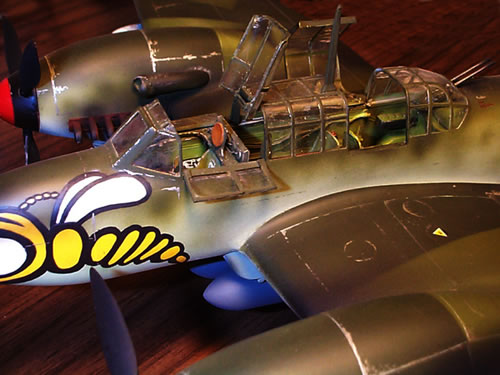
ZG I Wespen (Wasp) features very colorful nose art and is one of the reasons I chose these markings. The nose art, swastika and crosses where all painted on by hand. I did use decals for some of the smaller markings but prefer to use paint when I can.
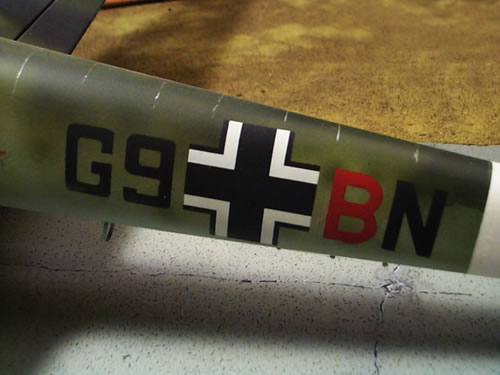
I used frisket paper for the markings and airbrushed the colors with model master enamels thinned with Lacquer thinner. The Lacquer thinner goes on thin while biting into the plastic and paint for a good finish. It also speeds up drying time and keeps the airbrush from clogging.
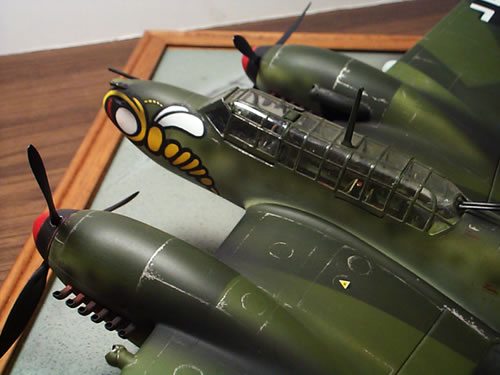
I had to do a lot of reshaping with the engine nacelles. The Zap a Gap came in handy here. I drilled out the exhaust ports and used silver enamel for the metal chips.

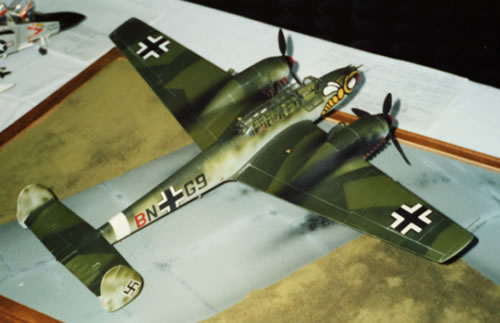
I used a number of books for markings and color. I chose the Dunkelgrun 81, Hellgrun 82 color combination as outlined in the Monograms paint guide. The splinter pattern came from Monograms Close Up 18.
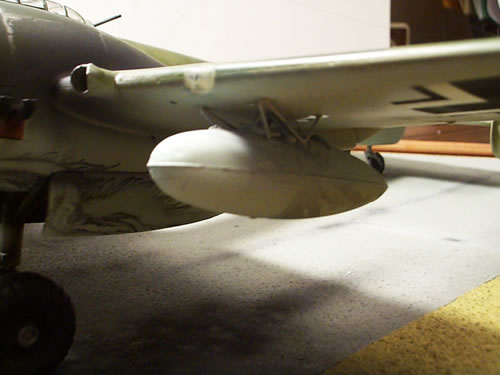
The drop tank mounting frame was made from a paper clip. The drop tanks themselves are all wrong as they are from an ME-262 B night fighter kit. I some times think of stealing the 66 Imp. gal drop tanks from my Matchbox 109's but I never have time. The dust filter clamshell doors where made by heating a piece of plastic over a flame and then stretching the softened plastic onto the round end of a paintbrush. This created a perfect half sphere that I cut off as a half circle. I then split it in half and attached them to the intakes.
Using a Badger XL Airbrush I painted the under surface first and covered most of the sides and Vertical Stabilizers. Using pieces of poster board, I cut out the shape of the camouflage pattern and held them slightly above the plastic when I sprayed on the greens. I hand painted the nose art and hit it lightly with a Scotchbrite pad to get a smooth finish. Using Denatured Alcohol, I made a wash with just a touch of black paint. I applied the wash with a brush and wiped it with a cotton cloth. The Alcohol is milder than thinner but at one point I did start removing some of the paint job. Pouring some of this solution in my airbrush I sprayed the underside of the engines to produce the look of prop blasted oil stains.
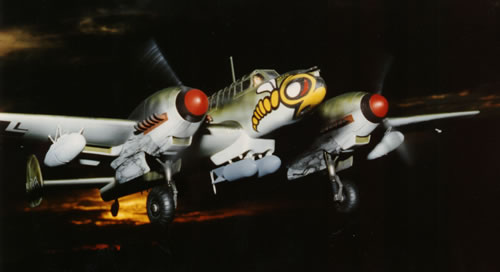
I motorized this model and put in working landing and navigation lights. The on/off switch is behind the navigators seat.
I entered this model in the PELICAN CLUB model contest and it took 1st place in the 1/32 scale category. After all the work creating the Wespen markings, I felt like jumping off a building when my son found a Revell 1/32 Bf 110 in Wespen markings at one of the Traders table. I didn't even know this kit existed. Oh well.
I wanted to make a nice display for the model and was prepared to build one from scratch when I noticed a cork board in my sons room. Well!,, my wife wasn't going to have any of that and reminded me how upset my daughter was because her Barbie car wouldn't go anymore. (Motorized remember) So...I went to the nearest Office Depot and picked up a cork board for $8.00. Using Badger airbrush inks, I painted the oil stained concrete directly to the cork board. Next I spread a thin layer of Elmers glue on the rest of the board and sprinkled model rail road grass onto the wet glue. Once the glue dried I blew off the excess grass and that was it.
I spent a good solid month on this kit in one of those rare opportunities when I had the luxury to do so.
Right now I have an
Me 410 in the works and have been at it for 6 years.
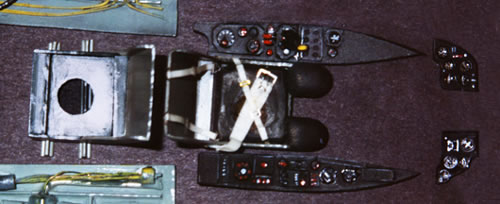
Me 410 Cockpit Pieces:
I don't have the time to build like I used to and would rather pursue my paintings when I get some free time. That is why I have decided to sell my model collection. A collection spanning 20 years. If you have any questions you can e-mail me at model57@cfl.rr.com.
© Charles Wissig 2002
This article was published on Wednesday, July 20 2011; Last modified on Saturday, May 14 2016