
Craftworks 1/32 Macchi C.200 Saetta
By Chris Busbridge
A few years ago I obtained a 1/32 Maccchi C.200 resin kit from M. Marsan (who painted the illustration on the lid). I thought it would be nice to display it along side the C.205 kit, which I had bought from Craftworks direct. Since then it has undergone a number of re-builds, in tandem with the Veltro model, because after its initial construction, it just didn't look right. Maybe the high level of detail that Craftworks lavished on this kit lead me to believe this kit could not be anything but accurate. Anyway, I compared the model with photos from the AeroDetail and Ali d'Italia reference books and after additional comparison against scaled up 1/48th plans, my suspicions were confirmed.
The first error I came across, during initial construction, was the cockpit fairing. Craftworks modelled it on the Folgore/Veltro fairing. It is plain to see that the Saetta had an entirely different shape.
Fortunately, it was easy to correct with Milliput and careful re-profiling.
The next big mistake was to the tail fin's shape and position (it was even worse than the same error made on the C.205 kit!). It was far too big, thick and too far forward. It was removed, re-profiled and fixed back in the correct position, using Milliput to fair it back into the cleaned-up fuselage. The rudder was also reshaped to fit. The horizontal stabiliser profile, shape and position also needed a fair amount of correction. Just like on the sister C.202/5 kit, all control surfaces had very poor fabric effect that needed smoothing out with filler and wet & dry. New hinge covers (not supplied in the kit) were made. There were quite a few of these to do.
Having got this far, I decided to checkout other areas and found the following:
There were problems with the wing fillet shape, both fore and aft. They needed a combination of plasticard and Milliput to correct them.
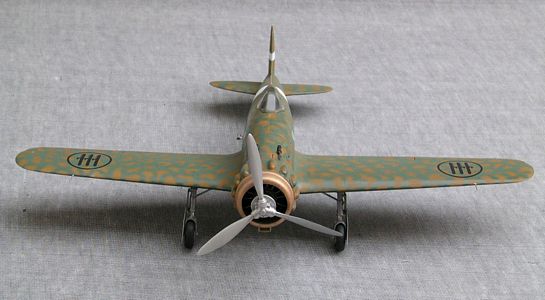
The leading edge of the wing needed to be re-profiled, as it did not feature the slightly sharpened edge (an attempt to increase airspeed). This involved a lot of scraping, sanding etc. The wing tips need the same reshaping treatment that was given to the Veltro kit (from elliptical to semi-circular).
Just like on the C.205 kit, the fuselage had weird panel line detail all along its length which I smoothed out with wet & dry. The fuselage cross section was also suspect and the side profile showed up shape problems to the lower fuselage from the back of the wheel well to the rear of the cockpit. This needed reshaping with more Milliput.
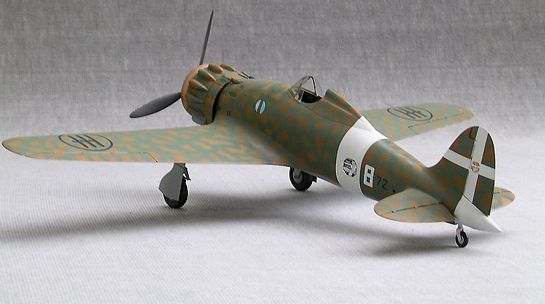
The brass oil cooler on the front of the cowling had an aperature that was much too small. I enlarged it after checking the size against the plans.

The wheel wheels had been modelled in the same manner as the C.202/5 kit. To my knowledge they did not feature covers. This would have left the Saetta wheel wells completely open, allowing the entire internal structure to be seen. I set about the daunting task of detailing this, which included the laborious effort of hollowing out the wheel wells. I admit it did prove to be an impossible task, but at least it was better than what was there before. Although it is a minor quibble, the brass etch undercarriage doors are the same as those supplied the 202/205 kit. They are not quite correct for the Saetta, so I made new ones out of plasticard.
For the cockpit canopy, I resorted to using the front section of the early Serie 1 style vacform canopy that was supplied in the kit, but only after a botched attempt trying to correct the crudely moulded resin pieces to anything like their proper shape. I also used plasticard to recreate the cut-down style side panels. This did alter its appearance somewhat from the more familiar semi-enclosed type and
would mean that the choice of markings would be restricted as a result.
Once I was happy with the overall look of the corrected model, it was time to choose such a camouflage. The Ali d'Italia book had some photos of possible subjects and the excellent 1/48 Skymodels decal sheet also helped.
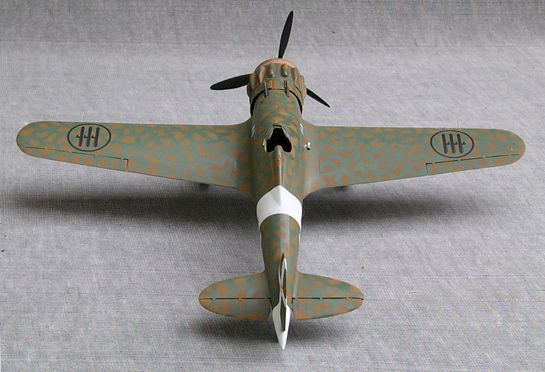
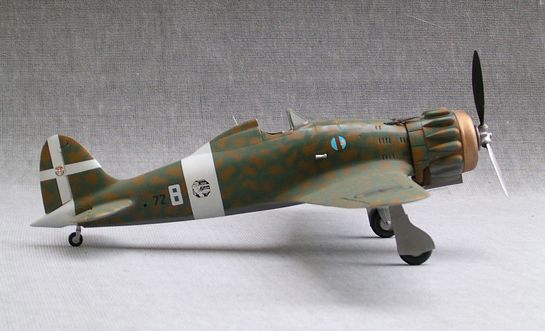
I decided on an aircraft of the 79 Squadriglia, 6° Gruppo, which had the unusual feature of a white tail cone (the Insignia was also quite small in the fuselage band). The more eagle eyed of you will notice
that the markings show a 72 Squadriglia coding. Apparently, they were all transferred to 79 Sq. Xtracolor enamels were used for the camouflage. All decals are a combination of spares and a few numbers from Craftworks comprehensive (but not entirely correct) decal sheet.
So much work was required to correct this model that, just like on the Veltro, the purchase price was the only reason I perservered. It is hoped that more recent Craftworks kits will show better research,
something this kit was found wanting.
© Chris Busbridge 2003
This article was published on Wednesday, July 20 2011; Last modified on Saturday, May 14 2016