
The Lockheed XP-49 In 32nd Scale
By Frank Mitchell

The Airplane
XP-49 is not the most well-known of airplanes, but it has always appealed to me as looking like a larger and sleeker P-38, which is, of course, exactly what Lockheed had in mind. It was primarily built to take advantage of the new twenty-four cylinder Pratt & Whitney X-1800 engine, but also included in the changes were a pressurized cockpit and increased armament of two 20 mm cannon and four 50-caliber machine guns. However, two months into the contract, a decision was made to substitute the Continental XI-1430-1 twelve cylinder liquid-cooled inverted-V engines. The one-and-only XP-49 (40-3055) first flew on 11 November 1942. Unfortunately, the preliminary flight data showed that performance of the XP-49 was not significantly better than the production P-38, and, in addition, the future for the XI-1430 engine had become questionable. Therefore, quantity production was cancelled and the aircraft was flown to Wright Field and eventually scrapped.
The Model
I had thought about building a model of this airplane for a number of years, but always assumed that I did not have enough information about the cockpit, since it was obviously quite different from the ’38. Recently, however, I was going through some ancient magazine articles for another project entirely, and discovered, buried deep in my files, a nicely detailed picture of the cockpit. Never throw anything away---
At first, I thought that this would be a fairly easy conversion involving only the cockpit and the lengthened engines. Not so (as usual). The booms were both longer overall and deeper than those in the P-38 and therefore, the wings sat relatively lower in the booms than the original. In addition, the radiators, vertical fins, and spinners were also a different or modified shape. The result, of course was that a little conversion became a big one (also as usual for me).
Construction
If you have read any of my other diatribes, this one follows the routine, with the pictures telling most of the story . I should note that, although I have a Trumpeter kit, I used two old Revell P-38 kits (one a parts kit) as the basis since so much would have to be thrown away. Meant more work in some places, but overall, it seemed to be the more logical thing to do.
I used plans in I found in Bert Kinsey's book on the P-38, but made changes based on my staring at all of the (very few) available pictures.
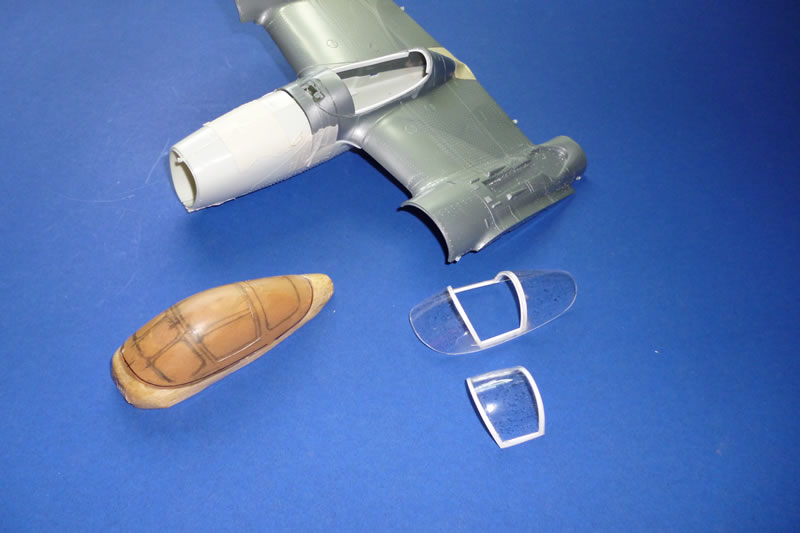
The first project was a new cockpit canopy mold, since the XP-49's pressurized canopy was thicker, very different in shape, and had a unique hatch. The mold was carved from balsa, then covered in a couple of coats of clear epoxy, and vacuum-formed from .030 acrylic sheet. The hatch was opened up, and styrene strip was added to the inside edge so that it would have a more realistic appearance. The new canopy was then fitted to the kit fuselage, and a modified Cutting Edge resin interior was added later.
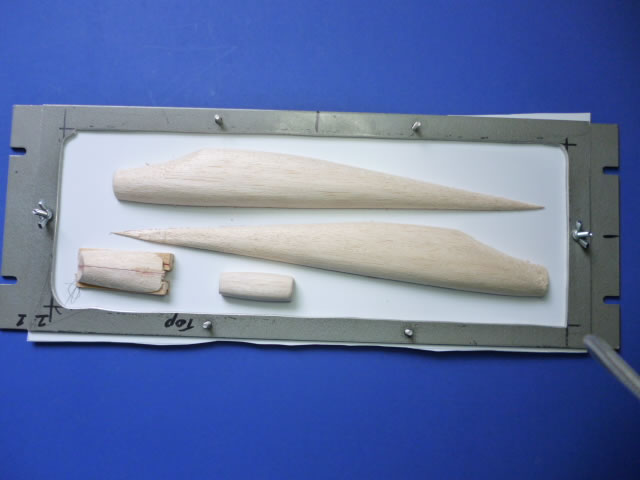
A mold for the new booms was carved, again using balsa, along with other molds for the intakes and boom radiators. All were then vacuum-formed on my ancient home built boxes and my wife’s oven (this always goes over very big). The booms were then assembled and the intakes and radiators added.
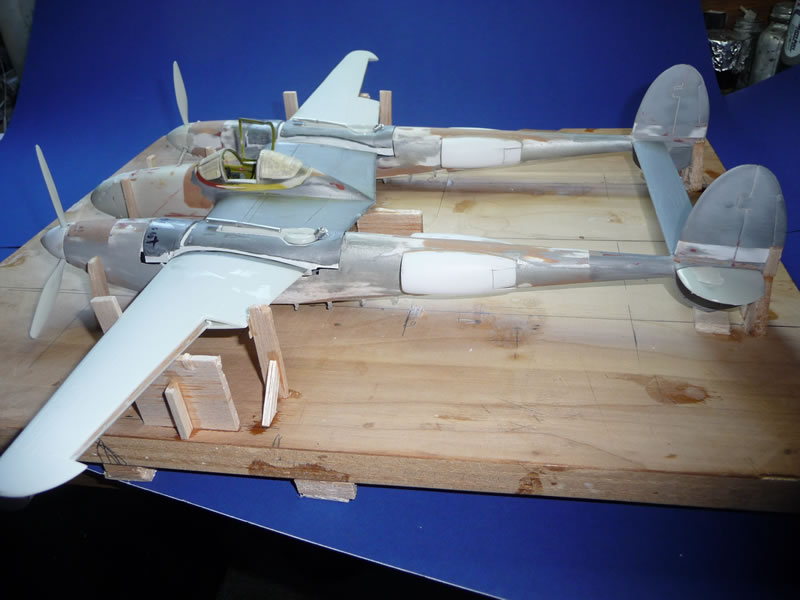
An assembly jig is a must for this airplane, so the Revell parts for the fuselage, wing, and horizontal tail were taped together and used for the basic placement of the booms. Many scrap pieces of balsa were glued to the ¾” base of the jig to make sure that everything would not only line up (more or less), but would also allow the parts to be removed (many times) yet be placed back in reasonably precise position.
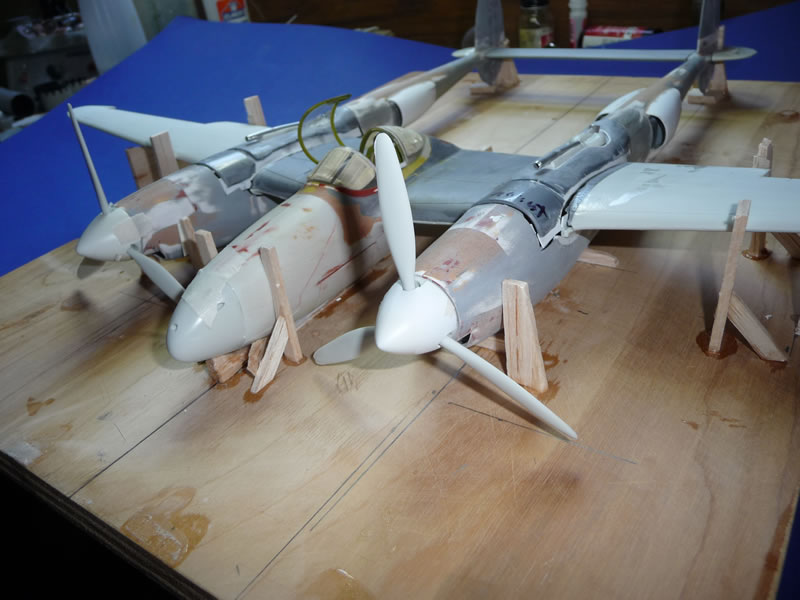
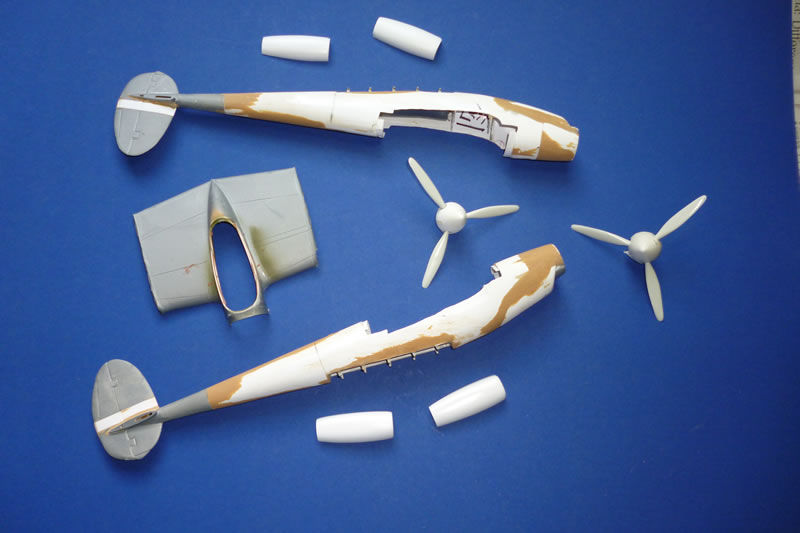
Cut-outs for the wings were made in the new booms and the Revell over-wing areas were fitted. The superchargers were somewhat modified on the ’49, so some changes were made, but, since few photos exist, some of that area is a bit of guesswork. Spinners were formed from turned wooden molds, and extensions were added to the fins and rudders. The P-38 Props were used because I couldn’t find any information about them being different (but they probably were). New molds were also made for the various intakes, radiators, etc.
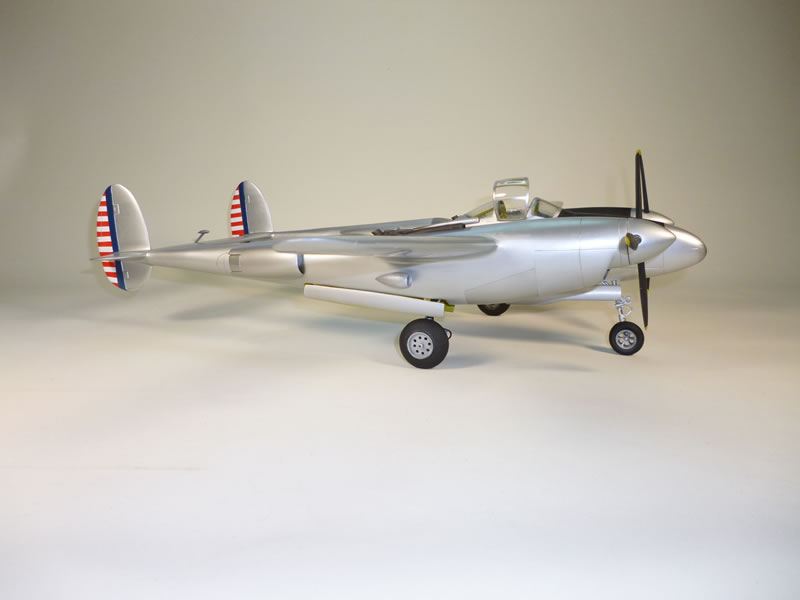
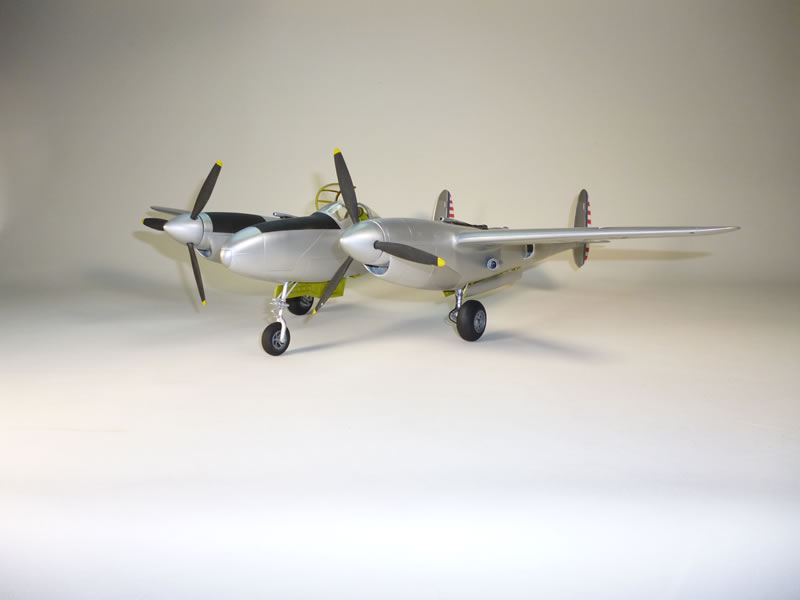
The finish was bright natural metal which was done with Tamiya spray-can silver. Panels were applied using various Alclad panels. As a test of your powers of observation, you might notice that there is one stripe too many on the rudders; the reason is that when the extensions were added, it was easier to simply add an additional stripe that to repaint the whole rudders.

Those guys were Born Modelers---
© Frank Mitchell 2011
This article was published on Tuesday, December 20 2011; Last modified on Saturday, May 14 2016