
Grey Matter Figures | 1/32 DB 603 Engine
Reviewed by Derek Bradshaw
Grey Matter Figures/Loic Bridot 1/32 DB 603 Engine – Advanced review
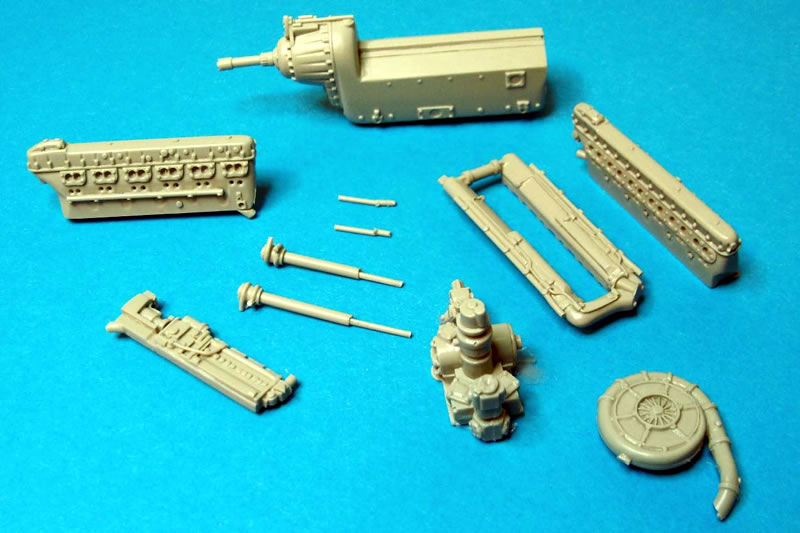
The engine comprises eleven finely cast parts
Grey Matter Figures (GMF), in conjunction with Loic Bridot, have just released a complete after market resin kit of the famous Daimler-Benz DB 603 aero engine in 1/32 scale.
Background and Development
The DB 603 was developed by Daimler-Benz as an enlarged version of their earlier DB 600 and 601 series of aero engines during in 1939, providing a substantial increase in available power (1,750 PS/HP for take off or 1,510 PS/HP continuous maximum cruise).
As originally envisaged, this engine (the third prototype) was destined to power the Daimler-Benz T80 land speed record car (called the Schwarz Vogel - Black Bird) for the 1940 Rekord Woche, or Record Week. The engine was to be fulled by pure alcohol, which with MW water injection, would enable the tuned engine to produce 3,000PS/HP - enough it was believed to propel the T80 to 750 Km/h! Unfortunately, the outbreak of World War II in September 1939 stopped all of that, and the engine was removed from the car and was put into a fighter aircraft.
The series production of the engine begun in 1942 with the DB 603A and continued throughout the war period until 1945. There were numerous versions of the DB 603 in both single and twin (coupled) configurations, as well as high altitude and turbo and supercharged versions, many having MW50 Water-Methanol injection systems to boost engine power for short periods of time . Some of the more notable aircraft powered by the DB 603 are the Dornier 217, 335, Focke-Wulf Ta 152, Heinkel He 177B, 219 and Messerschmitt Me 410 amongst other production, experimental and development prototype aircraft.
The Kit - Assembly
The kit itself comes in 11 medium grey finely cast resin parts. First visual impression is that this is a very finely detailed kit that is up to GMF's well renowned high quality casting standards - there were no casting flaws of any significance evident in any of the cast parts.
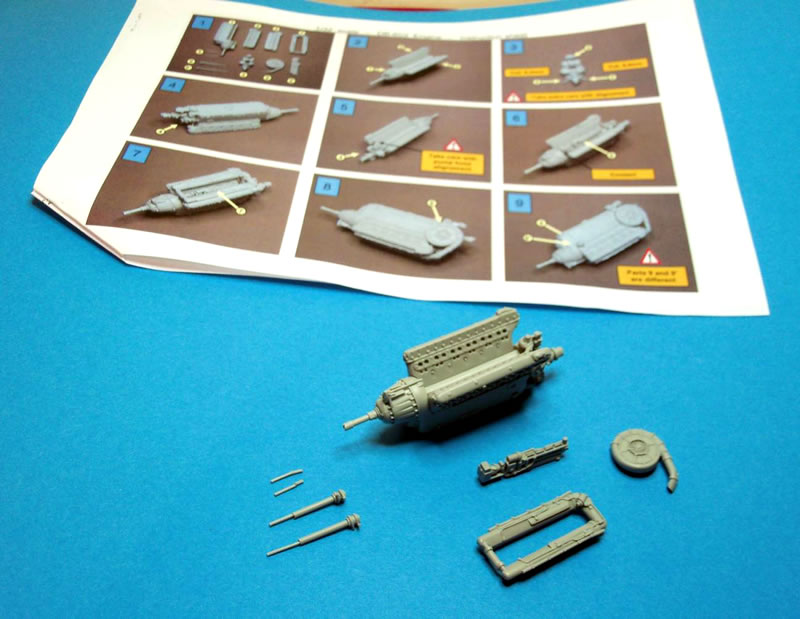
The layout and engineering of the parts is logical and simple. The attention to detail is evident and I expect that once it is painted, all of that wealth of detail will be readily appreciated. In assembly of this kit, I used a set of Loic's draft instruction diagrams, which is a single A4 landscape sheet of paper (double sided) with a serried of assembly photographs and two general views of the assembled engine, with very few words - very simple and effective, just like the kit itself.
Preparation of the kit parts is minimal thanks to the lack of casting blocks, all parts being sanded and prepared in about half an hour – the use of small rod feed points for the moulded parts is a GMF specialty. There are almost no moulding seams, and the only part that did exhibit this to any extent was the centrifugal supercharger compressor component, but this only took minimal sanding and filing to correct.
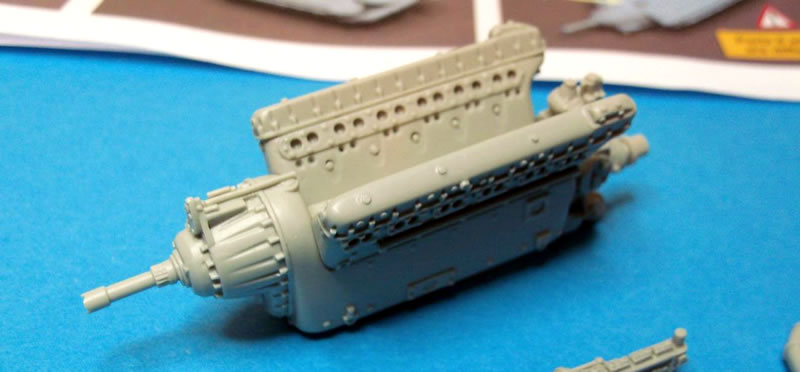
Using Loic's very clear assembly diagrams as a guide, the first two components to assemble were the left and right cylinder banks onto the engine crankcase. These are handed and are self locating.
Engine cylinder banks attached to engine crankcase
Close up of attached cylinders
At this point, I deviated from the assembly guide slightly and decided to assemble the parts to my own preference. The guide would have you cut to two differing lengths two shaft rods which are located on the rear engine ancillary accessories gearbox. I decided to mount this accessory gearbox onto the rear of the engine first, and then add the different length rods after assembly.
Unlike the left and right cylinder banks, which are self locating, the rear accessories gearbox is a butt fit between two flat plains with no obvious location aid to guide you, which means that it is difficult to determine exactly where it should be positioned. Loic makes clear at step 5 of his guide that the pump hose on the left of the accessories gearbox must be correctly aligned with the mating part on the left rear engine cylinder bank – I therefore used this as my datum point for the correct position of the gearbox.
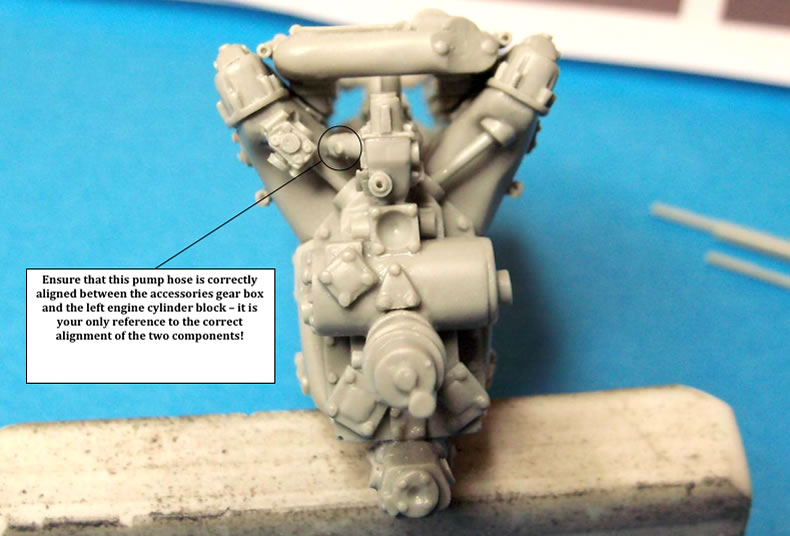
Rear view showing correct location and assembly of the accessories gear box on the rear of the engine
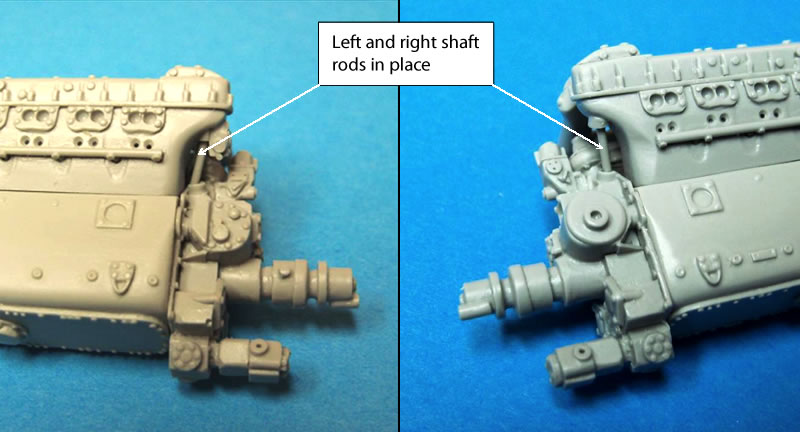
The left and right accessories gearbox shaft rods were cut to length to form a tight fit into the relevant recesses
The next part I installed was the fuel injection unit between the cylinder blocks. It should be noted that the front of this unit has a block shape with a pipe connection that aligns with the corresponding pipe moulded onto the centreline of the forward upper engine crankcase and reduction gearbox.
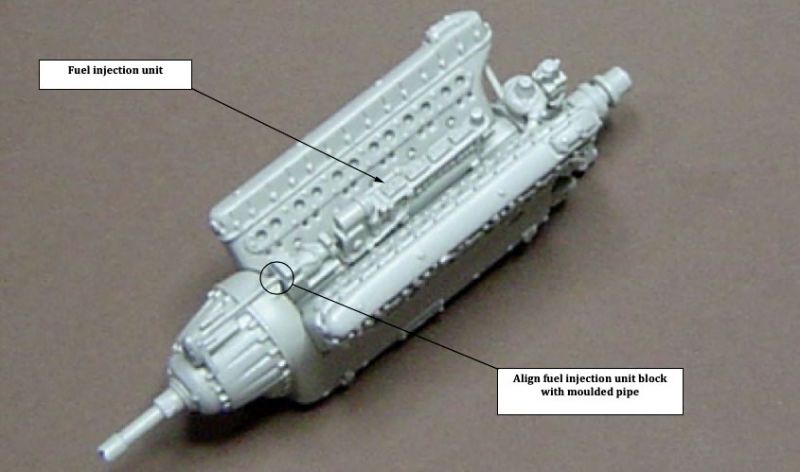
Correct positioning of engine fuel injection unit
The induction manifold was attached next. This is attached centrally between the Vee of the engine cylinder blocks and covers the cylinder induction ports. Loic has added the fastener heads to each individual cylinder induction port of both cylinder banks – this is how the engine would normally look with the manifold removed. However, when installed on the full size engine, a gasket would have been fitted between the manifold and cylinder block to create a seal. The purists amongst us may therefore wish to remove the induction port fasteners by sanding, thus creating an accurate flush fitting manifold to cylinder block joint. For the purposes of this particular review, I have left the fasteners in place, as the noticeable difference is negligible.
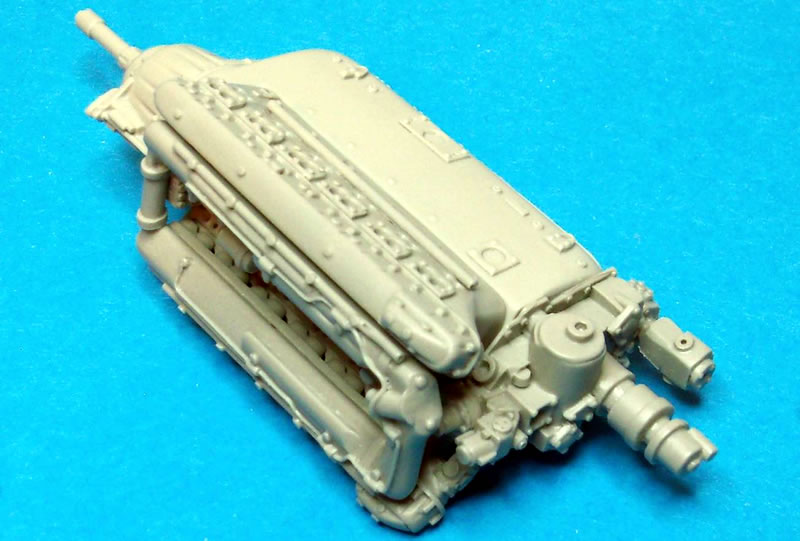
Induction manifold in place
The centrifugal supercharger compressor unit was next to be installed. This item required more cleaning up of moulding seam lines than any other part, but this may just have been a feature of my particular example. It is advisable to test fit and adjust the angle of the manifold attachment end of the compressor unit in order to achieve a good fit.
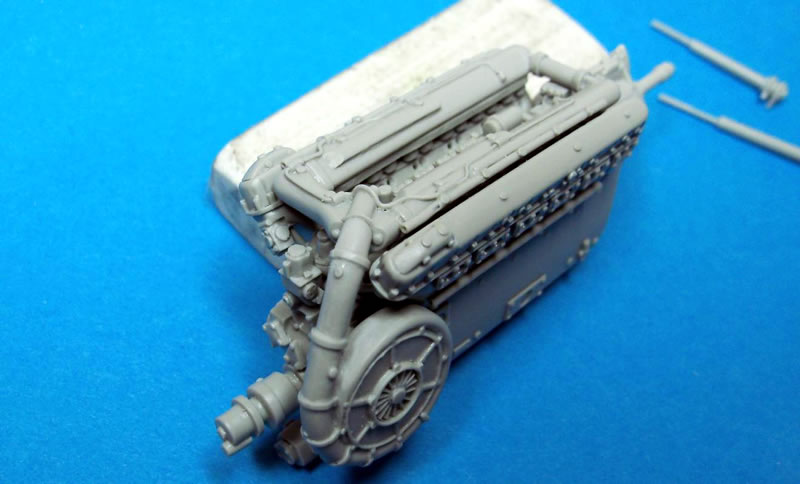
Engine supercharger compressor unit in place
The final two pieces required to complete the engine build were the left and right MW50 Water-Methanol injection system centrifugal pipe work which fits at the forward end of the engine cylinder to crankcase joint areas. It should be noted that these two components are handed (the 'hole' moulded into the middle of them should face forwards).
Both MW50 centrifugal pipes fitted to either side of the engine cylinder/crankcase positions
Overall Verdict?
Once assembled, a final check of the size of the engine against Daimler-Benz published dimensions found the engine to be accurate dimensionally (i.e. spot-on at propeller shaft and reduction gearbox lengths, and depending exactly where you take the rear most dimension from, either – 1.mm, or +2.mm in overall length) - so if you plan to install this into your latest model, and intend to have removable engine covers, you had best make sure that those covers approach something like scale thickness or you may find that they will not fit properly!
Thanks to the logical break down of parts and engineering of the kit, I found this DB 603 kit very easy to prepare and assemble, so it should therefore hold no fears for any modeller of any ability. The ease of construction is matched by the quality of the cast parts from Grey Matter Figures, which is first rate. The parts are exceptionally well detailed and just careful painting of the parts alone will make this one very impressive model in its own right, and those who are prepared to super detail it, then the results will undoubtedly be stunning. There are really no negatives with this kit (apart from some minor cleaning up of the compressor to do, but that may just be my example), just pluses on the engineering, detail and quality of the parts.
This is Loic Bridot's first venture into the world of making master pattern parts, and if this first offering is anything to go by, I feel very confident that we can expect even better things from him in the future – I wish Grey Matter Figures and Loic Bridot much luck and success with this product.
My verdict is that this is a most welcomed addition to any modeller that has an interest in either the engine itself or wishes to incorporate one into their latest model creation - I thoroughly recommend it.
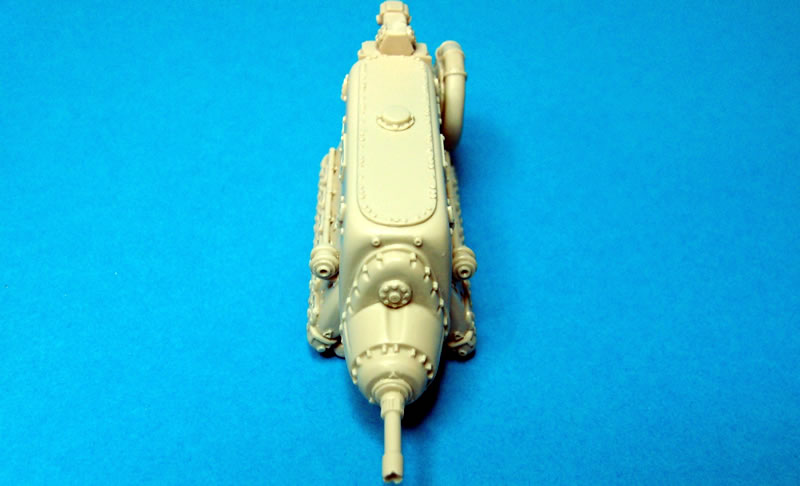
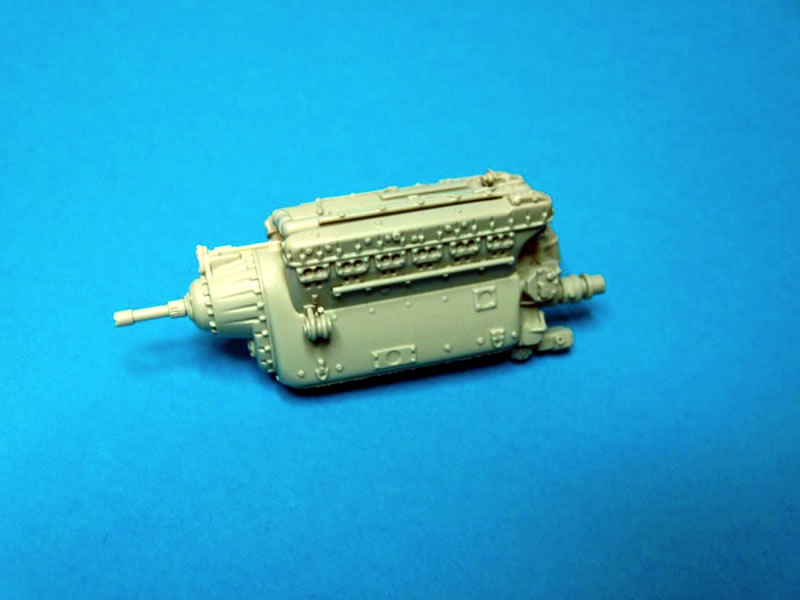
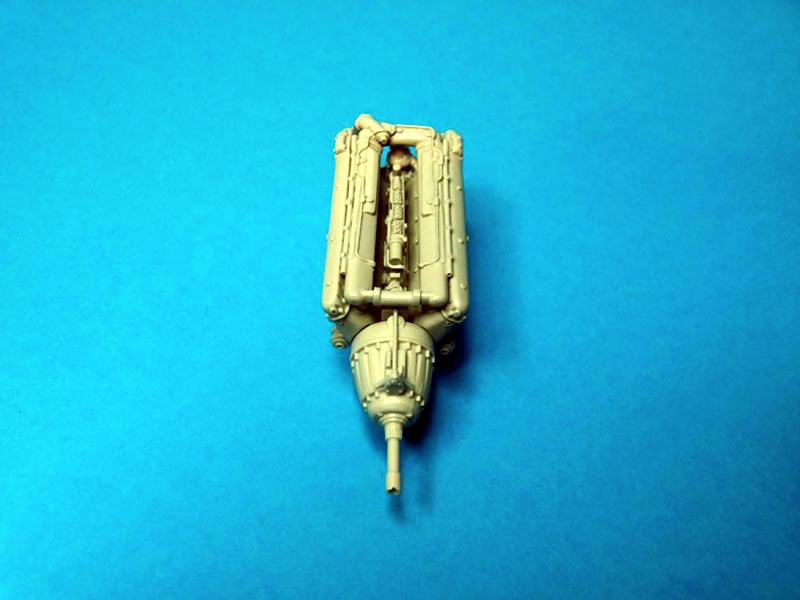
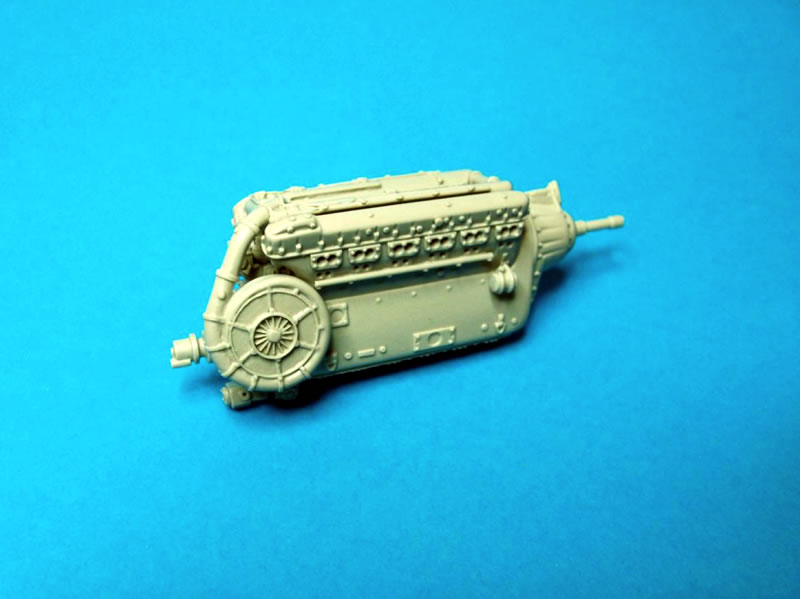
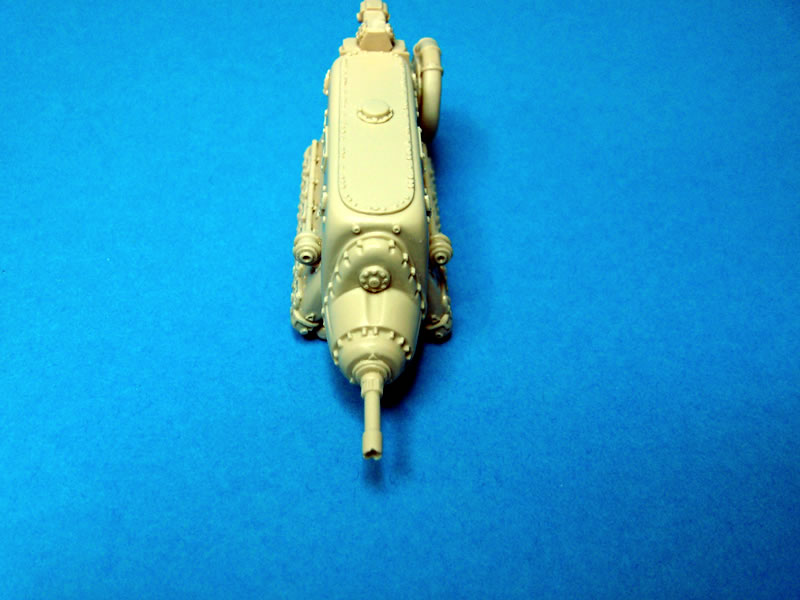
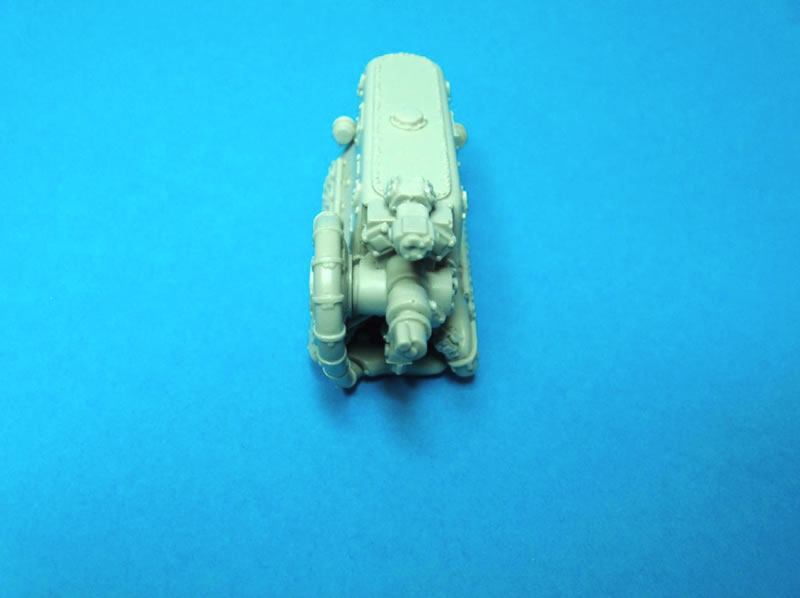
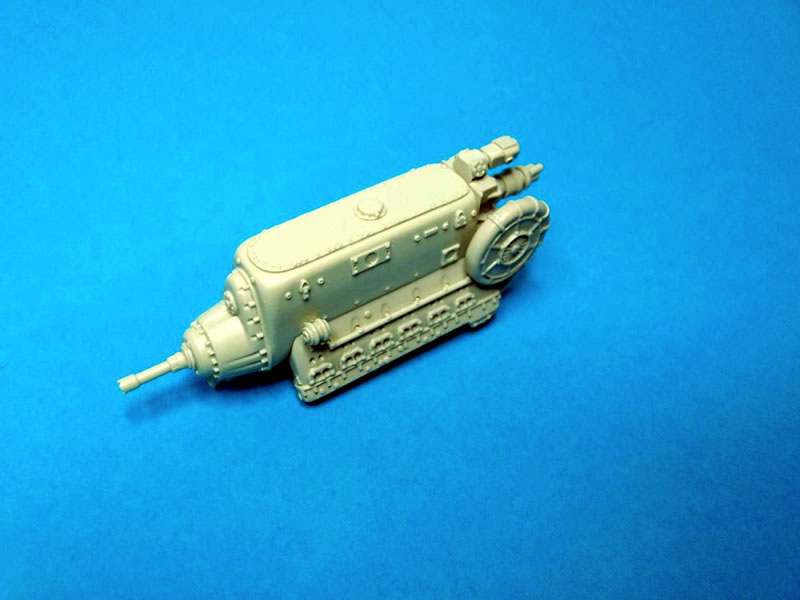
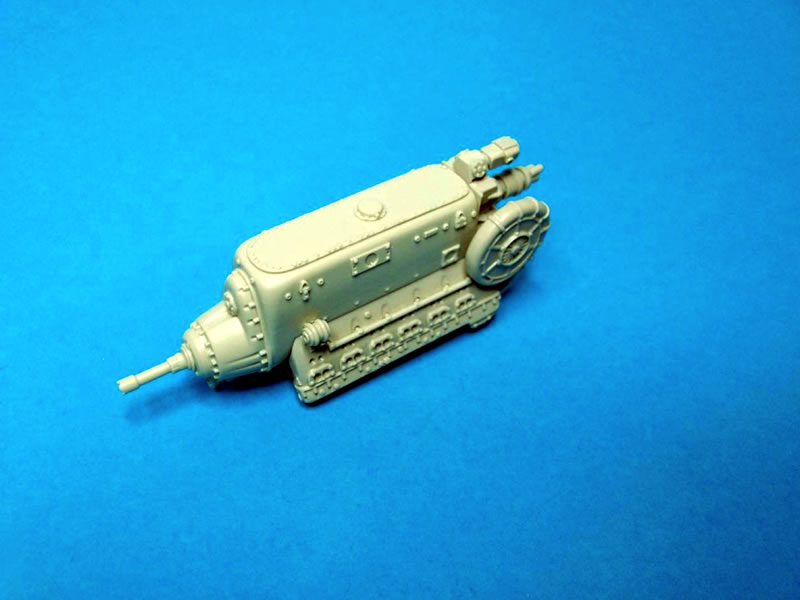
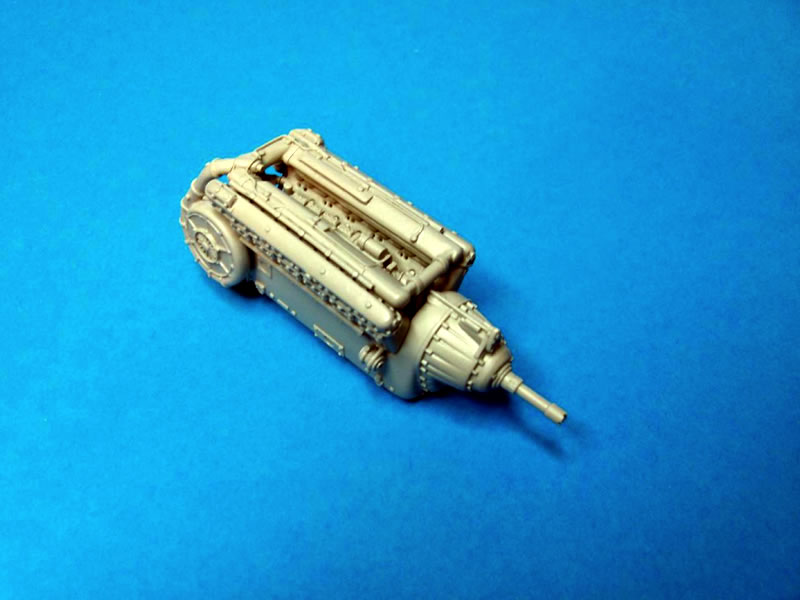
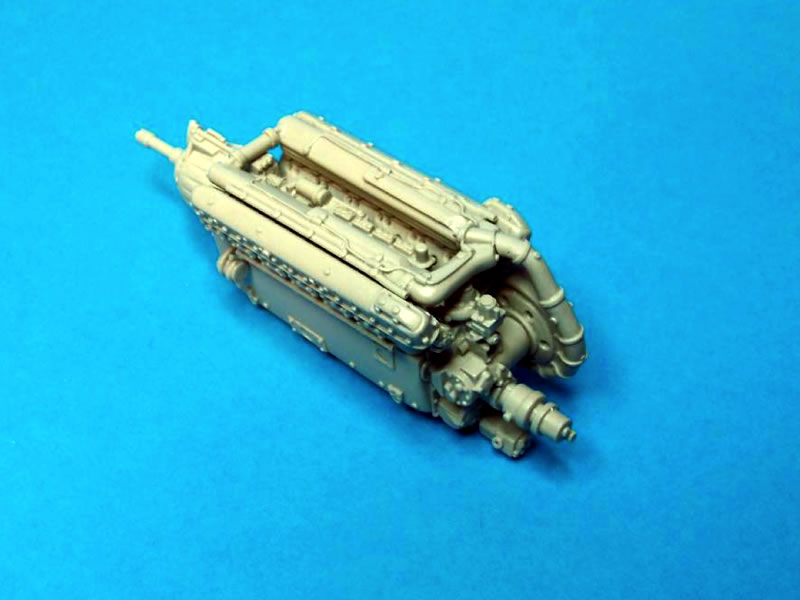
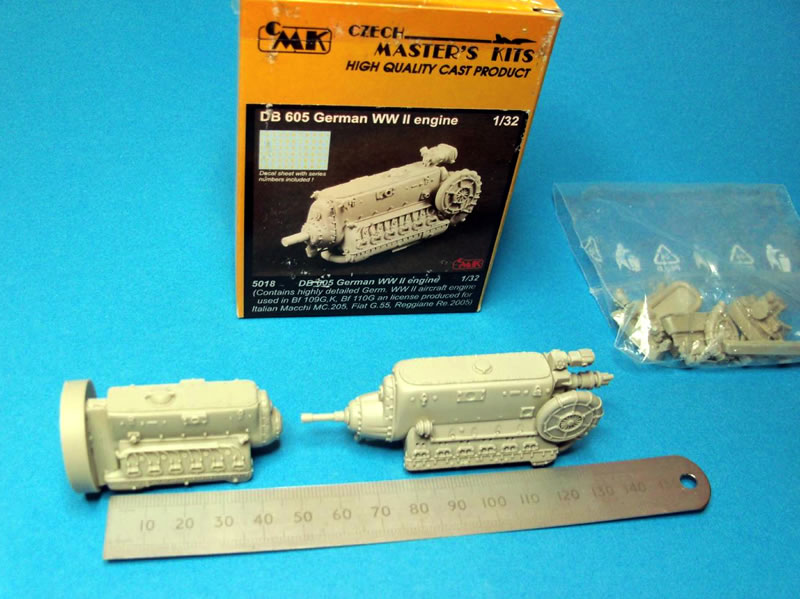
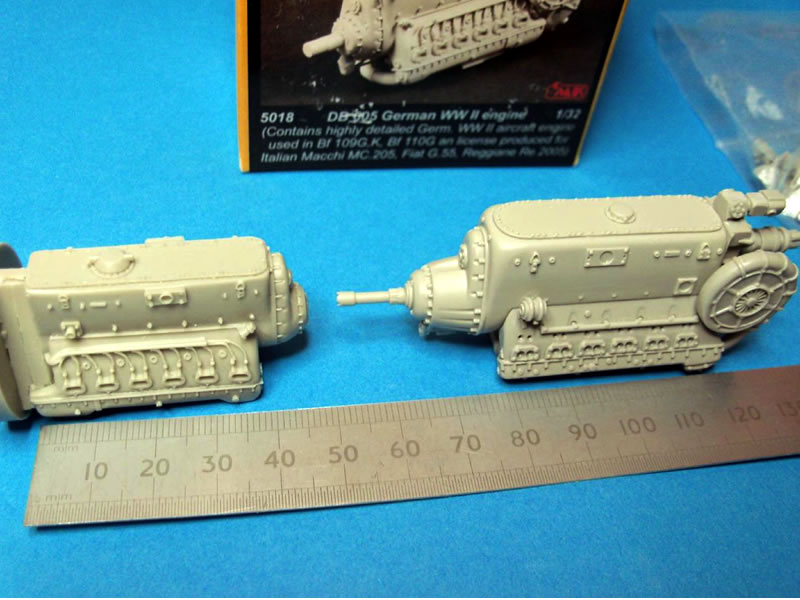
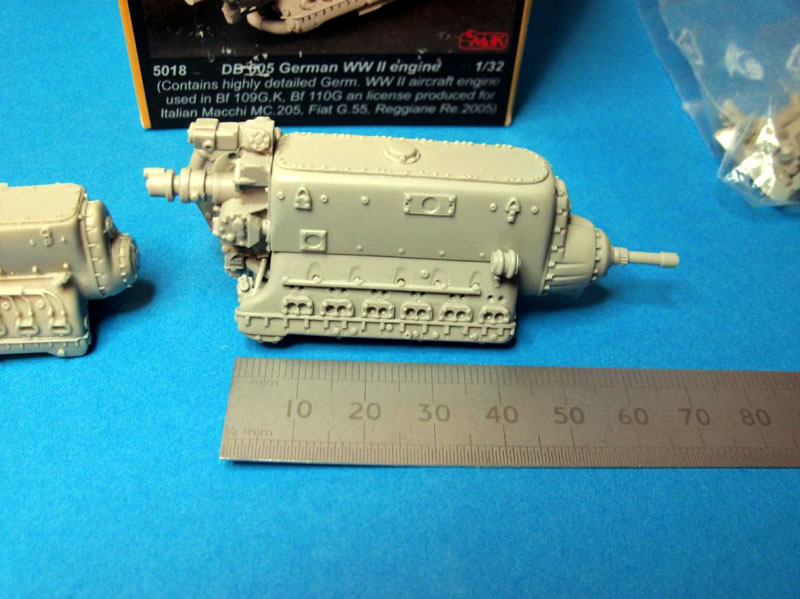
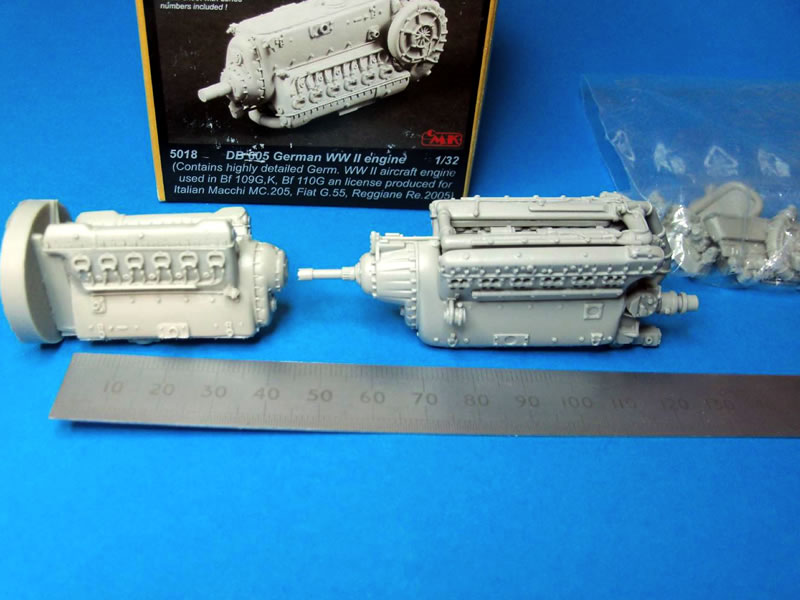
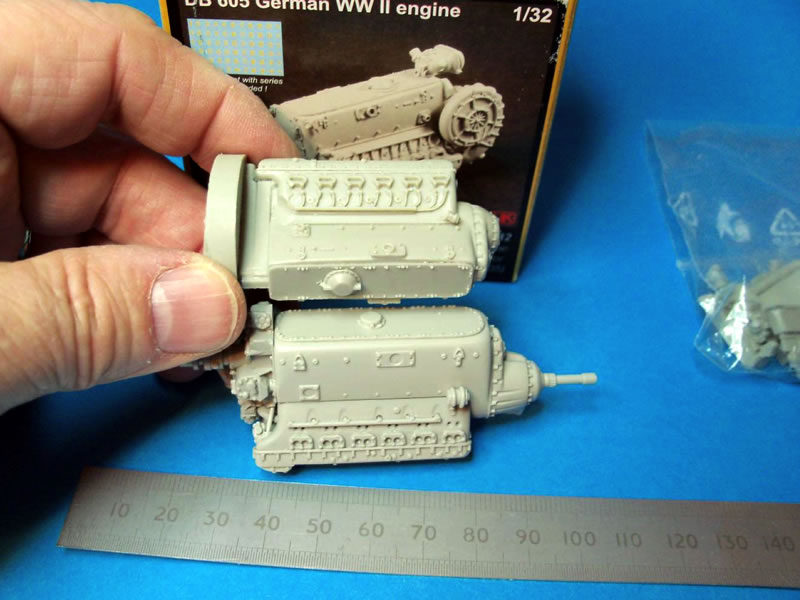
To finish off, below are some general shots of the review example and just for those of you who may be curious, I have also included some photographs of the CMK 1/32 DB 605 as a comparison with Loic's DB 603 (to my mind, it is very much like comparing a Rolls-Royce Merlin against a Griffon!).
My thanks go to Grey Matter Figures and Loic Bridot for supplying a sample engine for review.


The DB 603 can be purchased from the Grey Matter Figures website, and currently retails for £12.00 (ex. VAT: £10.00).
© Derek Bradshaw, 16 March 2012
This review was published on Monday, March 19 2012; Last modified on Wednesday, May 18 2016