
Jerry Rutman | 1/32 Ta 152H Resin Kit
Reviewed by Mark Proulx
Professor Kurt Tank's Ta 152 H was the ultimate design of the highly successful Fw 190 production line. Unfortunately for the Luftwaffe, this amazing aircraft was produced too late and in insufficient numbers to have any effect on the conclusion of WWII. Like all piston engine aircraft produced at the end of the war, these designs were soon to be surpassed by the dawn of the jet age. Ultimately, only 67 Ta 152's were manufactured and put into service with JG 301.
Jerry Rutman has just released an excellent 1/32nd scale rendition of this aircraft. This follows Jerry's successful 1/32nd 109G and K series aircraft. He also produces a very extensive line of 1/32nd scale resin detail sets for the modeler.
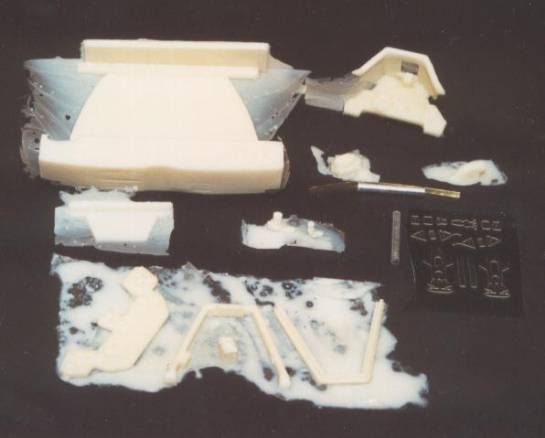
The modeler is confronted with an extensive parts breakdown upon opening the box. It is clear that this model is not for the beginner. I knew from my discussions with Jerry that a lot of effort has been put into this model with a vast amount of research being completed. The majority of the parts for the Ta 152 H are resin with vacuformed wings, white metal landing gear and photoetched components. An Alps printed decal sheet is included with the kit. Pencil sketch instructions complete the package. Let's now break down the kit into subassemblies for a better look:
FUSELAGE
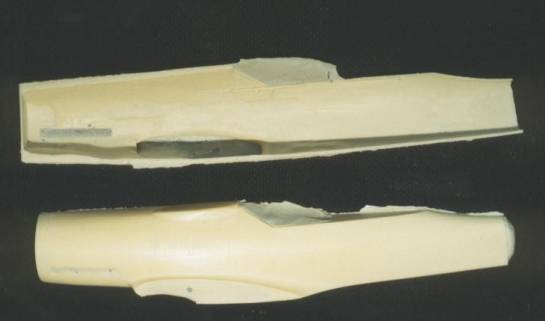
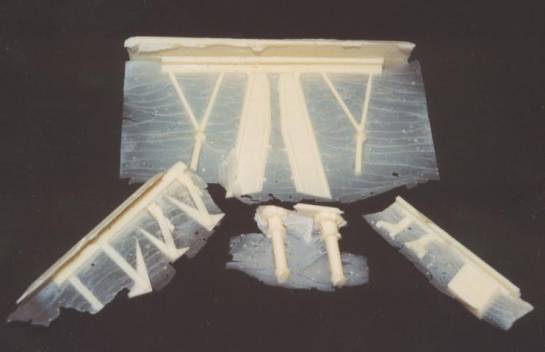
The fuselage is a testament to the art of resin casting. It is cast in two hollow pieces, similar to what you would see in an injection molded kit with a minimum of flash. The surface detail is beautifully scribed, including all access panels and latches. The scribing is very fine. Very crisp cockpit details are molded onto the inside of the fuselage.
The engine on the Ta 152H was visible through the wheel wells, like its Fw 190D predecessor. Jerry captures this area in great detail. An aft engine plug with separate mounts, firewall and wing spar centerpiece make up all the components for this often overlooked area.
The forward section of the fuselage consists of two large resin pieces for the cowling. Jerry accurately depicts the cowling and radiator arrangement found on this aircraft. The individual cowl flaps are photoetch parts, supplied by Fotocut. Hollowed resin exhaust stacks and supercharger intake completes the fuselage components.
PROPELLER
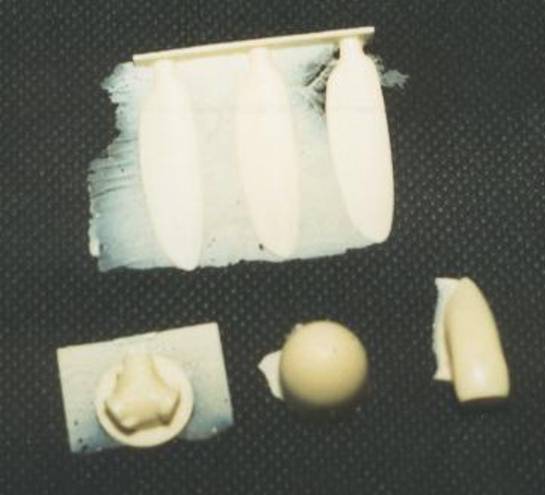
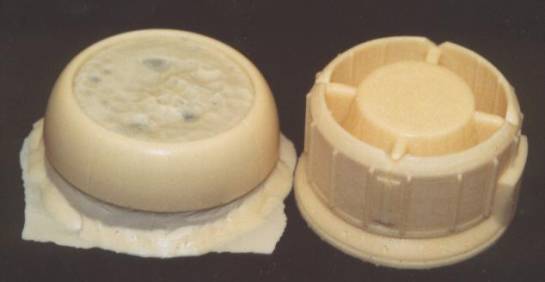
The propeller assembly consists of a resin cast spinner, back plate with a molded-on hub and propeller blades. The spinner has finely scribed surface detail and is even dimpled for the planned use of the engine mounted MK 108 cannon.
EMPENNAGE
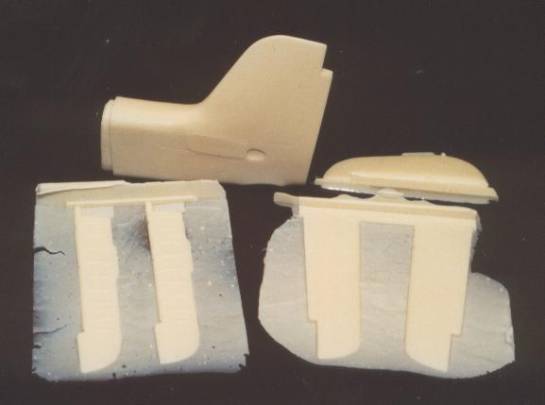
This is one area that clearly shows the research that Jerry has put into this kit to ensure its complete accuracy. The tail section is cast as a single unit. Upon further examination, I noticed the distinct lack of scribing on the tail section. My first thoughts were that Jerry had inadvertently forgot to add any panel lines to the tail section. I quickly called Jerry and questioned the reasoning behind this. I was subsequently advised that some Ta 152's had a wooden tails with no panel lines visible. This is confirmed with photographs and in my discussions with Jerry Crandall. Horizontal stabilizers are cast as complete single piece assemblies for both sides of the aircraft with very fine surface scribing.
The rudder and elevator control surfaces are cast separately so the modeler may place them in any position. Surface details include the very subtle rib detail and trim tabs. The nav light for the rudder is also cast, completing a superb tail section!
COCKPIT
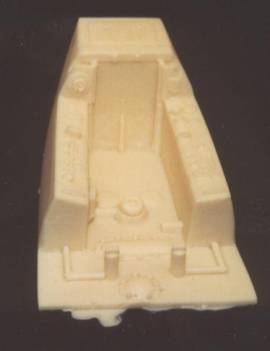
A highly detailed, single piece cockpit tub is supplied. The most minute details are captured on the sidewalls which will be easily discernable after drybrushing. Small details such as a control stick, throttle and canopy crank, are all included and molded separately. The pilot's seat is a work of art with some nice detail on the seat cushion. Photoetch harness attachments and buckles are included to be used with belts of the modeler's choice. Rudder pedals and their associated straps are photoetch.
The instrument panel is cast as two pieces and is complete with clearly visible instrument faces. The upper panel is ingeniously attached to the glare shield for easy placement.
Overall, I am very impressed with the level of detail that is found in the cockpit. The detail will be visible with an open canopy. A resin gunsight completes this area.
The windshield is uniquely designed. It is cast as a complete unit. The modeler needs only add the clear plastic parts to the framing. This was done to allow the modeler to accurately represent the thick armored glass that Kurt Tank incorporated on the center windshield. Two thicknesses of clear glass are supplied in the kit. The framing is very fragile and will require some delicate trimming and sanding. If this method works, painting will be a breeze with no masking required!
The canopy consists of a resin frame and vacuformed clear parts. Photoetch lugs, that are a function of the Ta 152's pressurized cockpit, complete this subassembly.
WINGS
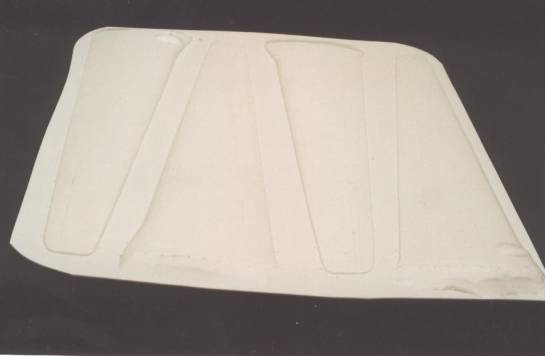
The wings are supplied as vacuformed units. I am sure that this is to keep the weight and price of the kit down. Due to the limitations of the vacuforming process, the wings are more heavily scribed than the fuselage. My preference would be to fill in the lines and rescribe them, matching them more closely to the fuselage. Wheel well openings and gun shell ejection slots need to be opened up by the modeler. All blisters, except for the upper wing wheel wells, are supplied as resin items to be glued on. A simple fairing is included to be used within the wing to ensure the fit at the wingroot.
The gear wells are cast as resin items and require some sanding to conform to the wing. All details are included. Resin cannons are visible within the wheel wells. Aluminum tubing is included to represent the guns that protrude from the wing leading edge.
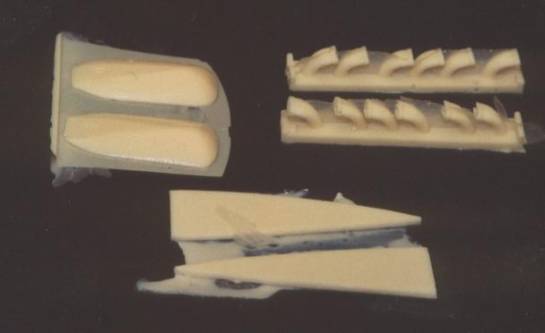
LANDING GEAR

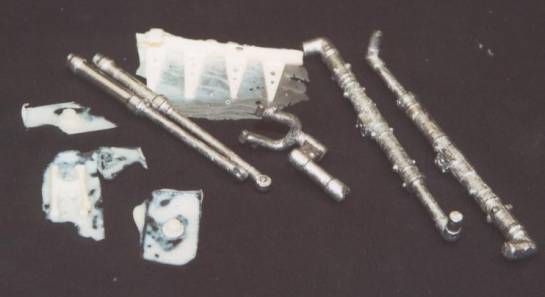
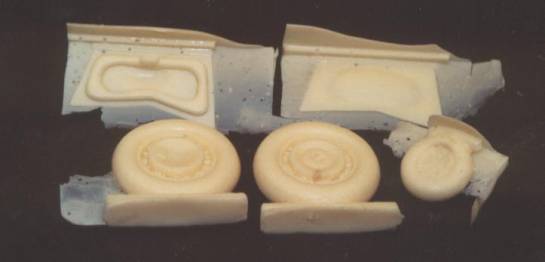
The three landing gear struts and retraction arms are supplied as white metal parts. The torque links are resin. The main gear doors are a combination of photoetch and resin pieces. The tires are nicely cast complete with fine hub detail. The inner gear doors are resin items that incorporate all the details that are visible on the inner surfaces. The modeler will have to add their own brake lines.
ANTENNAS
All the antennas are photoetch and supplied within the kit. Check your references for the proper location of the antennas which are found on the underside of the aircraft. Stretched sprue will be needed for the fuselage wiring.
INSTRUCTIONS
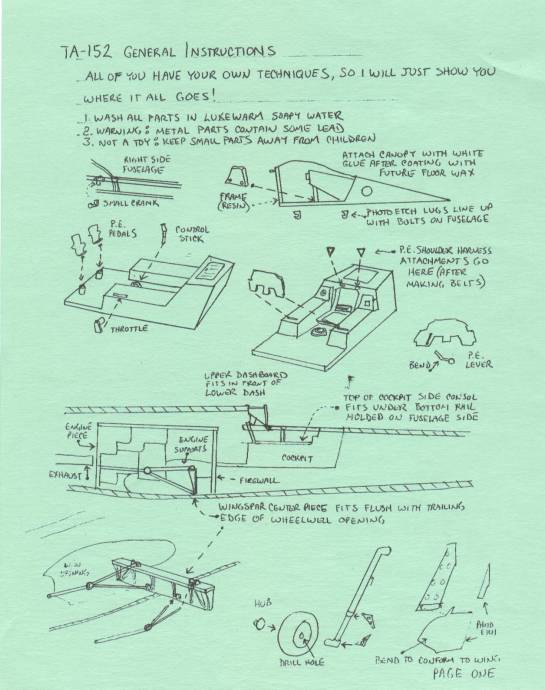
The instructions do not include any painting details so the modeler will have to look elsewhere for help. I would recommend Monogram Close-Up #24 on the Ta 152 and German Aircraft Interiors 1935~1945 for further assistance.
CONCLUSION
I highly recommend this model to anyone wishing to add a Ta 152 to their 1/32nd scale collection. The kit is very well researched and engineered. I wouldn't suggest this kit to a beginner, however anyone with previous modeling experience should find little difficulty. Jerry offers great product support and he is always willing to help me out whenever I call. Don't let these low resolution scans deceive you. Unfortunately, my camera does not give justice to the level of detail found within this model.
My congratulations to Jerry Rutman for producing an outstanding model of this graceful high altitude aircraft. He has an ever expanding product line available. It now includes the 1/32nd scale models previously mentioned and detail sets for those 1/32nd scale Revell kits of yesteryear, that we all have stored in our basements. Thanks to Jerry, you can now pull these kits off the shelves and breathe new life into them.
© Mark Proulx
This review was published on Saturday, July 02 2011; Last modified on Wednesday, May 18 2016