
Revell | F-4F Phantom II
Reviewed by Menelaos Skourtopoulos
Introduction
Since July there's another Revell F-4F reissue in 1:32 scale in the market (kit No. 04706). This time with some different decals but no other changes.
The Box
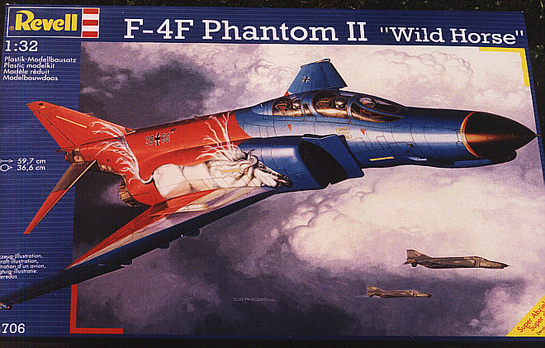
Again a huge carton box with a nice art work of a F-4F in anniversary colors of the JG 72 "Westfalen".
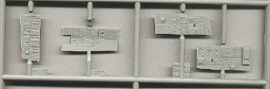
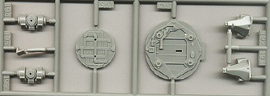
There are 10 trees with ca. 297 plastic styrene parts inside the box. 12 of those Parts are in clear plastic for the canopy, landing lights, gun sight and etc.
The instruction guide is again of the newer type with a B & W picture of the real plane in the front page and 23 pages full of building and painting instructions. Again there are no guides for FS and even not RAL colors. At the bottom of the box you will find the big plus of that kit: a huge decal sheet full of myriads of stencils in best quality…
The Parts
I'm not going to make a complete review of that kit. This is Revells well known F-4F kit from the year 1995 with all its problems but all its goodies (see my previous articles of the F-4 for more information).
As I wrote before the kit has its problems and here is what you have to do, to make it looking right:
- The upper part of the fin (part no. 208) is not correct and I had to rework it, or order it from Revell-Monogram (in the F-4E kit you'll find the right one!)
- You'll have to cut off the rudder and flaps and glue them in an other position but this is not a must.
- You'll have to build the nose gear leg from scratch, because it is out of scale.
- You'll have to cut off 0,3cm of the main gear legs, because the Model seats too "high" in its main gear. Drill a hole in the middle of each main wheel to make it looking better; otherwise the main gear legs are done very well.
- Once again the back cockpit is too deep and you have to rework it. You'll have to cut it away from the front and back wall, and glue it again 0.5cm higher. If you don't change it, you'll have to put the seat much higher and it doesn't look right ... otherwise the situation in the cockpits is OK.
- You'll have to rework the radome to make it looking better.
- You'll have to make some work inside the canopies. (I use sheet styrene and putty to represent the structure of the front and the back canopies).
- Open the bleed air doors under the fuselage between the centreline-tank (do it before you glue the fuselage halves with the wing) and glue them in the open position.
- The air intakes are somehow too long (2-3 mm) but you can live with them.
- Make the afterburner cans deeper.


The seats are really good and Revell noticed the differences to the US MB-H-7 seats (see my article RF-4E part III).
You'll find the APG-65 Radar antenna in the kit. It's nicely made and you MUST cut the nose to show it, if you want to make either an upgraded German ICE or Hellenic Peace Icarus Phantom. There's the F-15 style centerline tank in the kit, four AIM-120 AMRAAMs and many more goodies.
The Decals
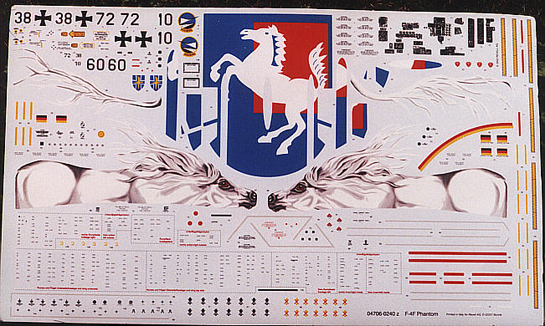
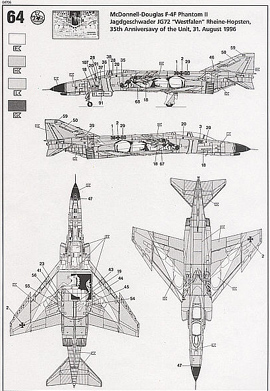
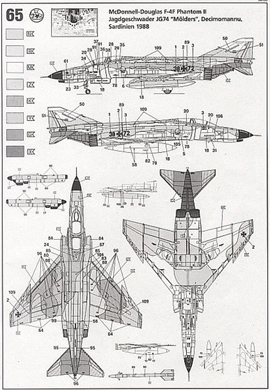
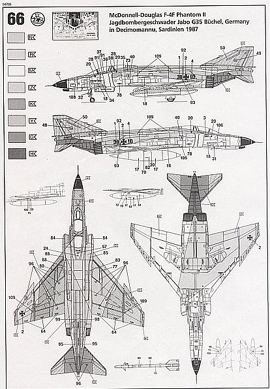
You can build one of three aircraft: an anniversary plane "Wildhorse" of JG72, and two normal "F" one from JG 74 and one from JaBoG 35 (today JG73) both in Norm 81 paint scheme.
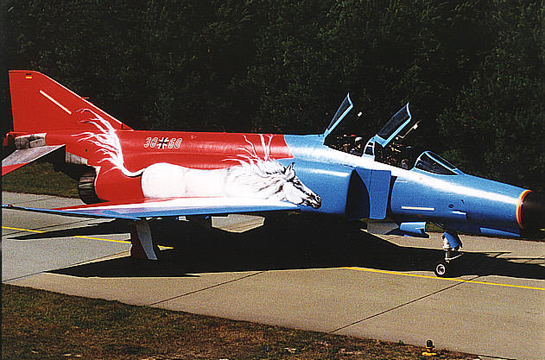
The head of the white horse is somehow different from the actual thing (see at my pic, that taken in 1996 in Hopsten), but all in all it's a great artwork.
You'll find again all of the stencils that came along with the first F-4F kit and that's great, because you don't have to buy an aftermarket decal sheet for that reason.
Conclusion
I like the F-4F even with all its problems. It makes a fine looking model and if you think its price is five times below the Tamiya price, then it makes it a reasonable choice for an F or E Phantom.
© Menelaos Skourtopoulos 2002
This review was published on Saturday, July 02 2011; Last modified on Wednesday, May 18 2016