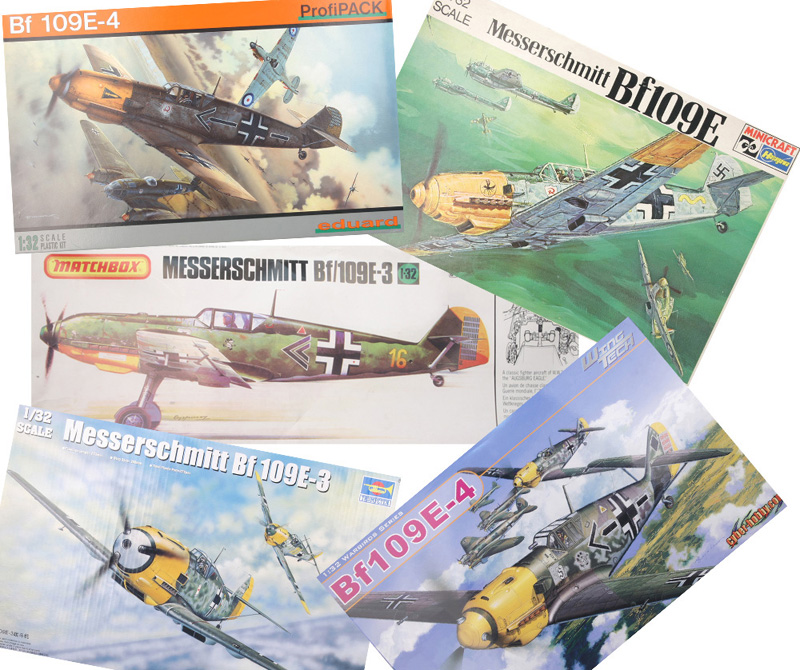
With the last release by Cyber-Hobby/DML, we now have five manufacturers that have released Bf 109E kits. The first to release a 109E I believe was Hasegawa in the '70s. This was followed in 1982 by the Matchbox release, noteworthy for being an early kit to have recessed panel lines, as well as professed to have a more accurate outline. Only recently were these kits superseded by more modern tooling, first by Eduard then shortly followed by Trumpeter and finally Cyber-Hobby. So how do these kits compare? We shall see...
The Major Details
In Part II I will cover specific details of the kits, including landing gear and wheel wells, engines, and armament. In Part III I will cover the kit cockpits, as well as several aftermarket cockpits. In each area I will start with the oldest kit, the Hasegawa Emil, and moving through the five to the latest entry, the Dragon kit.
Landing Gear and Wheel Wells
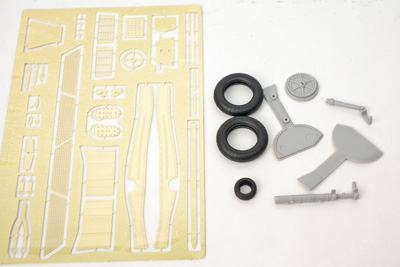
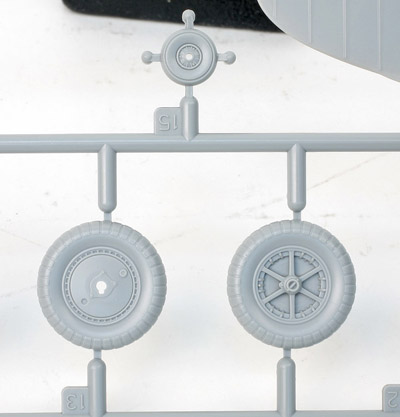
Starting with the Hasegawa kit, well, there isn´t much to say. The wheel wells are shallow and squared edged with no detail. The wheels have very shallow relief and incorrect tire pattern. The insides of the gear doors have no detail at all, unless you count the ejection pin marks you need to remove! The gear itself is also very rudimentary, and what little detail there is not all accurate. The tail wheel is a single piece with wheel molded with the forked axle.
The Matchbox kit fares a bit better, with detail on the wheels and gear doors, though it is quite heavy. The worst part of this kit is the wheel well, or should I say lack of one. All that is included is the cut-out in the lower wing with hardly any attempt at well walls at all. The well must be scratch-built or an aftermarket set such as the old CE sets used. The tail wheel is pretty well done, with the wheel as a separate part, although it is smooth.
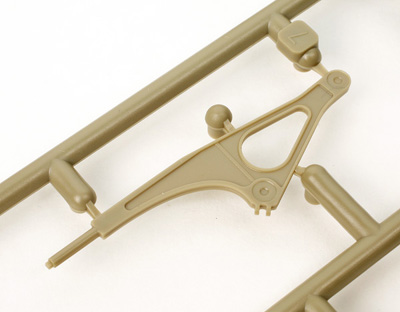
Eduard gave us finally a state of the art kit, with much more accurate wheel wells and landing gear. The walls of the well are plastic, with very little detail, however, with a shallow representation of the inspection port and no fastener detail. The wheels in these first Eduard 109E´s are also quite shallow in detail. This was fixed in later versions, but I am not sure if later runs of these first Emil´s have the newer version of the wheel moldings. The tail wheel and fork is quite nicely done.
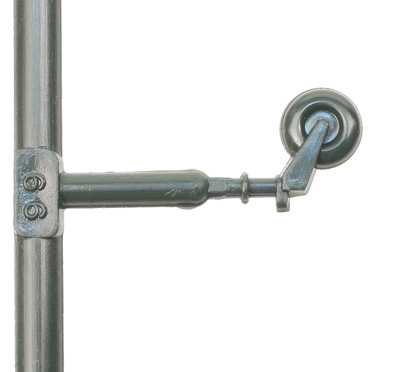
Trumpeter´s Emil has decently detailed wheel wells, using PE parts for the canvas covered walls as well as to provide the fastener detail in the gear leg wells. I did not check how well the PE fits, however. Also, the PE does not include a cut out for the inspection port. Unfortunately, the insides of the gear doors are rather weakly detailed and the wheel detail is woefully shallow. The tail wheel and fork look OK, as does the gear legs which include a separate torque link and brake line, although the brake line looks a bit stiff. Separate PE straps are to be used to fasten the brake line to the gear. One thing I do hate: Trumpeter has once again provided vinyl tires. They are always a pain to deal with, especially when trying to remove any mold lines. I do wish they would at least provide plastic alternatives.
Dragon's wheel wells have the best detail of the bunch. I was curious about the ´DS´ (soft, glue-able vinyl) used for the canvas covering of the walls and how well it worked. Dry-fitting revealed that it worked very well and is very convincing. Dragon also has nicely detailed gear struts with finely detailed torque links and separate brake lines in plastic. They also represent the canvas or leather covered oleos. The wheels look good - on both sides - as does the tail wheel assembly and it is all in plastic.
Here is a chart of the tire and wheel diameters from the different kits. The actual tire diameter should be 20.3mm in 1/32nd scale.
Kit
Tire Diameter
Wheel Diameter (all in mm)
Hasegawa
19.8
11.5
Matchbox
20.4
12
Eduard
21
12
Trumpeter
20.5
12
DML/Cyber-Hobby
20.5
12
Armament
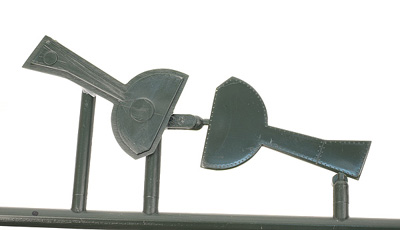
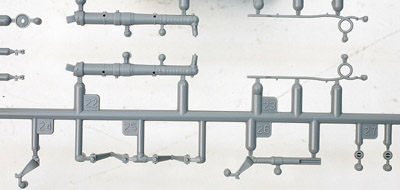
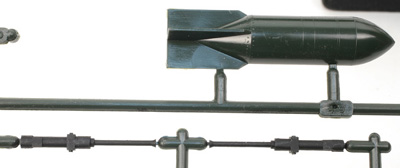
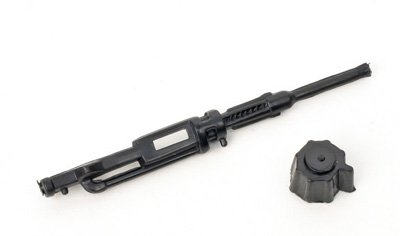
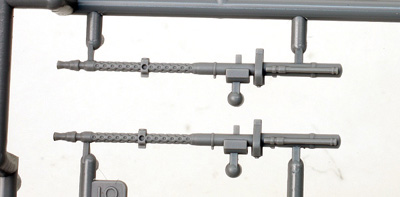
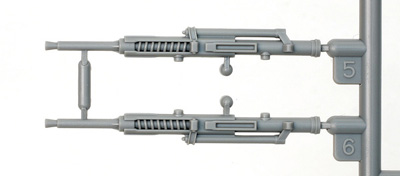
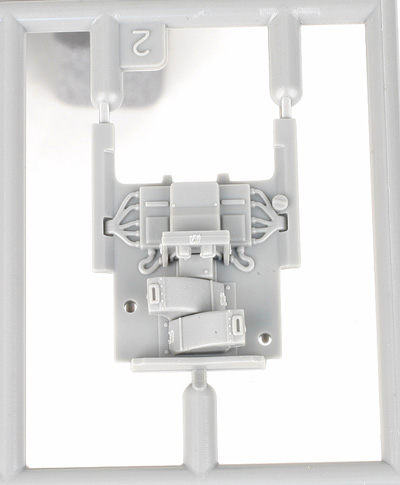
Wing armament detail is included in all 5 kits even though in all the kits no provision is made to see the detail except for perhaps the ammunition drum. The Hasegawa kit provides the least; simply barrels for the E-1 or E-3 option, or a rough version of the cannon with no magazine drum. Again, doesn´t really matter as you can´t see it. The MGFF barrels are solid and would need drilling out (or better yet, replaced entirely). The nose MGs aren´t much better; served with a one-piece MG with magazines and a two piece hopper with faint wiring molded on. I didn´t even bother taking many pics of it.
The Matchbox kit includes full wing cannon and magazines, but the detail is quite soft. Matchbox does have separate drum covers on the wing to expose a portion of the cannon, but the cover is very thick. The Matchbox kit includes a quite surprisingly good representation of the fuselage MG compartment. The MG´s even include the short blast tubes on the end. The part for the bottom of the compartment comes with a quite convincing, if a bit heavy, molded in jumble of cables and boxes that with careful painting and maybe a few added wires would look pretty darn good in my opinion. I don´t have good enough pictures to verify how accurate the molded detail is, but it does look the part. The canvas cover for the instrument panel wiring looks pretty good, too. The MG barrels do need to be drilled out.
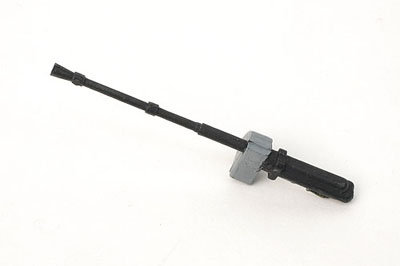
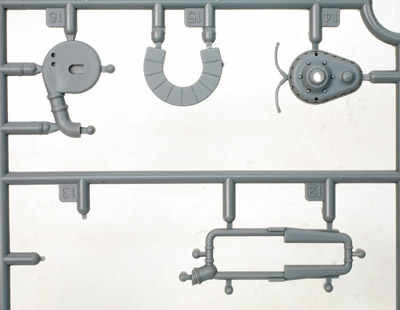
Eduard´s kit only provides barrel ends for the cannons in the wings. These aren´t bad for plastic, with hollow ends to a depth about a single mm, but turned brass barrels such as those from Master Models would help out. The fuselage MG bay isn´t too bad, the MG´s look pretty good, though these barrels need drilling out (or replaced), and two-part blast tubes are provided. The barrel cooling jacket has very small and shallow holes. Two magazine bins are provided, and a shelf with somewhat shallow box detail and some molded on wiring. Definitely need more detail work here; I think Matchbox actually did a better job. The canvas cover for over the back of the instrument panel wiring is OK, but the zipper detail is almost indistinguishable and there is a sink mark in the middle of it. Eduard also provides an insert with just the barrel ends if you don´t plan on exposing the gun bay; a nice touch.
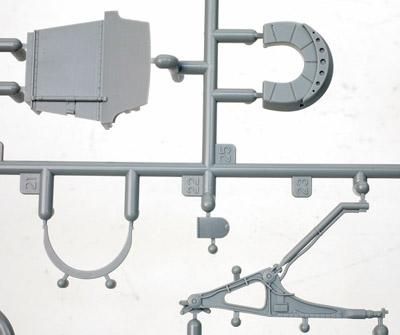
The Trumpeter kit wins the prize for most parts in their wing cannon, with each cannon requiring eight parts to complete. I am not sure why as the only detail you see is the end of the barrels and maybe the magazines if you leave the covers off. The barrels which are hollow to a good depth would still be best replaced considering the cleanup of mold seams and sprue attachment points. The fuselage MG compartment is quite similar to the Eduard kit with weaker detail on the compartment ´floor´ and weak canvas cover. Also, this kit does not include any blast tube detail. The cooling jacket holes are much larger and with deeper detail than in the Eduard kit, with some of the attachment rings missing.
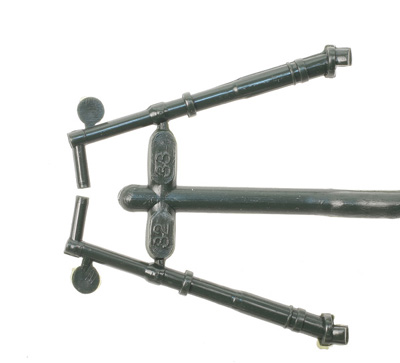
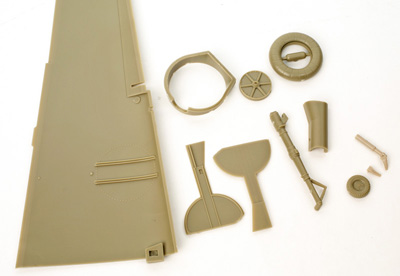
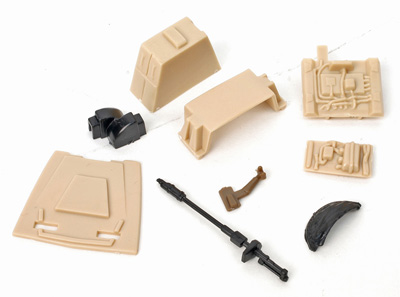
The DML/Cyber-Hobby kit includes a pair on very nicely detailed and molded wing cannon in a single piece and two-part magazines. Again, only the magazines could be made visible if you left the magazine cover off and even then I think you would have to work on the detail of the wing to correctly portray the cover off. The barrels are hollow to a shallow depth and like the other kits would look better with replacement barrels. The fuselage gun compartment is quite well done including 11 parts with a deeper compartment than the other kits and the best representation of the canvas IP cover, including the zipper to open it, although it could use a few folds or irregularities. The major components look pretty accurate when compared to photos, but like the other kits a lot of plumbing is missing. If the plumbing were added, however, this area would look stunning. The MG´s look pretty good, and have shallow barrel openings, but as usual, would look better with turned brass replacements. The kit does not supply any blast tubes.
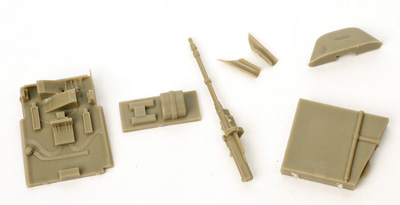
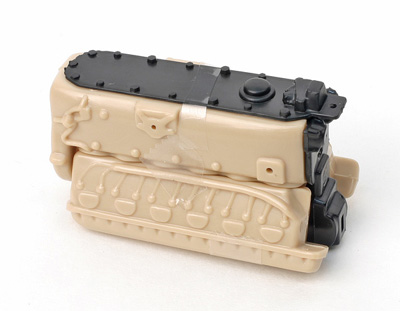
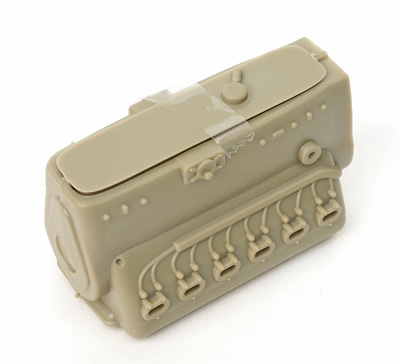
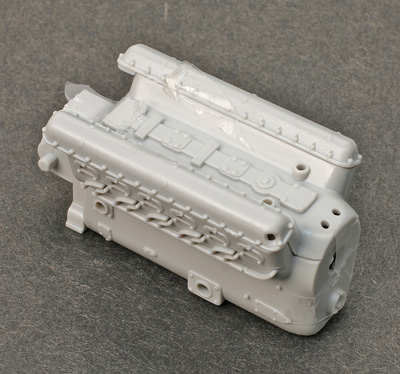
Engines
Hasegawa´s kit has a very rudimentary engine, consisting of ten parts with missing and incorrect shapes and detail and weakly detailed engine mounts. Note: sorry for the poor paint job; this is what happens when you buy a kit unseen off of eBay. The exhausts are poorly done also and are solid.
Matchbox´s kit engine is better, consisting of a total of 29 parts, but still pretty basic with heavily molded details and pretty poorly done plug wiring. The shape of the crankcase cover is a bit off and the bolts too heavy. Much better than the Hasegawa kit, though, with most of the major bits included.
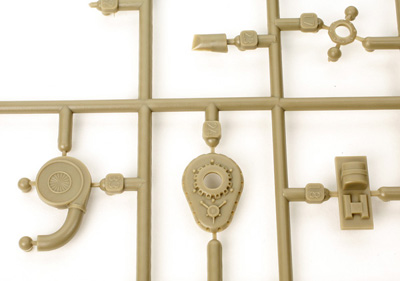
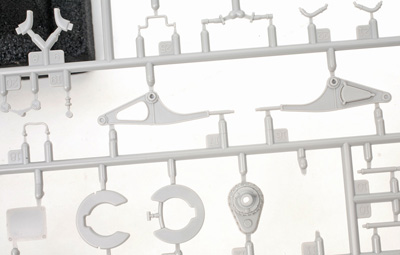
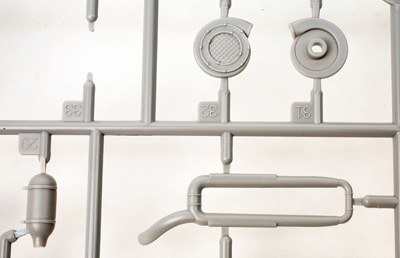
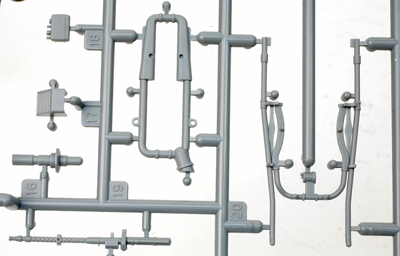
Eduard´s attempt, consisting of about 21 parts, has much finer molding, but surprisingly the engine block isn´t complete with just a flat bottom and no bolt detail on the crankcase cover. The drivecase cover looks pretty good as does some of the other provided major plumbing. A separate additional oil tank is provided for the DB601N engine for the E-4/N version and is correctly noted. The engine bearers are two parts for good detail, although the teardrop cutout doesn´t look quite the correct shape to me. No wiring detail is molded on, except for the plug wiring. As Eduard provides their own aftermarket engine detail set, on the whole it almost appears to be a half-hearted attempt on the plastic that comes in the kit. The exhaust stubs do look good, consisting of 12 separate parts with hollow ends and weld marks. Eduard also gives alternate parts to hold the prop in case you don´t want to expose the engine.
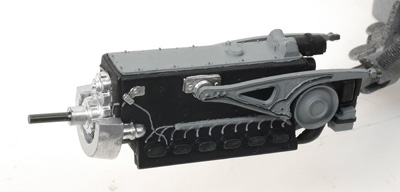
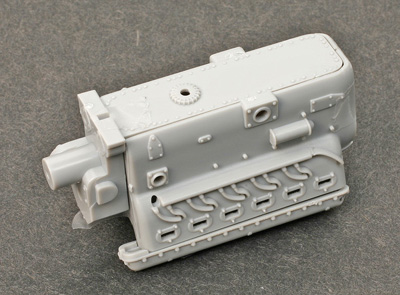
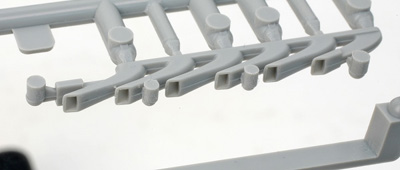
Trumpeter´s engine consists of about 28 parts and I believe this and the DML kit make up into the best engines out of the box. They are both well detailed top to bottom and match photos well. The plug wiring is quite heavy, Am I the only one that thinks plug wiring in this scale should be provided as a separate part or provide holes for are own wiring? The engine bearers aren´t the best, though not too bad, just not on the same level of detail as the rest of the engine. The one odd detail is the exhaust stubs. They are separate and have hollow openings, but are oval at the ends, where every picture I have and all the other kits have rectangular ones?
DML/Cyber-Hobby´s engine is based on the Bf110 kit, consisting of about 29 parts, plus part E6, which is the additional reservoir tank for the E-4/N version. The instructions don´t mention that this tank should not be used for a regular E-4, so don´t add it unless you want to do a /N, such as for Galland´s aircraft. Detail is excellent, with really well done plumbing along the engine bearers, although as usual a lot more plumbing could be added to the engine. The plug wires, like in all the other kits, is molded on but is probably the best looking of the bunch on this kit. Exhaust stubs are in single parts with all 6 stubs, with shallow openings. They are not as nice as the Eduard ones, but with a little carving out of the openings should look nice.
Here is a table of measured dimension of the different kit´s engine blocks. I don´t have the actual dimensions of the engines, but this is sort of a for-your-information type chart. I tried to measure the same for each engine, but there is variation in what is molded on so I did the best that I could.
Kit
Engine Length
Width
Height (all in mm)
Hasegawa
45
17.5
17.5
Matchbox
39
23
22
Eduard
42
22
24
Trumpeter
42
21
22
DML/Cyber-Hobby
42
21
23
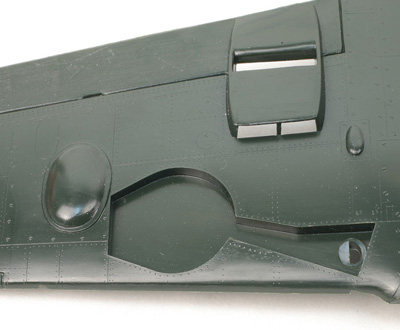
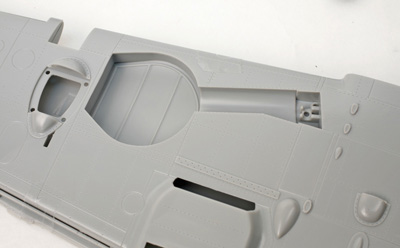
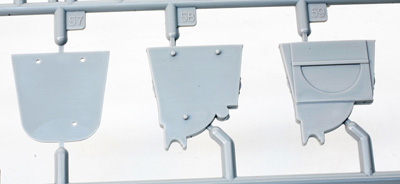
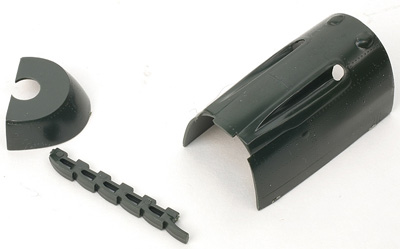
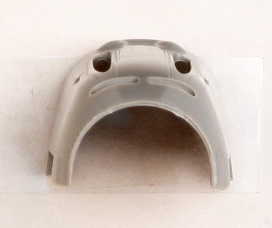
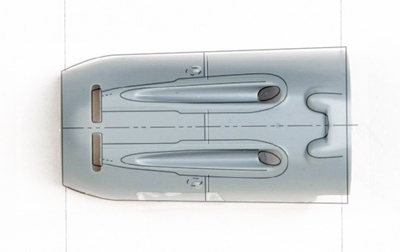
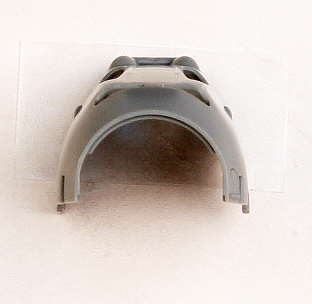
Engine Cowlings
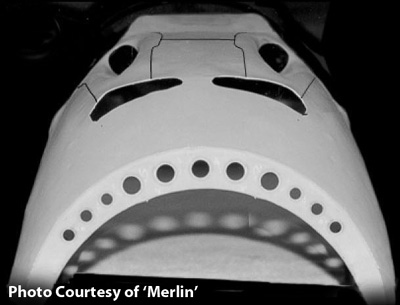
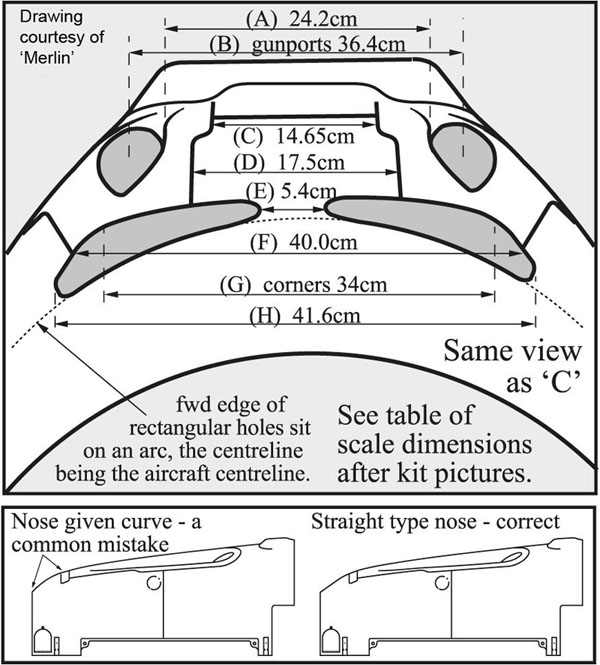
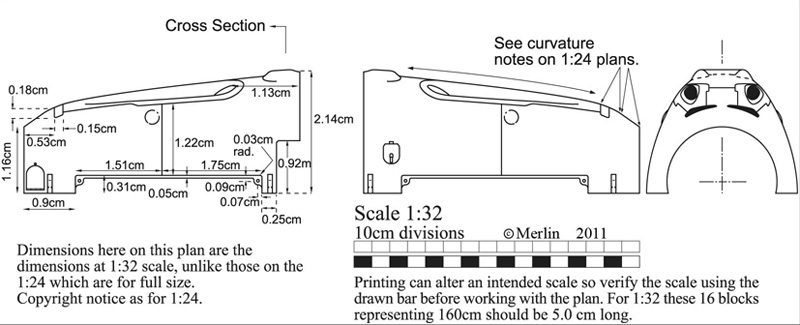
Our own ´Merlin´ has sent me a copy of his paper with results of his research on the Emil engine cowlings, one of the most visible and recognizable aspects of the Emil series. With this information, and his excellent drawings, I was able to offer these comments.
The Hasegawa kit, as is usual it seems, is pretty far off. The cowling is too long and the cooling slits in front are not properly located. The shape is also off.
The Matchbox kit is better, but a bit too tall. Gun troughs are a bit too close together.
The Eduard kit has probably the closest cowl to the drawings, with everything matching pretty darn well. It might be a little too deep just behind the cooling slits. The cooling slits have rounded ends compared to more rectangular ends of the real deal, but otherwise everything else is a pretty good match.
The Trumpeter kit is woeful for a new-tool kit. It is short in length (if you remember from Part I, the MG cover is correspondingly too long), and way too shallow. The cooling slits are too far forward also, as well as not having the correct triangular shape to the slits when viewed from the front.
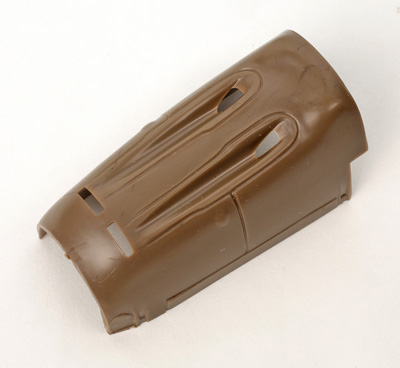
The DML/Cyber-Hobby kit is about a single mm too long. The shape seems to match the drawings well, although looking at pictures I think in cross section it is a bit too flat on top, especially at the rear where it is supposed to meet with the MG cover (The MG cover also seems a bit too flat on top). Looking at the front, the back half of the cooling slits appears a bit too angular because of this flatter top. This could be reshaped a bit with some filing and sanding. The troughs are positioned correctly although the raised area to the inside of the troughs appears a bit too narrow, it should extend closer to the center of the cowling. The openings for the MG´s are also too large. They should actually be open circles when viewed to the front to mate up with the blast tubes, but DML has kitted them as though the entire trough was open to the MG compartment. The small bulges each side of the cowling are a little too pronounced; they should fare into the cowling more smoothly. The DML kit is the only one that includes a part with the correctly detailed front complete with lightening holes.
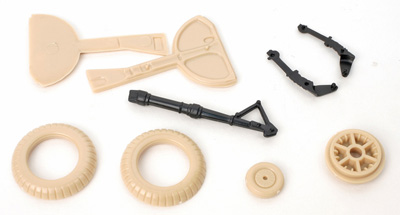
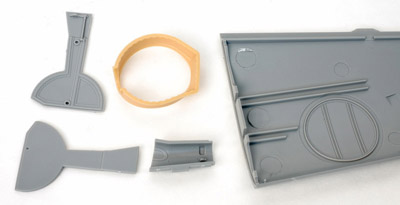
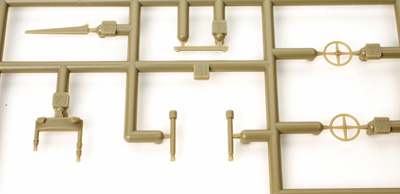
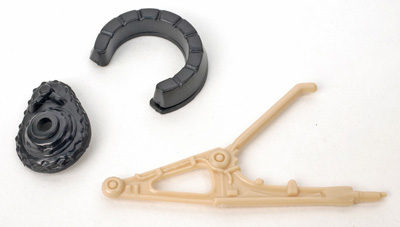
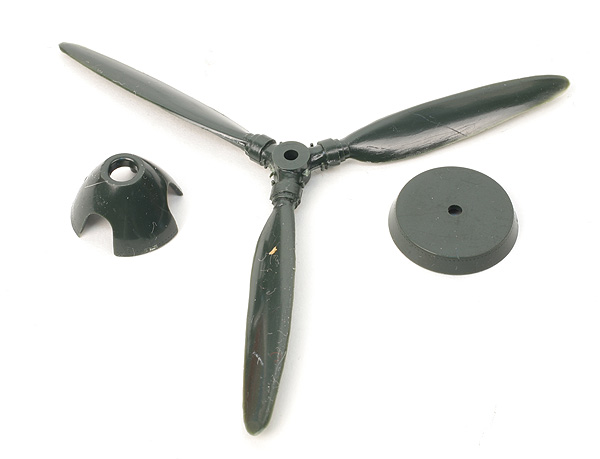
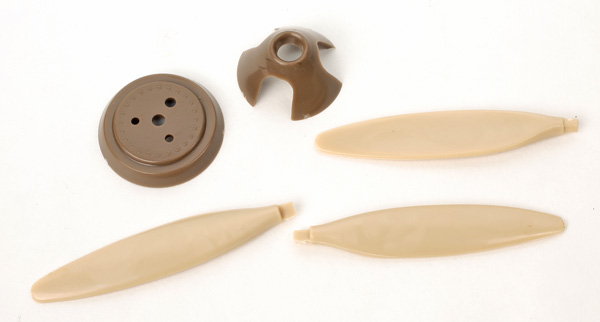
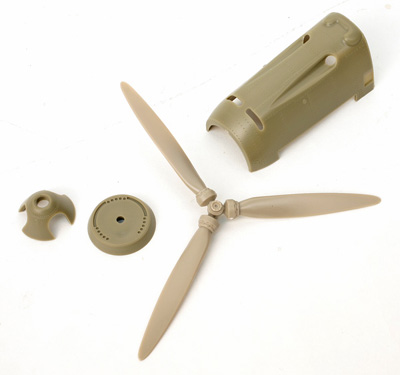
Props
I will try my best with the descriptions of the kit props. This is probably the most difficult part to check as with all the different curves going on it is very hard to verify accuracy against photos.
The Hasegawa kit offers two types of spinner and a prop as a single part. The prop is a bit too large in diameter, and has little hub detail. There is no detail on the spinner. The prop shape isn´t too bad, but looks like it gets fat too quickly and then tapers too quickly, and with not enough twist.
The Matchbox kit includes only the standard Emil prop with the open center. There is very little detail on the spinner and the hub. The props seem too narrow at the hub and don´t widen soon enough. There is almost no twist.
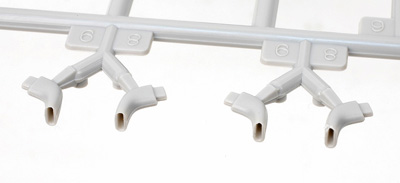
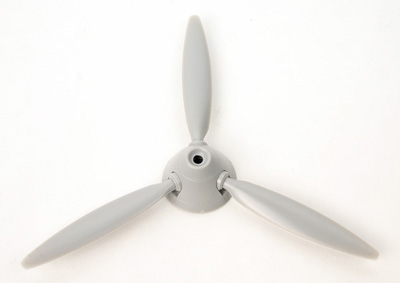
The Eduard kit prop is much better detailed, with fasteners represented on the spinner and nicely detailed hubs. The series of holes on the back plate of the spinner are represented by shallow depressions. Two spinners are provided, the uncovered standard spinner and the blunt covered spinner as used on Galland´s aircraft. Unfortunately, the prop seems too thin, especially as it tapers to the point.
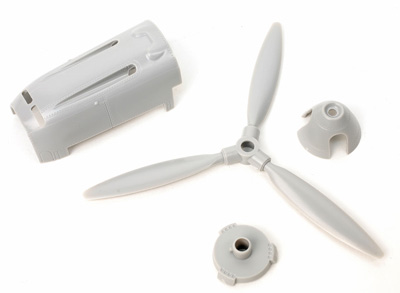
The Trumpeter kit has a one-piece prop and either the capped or open center spinner. The spinner has good detail, similar to the Eduard kit, with petite rivets on the spinner face and shallow depressions representing the holes in the backplate. Unfortunately, the spinner is broken down poorly; causing joints where there shouldn´t be that will be tough to fill without losing detail. The spinner open center looks a bit too sharp, also. The prop looks pretty good in shape and profile, the only comment is it appears like the prop blades start to widen a little too far from the hubs. There is no hub detail.
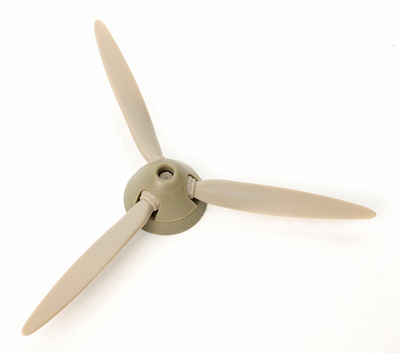
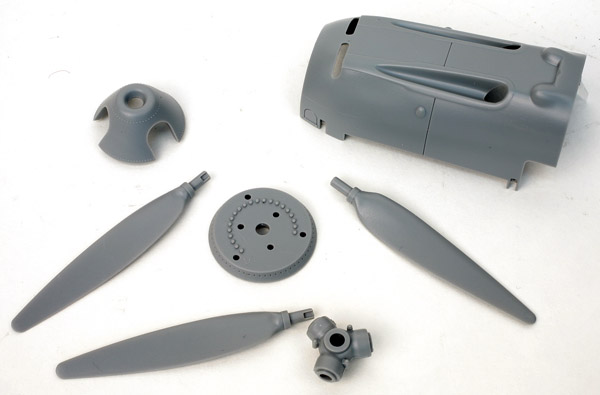
The DML/Cyber-Hobby prop has a nicely detailed spinner, again very similar to the Eduard kit with nice fastener detail on the spinner face. This time, the holes on the backplate are represented by raised (?) areas. The hub has nice detail with separate small parts (not shown) for the hub locks. The props look good at the hub, but the trailing edge seems to narrow too soon, with too straight of a profile as it heads to the tip on the outer third, making it appear too narrow for that outer third.
Here is a chart of prop dimensions. Actual prop diameter (in scale) should be 96.875mm.
Hasegawa 98.78
Matchbox 98.85
Eduard 96.68
Trumpeter 97.85
DML/Cyber-Hobby 96.58
Whew! That is it for Part II. Part III will cover the cockpit details, including description of currently available aftermarket cockpits.
References:
"Aero Detail #1: Messerschmitt Bf109E," Model Graphix
"Messerschmitt Bf109B-E," Model Art Co., Ltd.
"Messerschmitt Bf109A-E: Development, Testing, Production," Schiffer Military History
"Modellers Datafile #9: The Messerschmitt Bf109; A Comprehensive Guide for the Modeller; Part 1: Prototype to ´E´