
Azur 1/32 Dewoitine D520
By Suresh Nathan
I picked up this Azur kit on a trip to Canada and 2 things were certain. One that I would sculpt a figure for it and two that I wanted this to be the most colorful D520 I could find. Unfortunately, Azur released its upgraded kit a few months later when I had already started on the figure. The bird I chose was No 245 of 3éme Esc, GC II/7, Gabés, Tunisia, in autumn 1942. I also got the Contact Resiné upgrade kit.
Construction
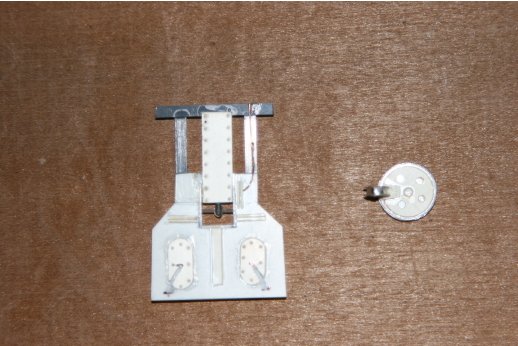
The Contact Resiné kit I got was incomplete. After months of writing to them for replacement parts I finally decided to make the parts myself. In the end I was glad I did because I think I ended up with a more accurate cockpit floor based on my references. Also the escape hatch was scratch-built (Figure 1).
Figure 1. Scratch-built cockpit floor and escape hatch
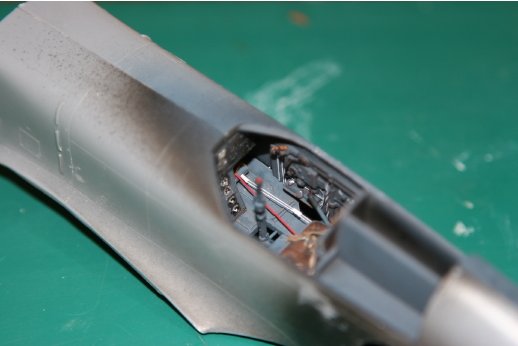
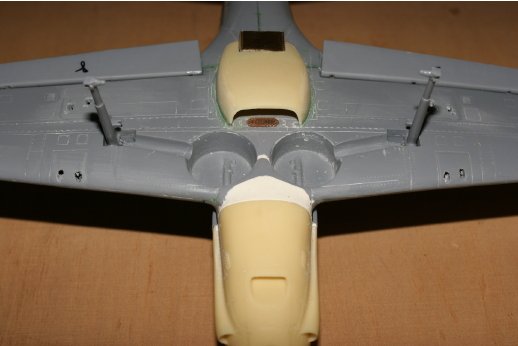
As described by others the nose assembly is a real beauty. To facilitate the fit I used paperclips drilled into the edge of the fuselage (Figure 2)
Figure 2. Fitting the nose assembly
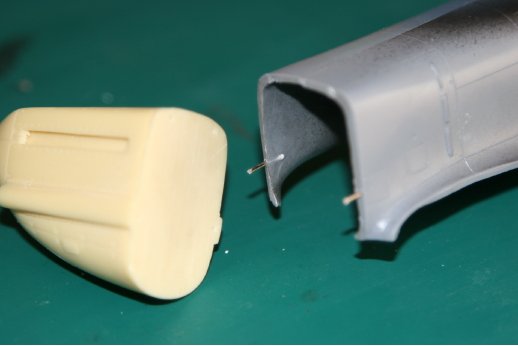
The other parts went together with some difficulty. There was a lot of trial fitting (Figure 3). I cut off the molded on navigation lights and drilled out the gun housings and shell ejection chutes. The worst part of the kit is the fit of the foreword belly to the wing (Figure 4).
Figure 3. A whole lot of filling going on.
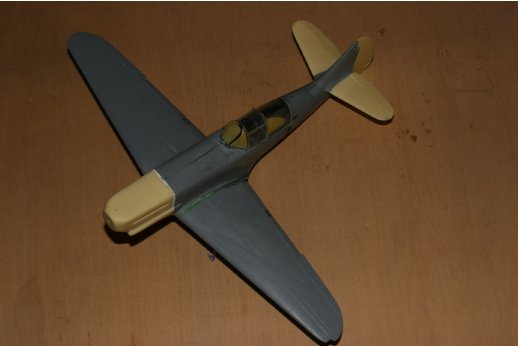
Figure 4. The belly assembly was filled in and reshaped with milliput.
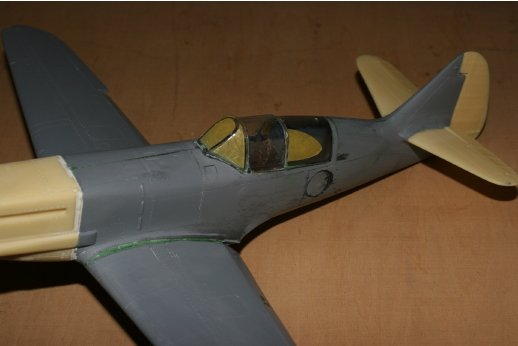
I elected to use the front and rear sections of the kit canopy and the vacuum formed middle section from contact resiné (Figure 5). This allowed me to fare in the canopy realistically. The final thing was dipped in Future floor wax.
Figure 5. The canopy assembly.
Everything fitted in, I rescribed lost panel lines and used a ponce wheel for rivets.
Painting
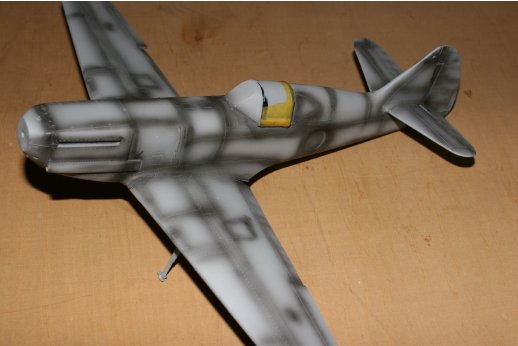
The completed model was sprayed with primer and pre-shaded (Figure 6).
Figure 6. Primed and pre-shaded
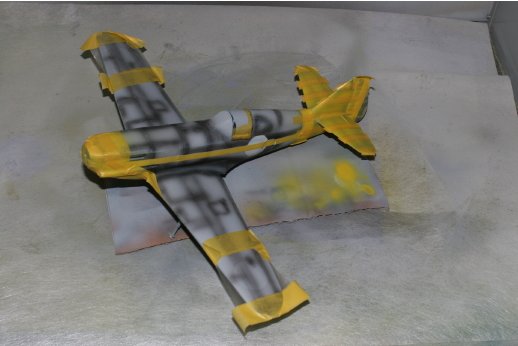
I then painted all the main markings with Vallejo paints. Determined to render the most colorful D520 I could find, there was a lot of masking (Figure 7). Of note, the white and yellow markings went on first to prevent camouflage from showing through.
Figure 7. Sequence showing progressive painting of markings.
a. Masking
b. Base colors
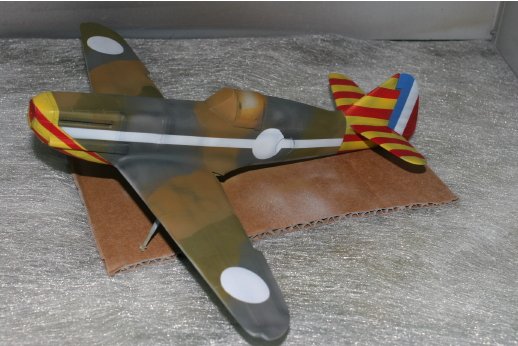
c. Basic markings finished. Everything seen here has been airbrushed including the roundels.
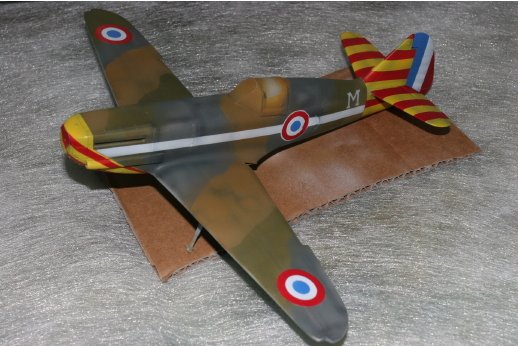
The kit was coated in future and markings (only the tail numbers were left) applied. The crane decal was designed on a computer and printed on decal paper. The number 245 was hand drawn. I applied burnt umber oil wash and wiped it off in a front to rear direction. The navigation lights were cut from clear acrylic, shaped, polished, stained with Tamiya clear colors, dipped in Future and secured with Microscale Klear. The secondary fuselage-mounted gun-sight and cross-hairs were from Waldron. Satin varnish sealed the finish and pastels were added for the exhaust and machine guns.
Completion
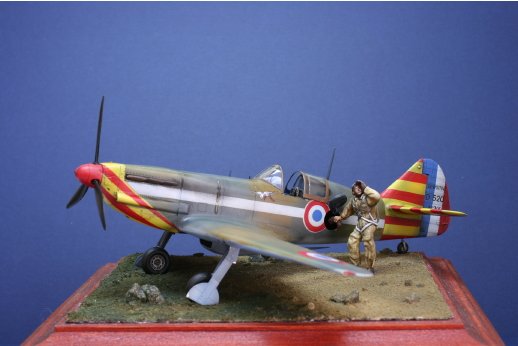
The final model was placed on groundwork with a figure I sculpted and cast. This was finished in oils. All in, I liked the kit and the upgrade parts. The colorful scheme was a welcome relief from the standard fare. Now looking at the plane I find it difficult to understand what tactical advantage the colors provided. Nevertheless, the plane has the lines of a racer from the pre-war era (especially the rear-set cockpit) and I think if your going to have the lines of a racer than you should have the colors of a racer.
© Suresh Nathan 2006
This article was published on Wednesday, July 20 2011; Last modified on Saturday, May 14 2016