
J. Rutman's Ta 152H-1
By Roland Forrer
Introduction: The Kit
As I was always attracted by Focke Wulf 190's designs, by the diversity of the Luftwaffe paintings, the beaten up look of their work horses and also not (too much) main stream subjects (it was the case, back in 2007, for the Ta 152), JR's kit was a logical way to go for me.
Almost everything was said about this kit good or bad and often in complete contradiction for the very same kit…go figure!
A complete review by Mark Proulx is available on LSP.
In my humble opinion, if you are ready to go further in your own mounting systems and tricks, and keep in mind this is not a industrial mass product but a one man's craftsmanship from A to Z, it out matches all others! Definitely!
It's for sure not a "shake and bake" kit and it has good and bad points like any other. But with a little effort one can easily go over it. Maybe this build went a little beyond, but still!
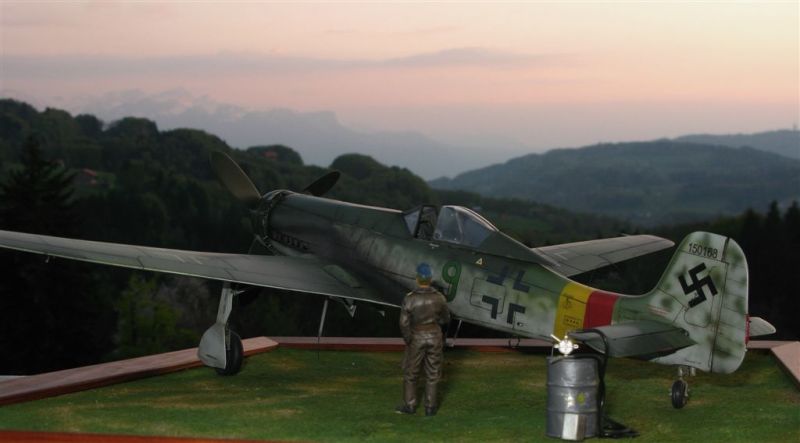
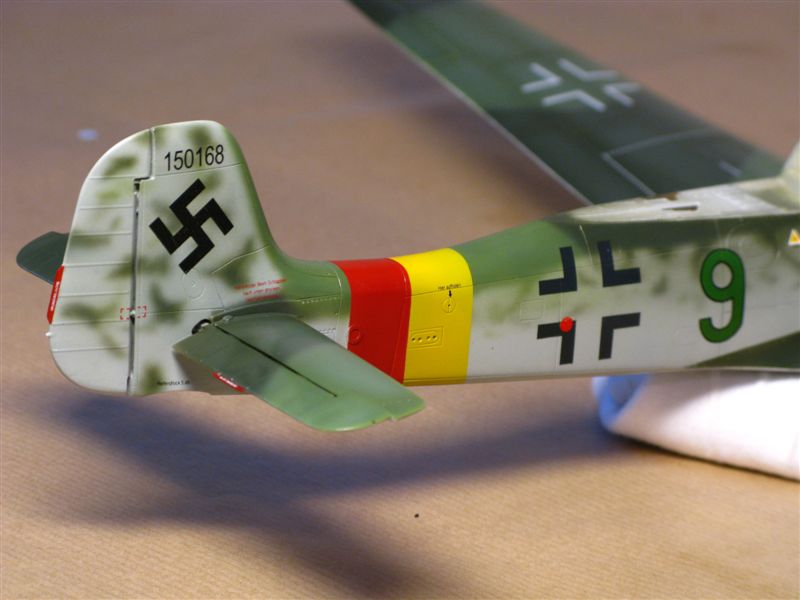
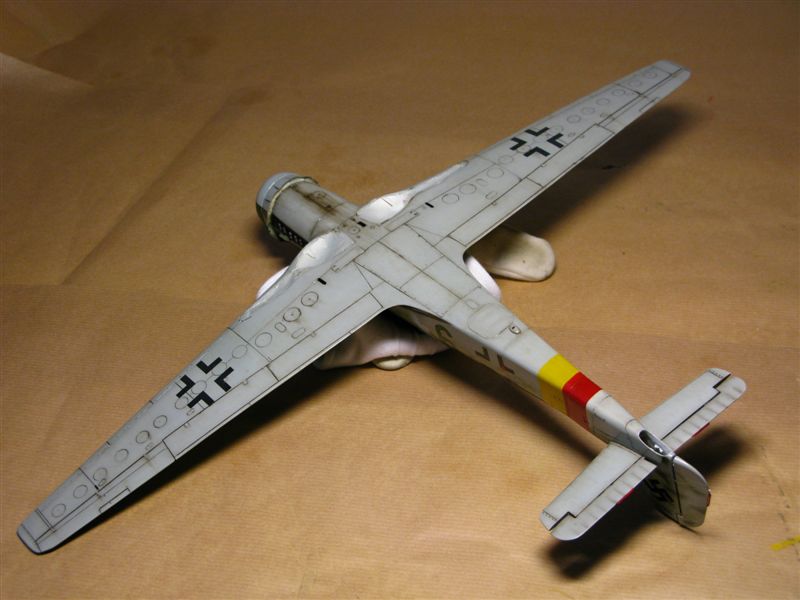
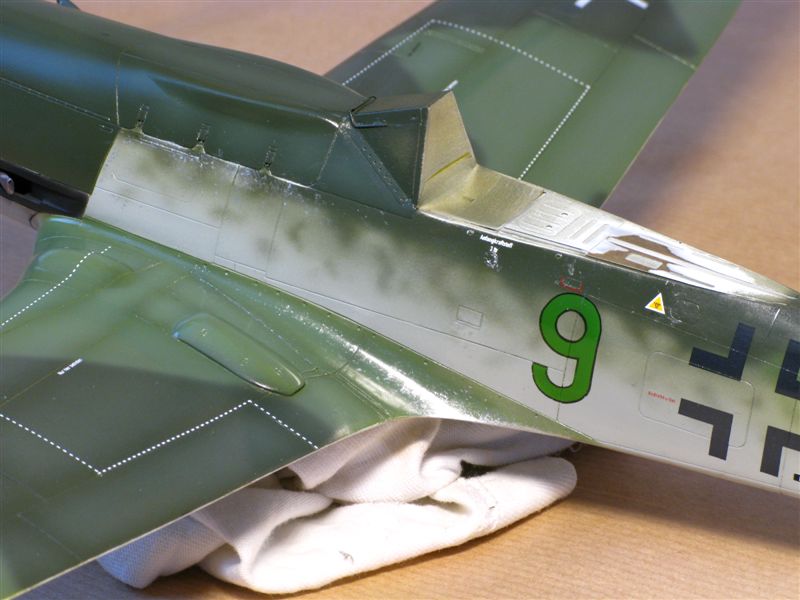
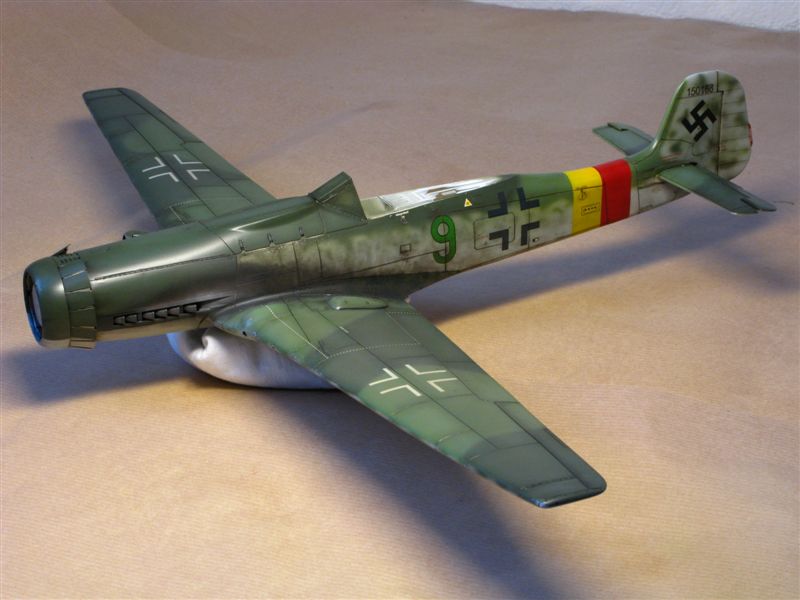
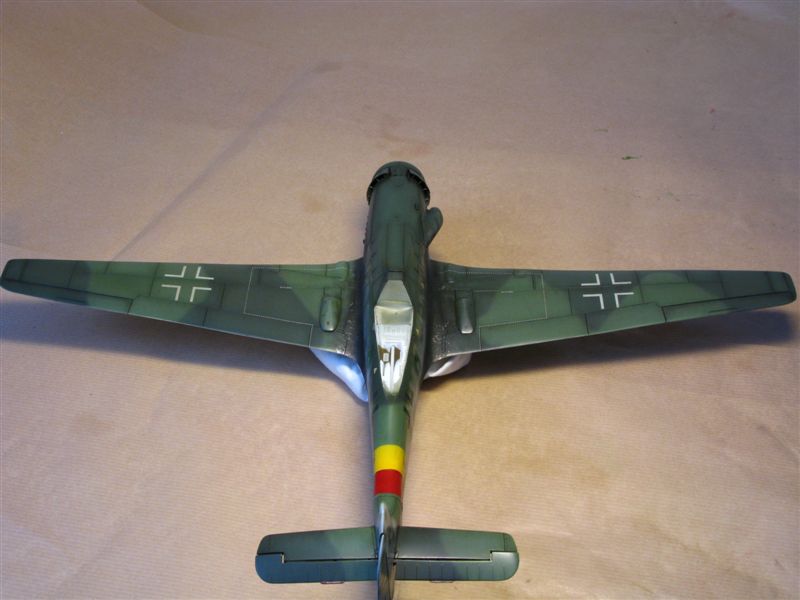
From the beginning, I wanted an operational aircraft. Somewhere along the way, decision was made to go with "green 9" of Jg. 301: Willi Reschke's last mount (one can see it everywhere now…but that's not the point!).
Part 1: Fuselage
First step was to prepare and adjust carefully the two main fuselage halves. What ever I read or heard about it, this kit has very precise assemblings. Meticulous dry fitting showed that putty was almost needless!
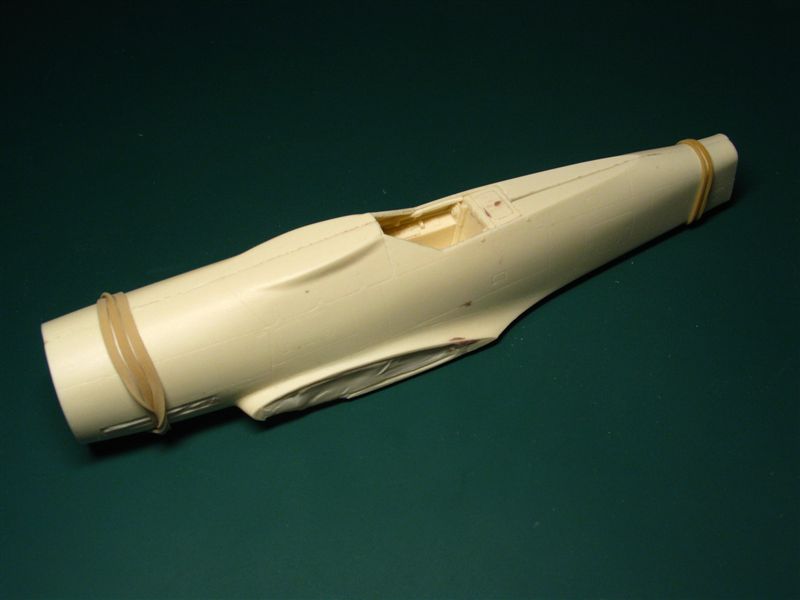
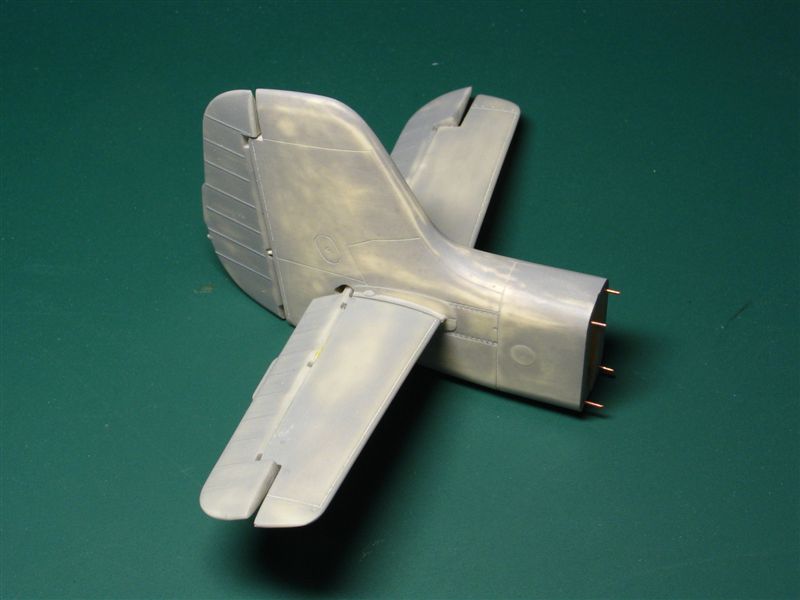
The tail was built by using cut away Hasegawa's D-9 ruder and elevators and then cast to have separated control surfaces.
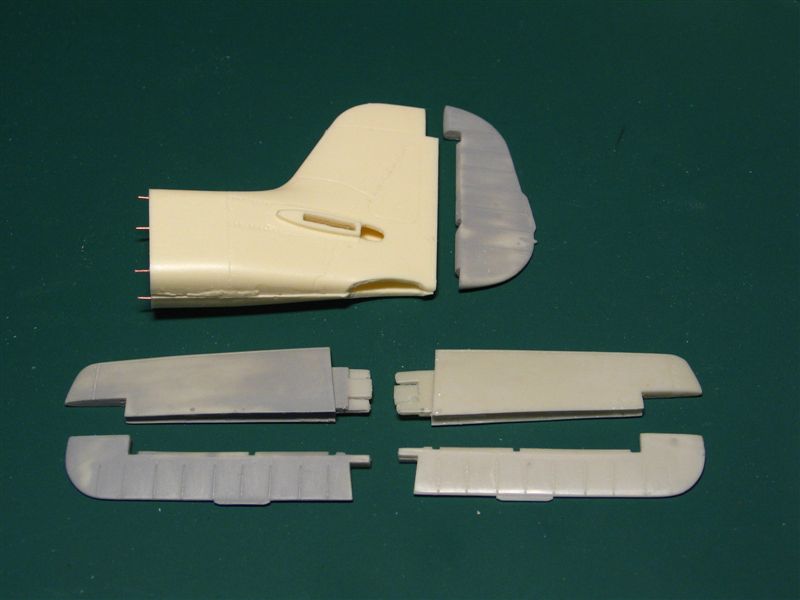
The finished "tail plug" with the addition of locating pins (0.8 cooper wire).
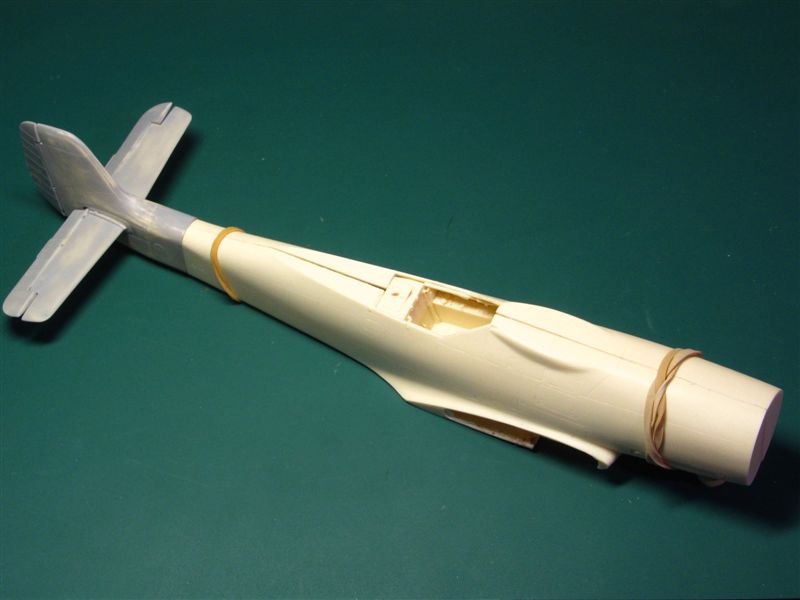
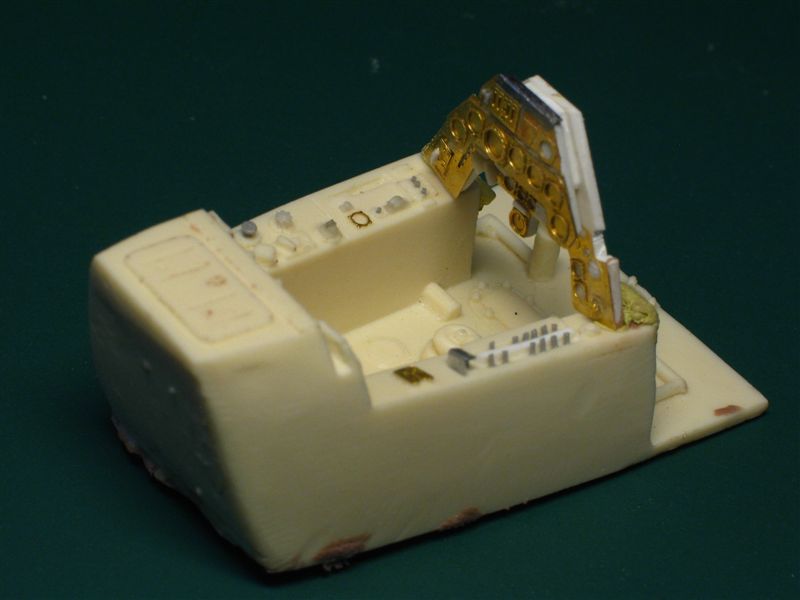
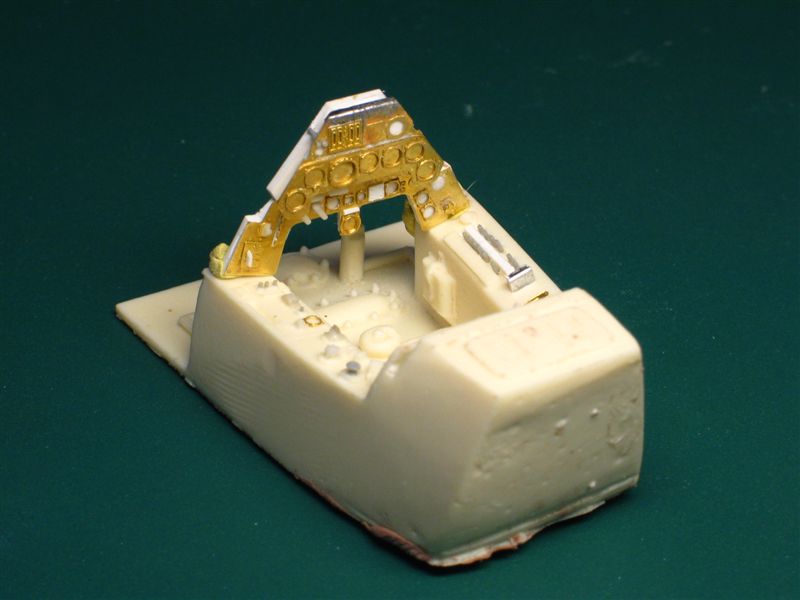
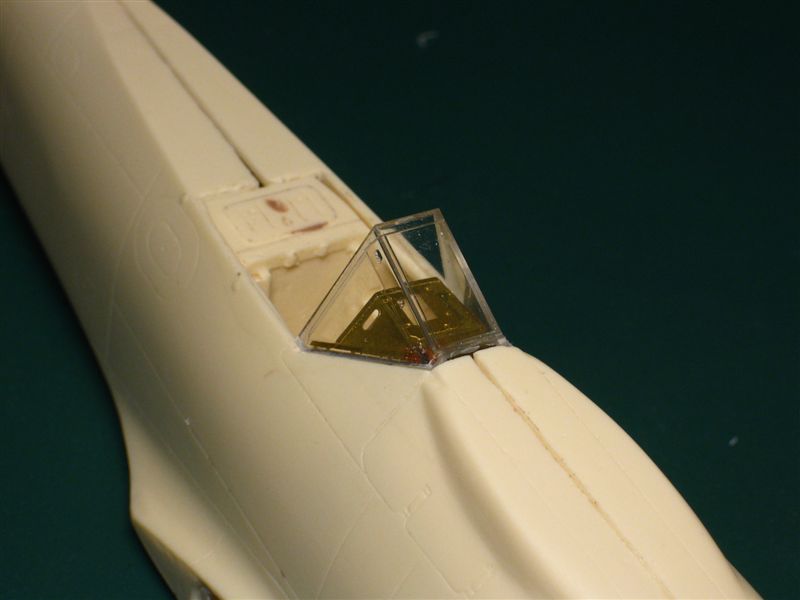
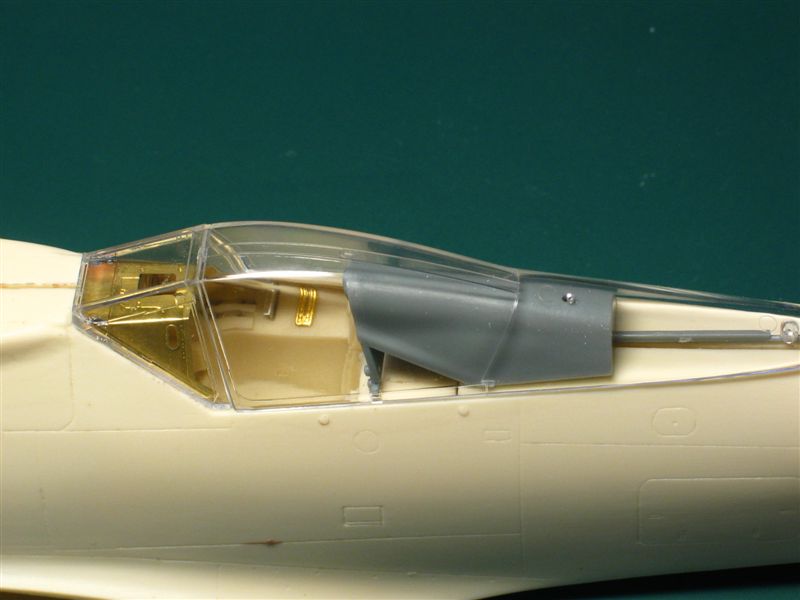
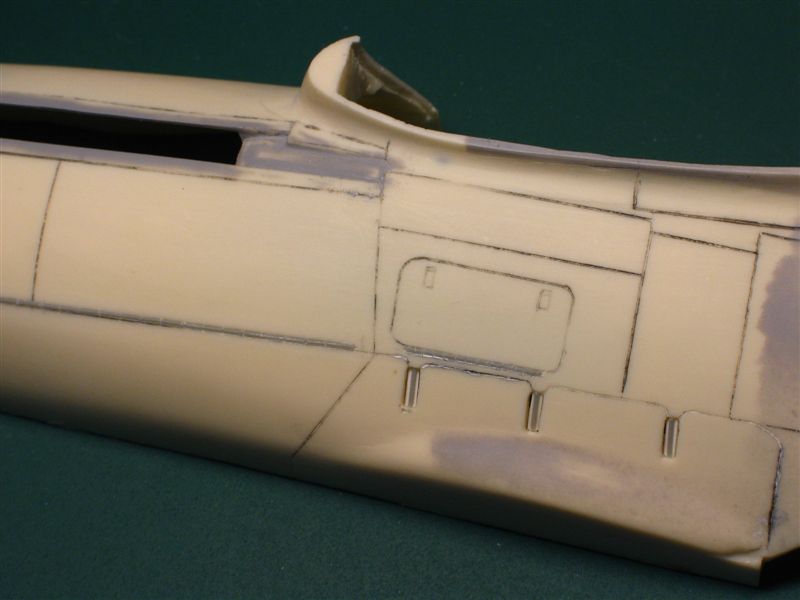
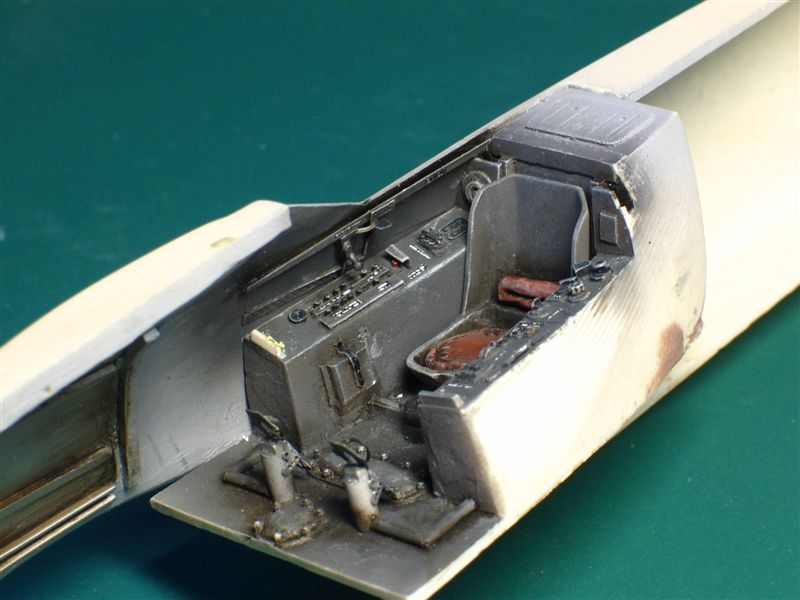
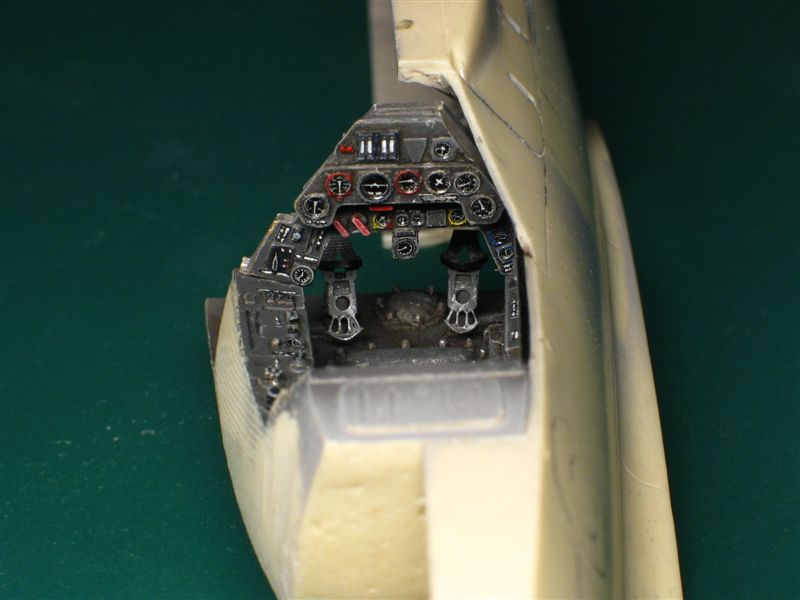
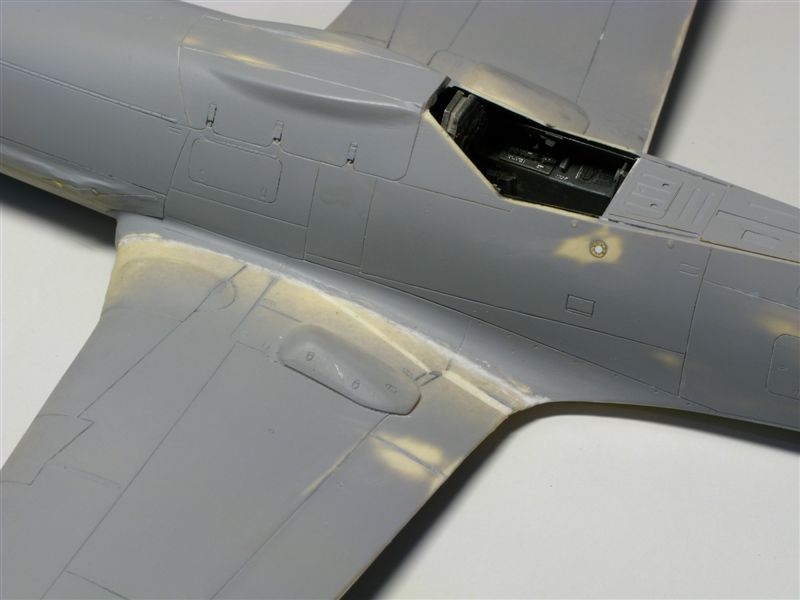
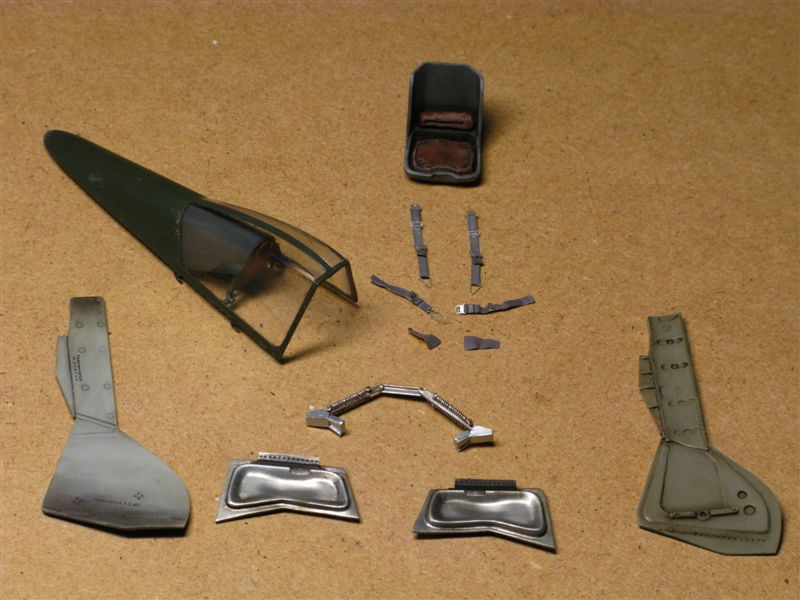
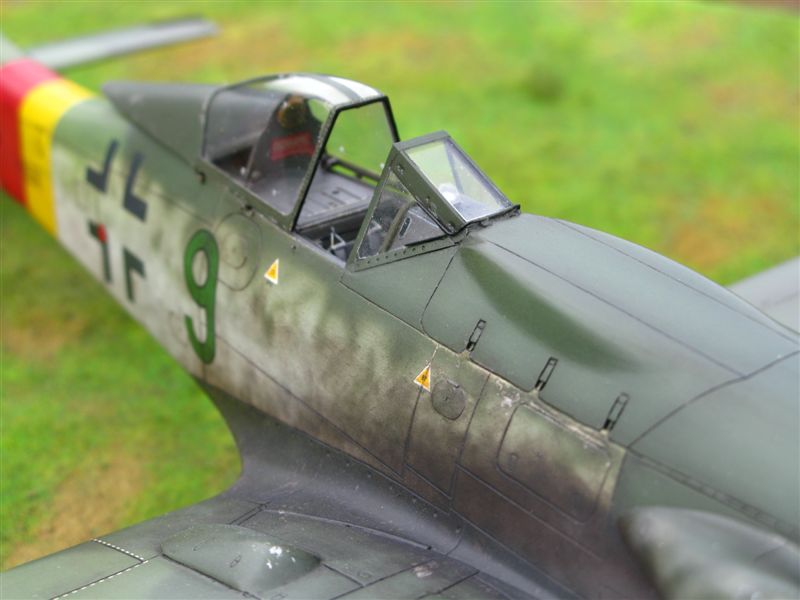
The cockpit received some more details with Extratech PE parts and a bit of scratch-building.
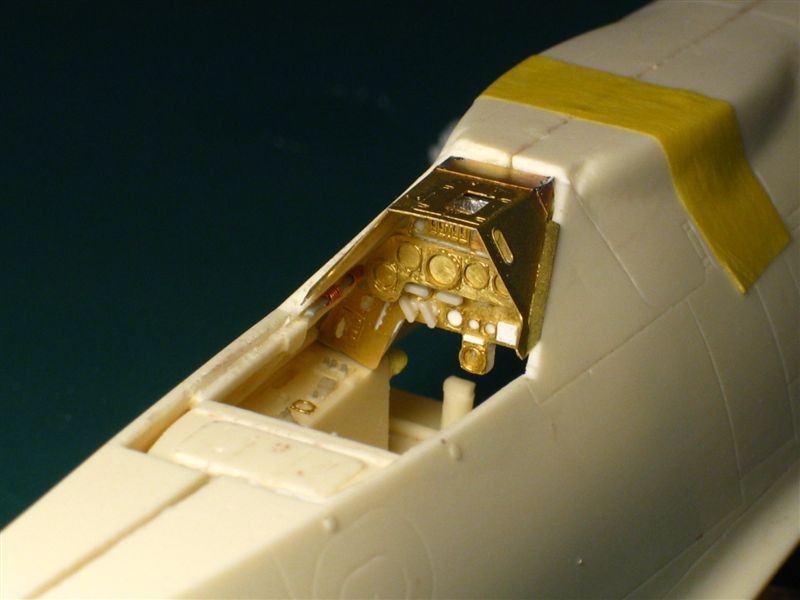
It also came out that the Hasegawa D-9 windshield and canopy fitted better the model and required quiet less work (I'm a lazy modeler!) than the kit parts (resin frame and acetate glasses).
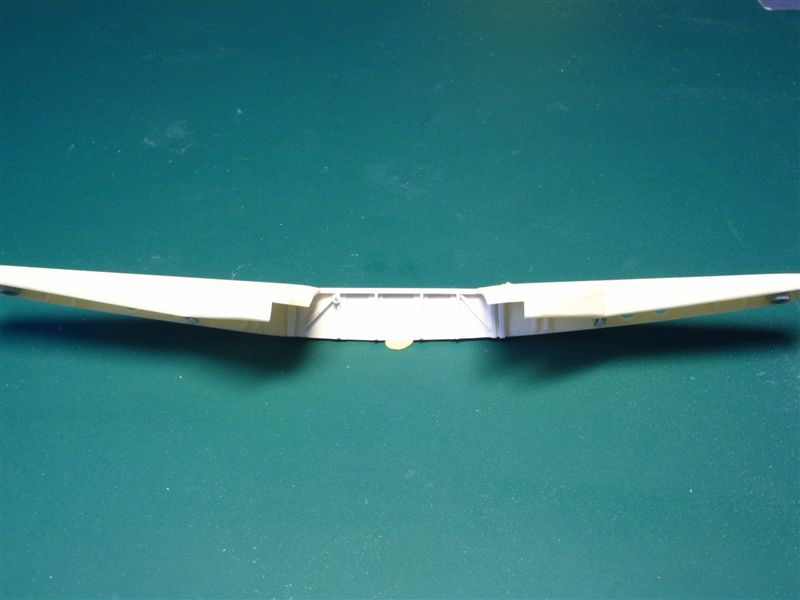
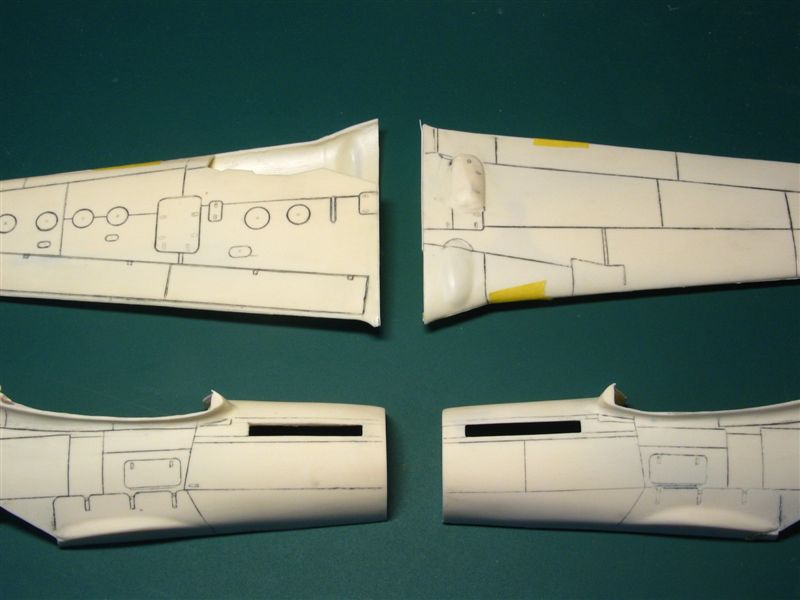
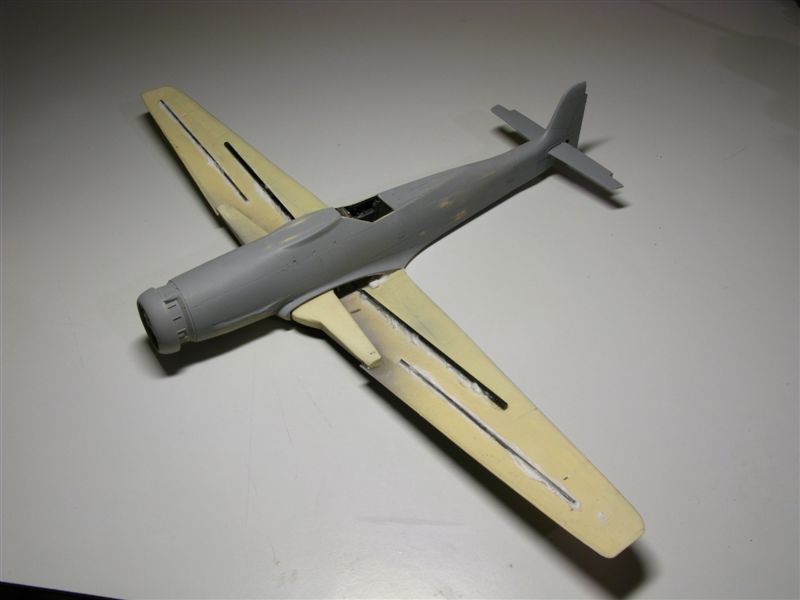
Part 2: Wings
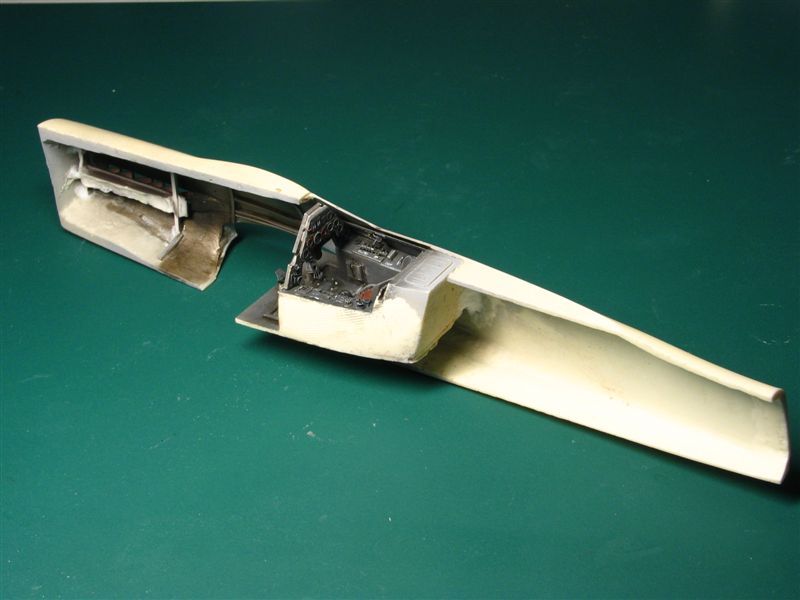
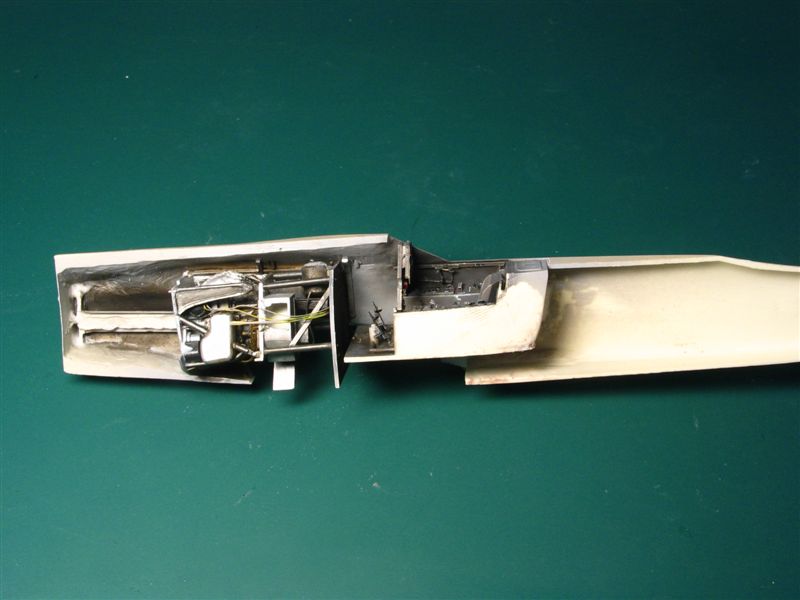
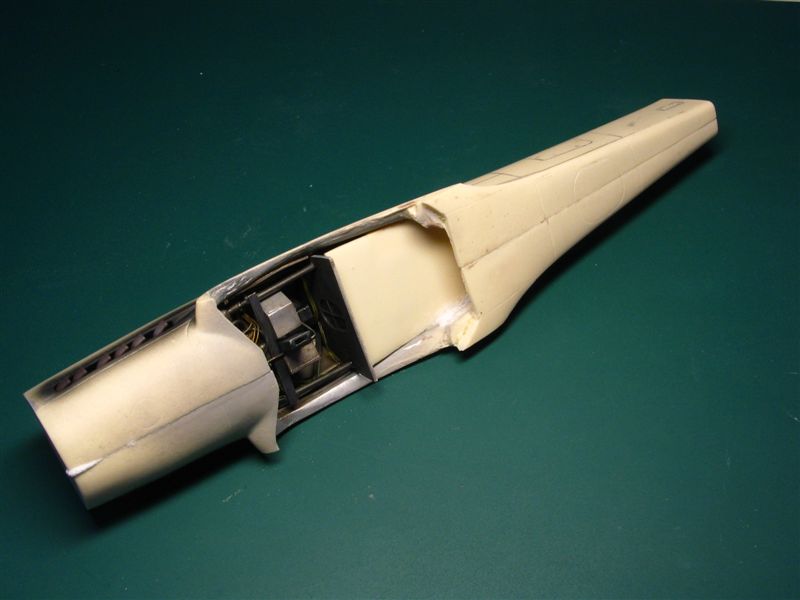
After a lot of thoughts about how to get this huge thing together, I decided to work on separate sub-assemblies steps: cockpit and fuselage wings, wheel wells, engine "plug".
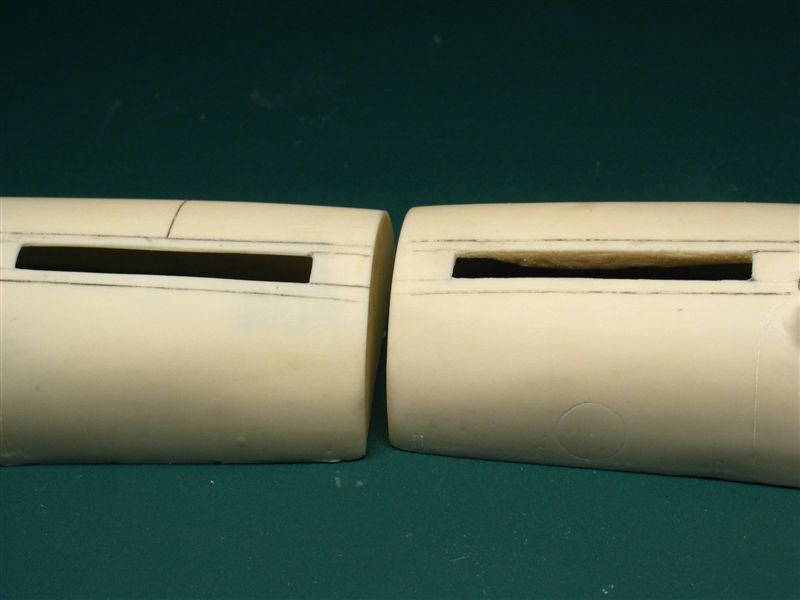
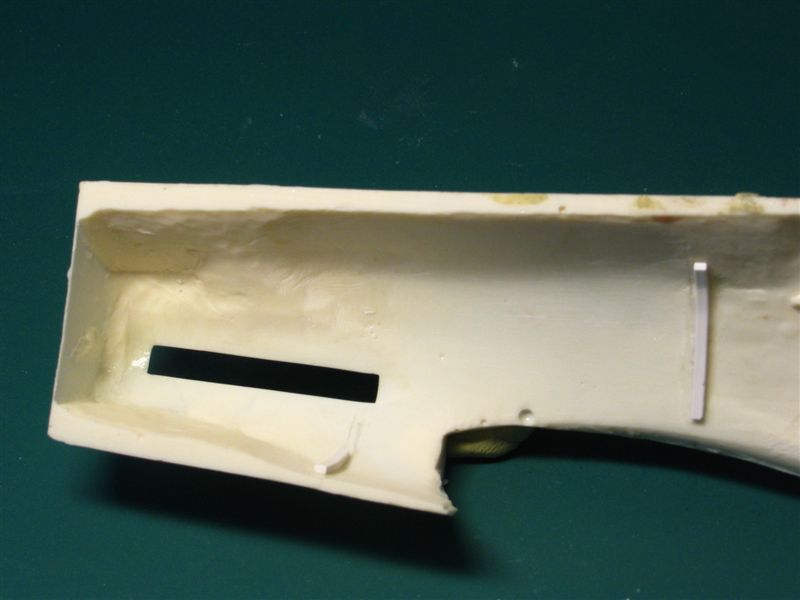
To make this easier, it was then obvious that the main parts of the wings and fuselage had to be split in a different way than originally.
First the bottom center of the fuselage was cut out. This will allow me to insert the future wings/wheel wells assembly into the fuselage without trouble.
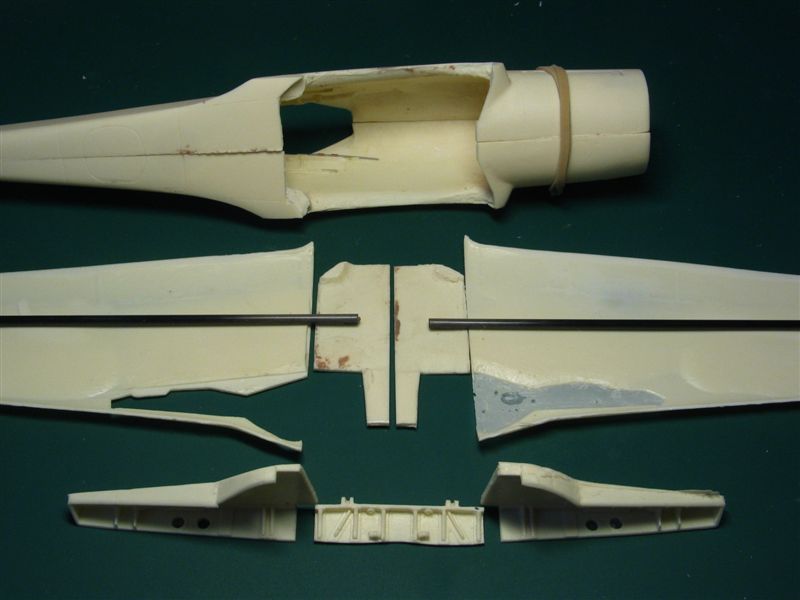
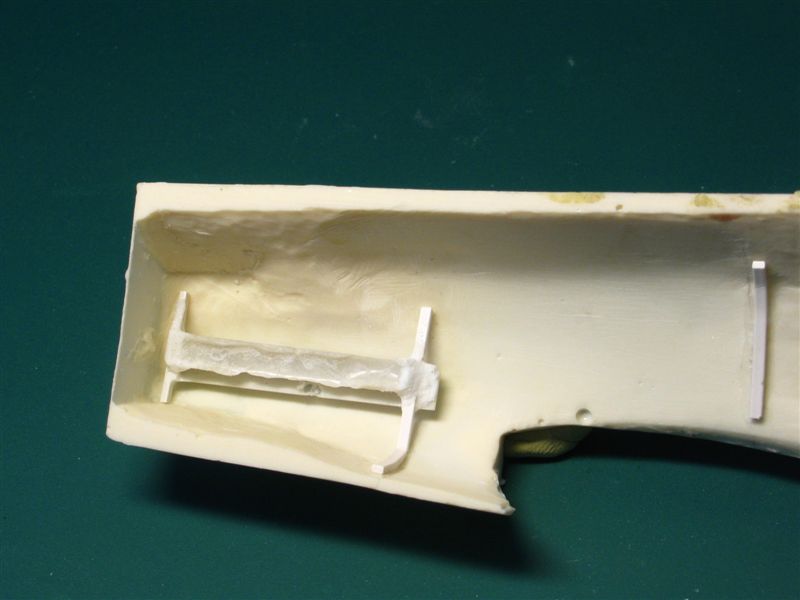
The (very) long wings were reinforced with thin carbon tubes while the bottom fuselage parts received a steel wire, bent to the proper Ta152's specific dihedral.
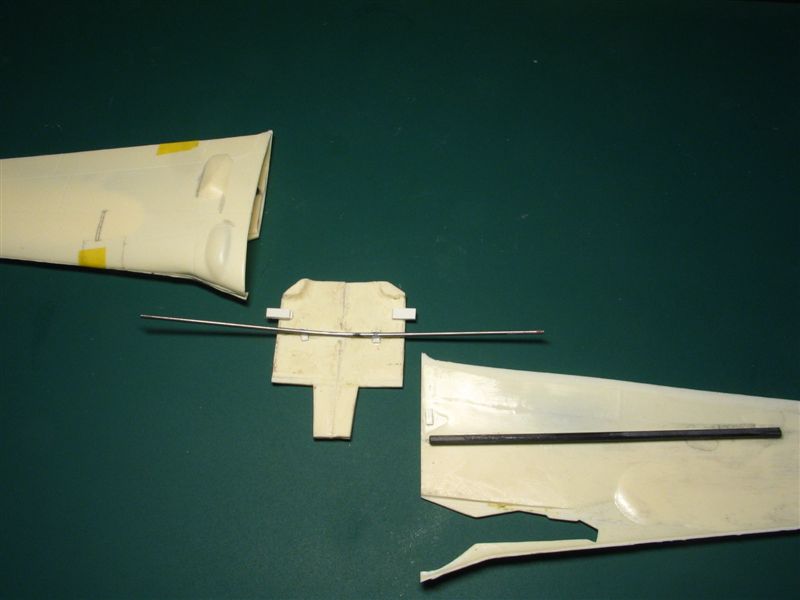
The carbon tubes will then just slide over this wire and the job is done (the same principle as on some larger RC models).
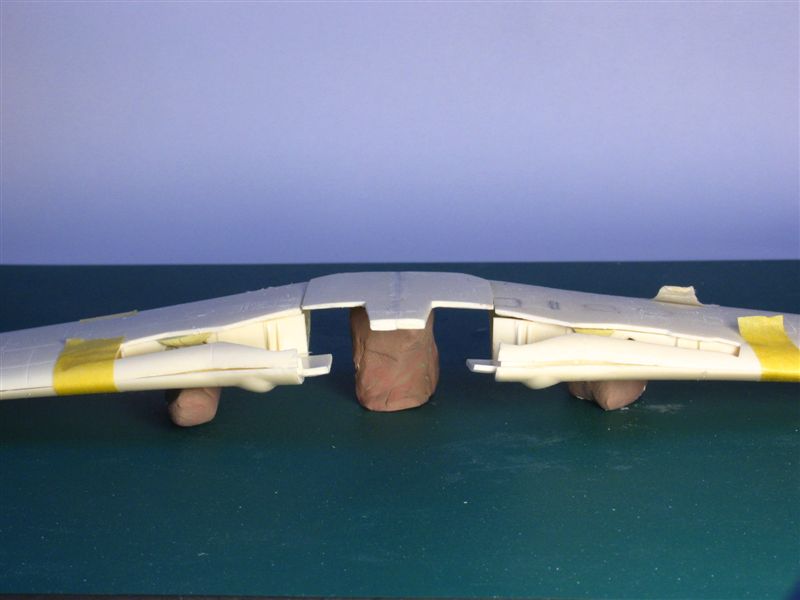

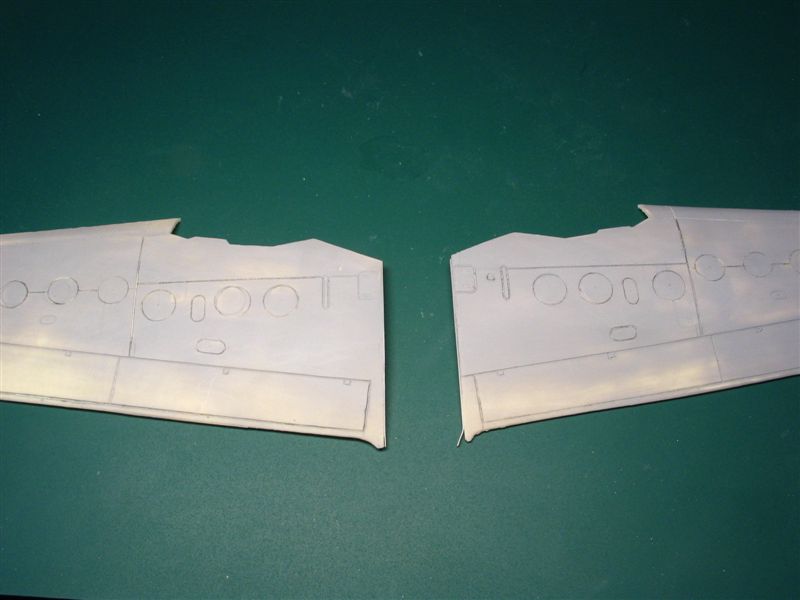
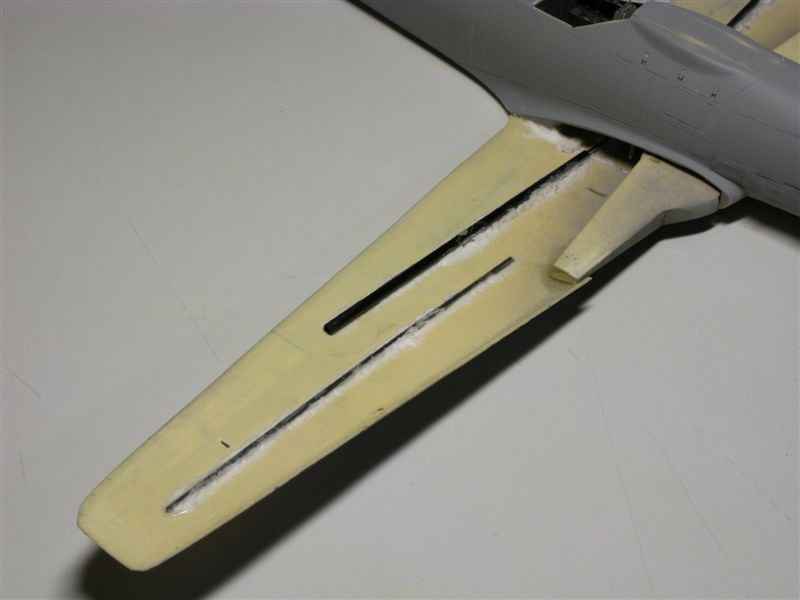
NB. Please be aware that at this point the gaps between the parts are scary. It has nothing to do with the kit itself! It's just me working little by little on the adjustments and dry fitting as the build goes on!
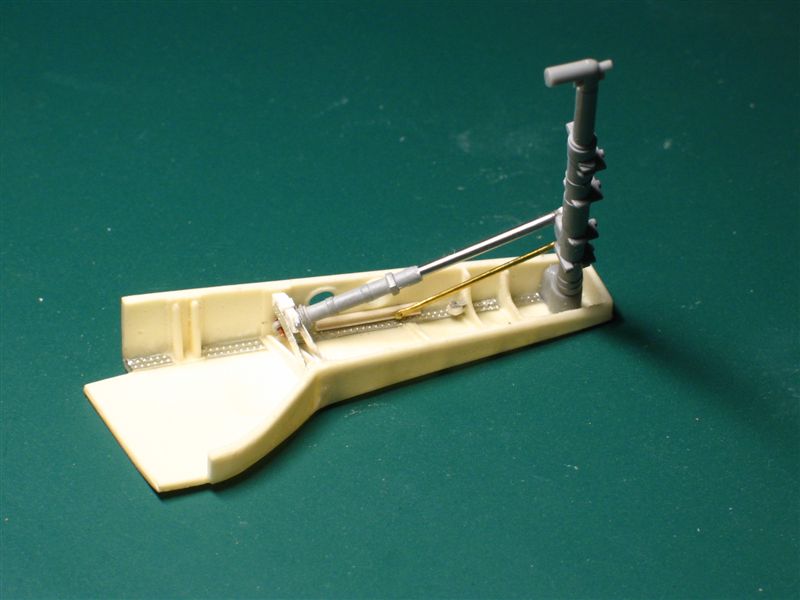
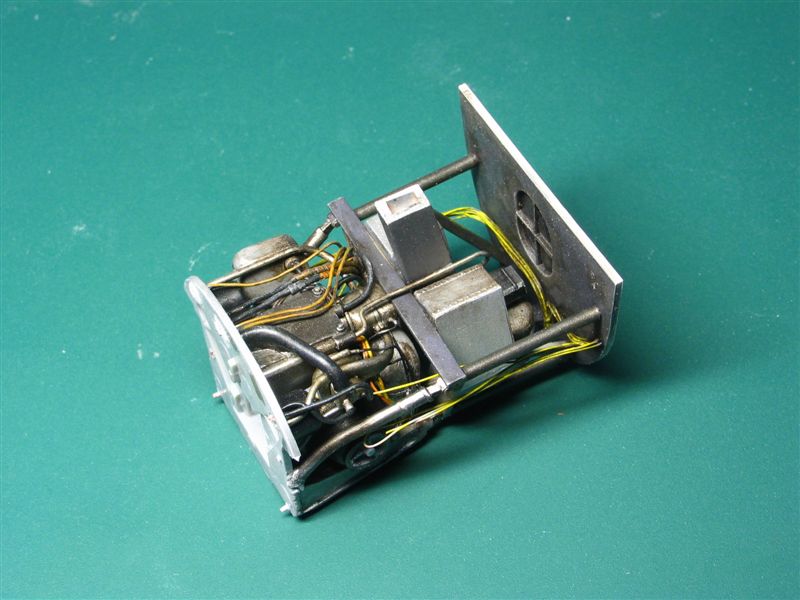
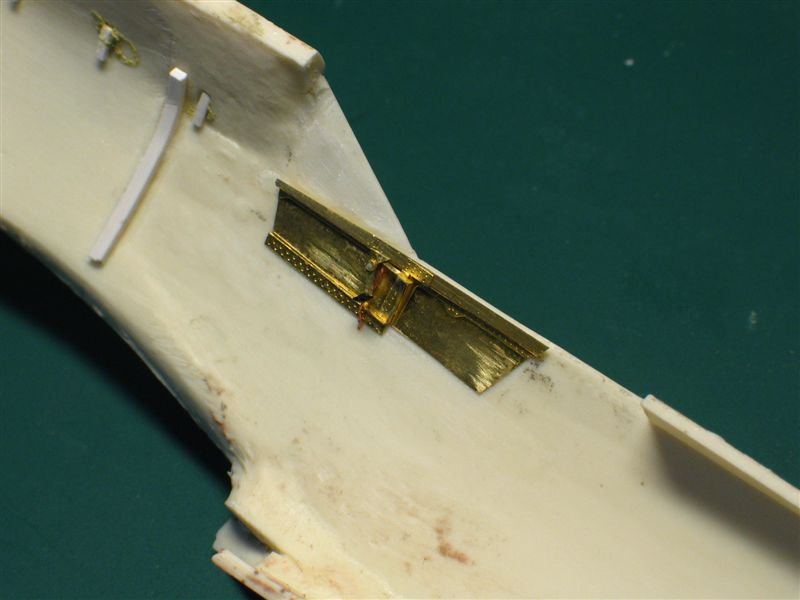
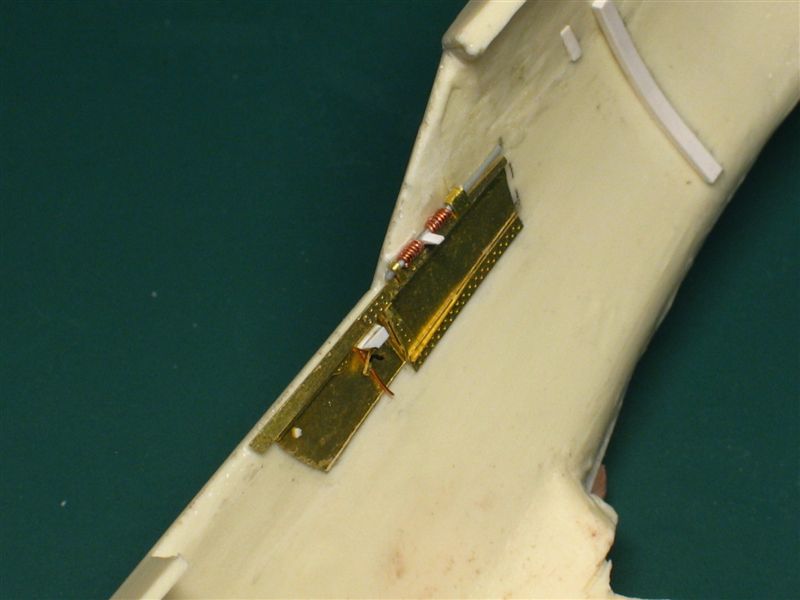
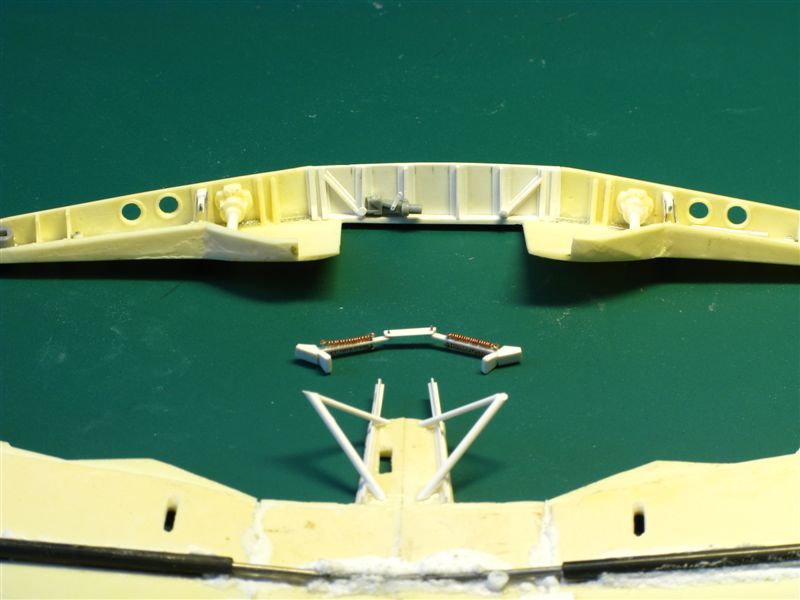
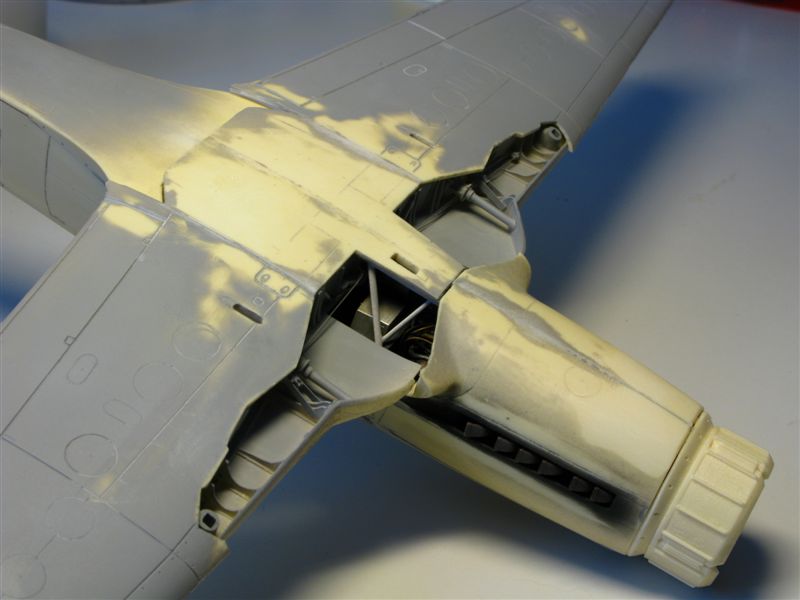
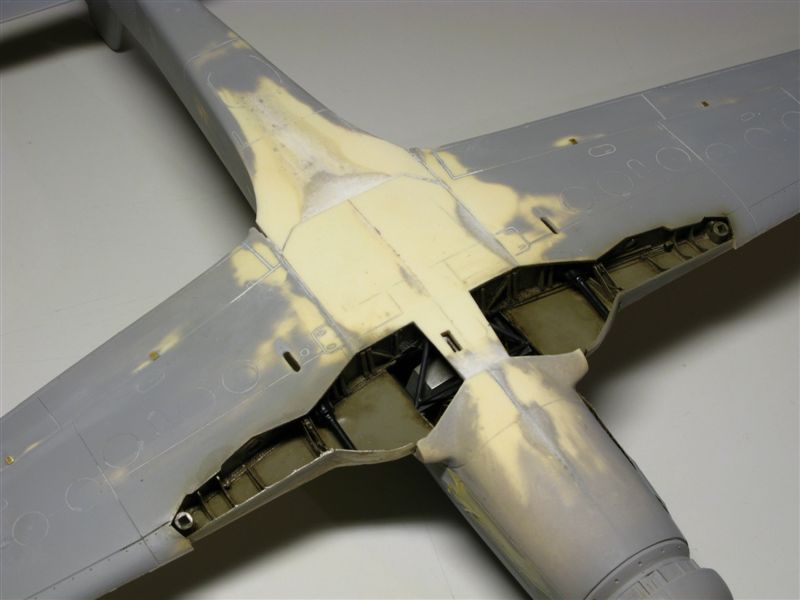
Part 3: The Wheel Wells and Engine Plug
The kit parts look very nice but I decided to redo the center wing spar section just because I felt it would be easier rather than to clean the kit's resin parts. Some more detail were added step by step according to the (very) few photos and documentation I had.
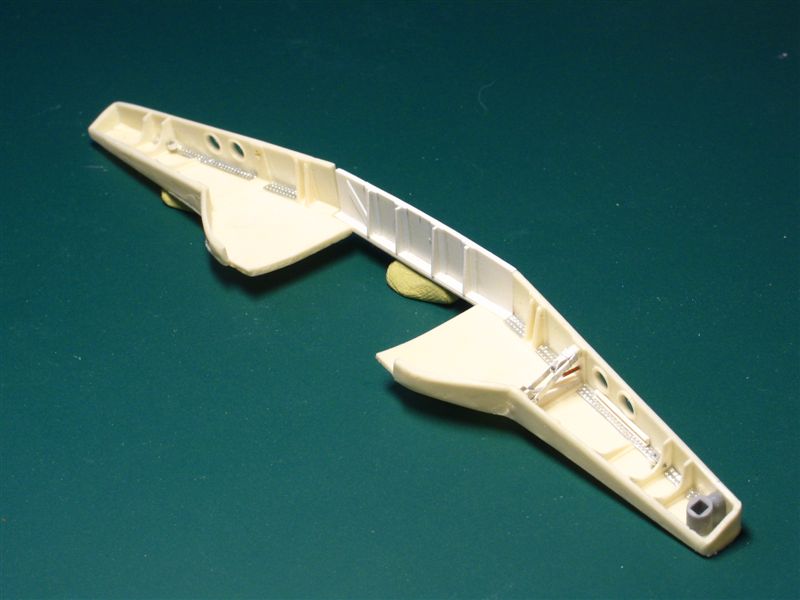
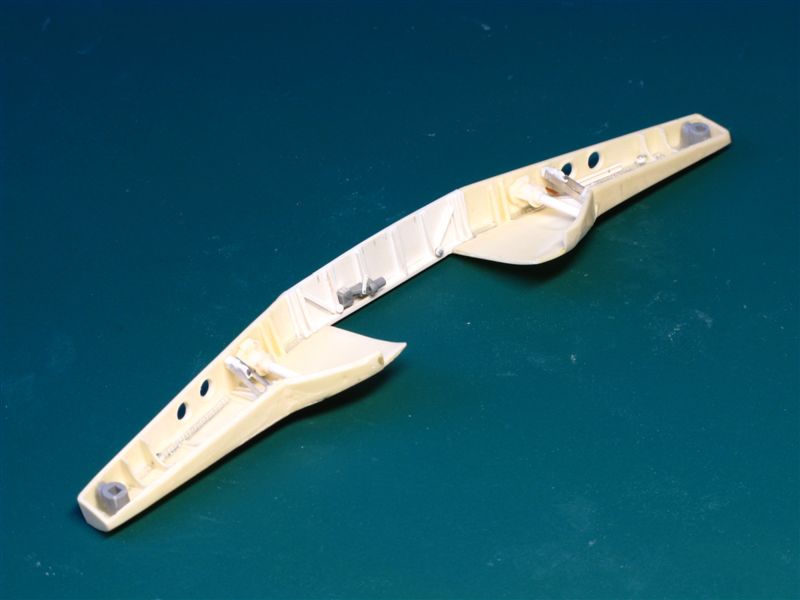
The wheel wells are assembled while paying particular attention to keep them following the right dihedral. This sub-assembly will later reinforce the wings too.
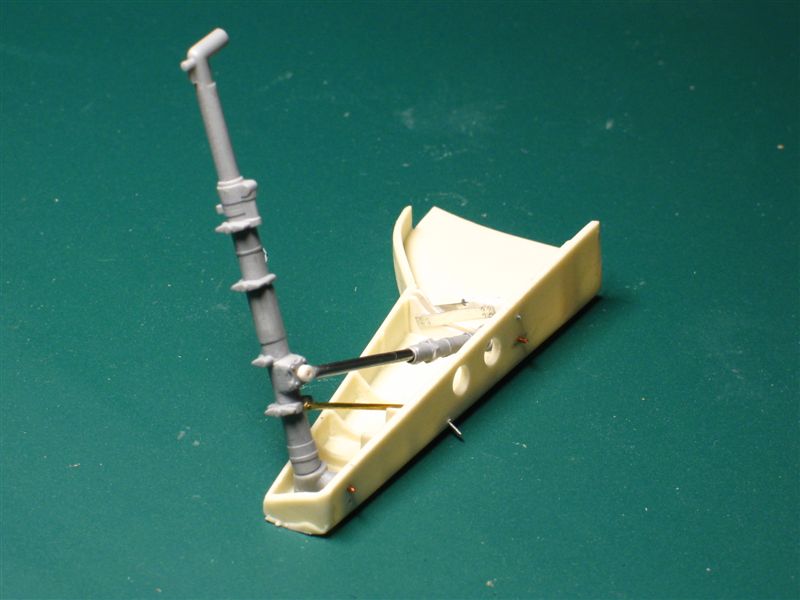
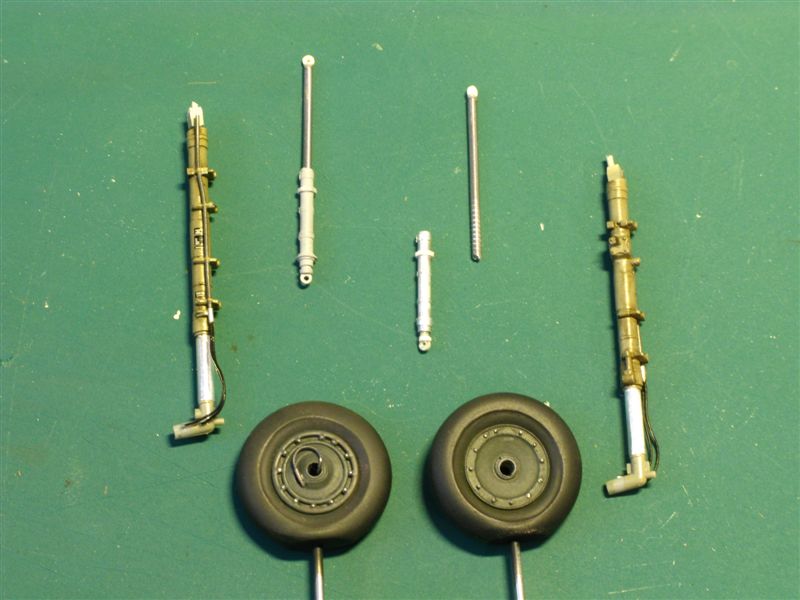
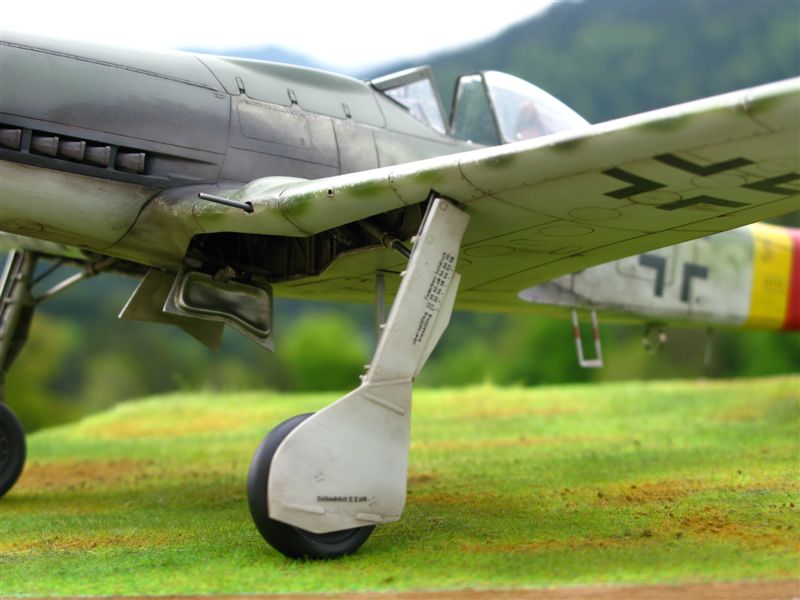
It was also decided to use Hasegawa's landing gear instead of the kit's white metal ones.
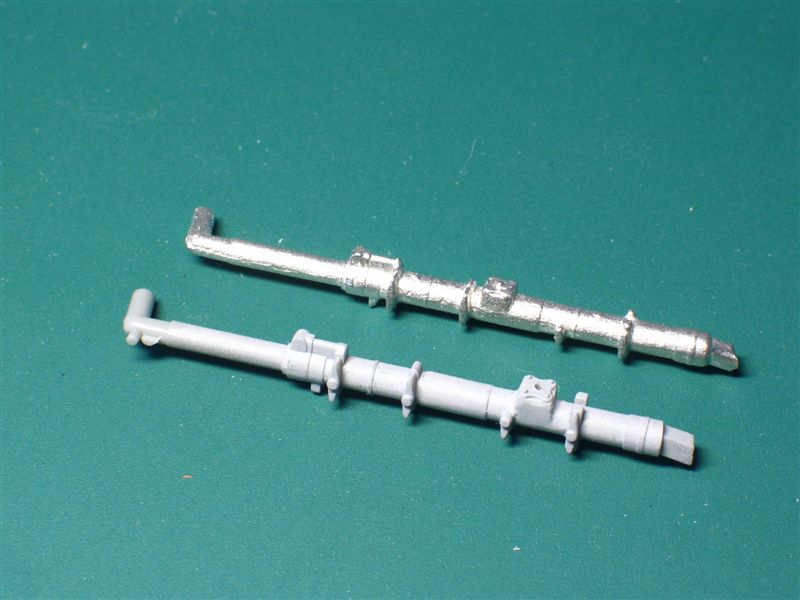
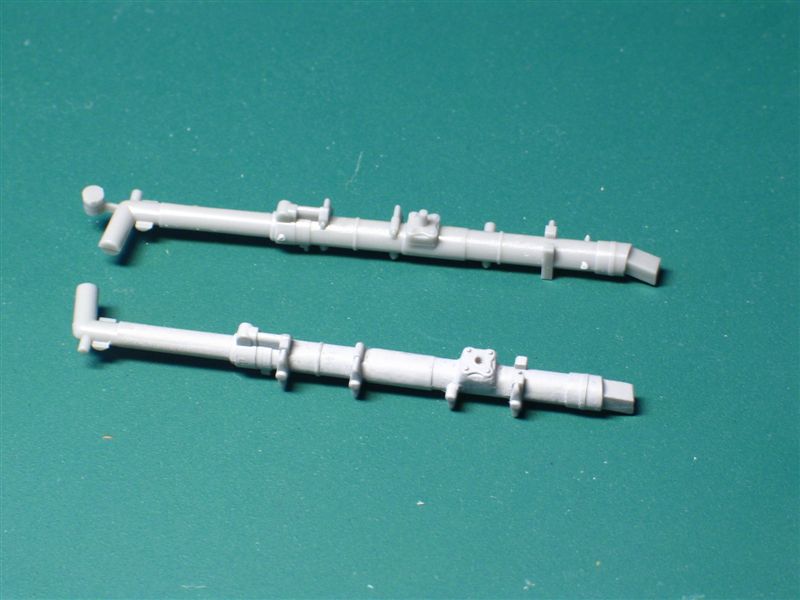
The Hasegawa's LGs attachments were cut out and used here to safely lock the legs into the correct position. The hydraulic retract piston attachment was also correctly relocated upward on the LGs, and two new retraction piston were built. The small rod and rail are the tail wheel retraction cable activator.
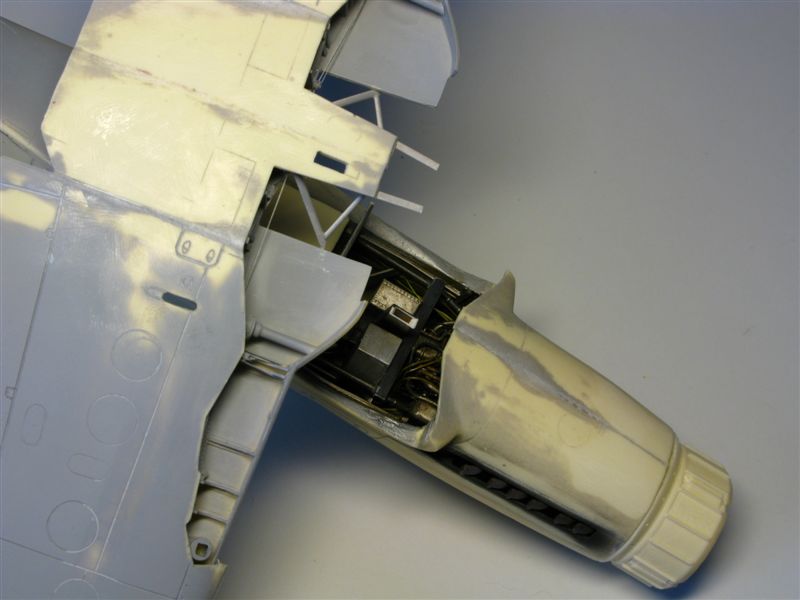
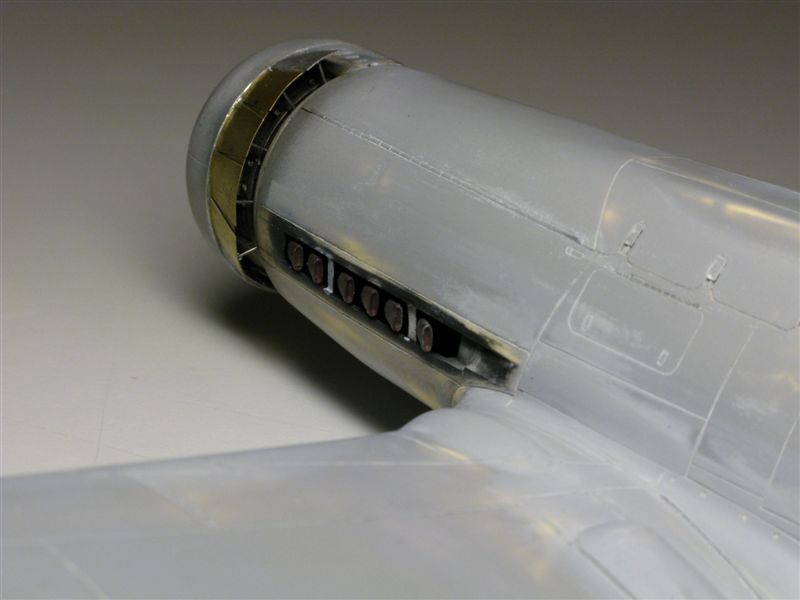
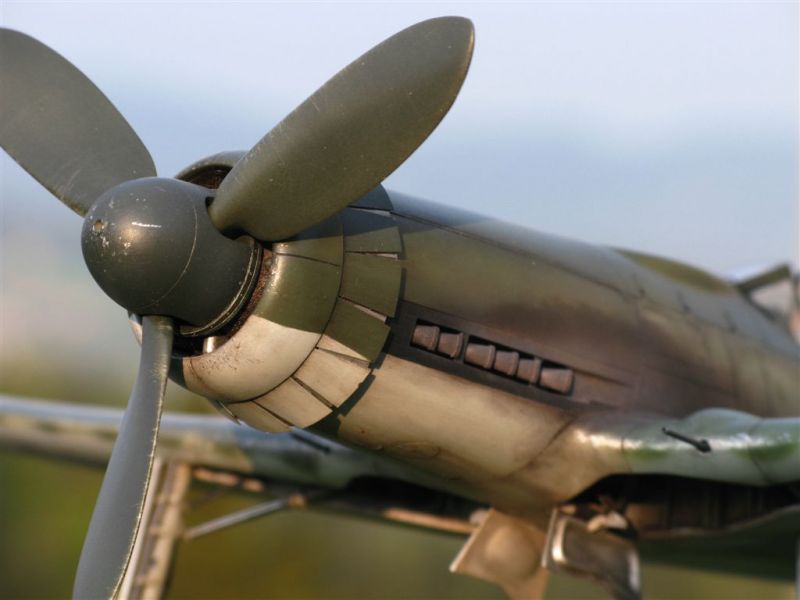
I also choose to rebuild the engine plug by taking the Hasegawa parts as base.
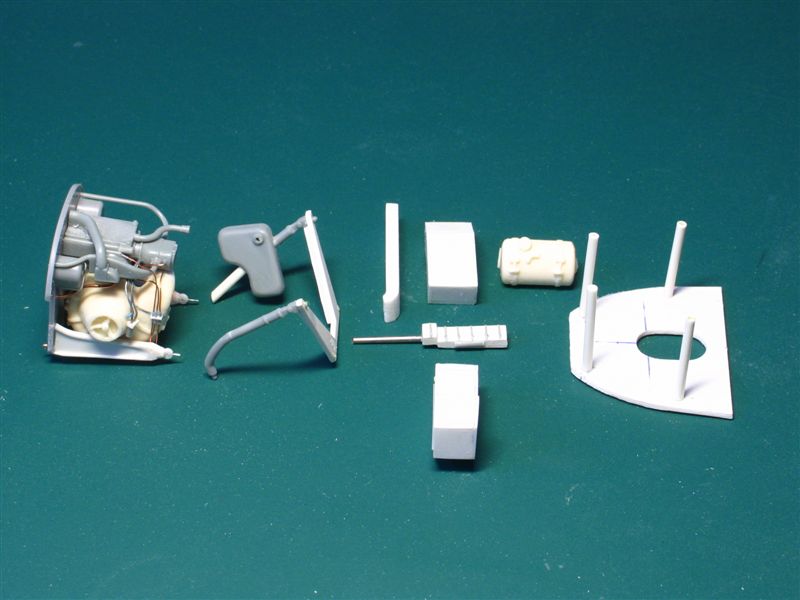
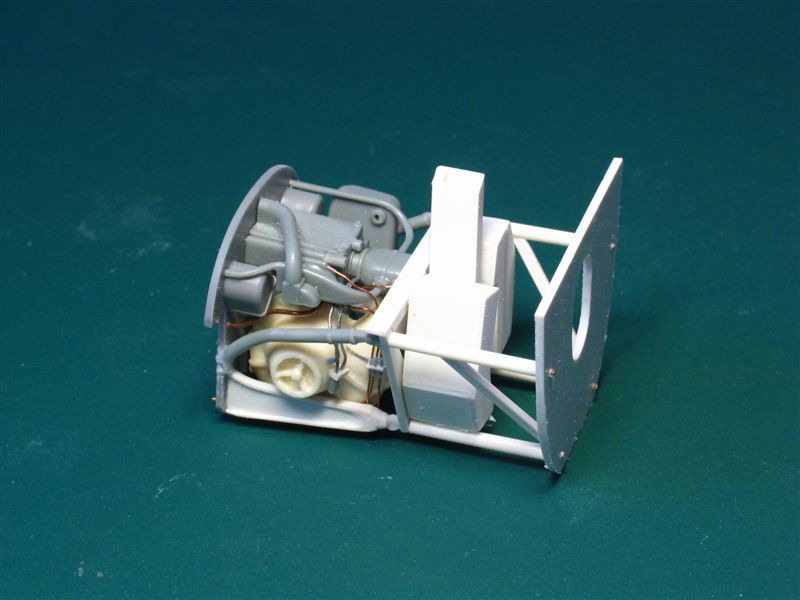
The plug was painted with Alclad II, Vallejo acrylic paints and weathered with artist oils at this stage.

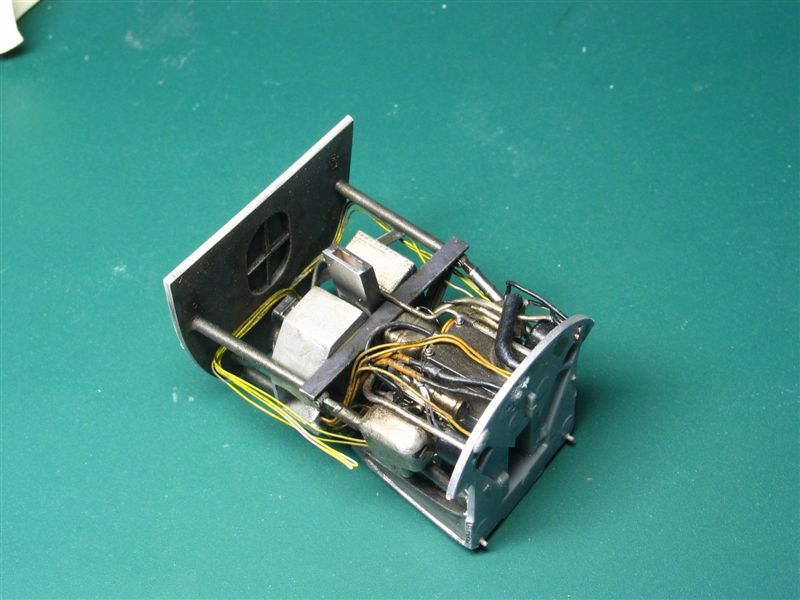
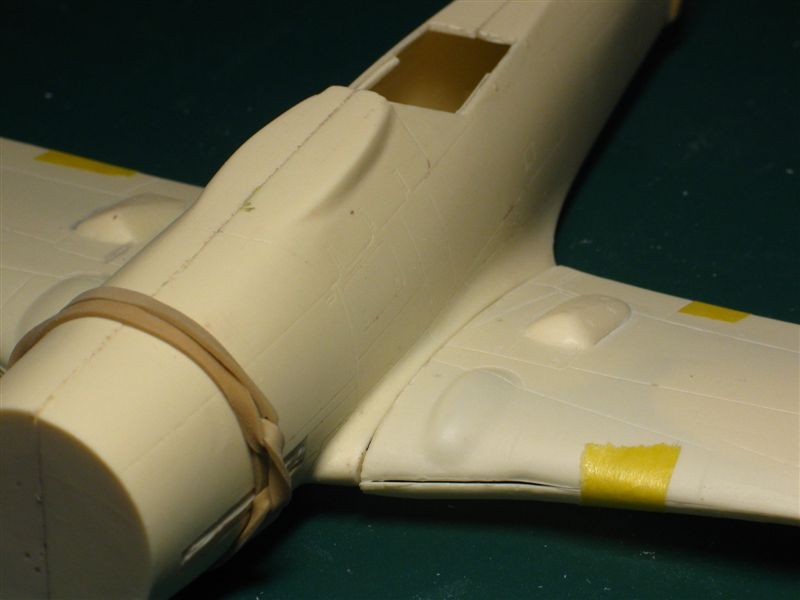
The fuselage side walls had to be thinned to accept the "new" slightly larger engine plug.

Constant (sometimes boring) dry fitting process was also the insurance to get all these things fit together in a right way. I did not wish any nightmare when it will come to add the few "no way back" cyanoacrylate glue drops!
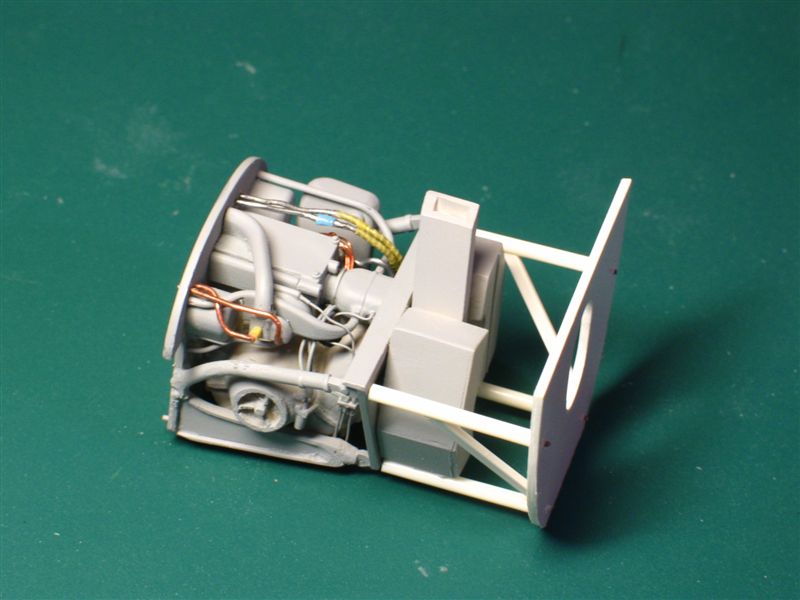
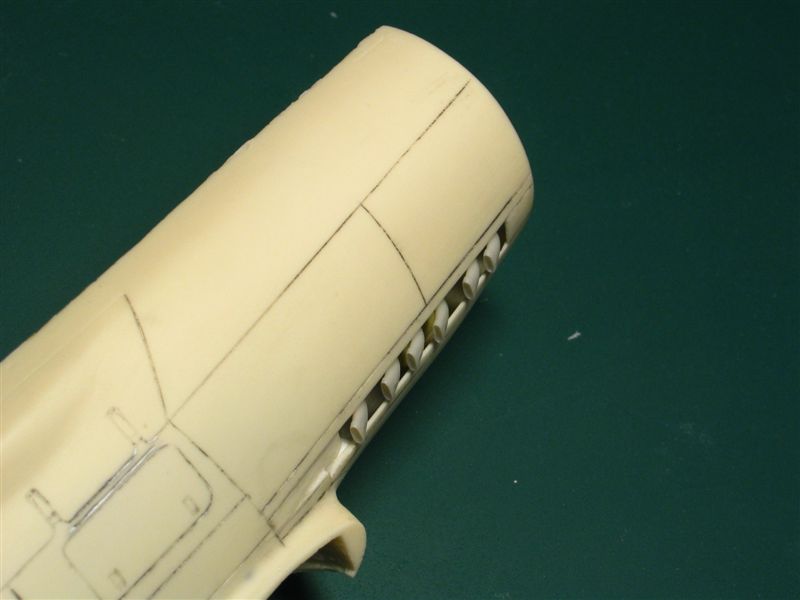
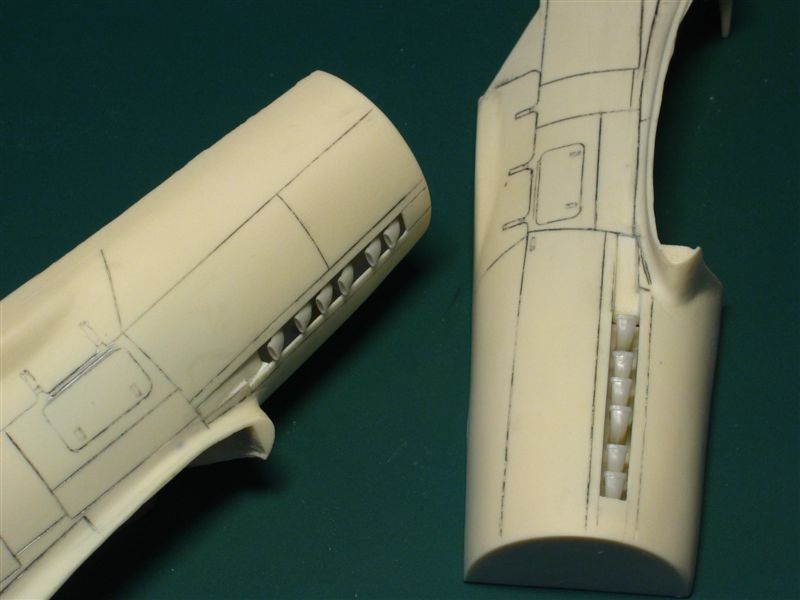
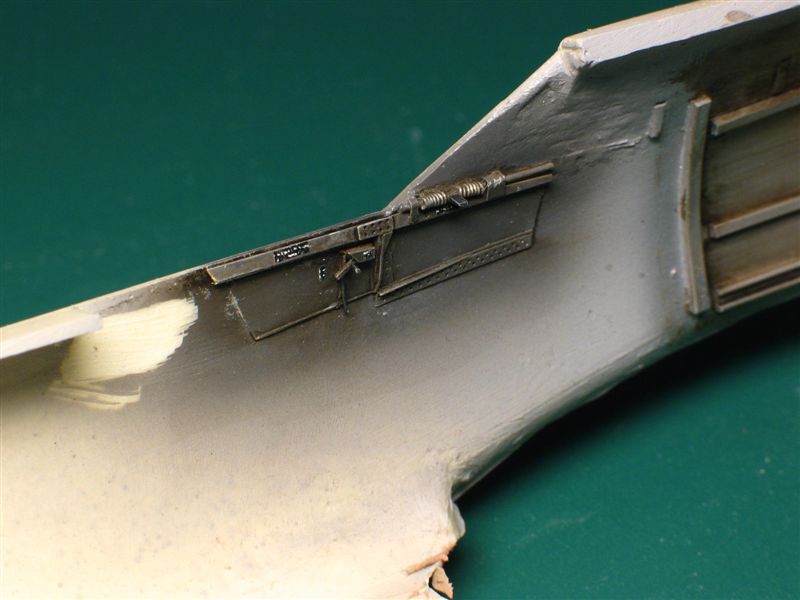
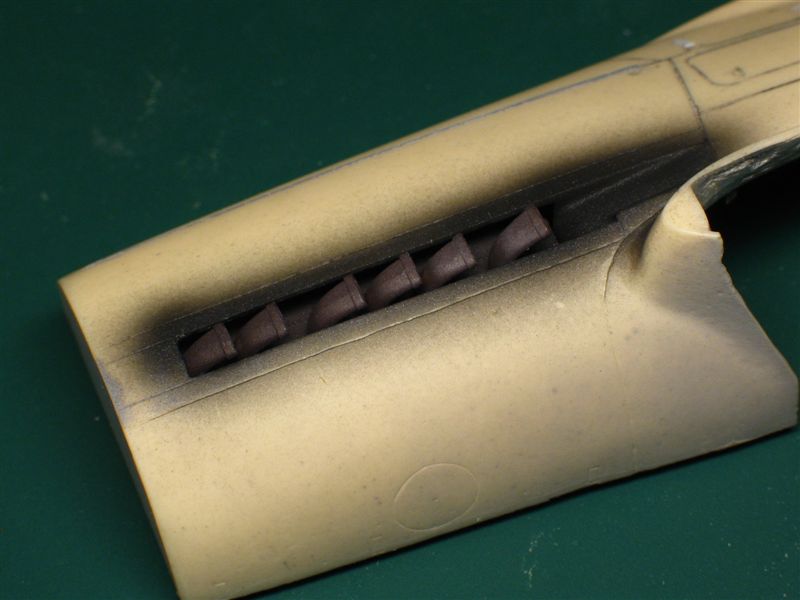
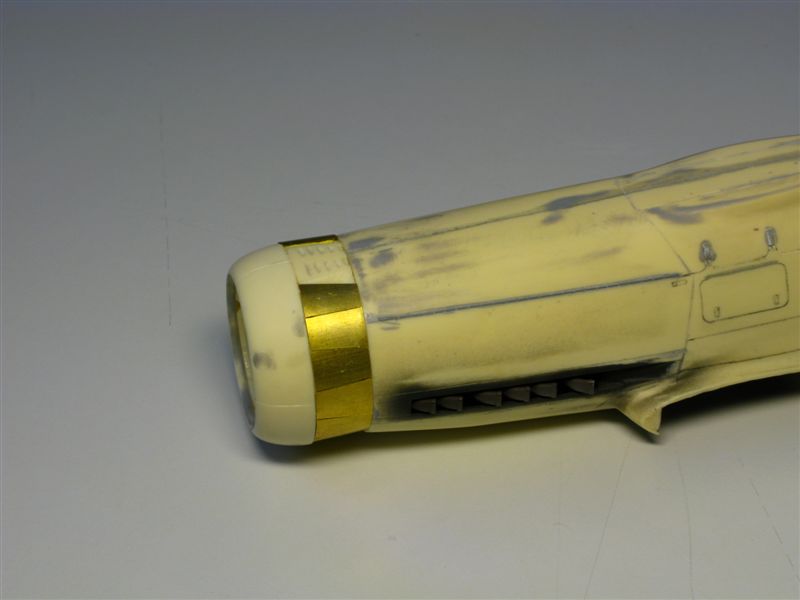
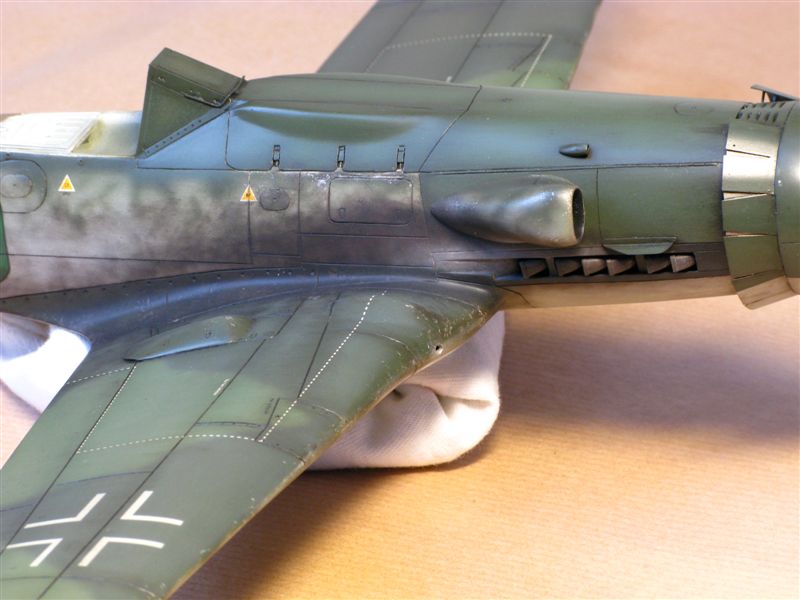
Then it came to work around the exhausts.
For the exhausts themselves, I made two copies of the Aires set and added some useful mounting brackets. The fuselage was again thinned from the inside to achieve an acceptable cowl opening thickness.
A kind of exhaust stain duct after the last pipe is missing on the kit. It was corrected by cutting out this portion along the panel lines, reshaped and glued it back into place.
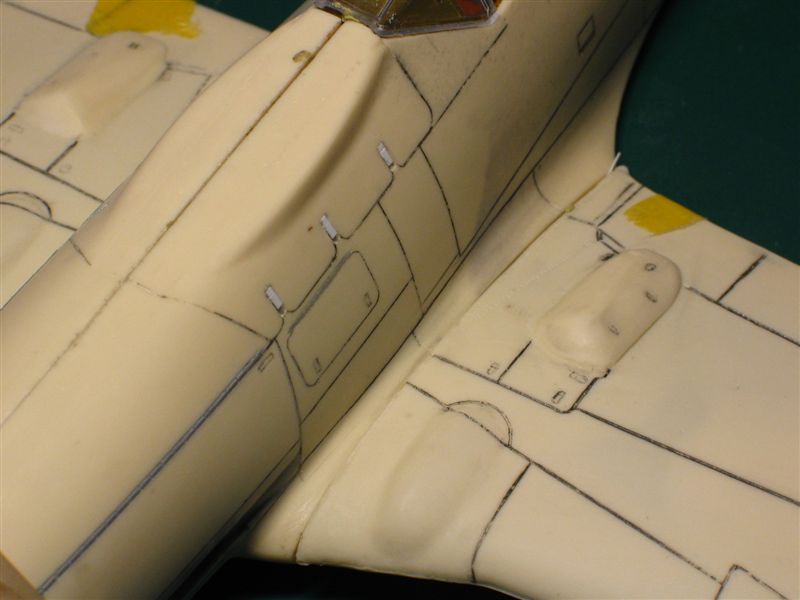
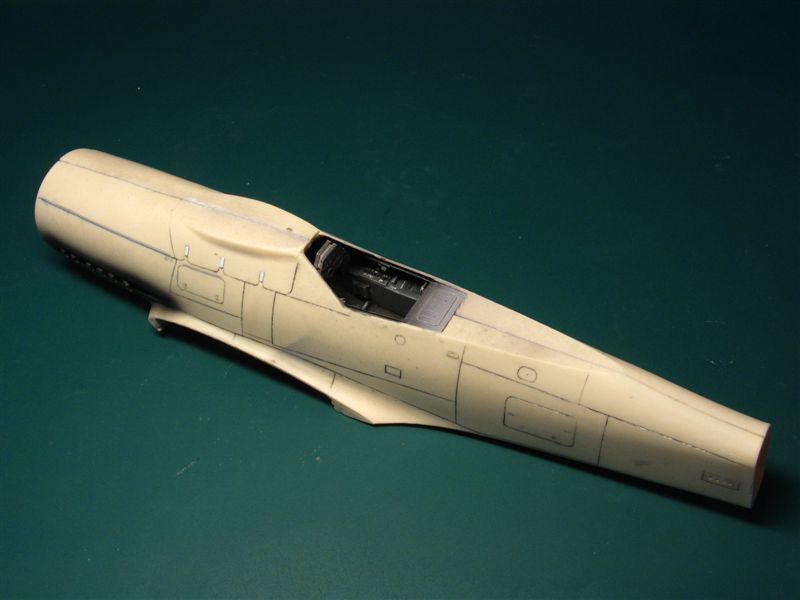
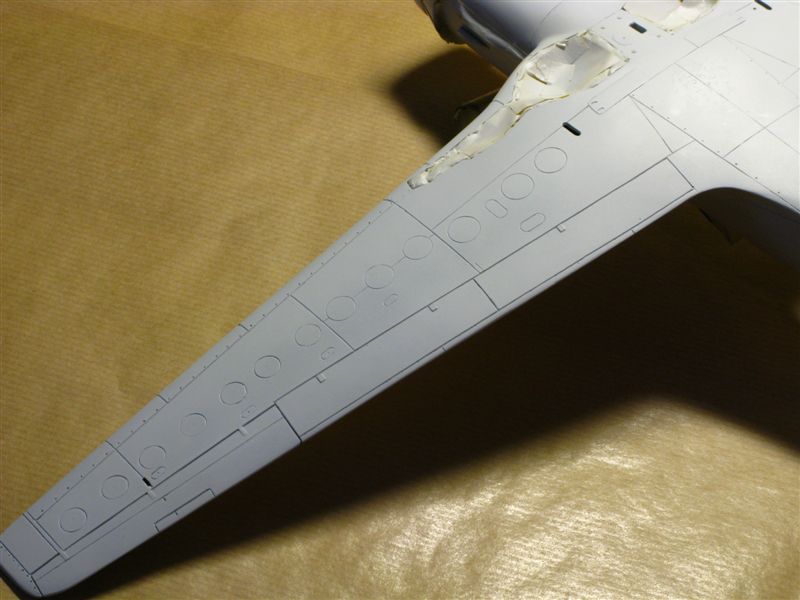
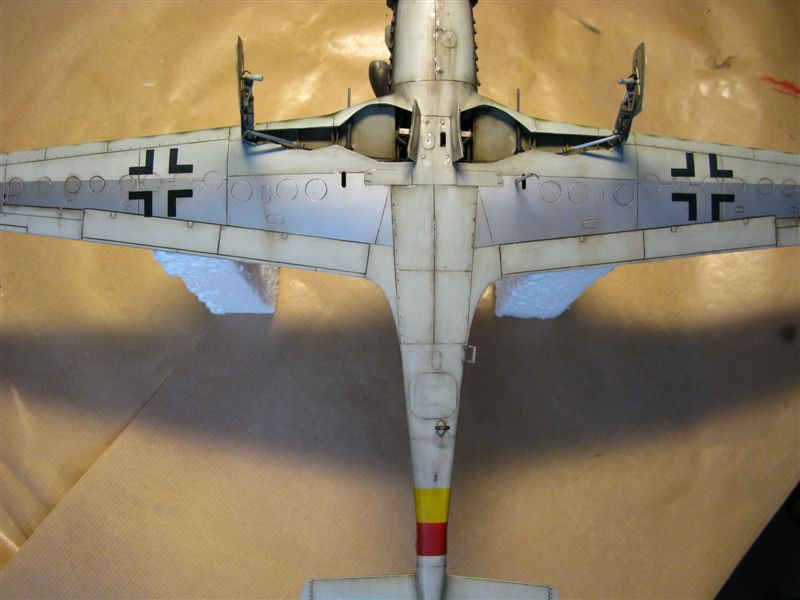
Part 4: The Wings/Panel Lines
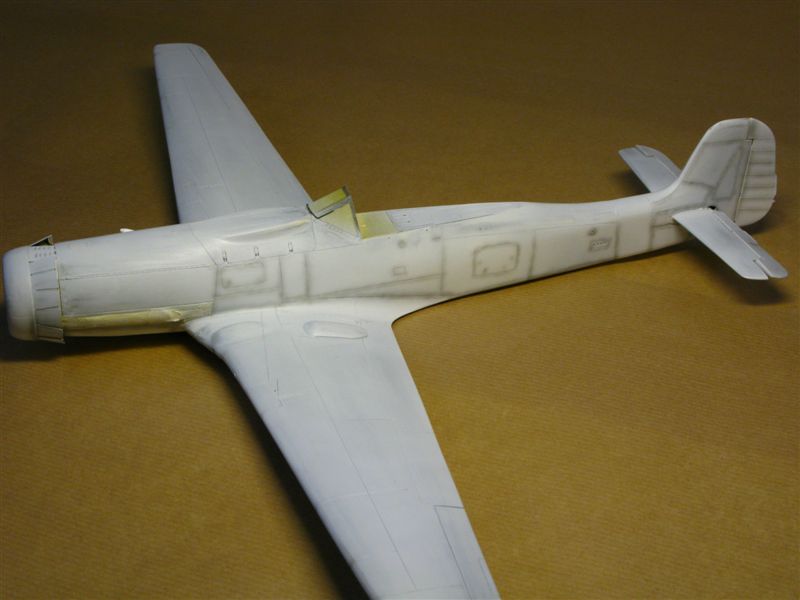
The surface preparation included some (to me) boring panel lines cleaning/rescribing. They are highlighted here with a graphite pen to suit my frog eyes.
Some minor corrections were needed on the underside to get the 'H-1 configuration (panel lines were filled with a cyano'/microballon mix).
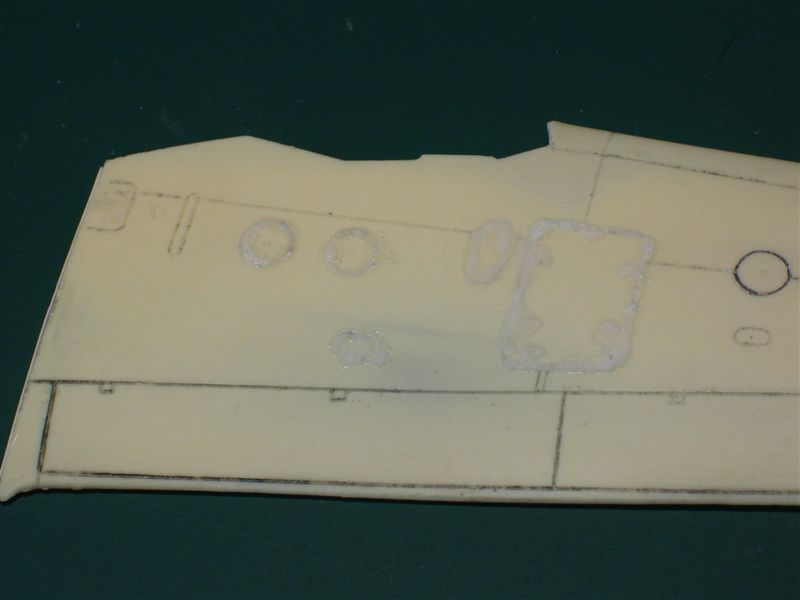
Some "surface details" were added, like hinges and fasteners.
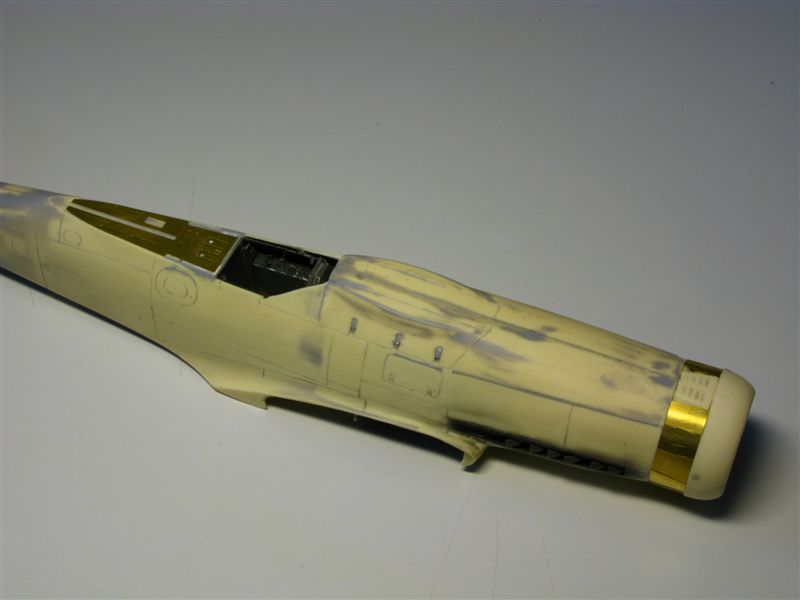
Part 5: Fuselage Assembly
Before closing the fuselage, the cockpit side walls molded details were removed and replaced by Extratech PE parts and a little scratch-building.
Painting was done with Gunze RLM66, artistic oils and acrylic dry brushing. The "placards" are coming from an old Revell Hunter decal sheet (but tell it nobody!).
The cockpit tub is painted in the same way. Details are painted with Vallejo acrylics while the dials are MDC decals. A thick drop of Pebeo gloss coat simulates the glasses.
The exhausts have been (pre)painted before glued on location.
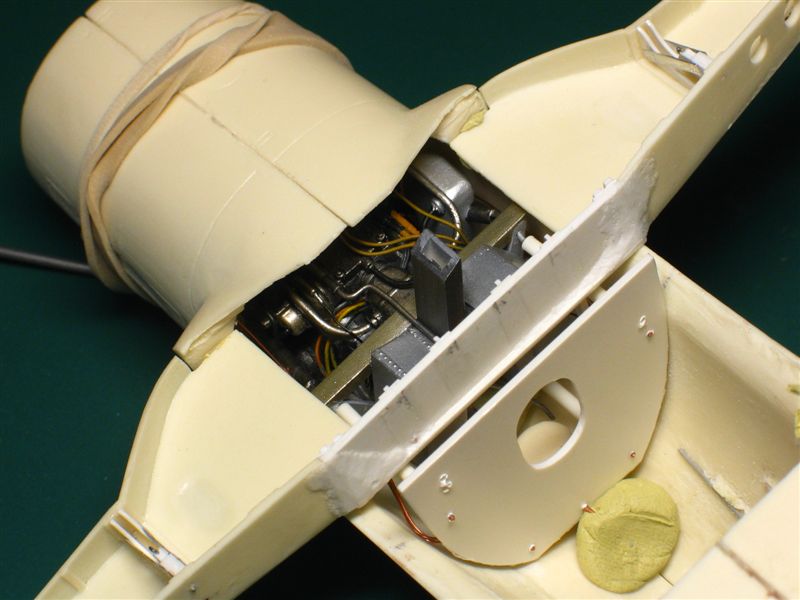
Time now to add the engine plug…
…close the fuselage…
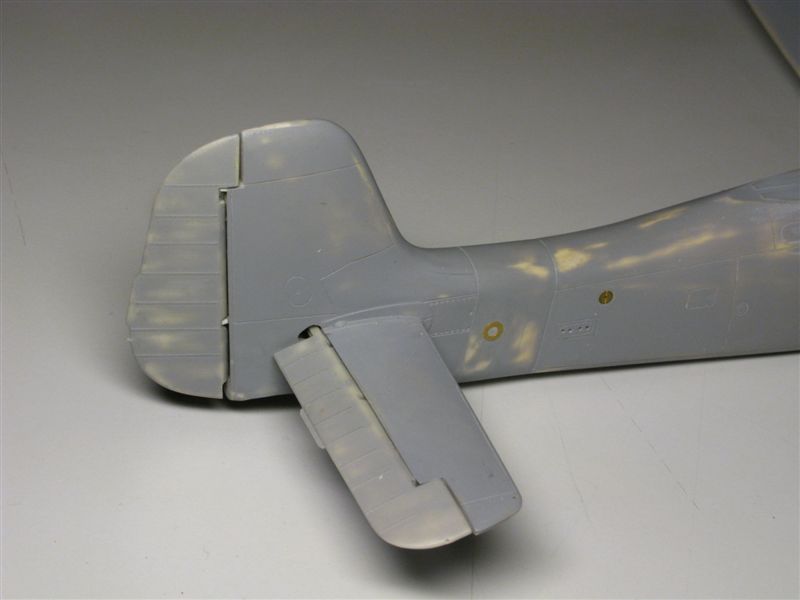
…and add the tail feathers.
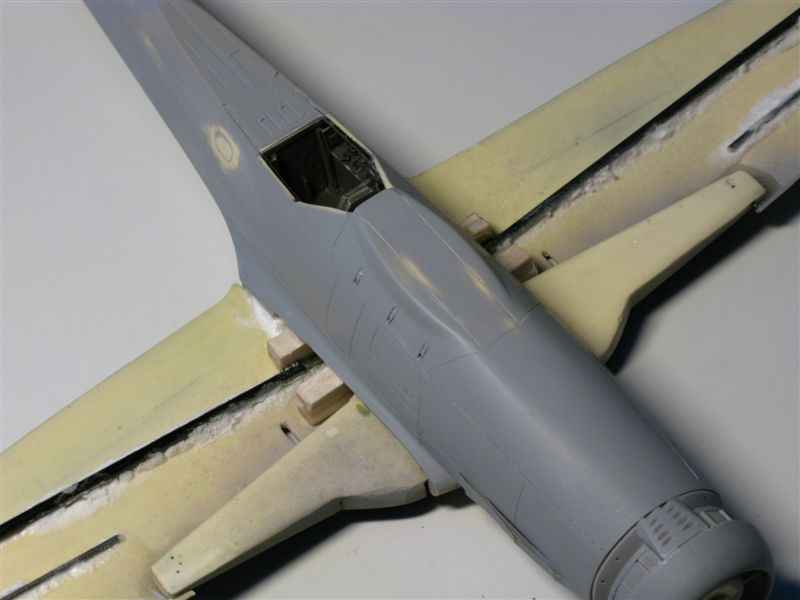
The time taken for dry fitting starts to show the benefits, parts go together like any of the best injected models!
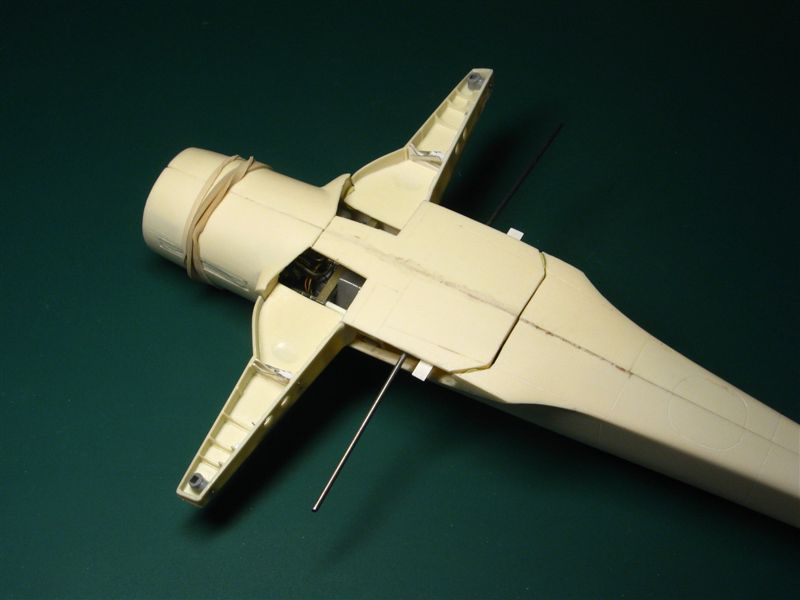
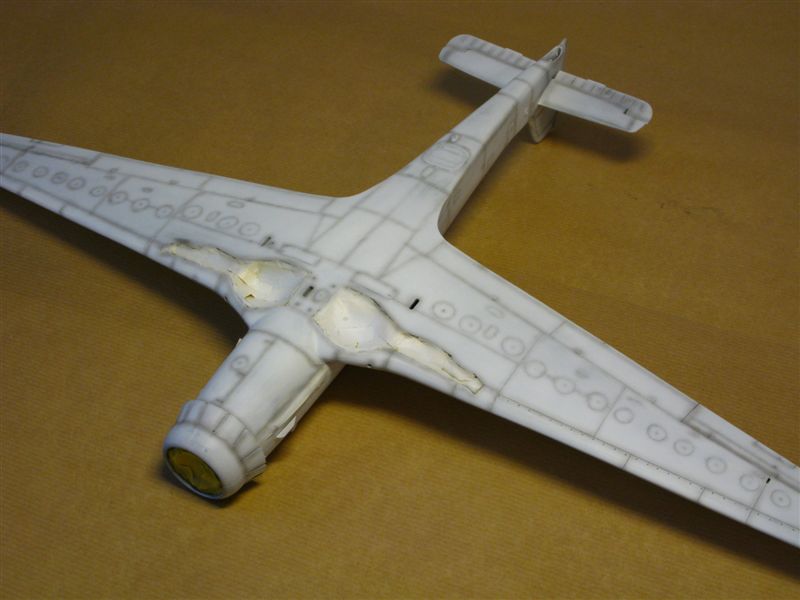
Part 6: Wings Assembly
It became clear that the bottom parts had to be assembled first with the wheel wells (sub)assembly added from above and finally the wings closed with the two top halves.
A kind of "click-clack system" was made to hold strongly the front of the wings to the fuselage. At the same time the center pylon reinforcements (that can be seen through the wheel wells openings) and the wheel cover retract system were build on this stage of the assembly.

The "system" works.
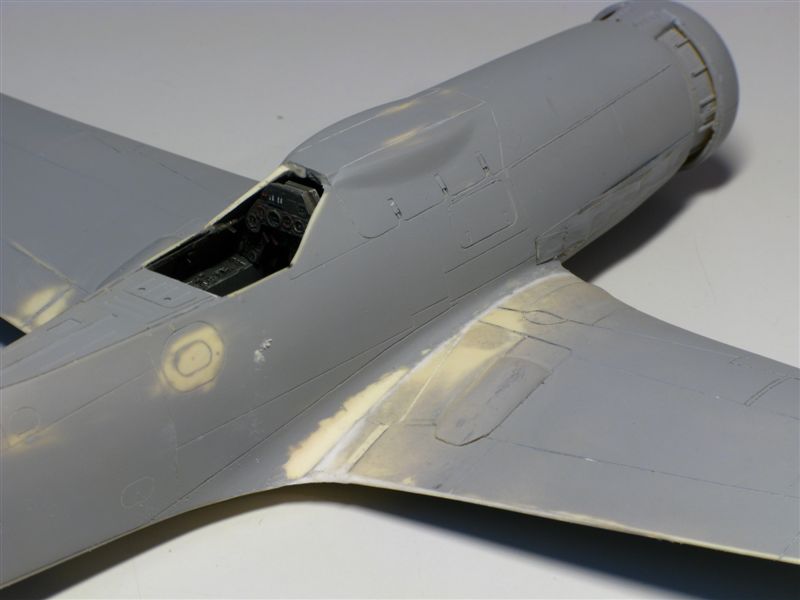
At this point the radiator was added too and the cowl flaps were prepared for a perfect fit to the further most fuselage portion.
The bottom wing halve and fuselage were now put together.
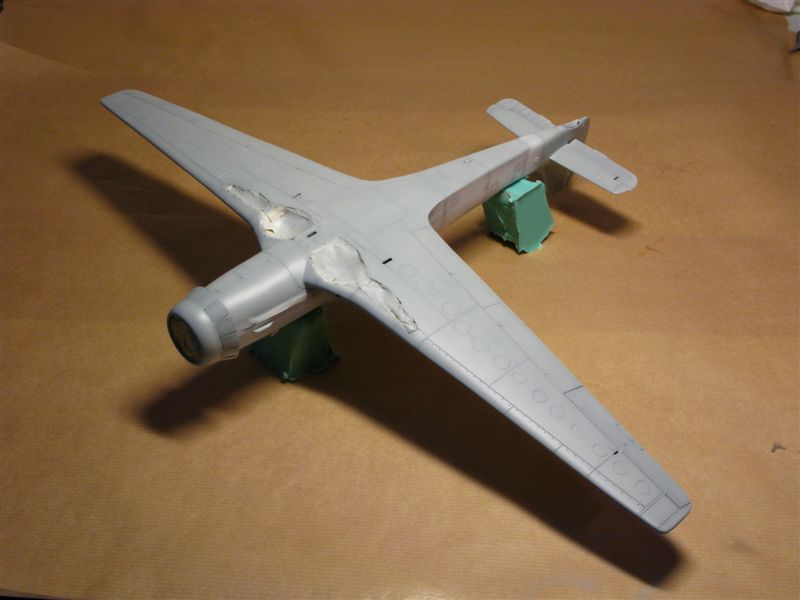
An other steel wire was glued to the wings tips to get them really straight to the very end and make sure they won't bend over the years.
Four small balsa blocks were fixed at the wings roots in order to reinforce the joint of the upper wings halves for the forthcoming work on this spot. These blocks are also helping to achieve a proper alignment of the wing roots.
Upper wing halves glued…
…and she starts to look like a Ta 152!
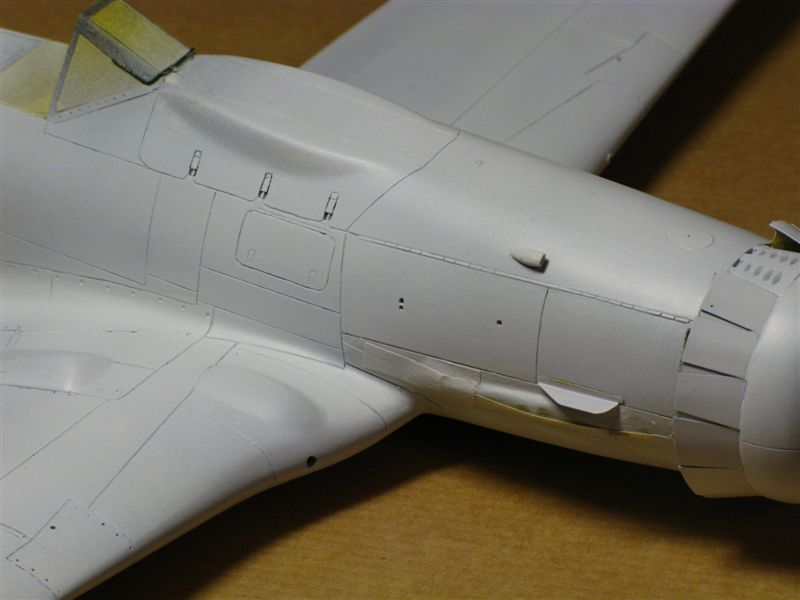
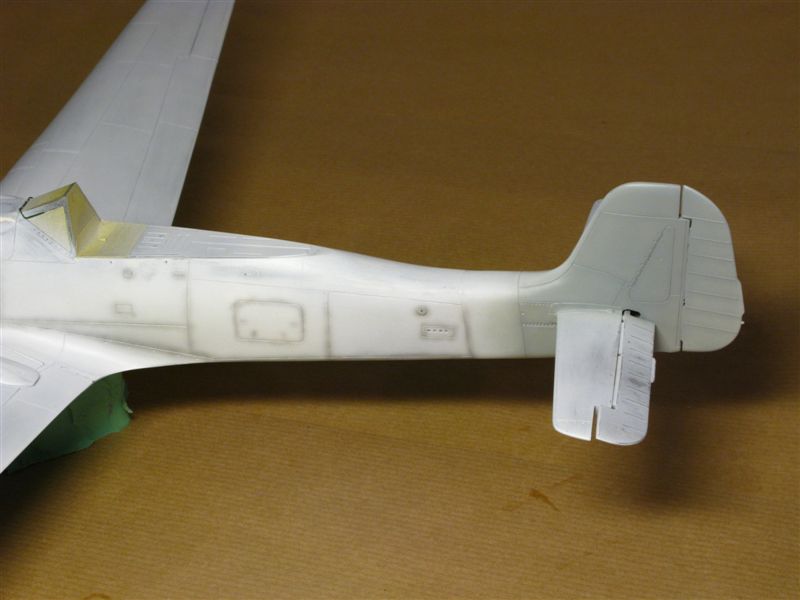
Part 7: Other Details
Some other small parts were added like windscreen, cowl flaps & push rods, control surfaces and various PE parts…

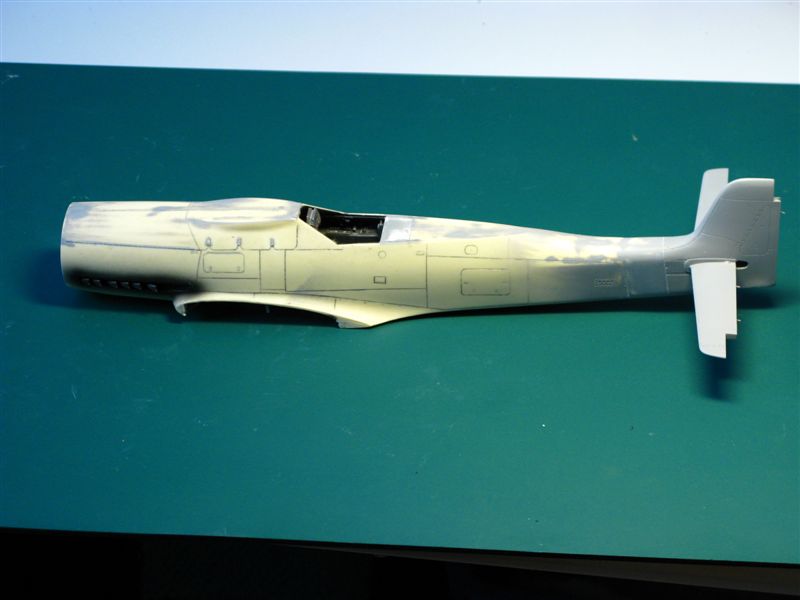
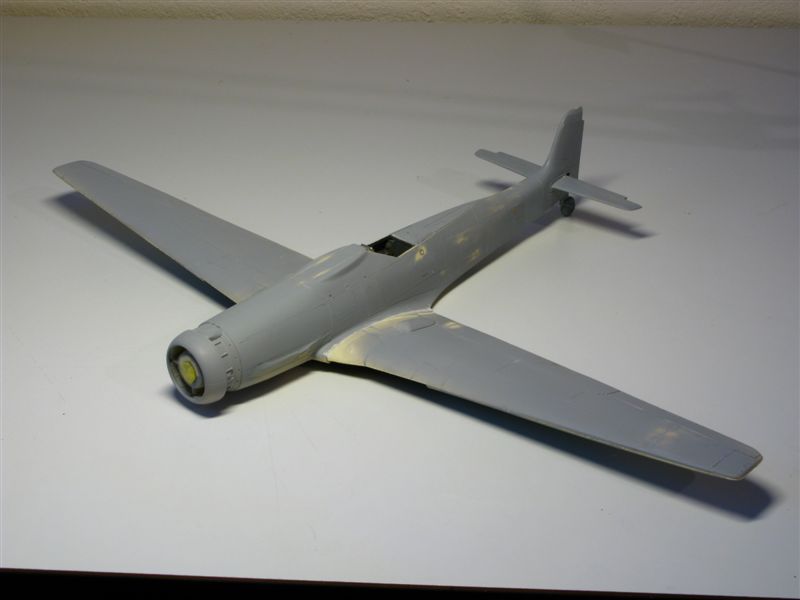
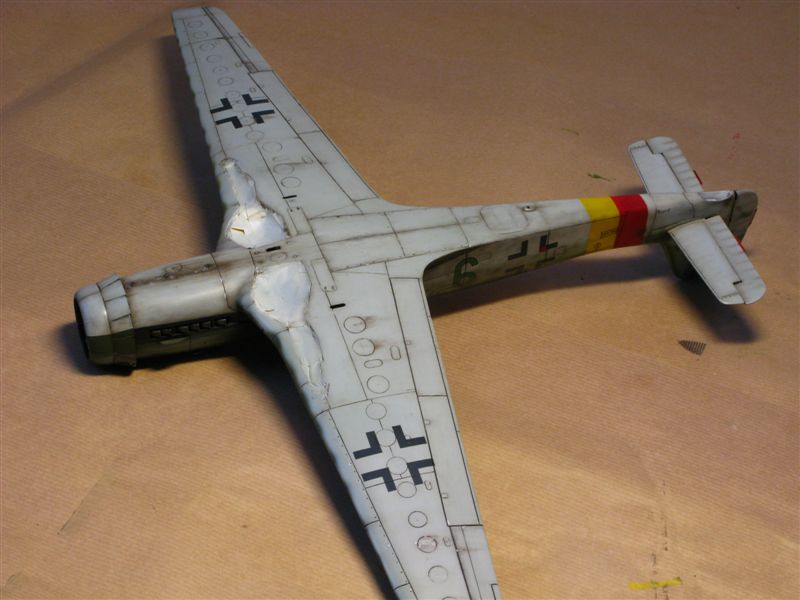
The whole bird was now primed with fine primer (Tamiya white surfacer).
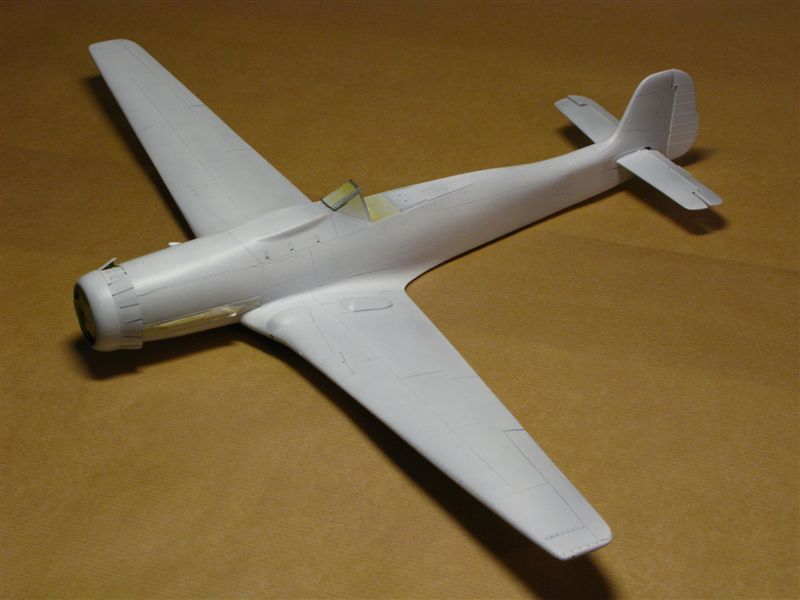
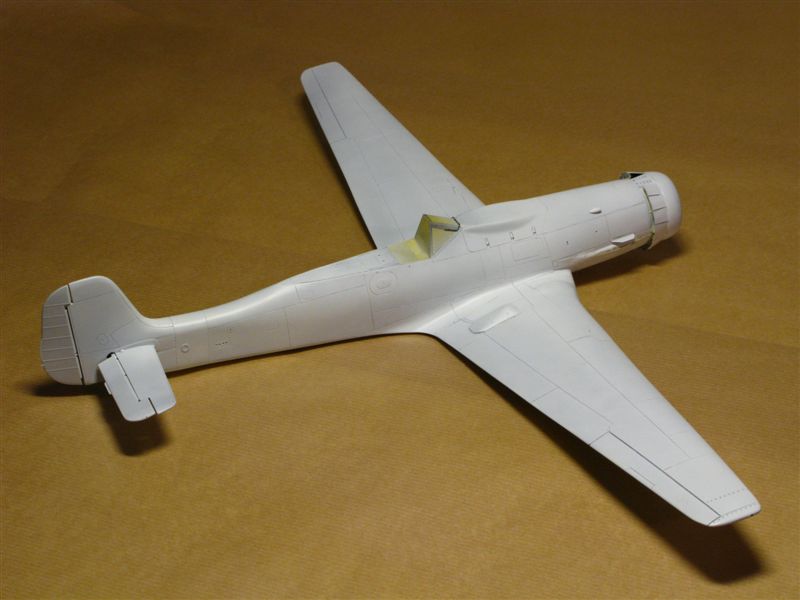
Part 8: Painting
First I have to mention I only used Gunze "standard" RLM colours and Tamiya acrylic thinner (as I usually do!) for the application of the "basic" paintings.
It started with a light preshading.
Then bottom and sides in RLM 76.
Camouflage on its way with the lighter RLM 82.
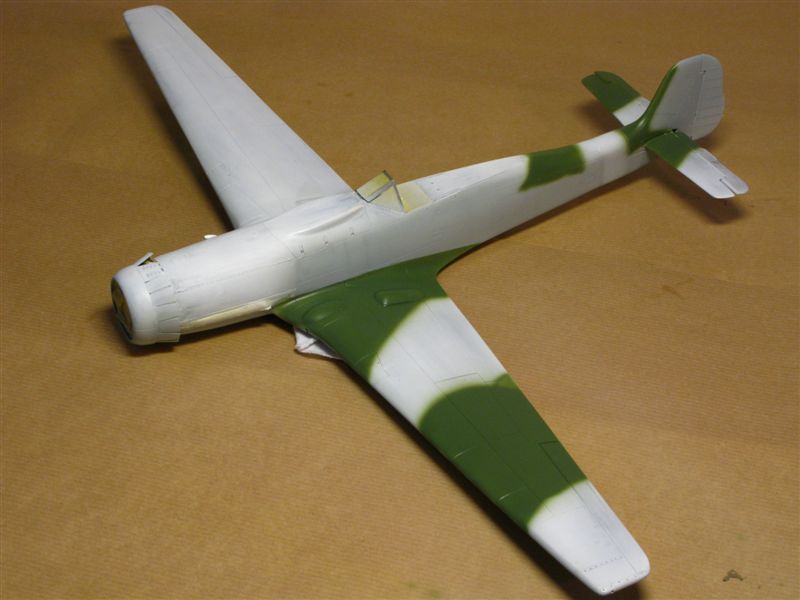
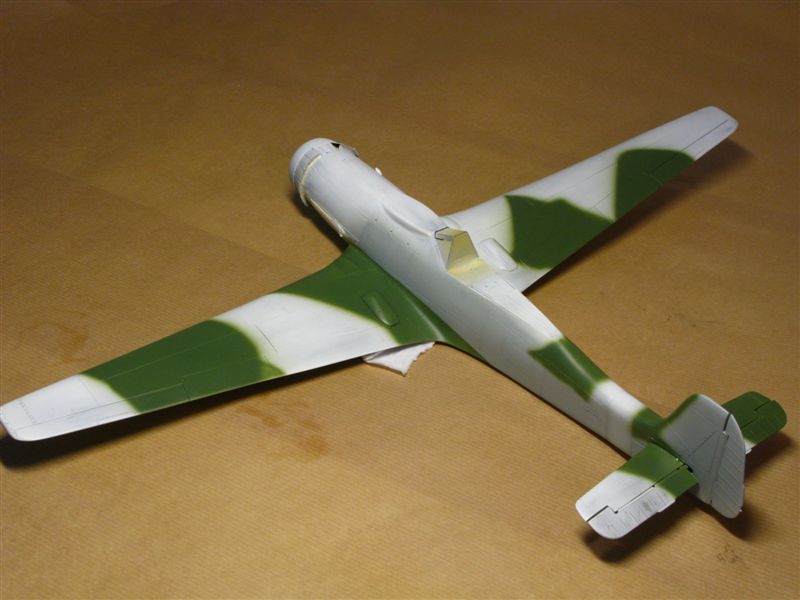
Then the darker RLM 83.
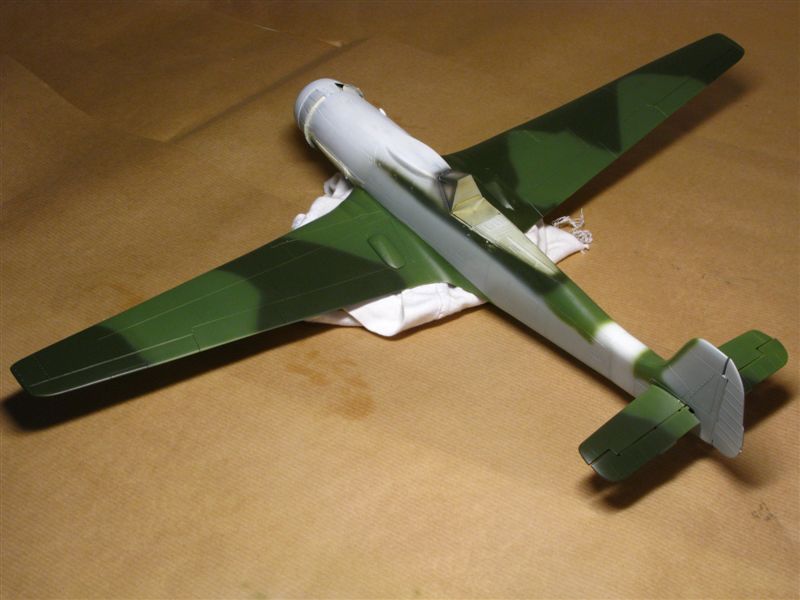
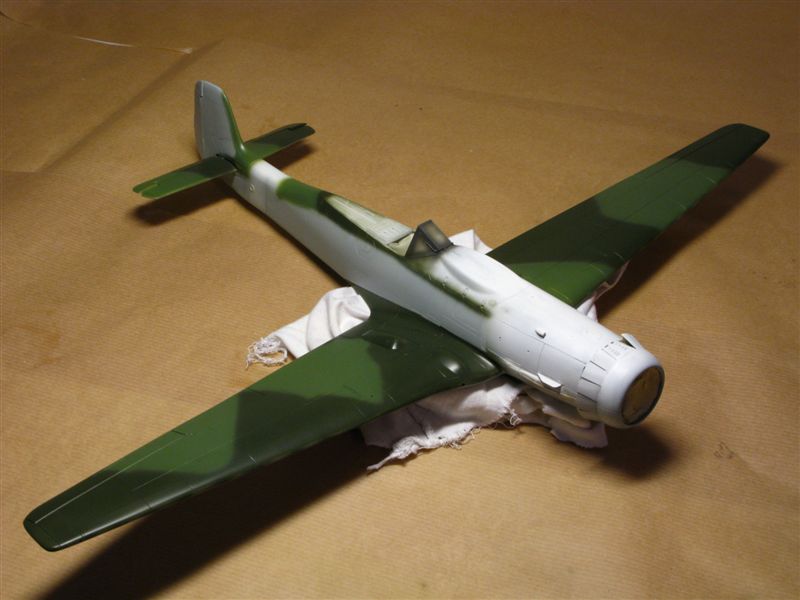
And finally the mottling.
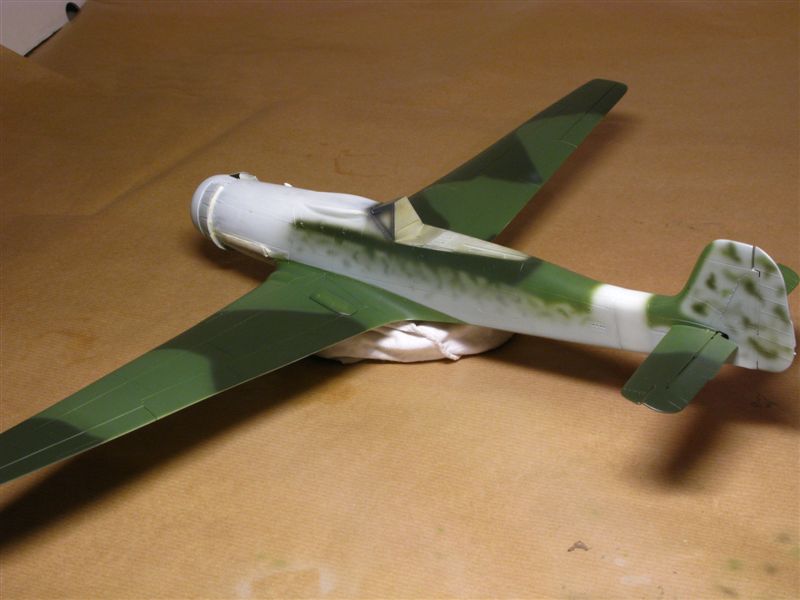
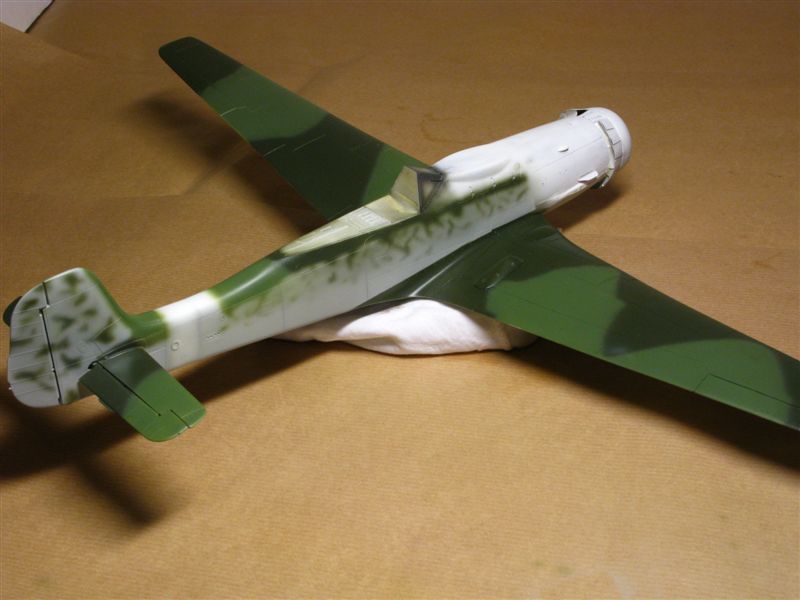
The engine cowls are left unpainted for handling reasons and also by the fact that the rare photos of the aircraft are showing those cowls to be almost brand new compared to the airframe.
It may be useful to mention that I'm working with nearly "over diluted paints" (almost the consistence of inks) and the paint was polished with an old cotton T-shirt between every 2nd or 3rd layer. It allows to achieve an almost glossy surface (no need for an additional clear coat for the decals) and one can easily take off all the c*** and dusts that can be caught in the paint (sometimes by using 4000 or 6000 Micromesh).
Part 9: Markings
Back then when I did this one, there were no existing specific Ta 152 markings, so the only game in town was: "do it yourself"… (I may have done it anyway ☺ ).
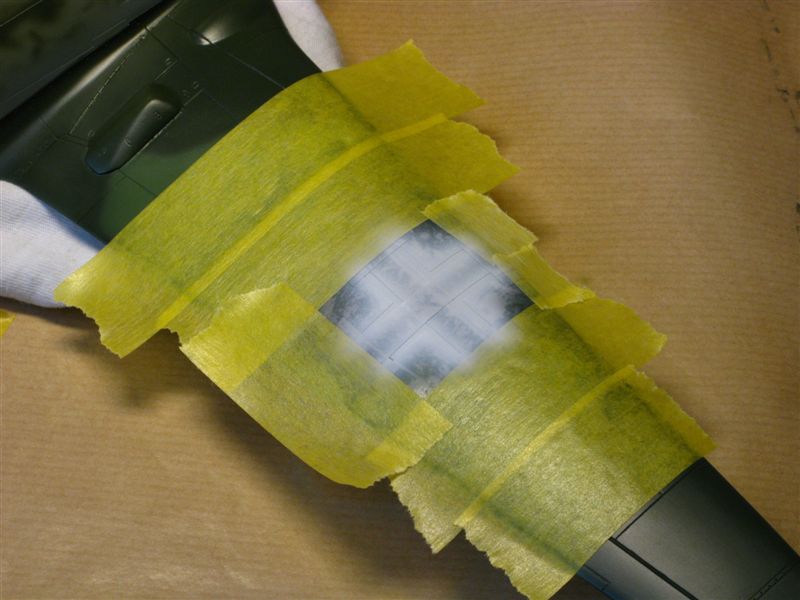
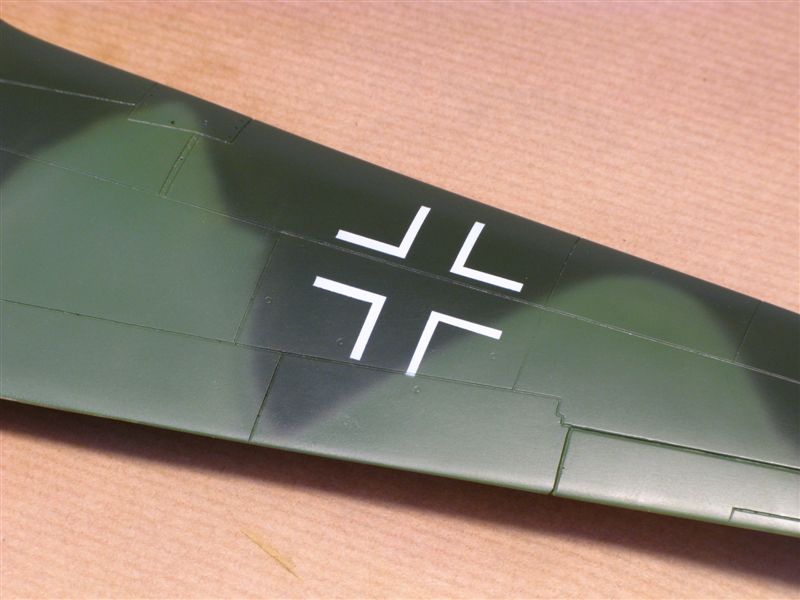
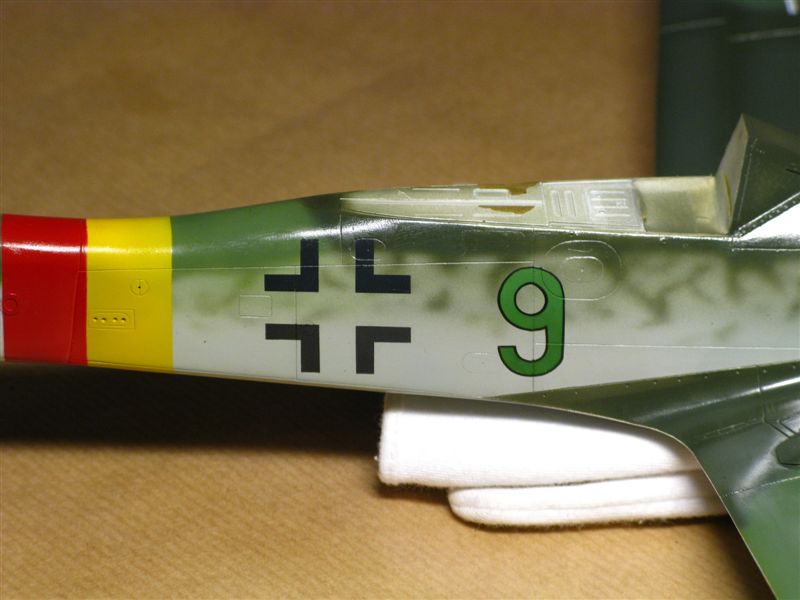
EagleCals (IMHO the most reliable "source") late war D-9 decal sheet was used as template for the national insignias. A sharp hobby knife and Frisket (artistic transparent low sticking masks) did the rest.
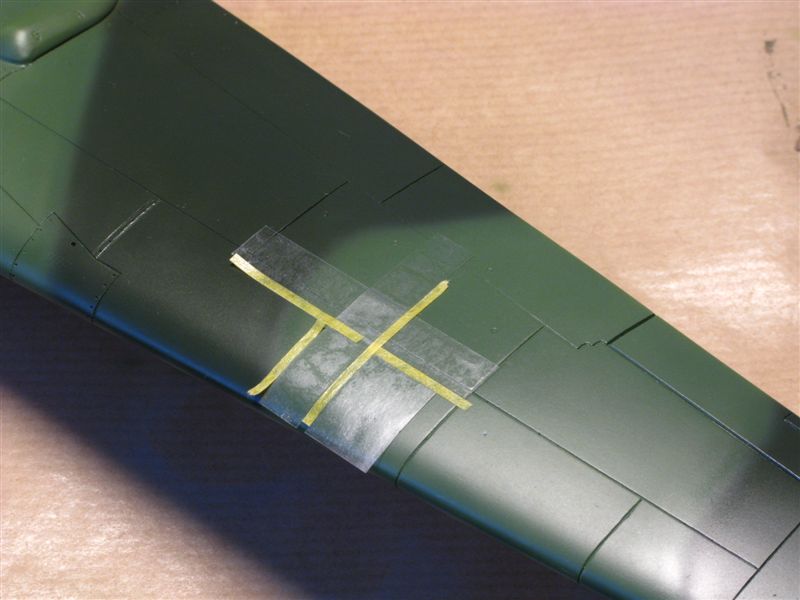
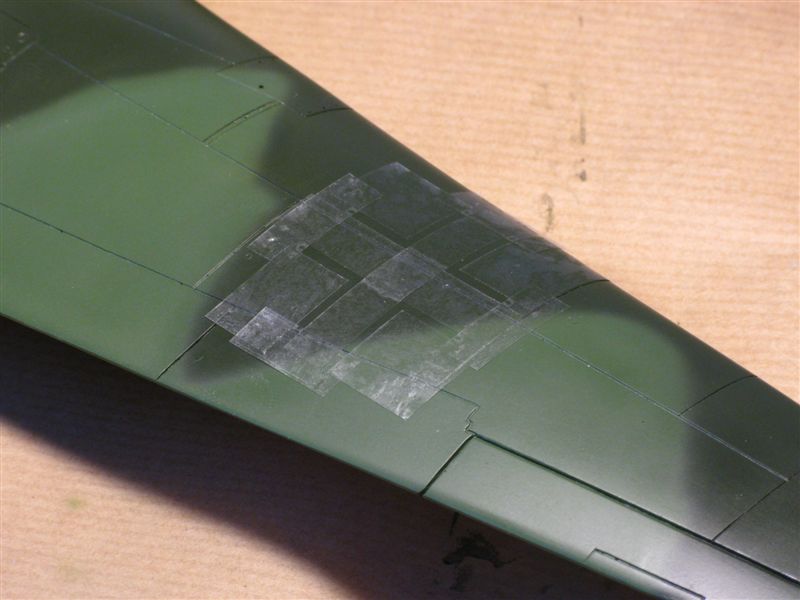
It came to some serious brainstorming regarding how to get the black outlined 9 done properly…
The solution came from "Thor"!
So at the end, a scanned 9 was taped to the back of a piece of glass, Frisket put on top and the masks were cut out by sticking 2 blades in the hobby knife. This gave the external outlines of the number and the portion given by the stance between the blades the thin black outline… and 3 masks to put back several times on the model…
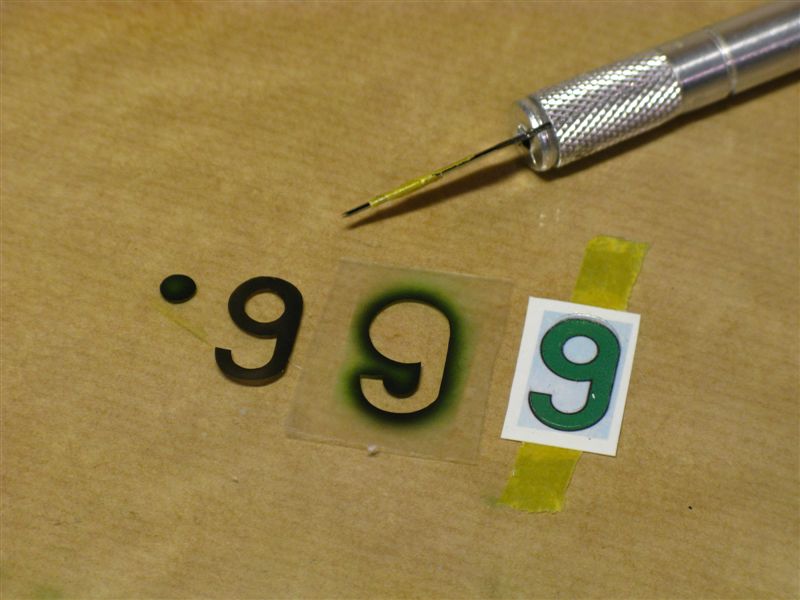
In other words, first the 2 "outline masks" of the 9 were put on the model and paint the green.
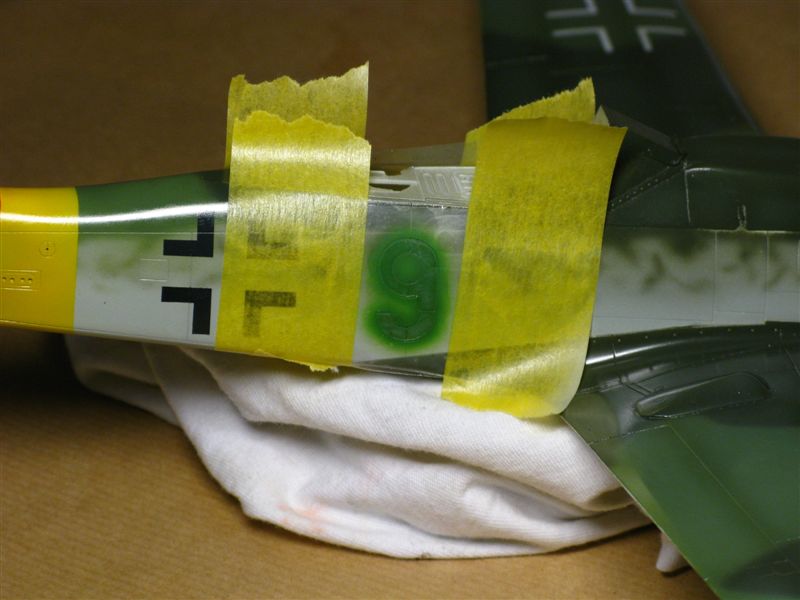
Then the green paint was protected with the third mask (the outline minus the stance between the 2 blades) and the black was sprayed.
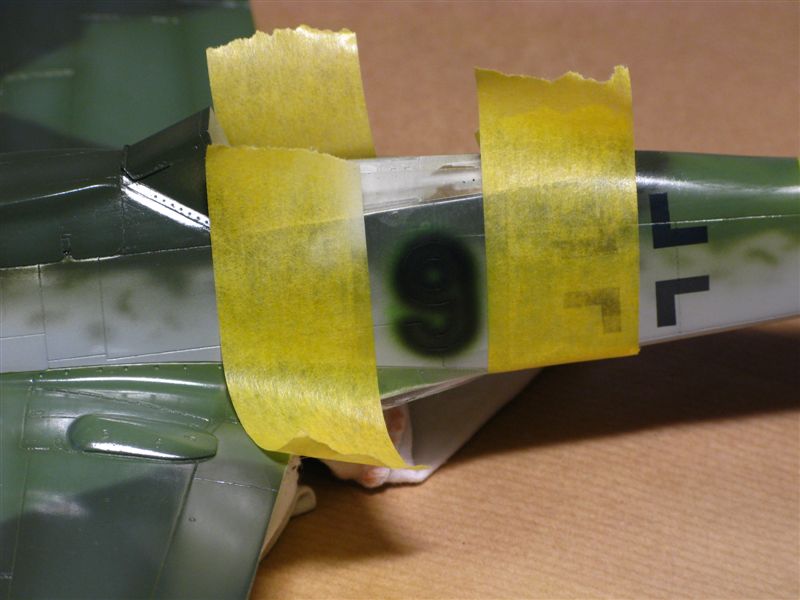
NB. It might be noteworthy to mention that the self-adhesives masks were applied on a slightly wet surface (water + a drop of dish washing soap). This allows to slide it around almost like a decal. Once the water wiped off and dried for 10-15 minutes, the masks are sticking like they should. No more messing around with a mask sticking on everywhere but on the right position.
Before the stencils were added, some work was already done to tone down a bit the flashy paint and a "quick" layer of Future was applied to protect the paint work.
The stencils are from EagleCals (as the swastikas). The snr. is a homemade decal.
Part 10: Weathering
After, an other (very) thin layer of future (brush applied) to protect this time the stencils, weathering was done with artistic oils and pastel powder (sanding dust of artistic chalks).
First the oil washes on the underside.
Paint chipping and washes on the top side and fuselage.
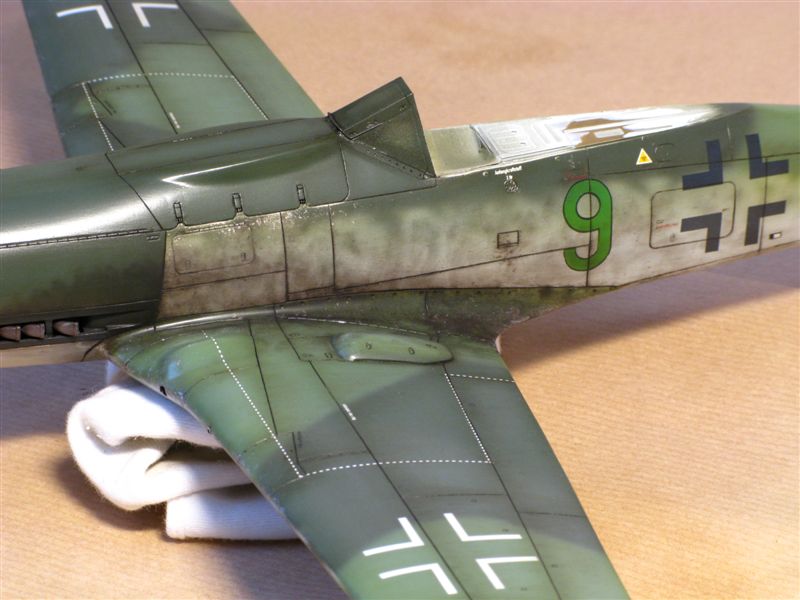
Some more weathering with pastels, this time, on the underside.
Exhaust stains (pastels again).
Panel lines shadings were again toned down a bit by using some green, grey and brown filters (so to say tinted thinner) on these last photos.
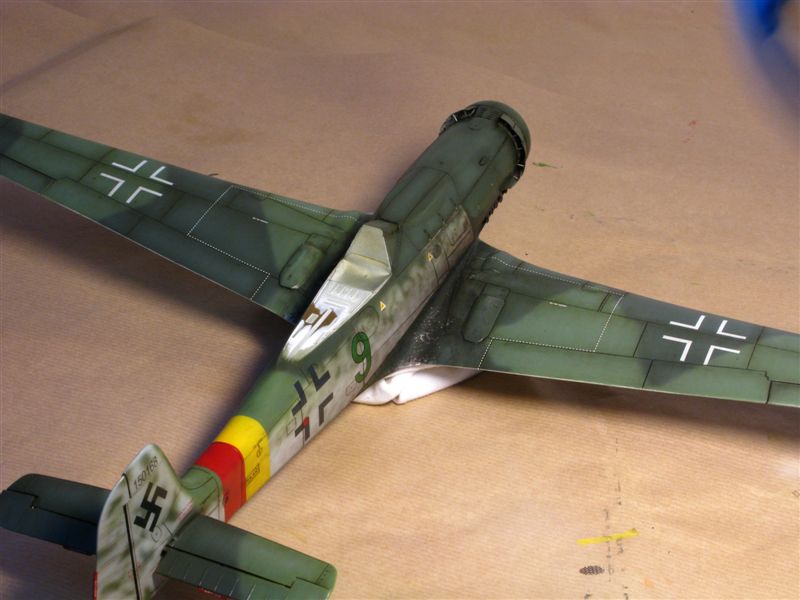
Part 11: Final Assembly
New "loaded look" wheels were made and cast.
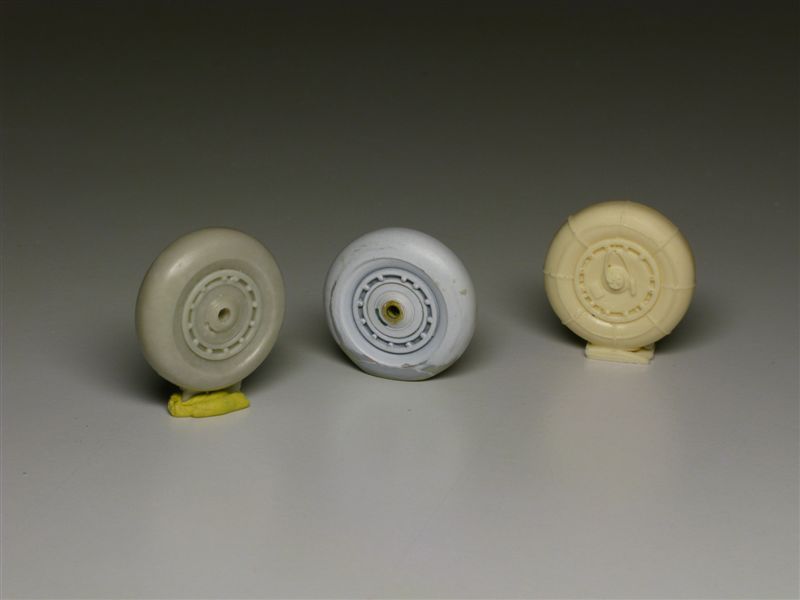
The inside of the wheel covers were reshaped.
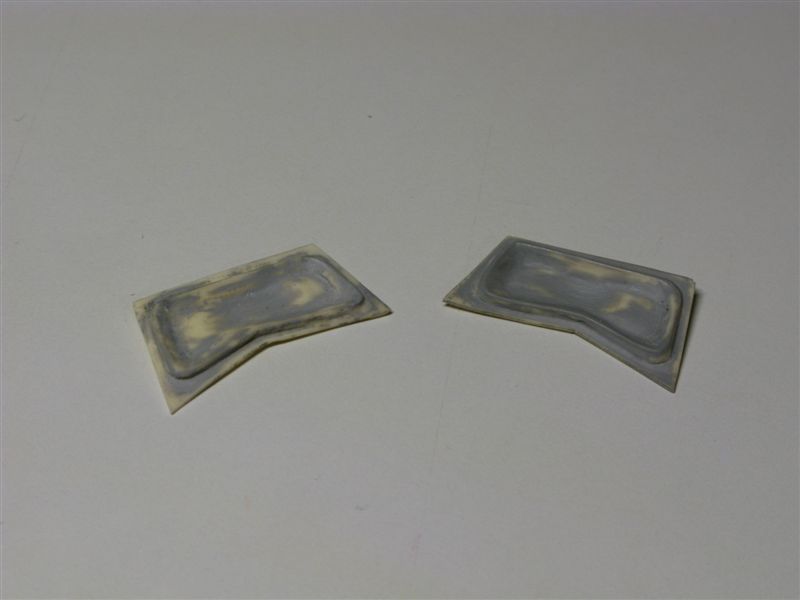
And the main covers were rebuild (correcting the outlines) by using the Hasegawa D-9 parts.

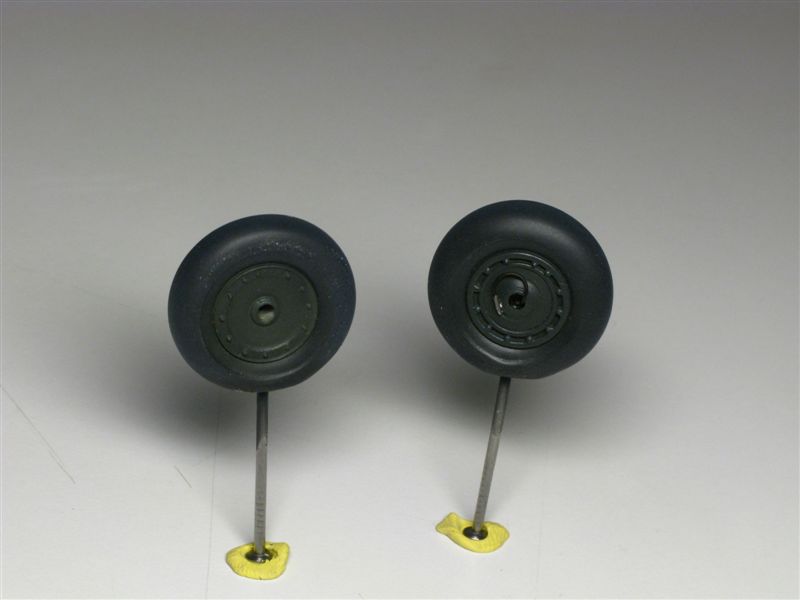
The completed LG parts (placards are from the MDC German dials set too).
A bunch of some more various stuff ready. The seat belts are made from lead foil and buckles are from the PE spares box (maybe Eduard or MDC).
After a few talks with regretted friend Eric Lager, it became obvious that the undersides weren't fully painted in RLM 76. So this was corrected before completion of the model.

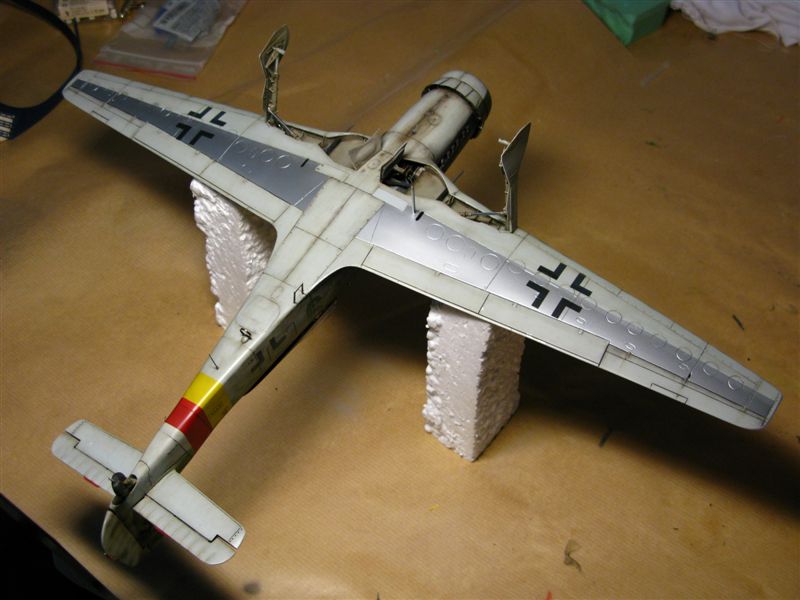
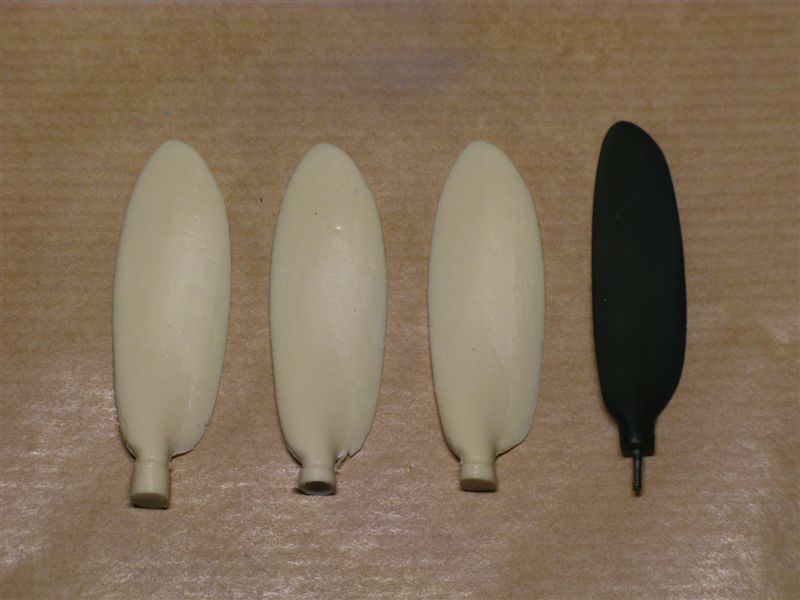
Jerry (Rutman) also kindly send me his new corrected large paddle prop blades!!
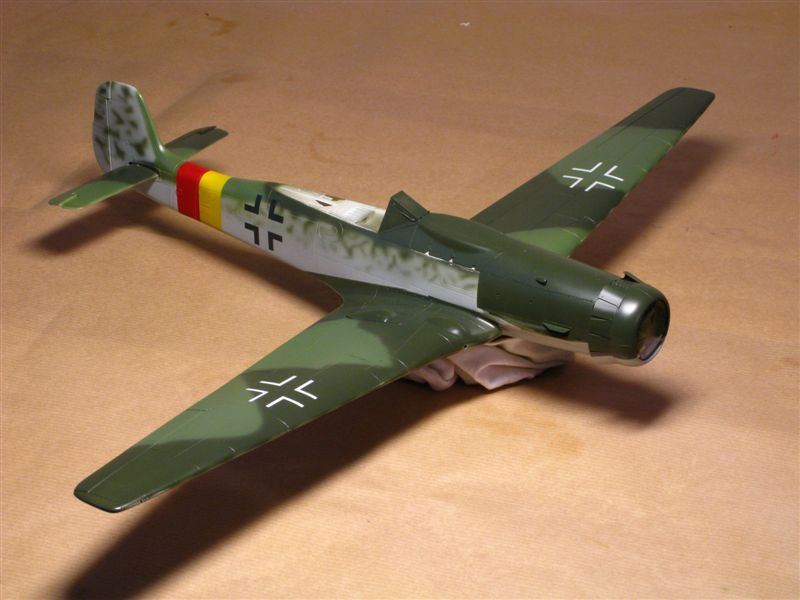
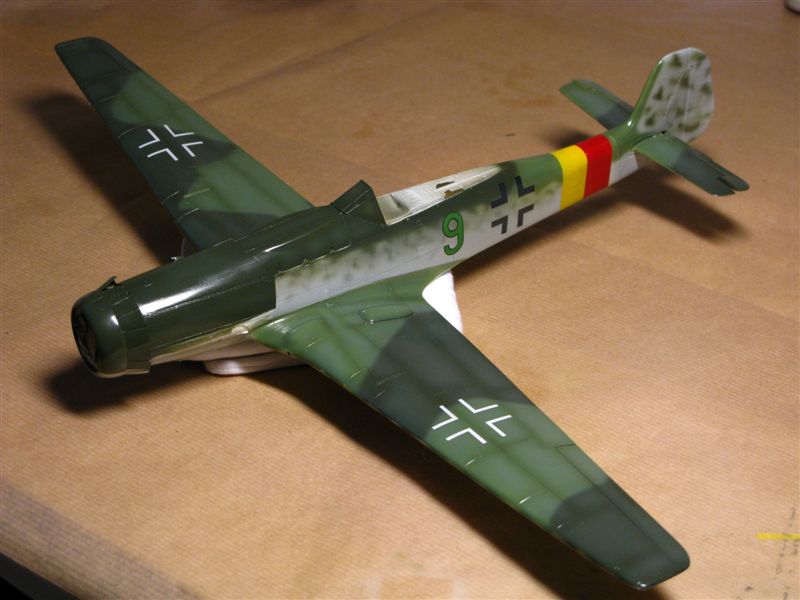
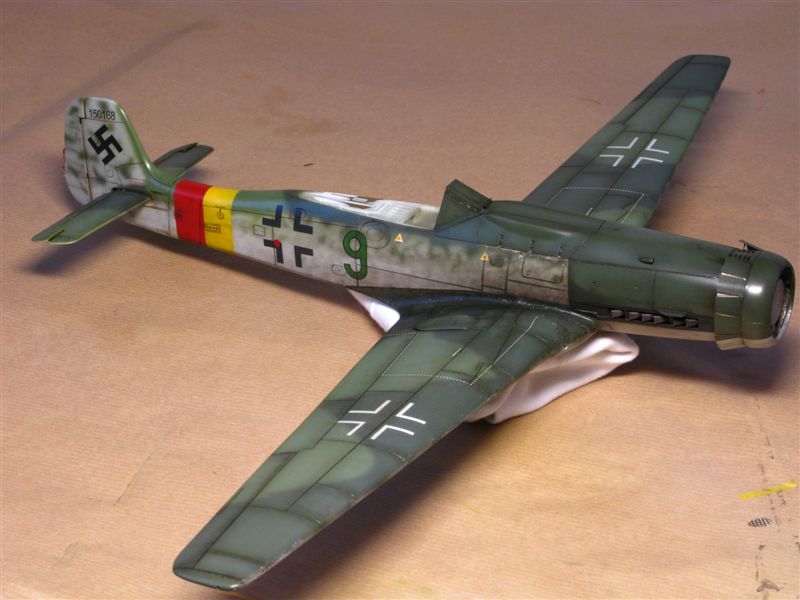
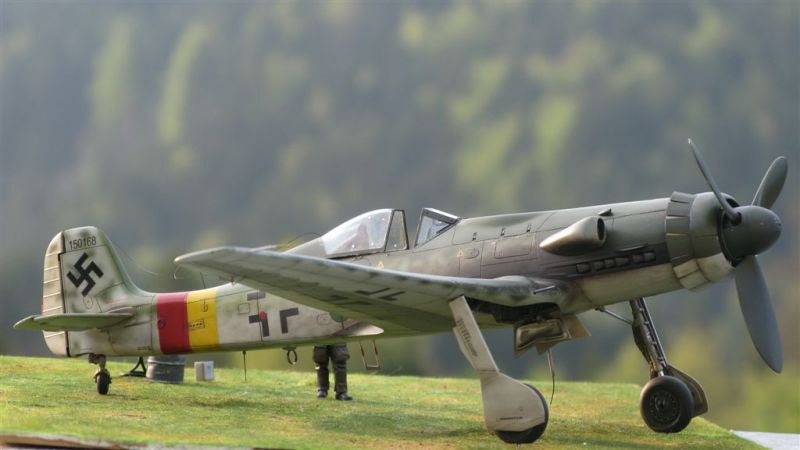
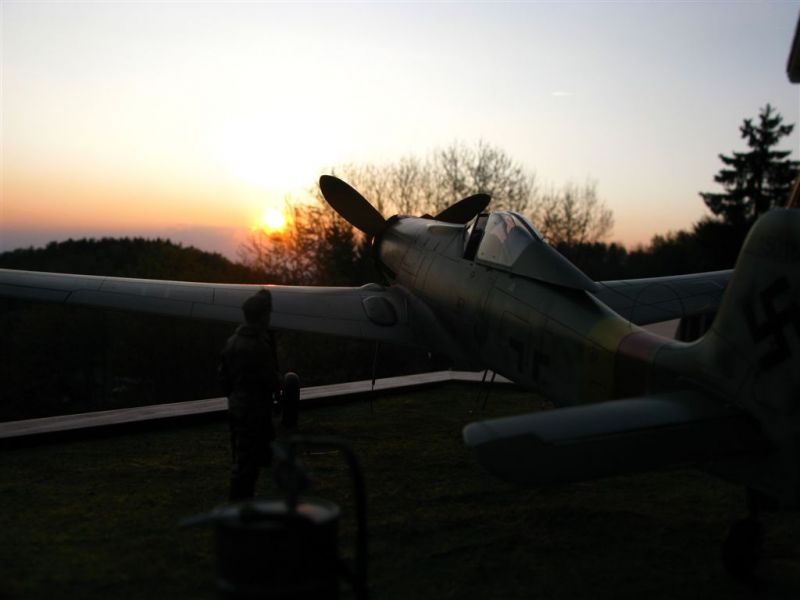
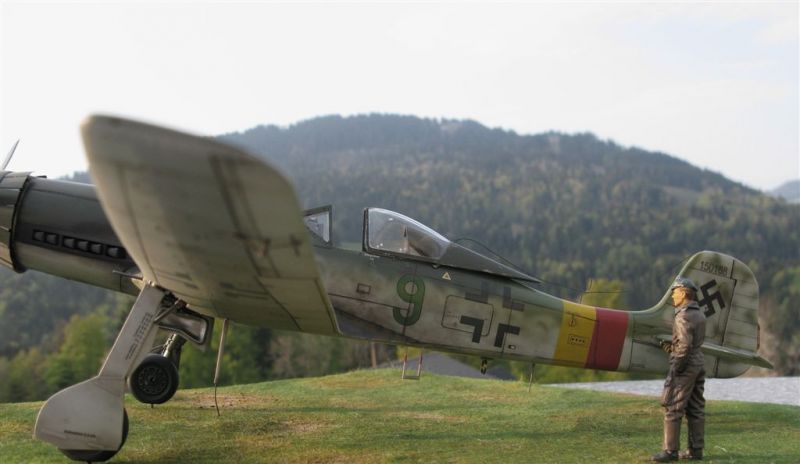
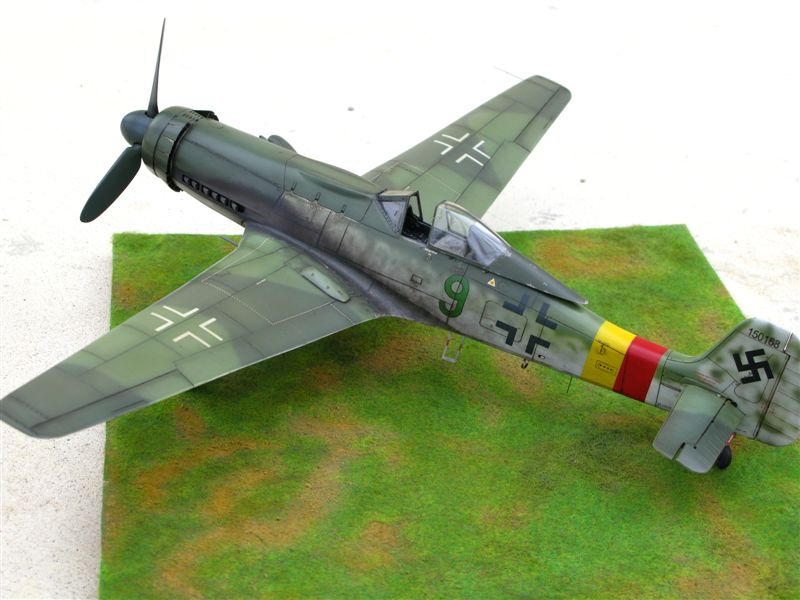
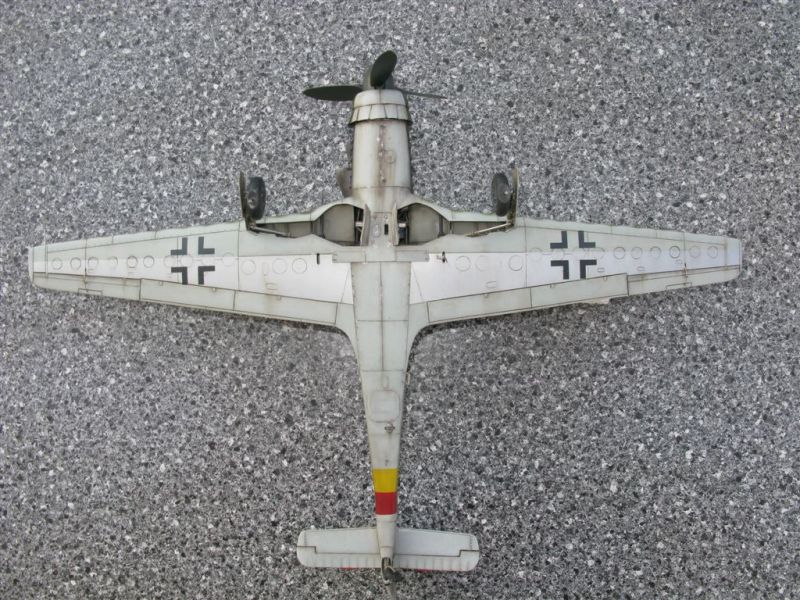
Part 12: Finished
After all those little bits were thrown together:

Notes
Just a listing of "goodies" used to complete this Ta 152H-1.
- Jerry Rutman's Ta 152 full kit (OOP)
- Hasegawa Fw 190D-9 new tool (ref. 08069)
- Extratech Fw 190D-9 "external detail set" (ref EX32004)
- Extratech Fw 190D-9 "interior set" (ref. EX32002)
- MDC "Luftwaffe instrument decals" (ref. D32002)
- EagleCals "yellow "10" and friends decal sheet (ref. EC#59)
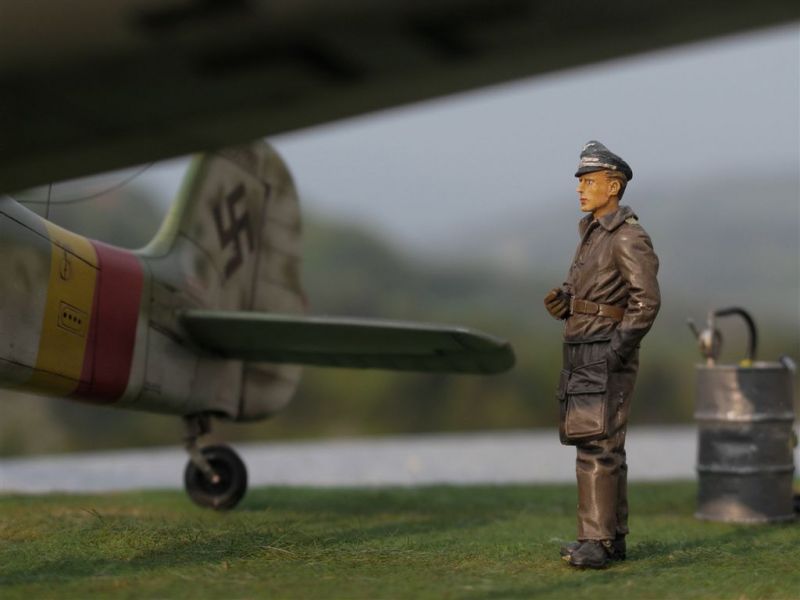
- Ultracast "Luftwaffe fighter pilot" (ref. 54004)
- … patience… ☺
Sources
- Many - MANY LSP friends !!! Specially Jerry Rutman and Eric Lager!
- "FW190, TA152 : Entwicklung, Technik, Einsatz"
(Heinz Nowarra / Edition: Stuttgart, Motorbuch Verlag) - "Der Weg zum Höhenjäger"
(Dietmar Hermann / Edition : Aviatic Verlag) - Monogram Close-up #24, TA152
© Roland Forrer 2012
This article was published on Thursday, December 06 2012; Last modified on Sunday, May 19 2013