
Elite Forces 1/18 F6F Hellcat Part 1 - The Main Landing Gears
By Rodney Williams
This kit is made by the following company:
"BLUE BOX TOYS, INCORPORATED"
220 South Orange Ave Suite #106.
Livingston, NJ 07039 U.S.A.
Their Motto Is:
"AS REAL AS IT GETS"
"TOTAL REALISM-MAXIMUM DETAIL"
In late 2009 one of my clients wanted to know if I would add the hydraulic lines to the main gear struts, make new drop tanks straps then add some ignition wires to the engine. Next, he wanted me to fix the gun barrels, including a few items in the cockpit on his recent purchase of a "pre-built" 1:18 scale F6F Hellcat.
Regressing back to 1999 I started a major revision on a 1:32 scale Hasegawa F6F-3 model for this client, thus I knew a bit about this aircraft. My photo album contained several dozen "in-progress" color photos of that 1:32 scale kit, so I was "off and running" on this new adventure. To view the 1:32 scale F6F-3, please access SKYWRITERS at www.skywriters.net. Go hunting as it´s there somewhere.
Many of the enclose photos have written captions on them and we can let most all of the photos tell the story with out me ranting and raving and trying to explain how I performed this and/or that.
Re-Work Begins
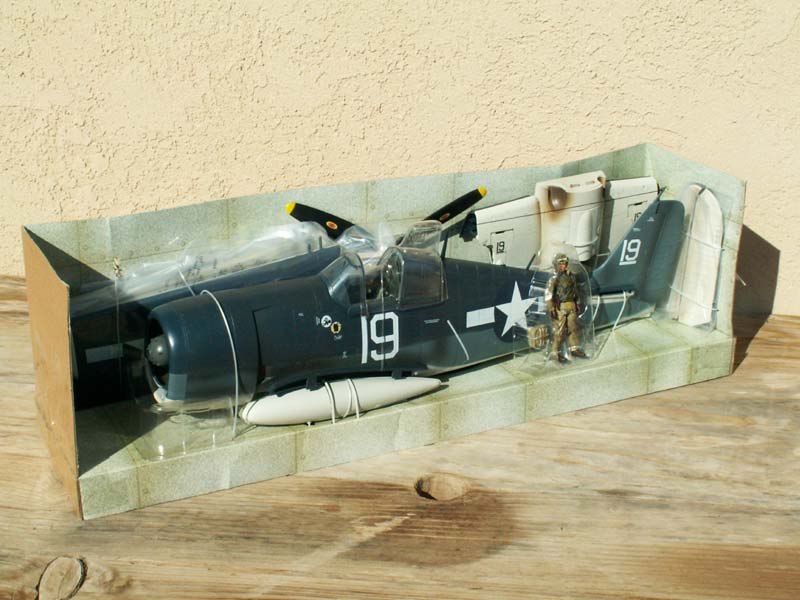
My very first photo shows the model in its´ shipping box...very nice looking model. It´s going to be a piece of cake to add the items mentioned above.
The kit comes in several parts, so I removed them very gently as they were all painted and I did not want to ruin the paint job on this model.
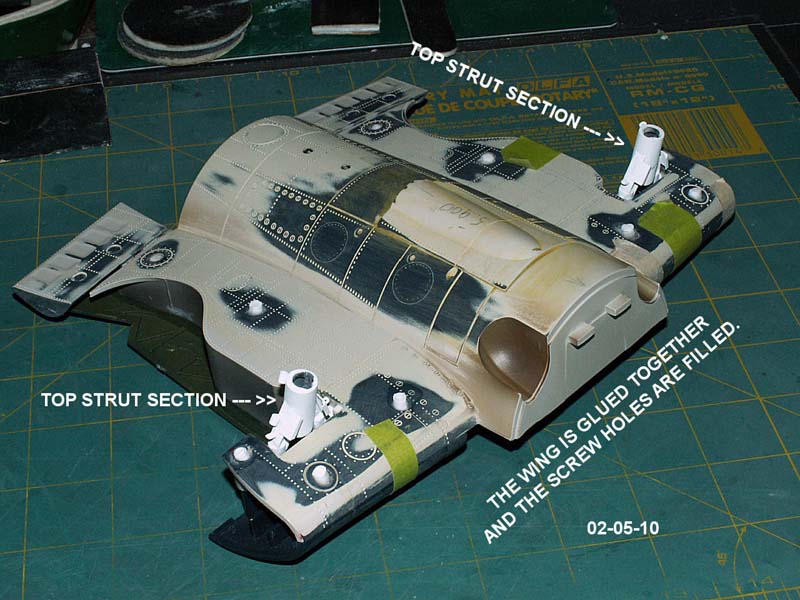
At the onset, I noticed that several of the round plugs that cover up the screw holes were not flush on the center wing section of the model so I began to sand the raised ones flush, then fill the sunken ones with super glue and sand them flush. The main gears were retracted up into their wheel wells, so I followed the kit instructions and lowered the gears to their landing/static configuration. Well, I thought this was a neat way to make a model so that the owner could display his model on a base and/or hang it from his ceiling on some wires with the gears folded up into the wheel wells.
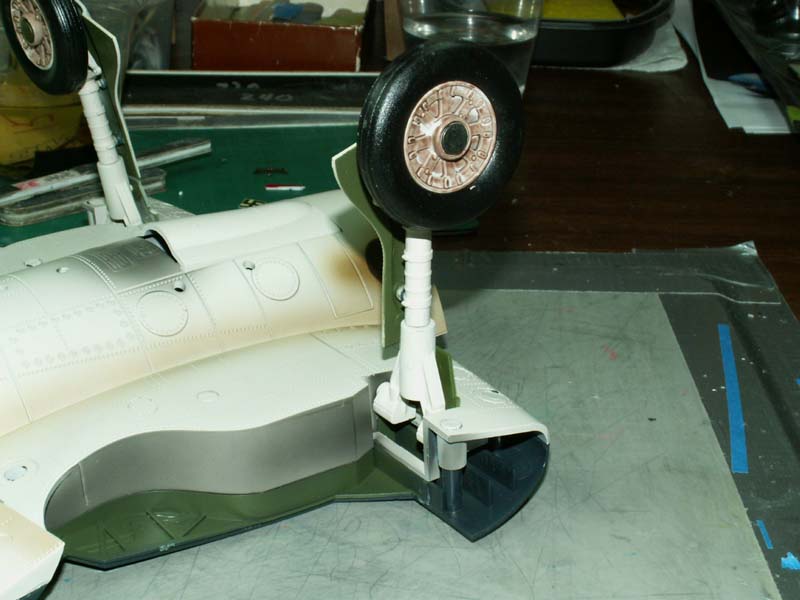
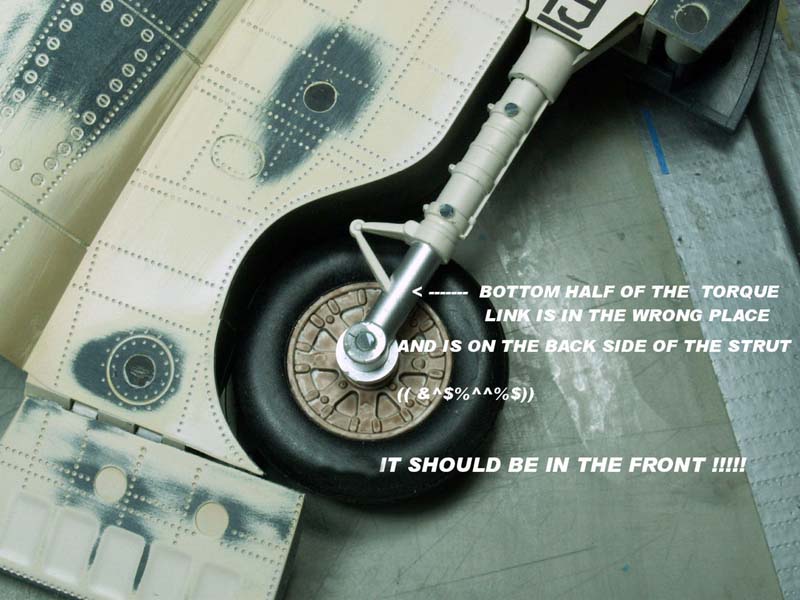
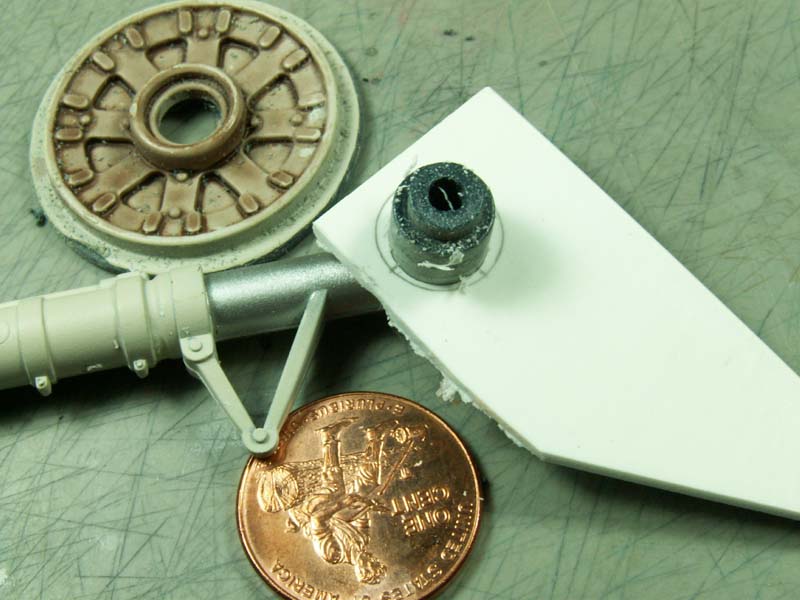
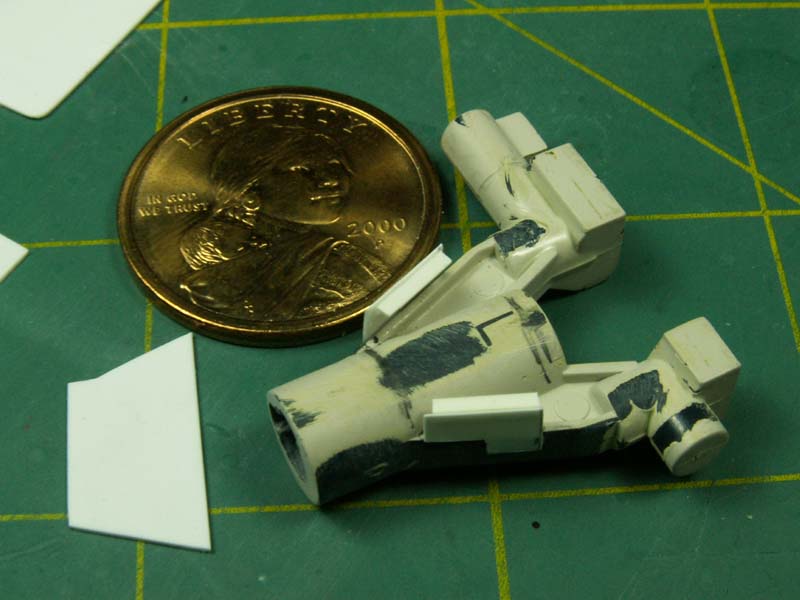
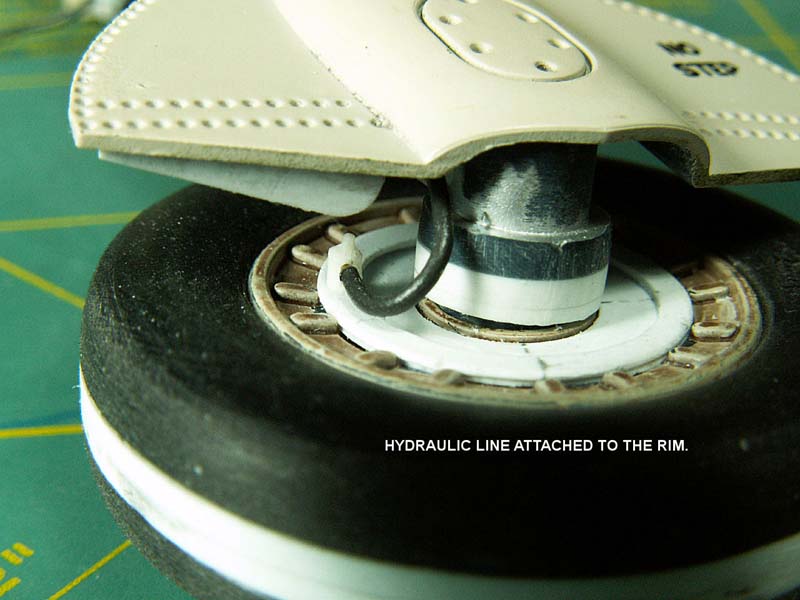
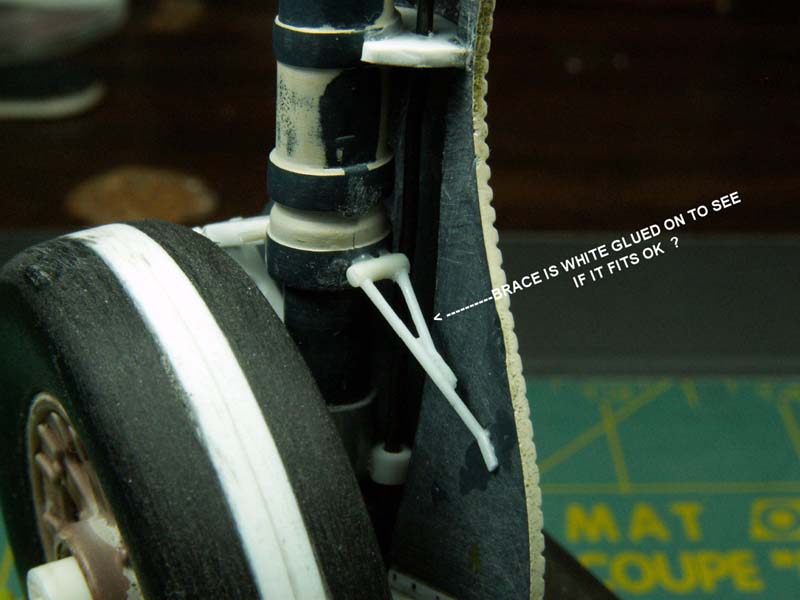
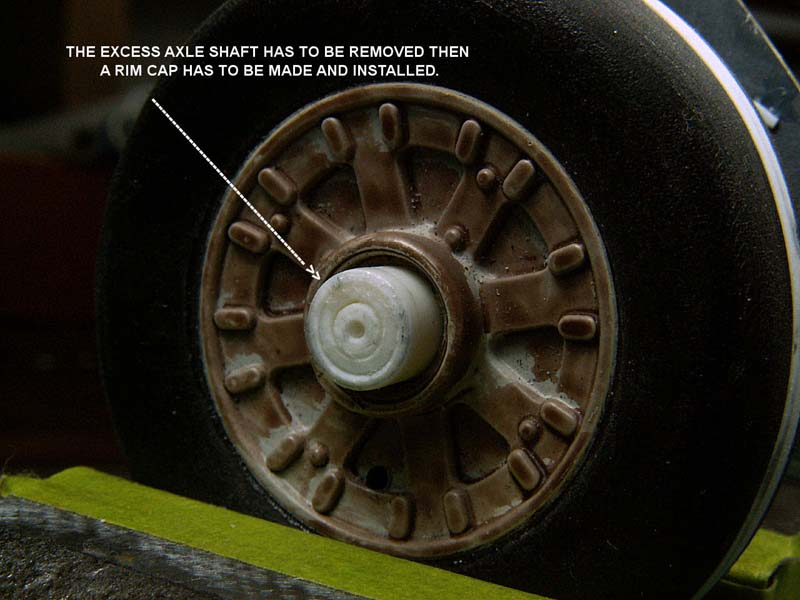
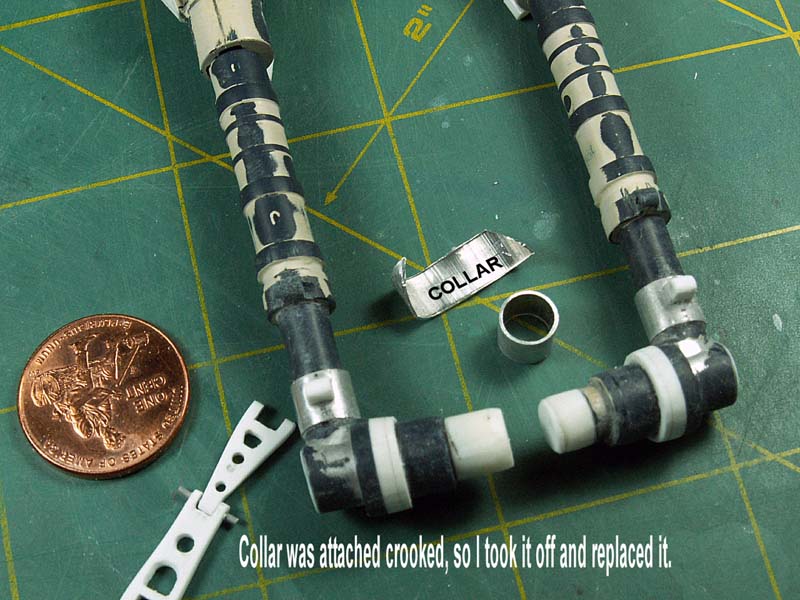
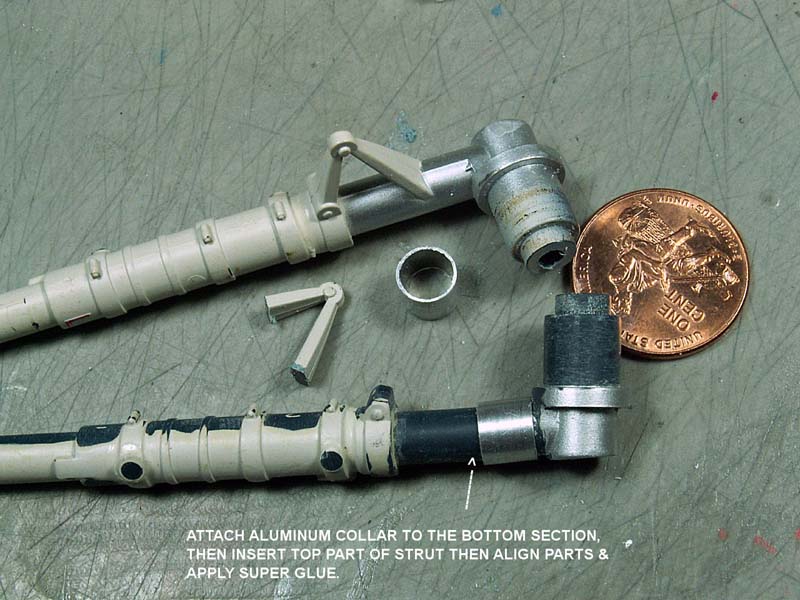
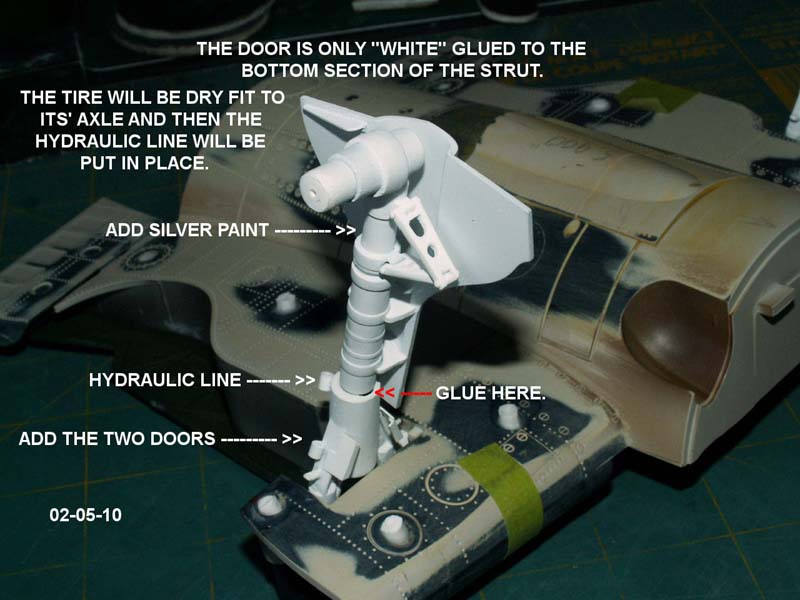
My "order of the day" was to add only a hydraulic fluid line from up inside the wheel well and connect it to the tire rim. To my surprise, the "torque-links" were on the back side of the gear struts and the lower portion of the link was attached to the "oleo-strut" instead of being connected to the top section of the axle. The "links" are facing forward on the Hellcats. This meant that a major overhaul was in order to correct this problem. I emailed my client with the bad news and he gave me the "go-ahead" for said revision.
To work on the gear struts, I had to remove them from the center wing section. I had to drill out all the round plugs that I had just filled and sanded flush with the outside surface of the lower center wing section. There was some male and female alignment pins that were glued together, thus I had to cut them apart.
Once I got the top and bottom wing sections apart I unscrewed the screw that was inside of the main gear struts which held the top and bottom sections of the gear together.
Inside this hollow strut was a small tension spring which was held in its´ location by a set screw. This spring and set screw let you pull down on the bottom section of the strut so you could rotate the strut from its´ landing position to its flight position and vise-versa.
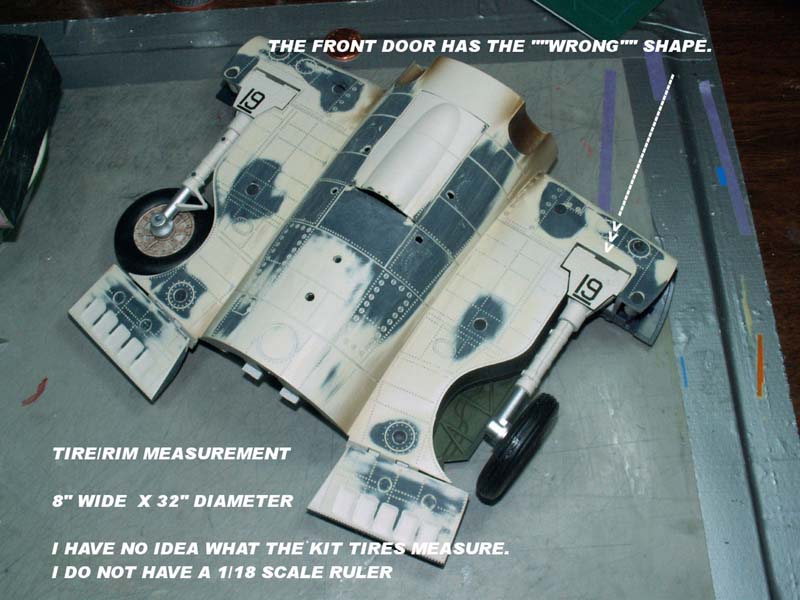
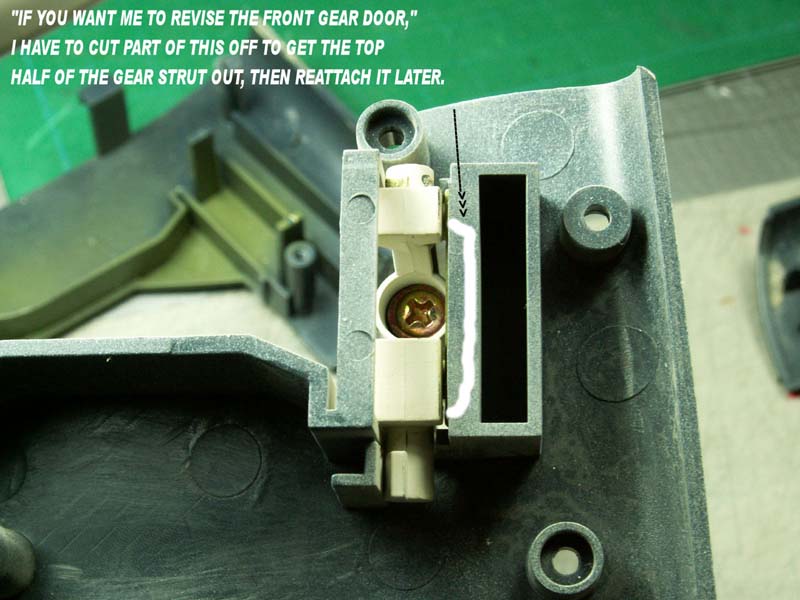
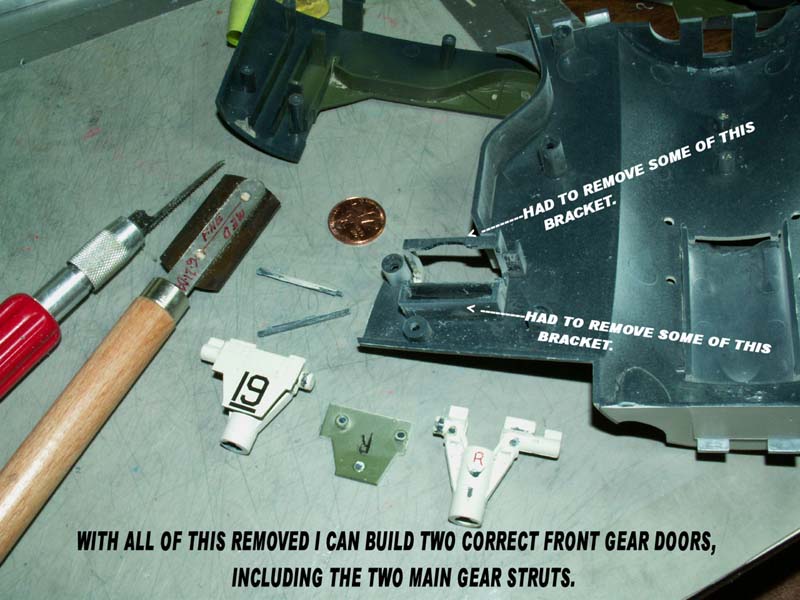
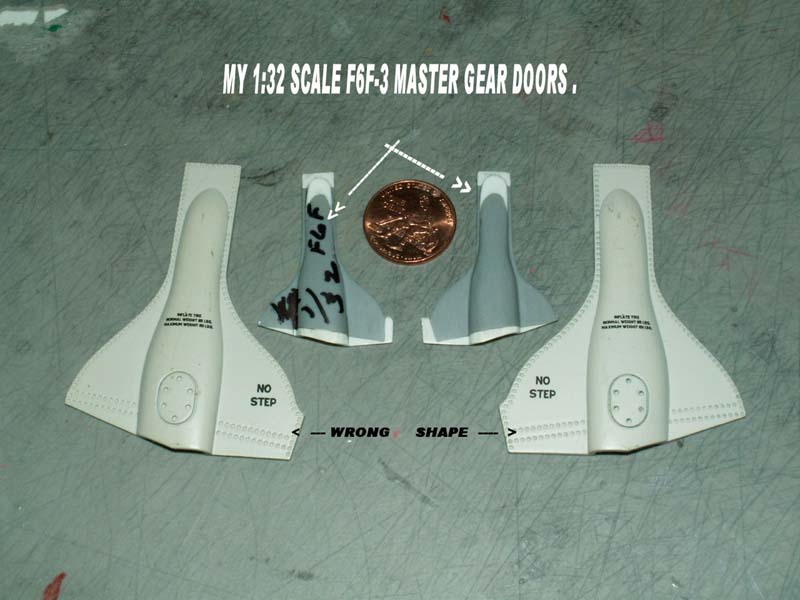
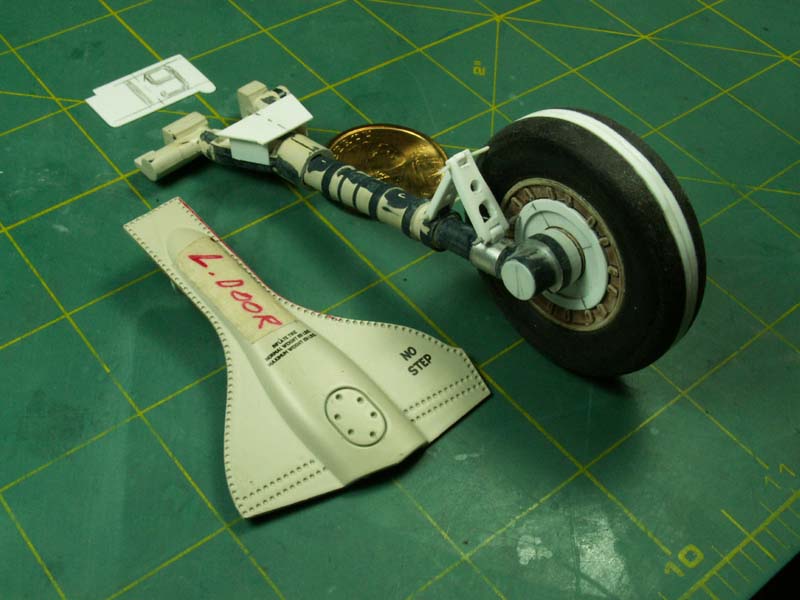
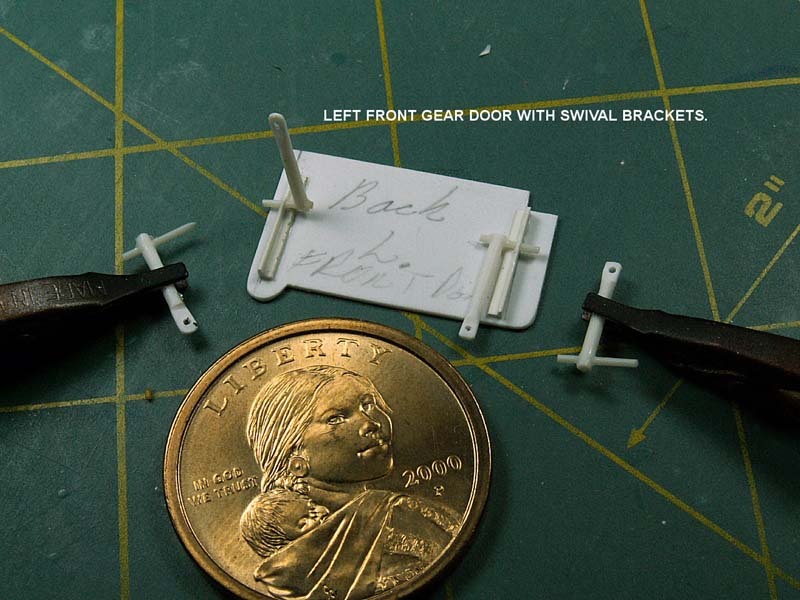
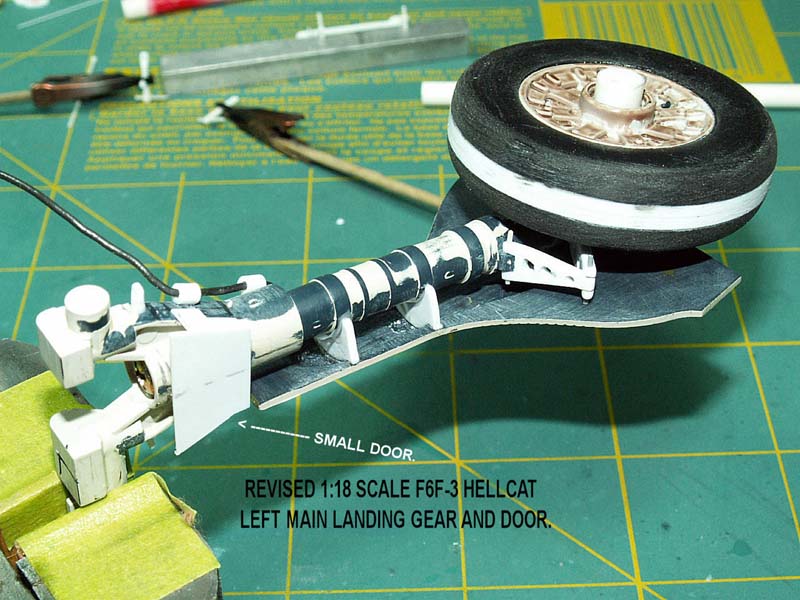
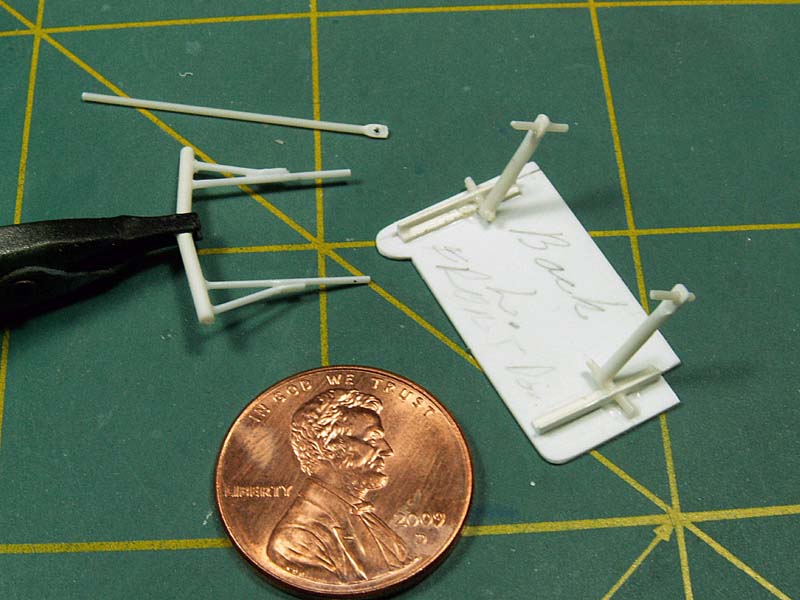
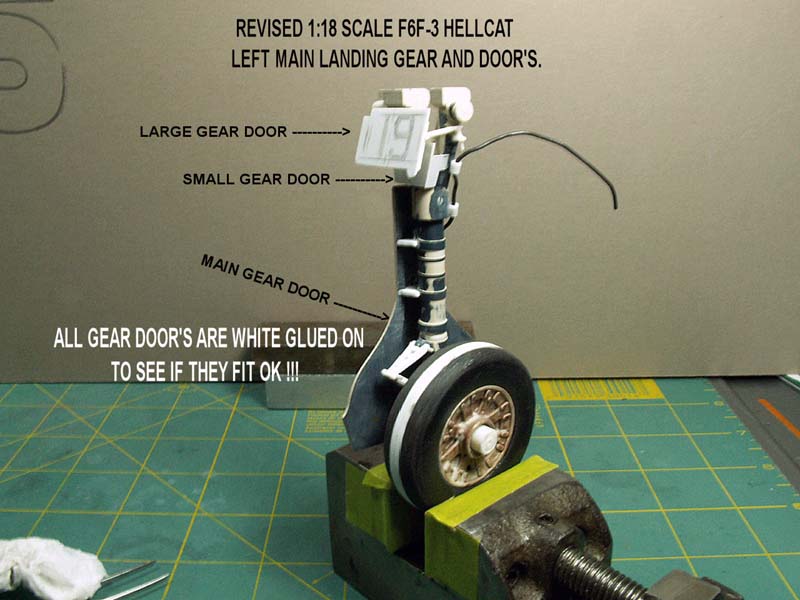
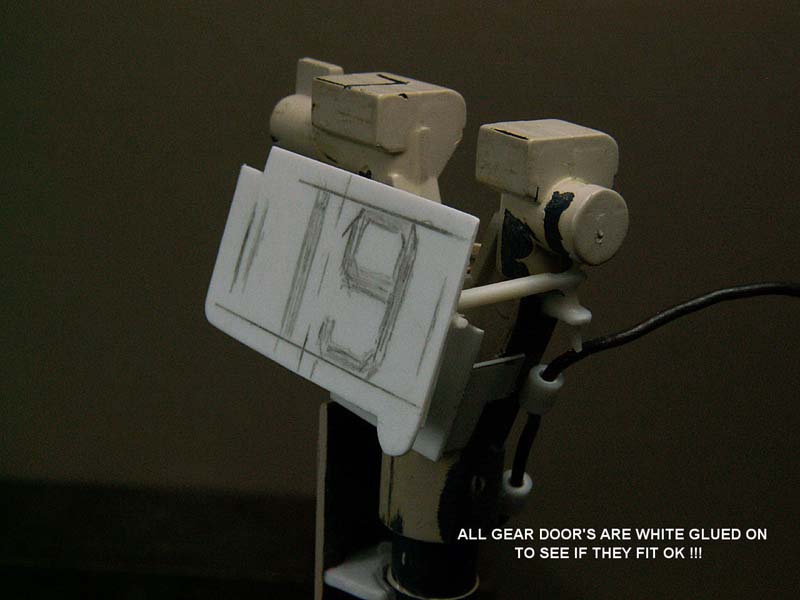
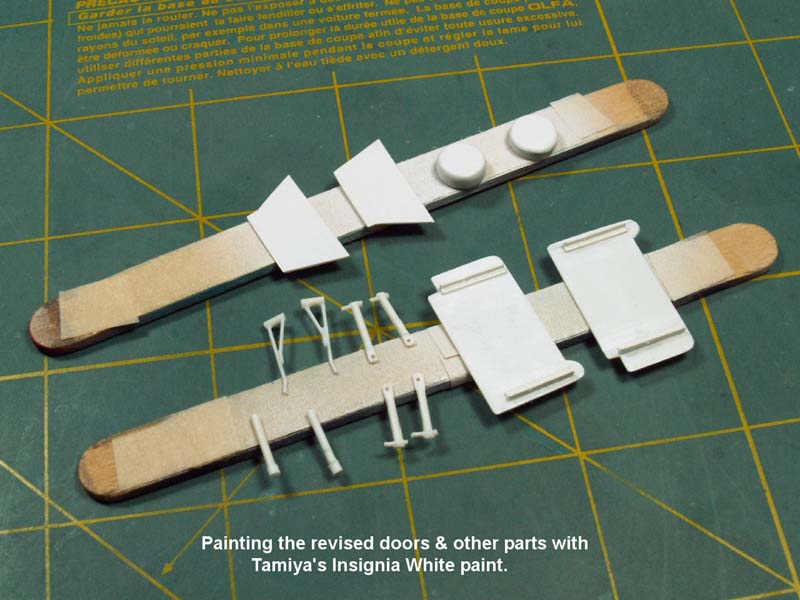
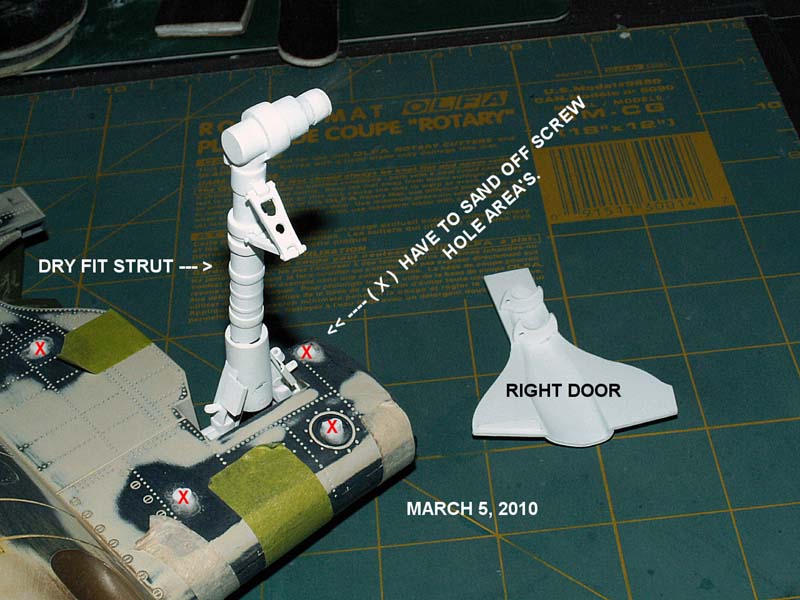
The top front gear door was shaped wrong and the second smaller gear door was missing, alas more emails to my client to get permission for "more" unexpected revisions.
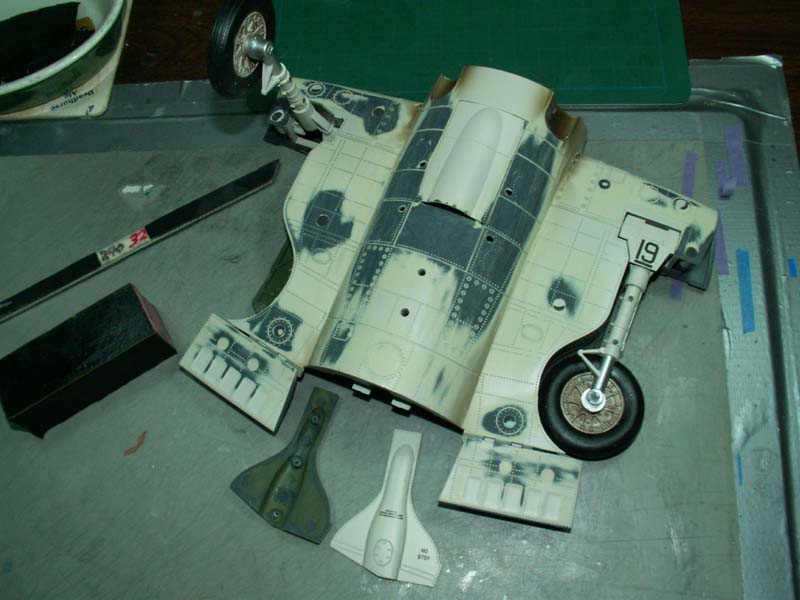
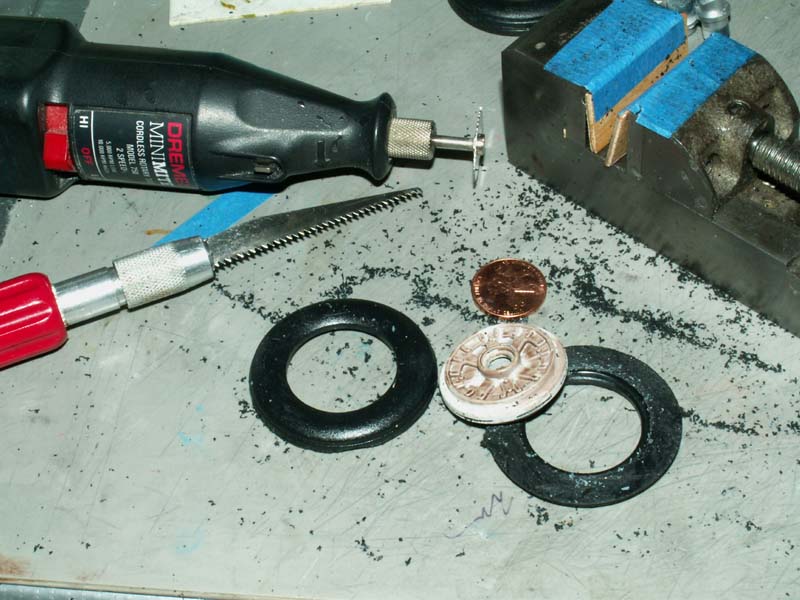
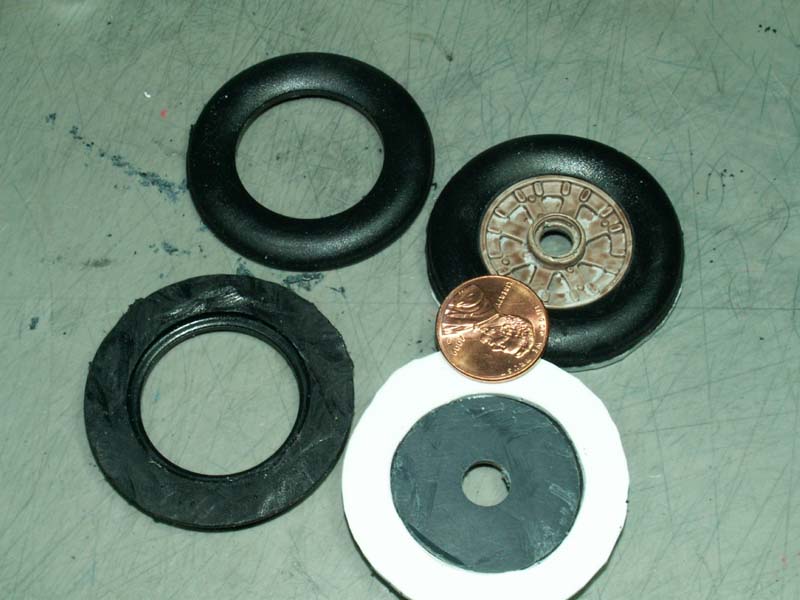
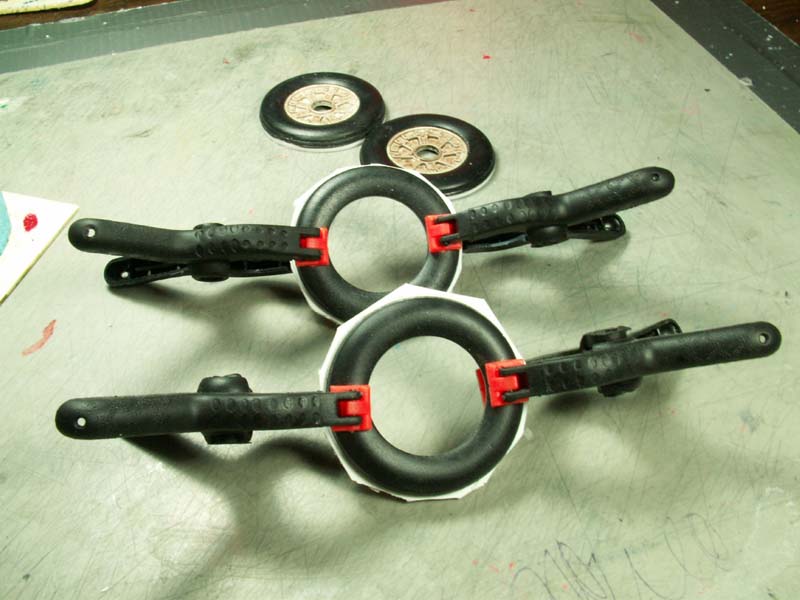
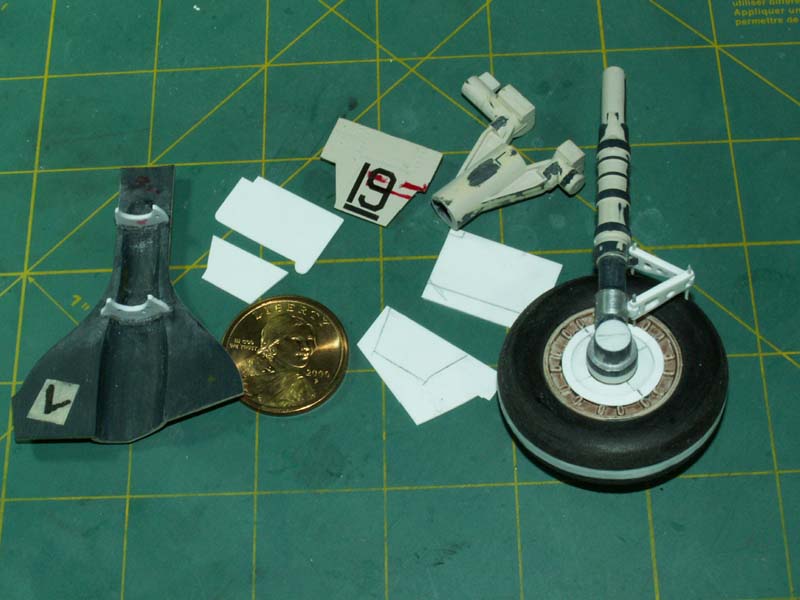
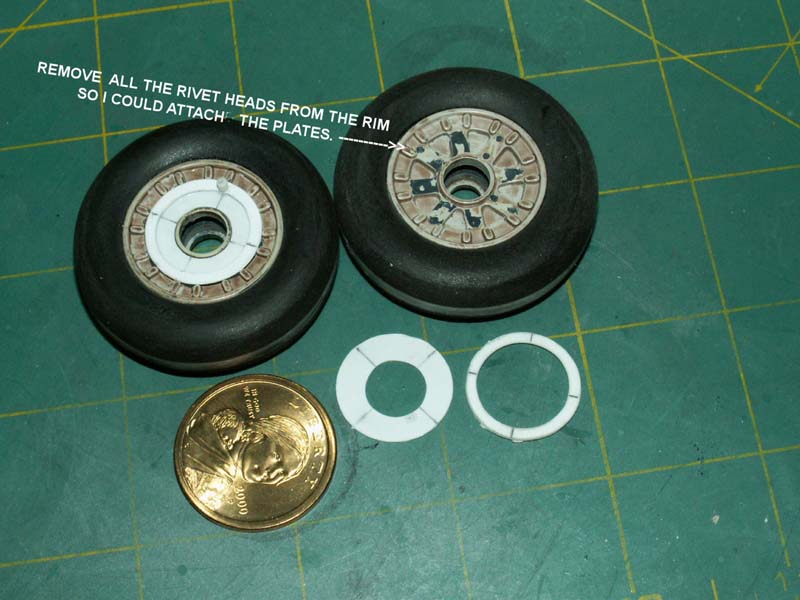
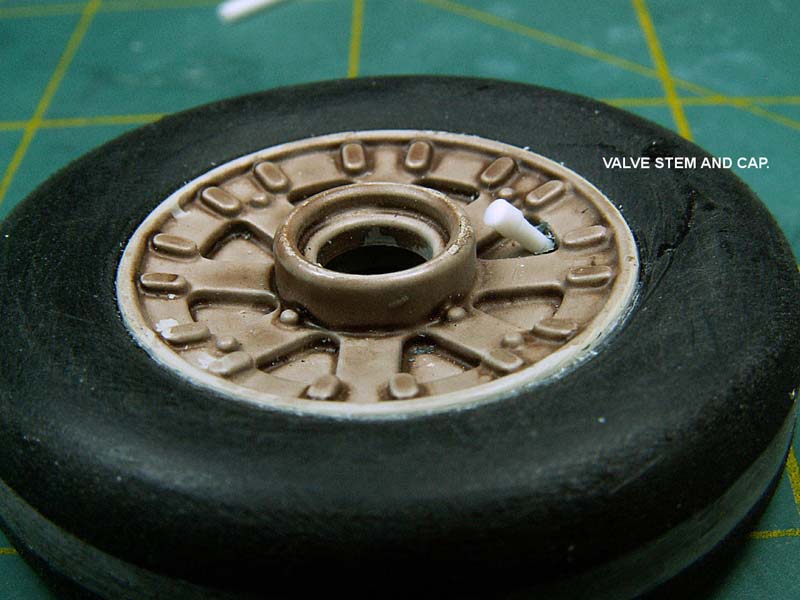
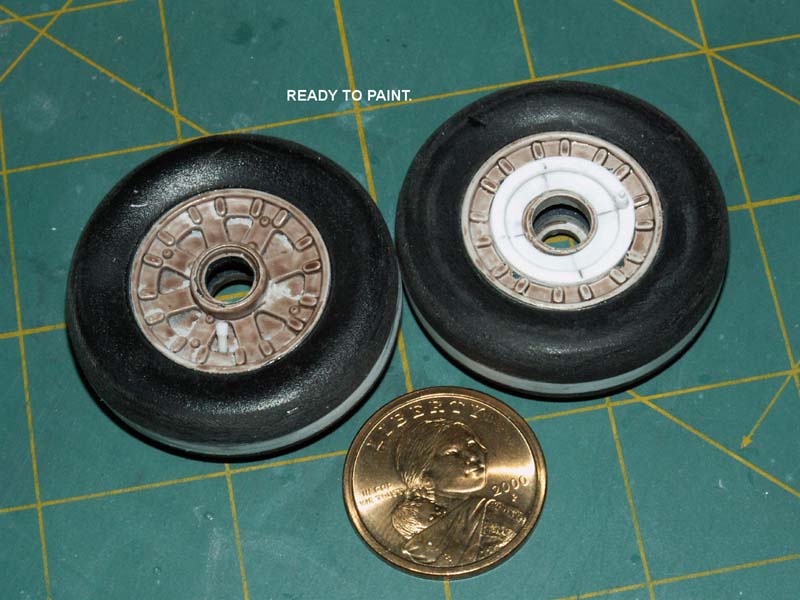
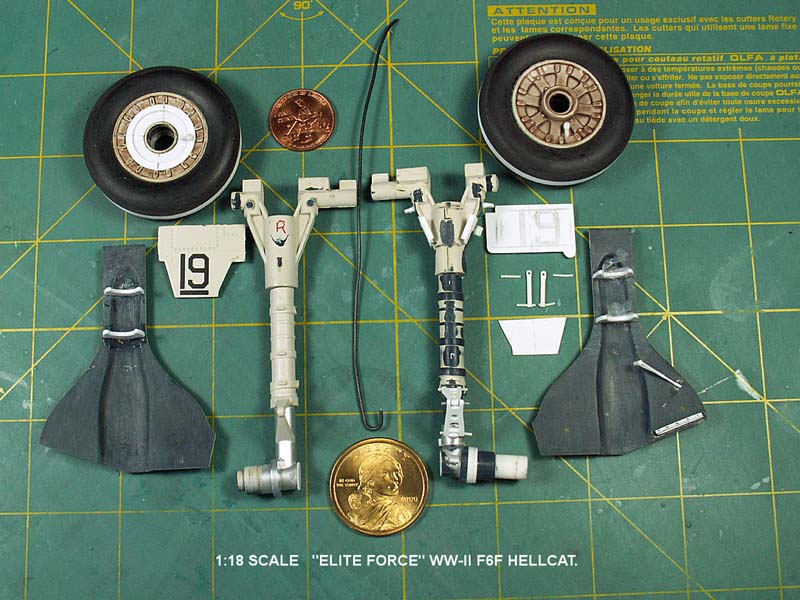
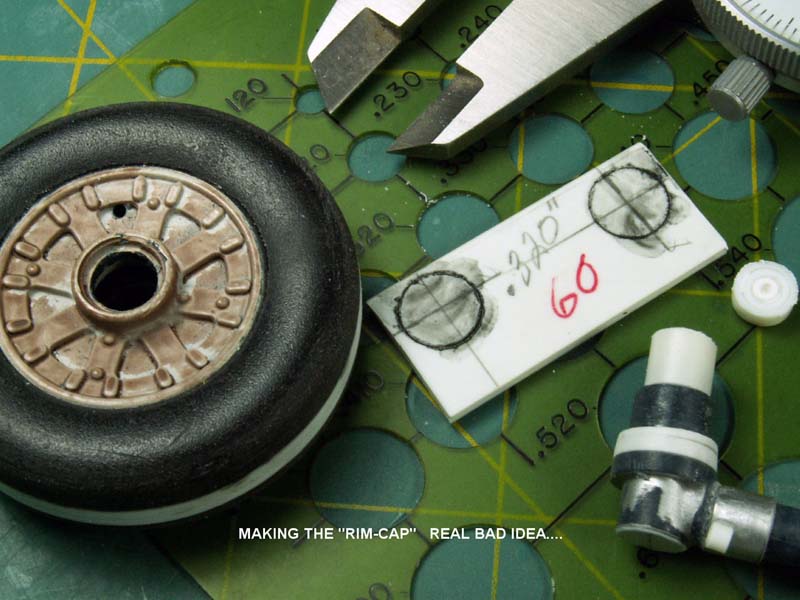
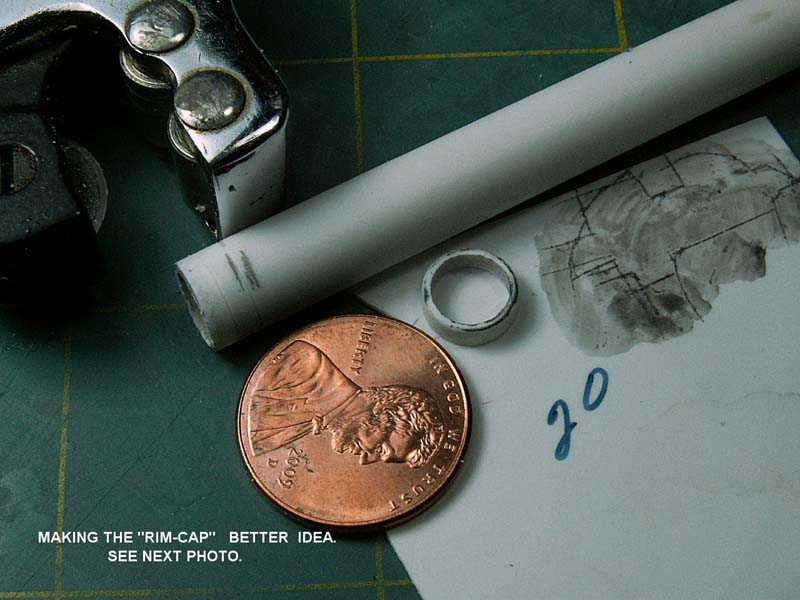
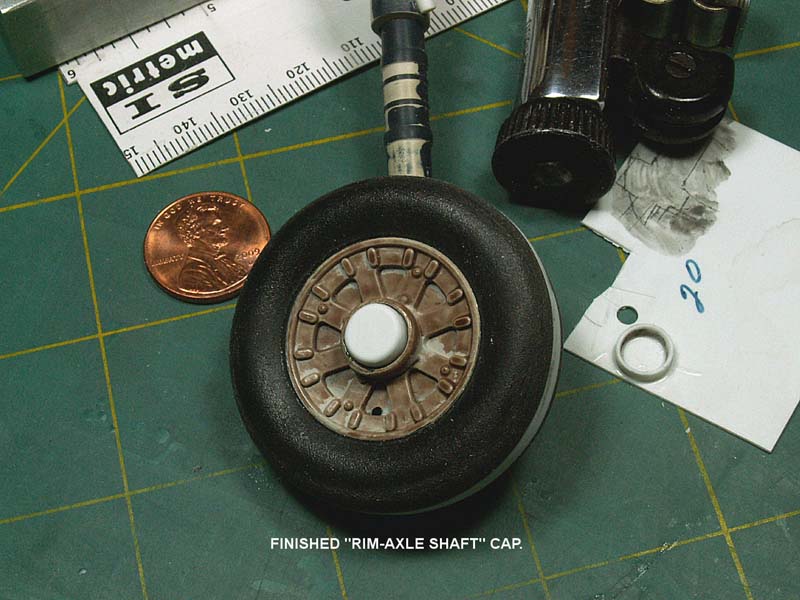
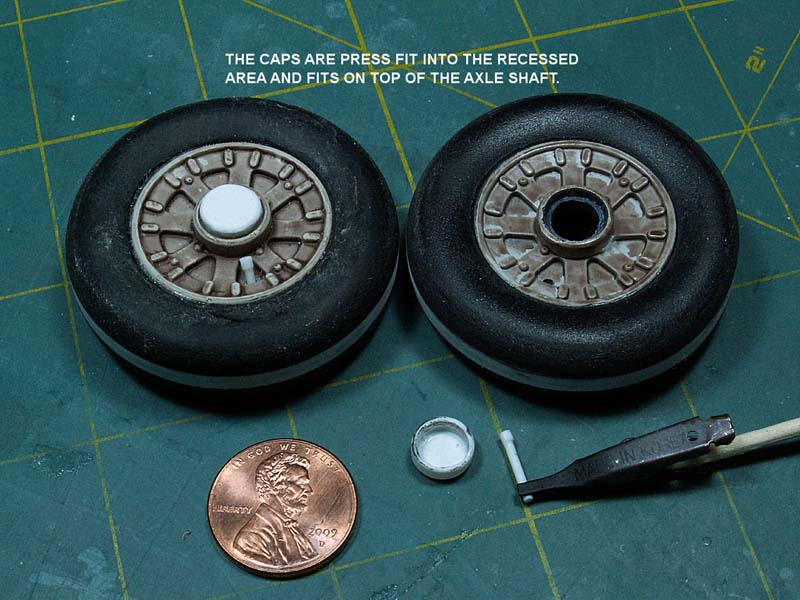
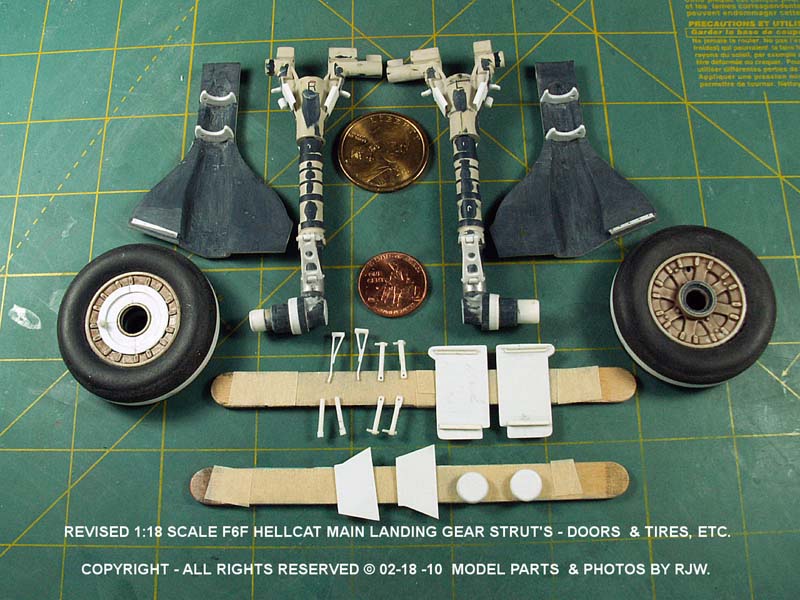
My client felt that the tires were too thin so I cut them apart down the center line, including the tire rims and then I added some flat white styrene stock. The photos show how I accomplished this operation, including revising the back side of the rims and adding other parts like a valve stem, etc.
One of my photos shows my "master" 1:32 scale main gear doors with the 1:18th scale gear doors. I did not change the shape of these kit doors for the simple reason is that I would have to incorporate a major revision to the lower section of the two wheel wells on the outer wing panels.
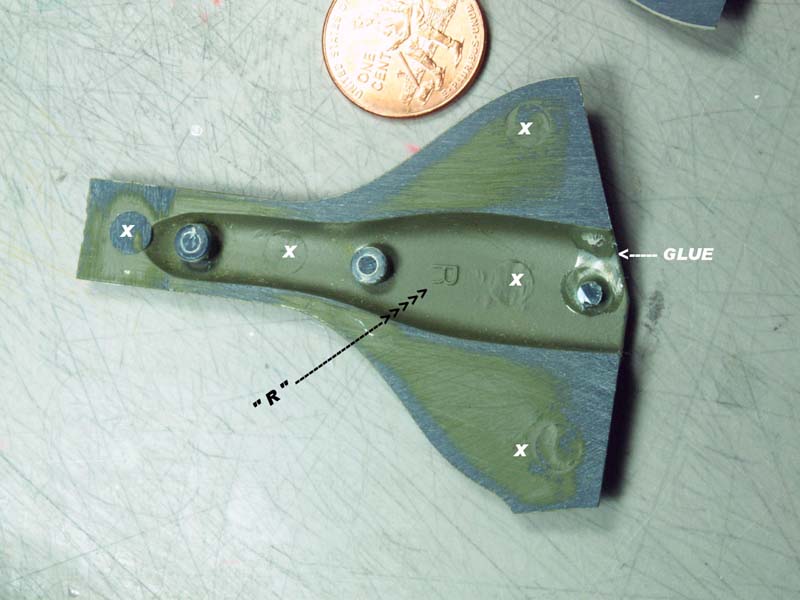
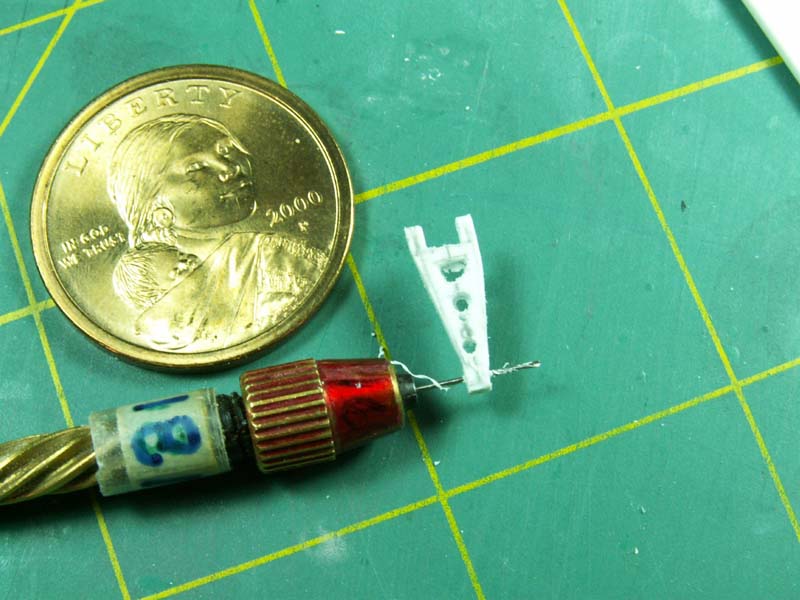
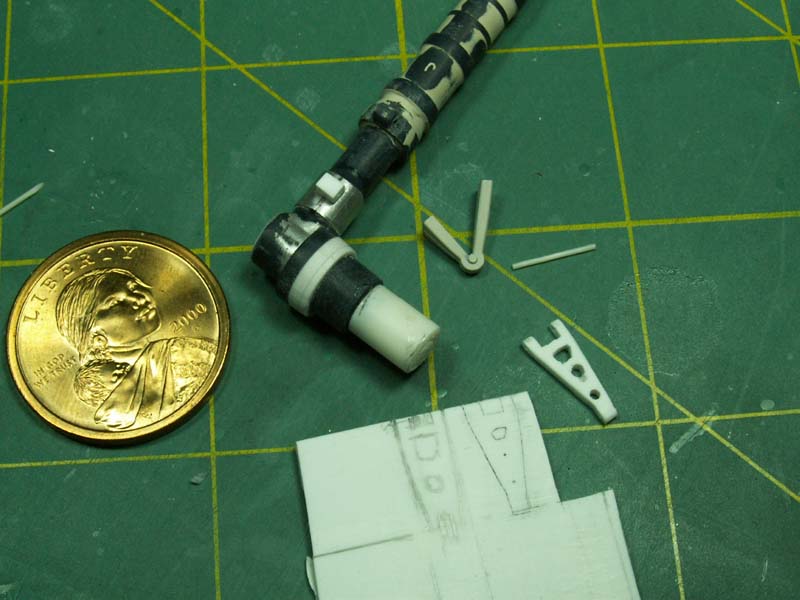
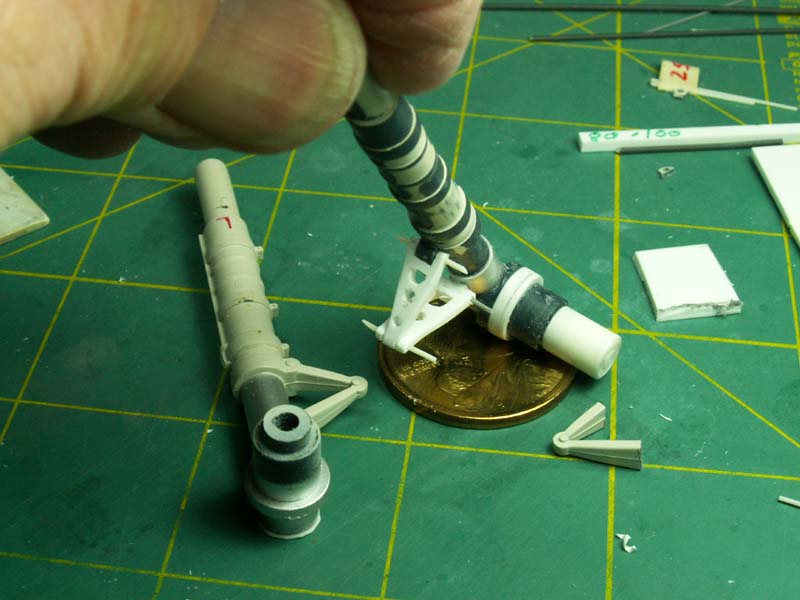
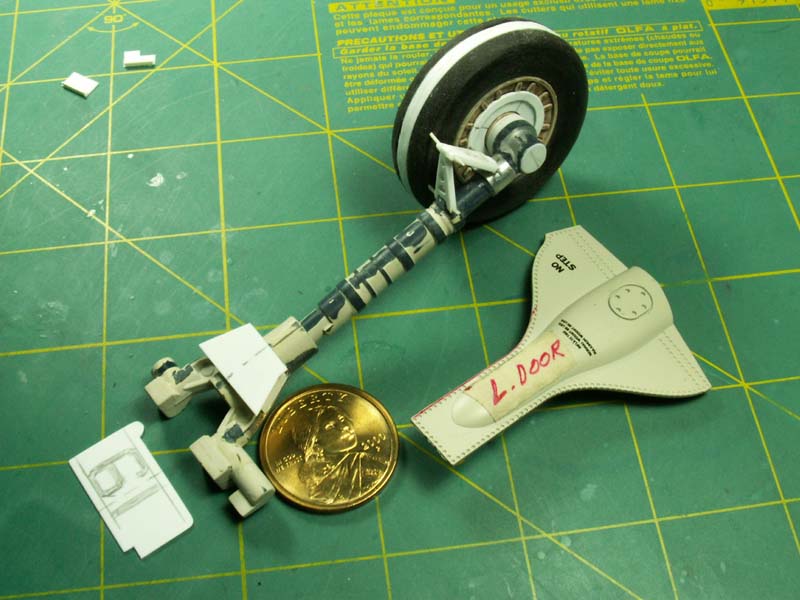
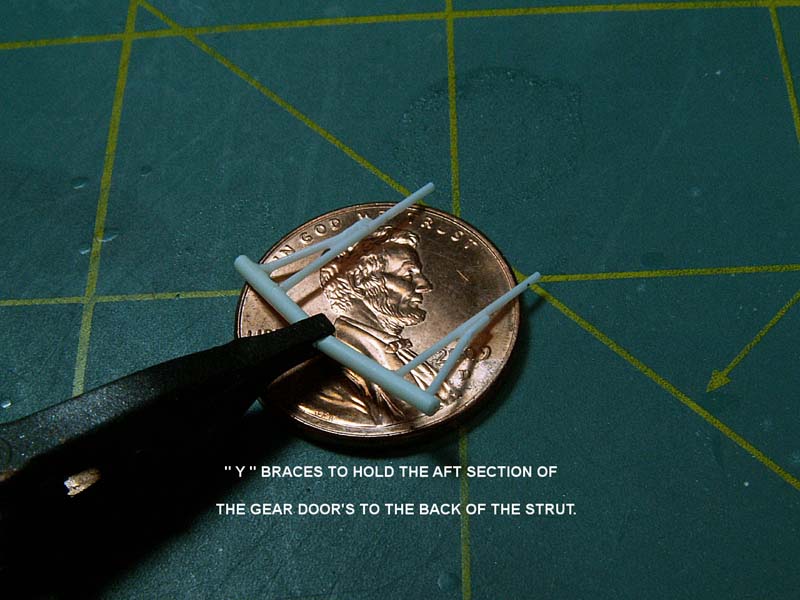
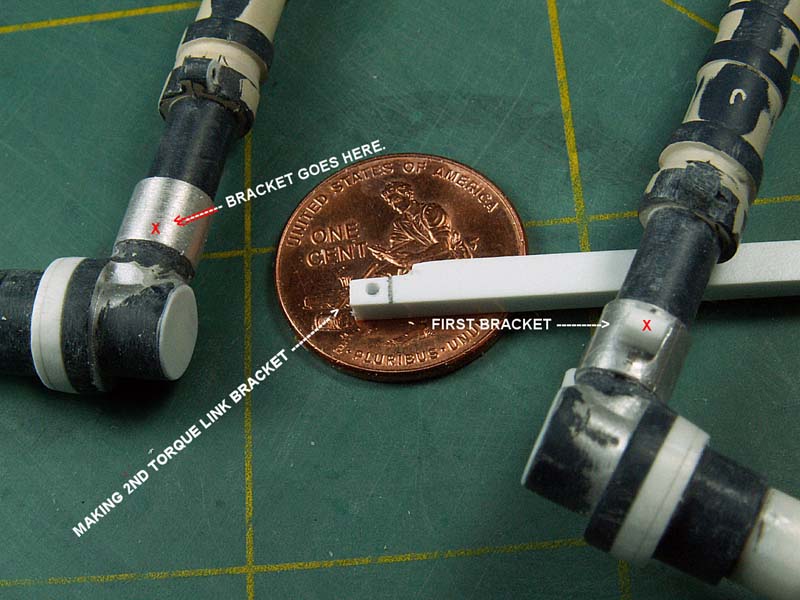
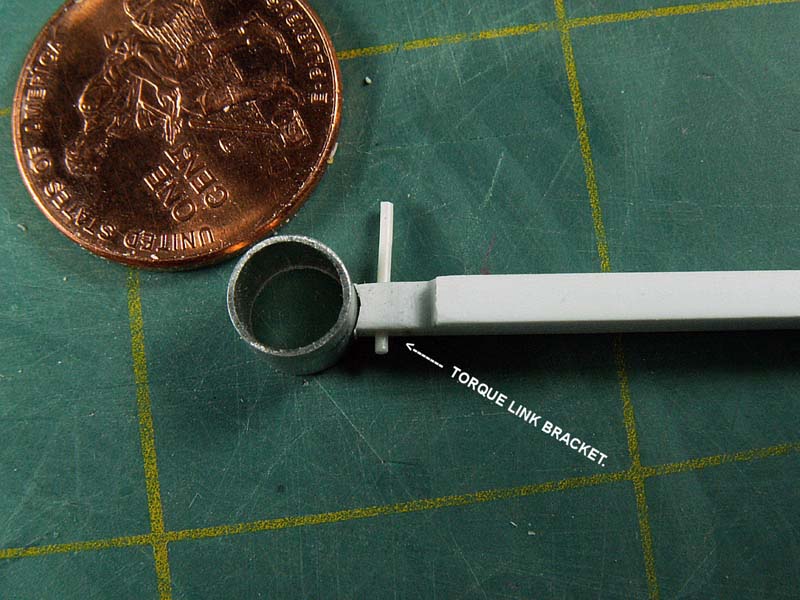
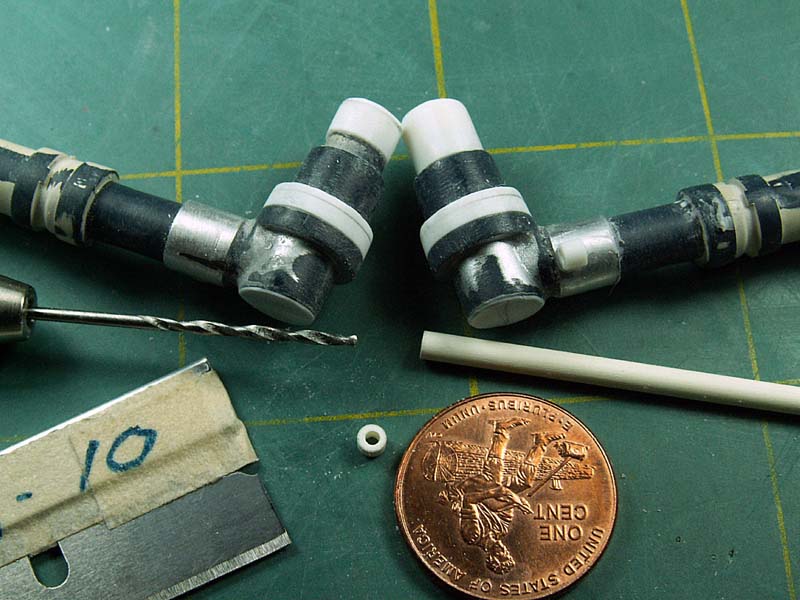
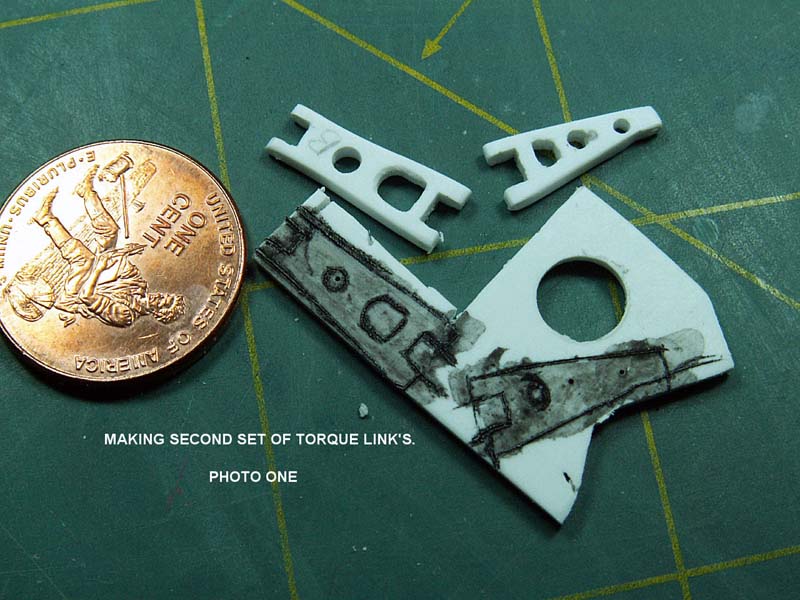
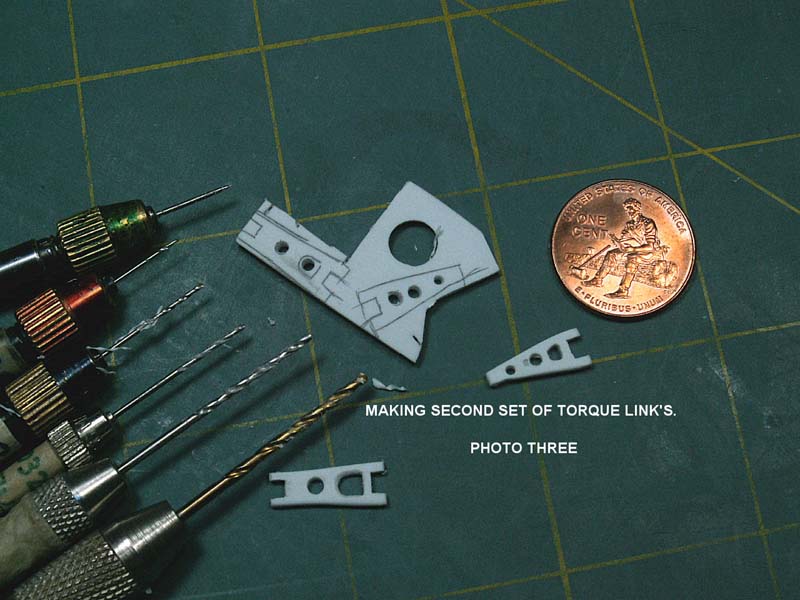
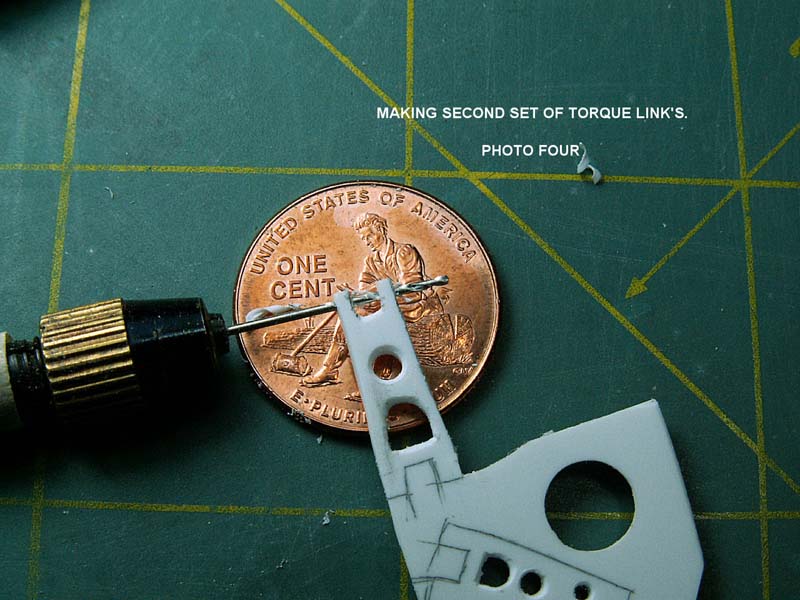
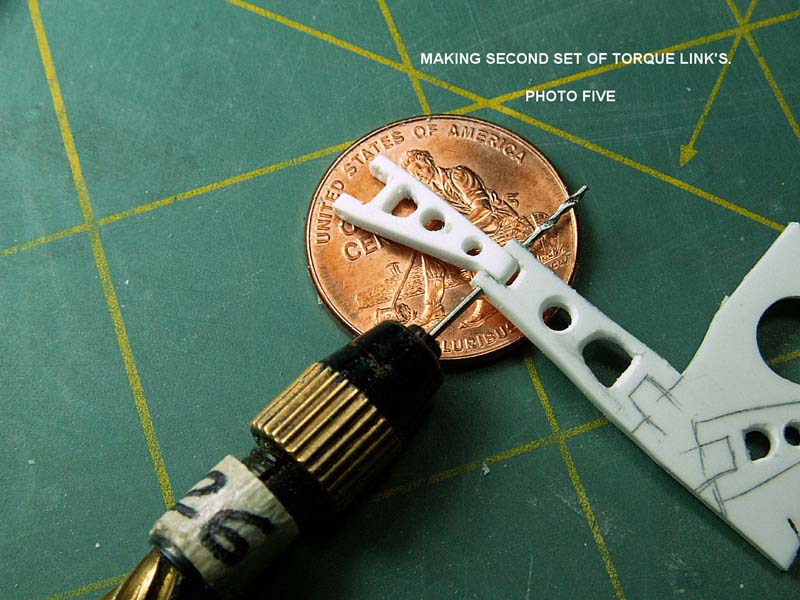
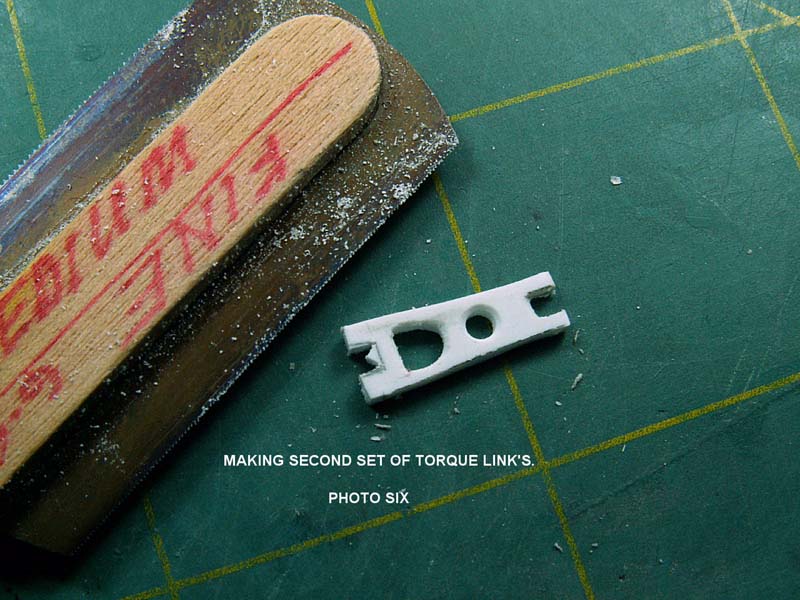
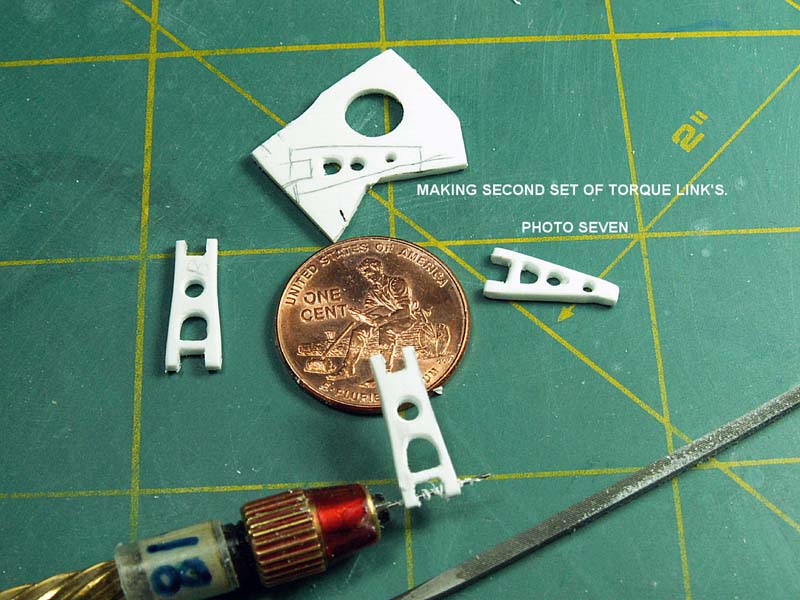
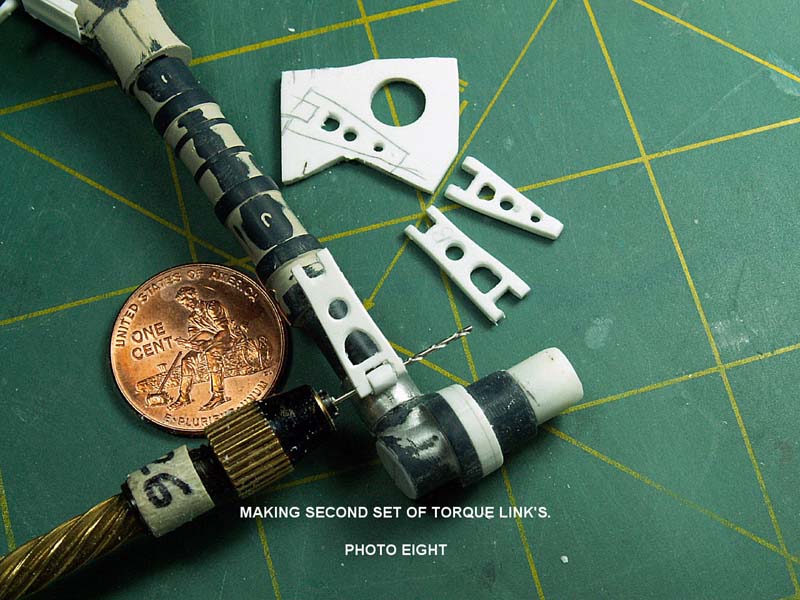
Here are a few photos that shows a "step-by-step" operation on how to make the torque links and get them to look and fit like the real ones on the F6F Hellcat.
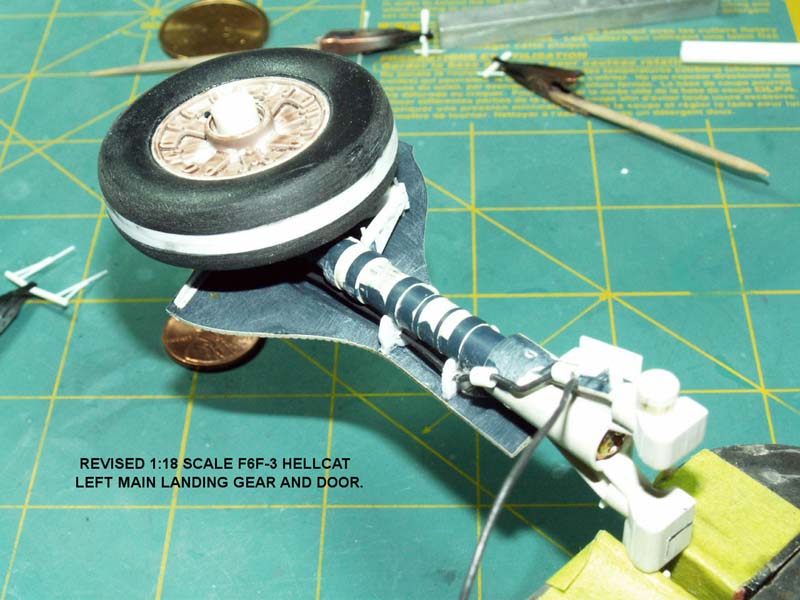
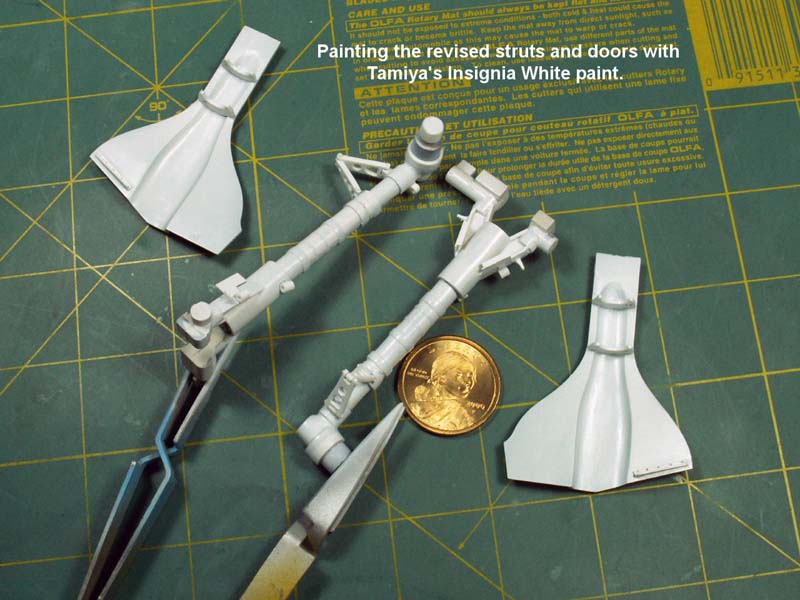
My client and I are happy about the outcome of this revision, so the parts were painted with Tamiya X-2 Gloss White Insignia paint.
Keep tuned in for more stories later this year.

Part 1 | Part 2 | Part 3 | Part 4 | Part 5 | Part 6 | Part 7 | Part 8 | Part 9 | Part 10 | Part 11 | Part 12 | Part 13 | Part 14 | Part 15 | Part 16 | Part 17 | Part 18 | Part 19 | Part 20 | Part 21
© Rodney Williams 2009
This article was published on Wednesday, July 20 2011; Last modified on Saturday, May 14 2016